

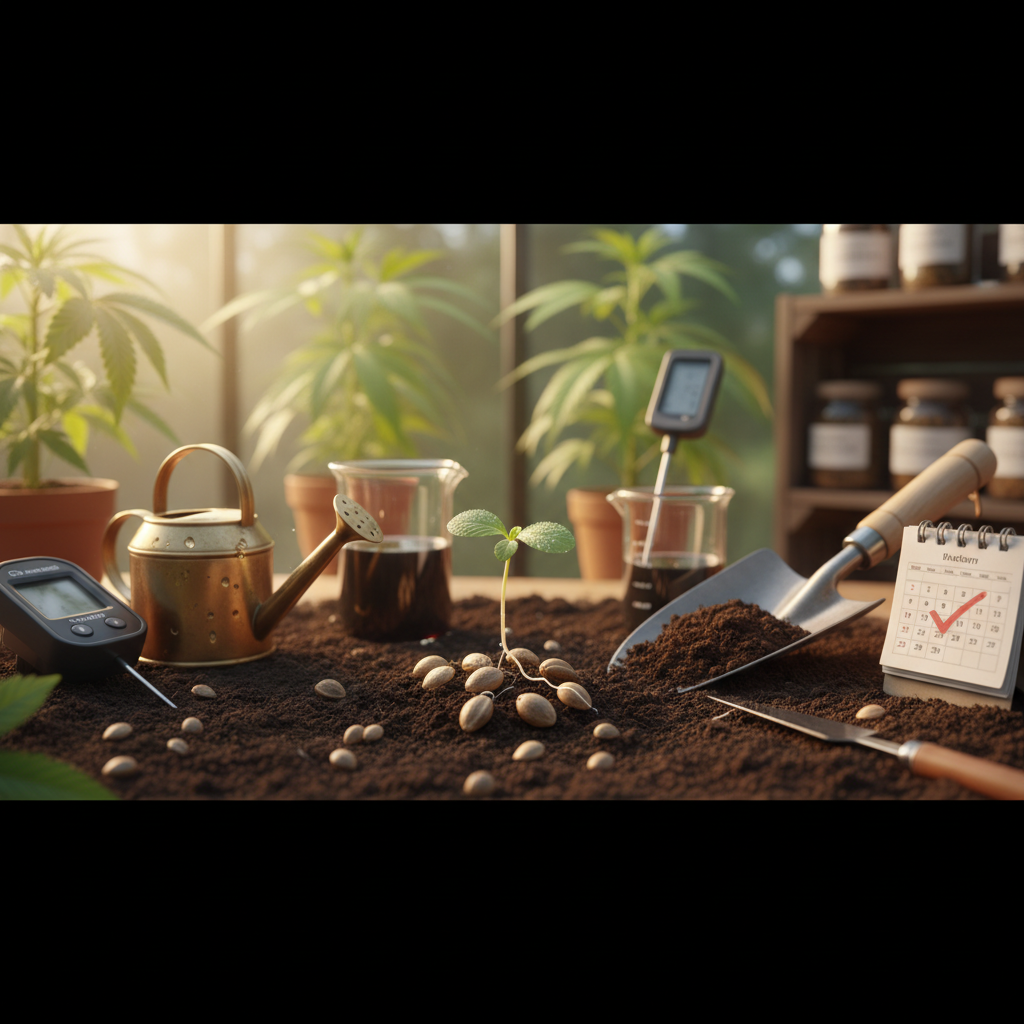
Many growers wait until seeds fail before searching for problems. They then check humidity, temperature, or the growing medium. Reliable germination depends on controlling a few key factors and creating simple routines.
This approach saves time and reduces seed loss, leading to even crop growth. This guide offers proven methods for reliable starts, suitable for both beginners and larger operations, with practical tips for common strains and environments.
Industry growers and home cultivators alike benefit from focusing on seed health, microclimate control, and repeatable methods rather than ad-hoc tricks. Small changes — consistent 20–25°C warmth, stable moisture without waterlogging, and gentle handling — shift germination rates from unpredictable to routine. That shift increases planting efficiency and produces more uniform vegetative batches ready for transplant.
> Reliable germination comes down to controlling a few critical factors, not secret techniques.
- How to assess and choose seeds with the highest germination potential
- Step-by-step germination workflows for paper towel, soak, and starter plugs
- Environmental controls: temperature, humidity, and light timing that matter most
- Troubleshooting common failures and when to discard a seed
- Adjustments for autoflower vs. photoperiod genetics
Practical, actionable methods follow, arranged so readers can implement a complete germination routine immediately.
> Key Takeaway: ## Essential Germination Tips
Successful germination relies on three factors: the right temperature, consistent moisture, and limited oxygen and light. For most cannabis seeds, keep conditions warm but not hot.
Essential Germination Tips
Successful germination requires three things: the right temperature, consistent moisture, and limited exposure to oxygen and light. For most cannabis seeds, maintain warm (not hot) conditions. Keep the medium damp but not soaking wet. Look for the first white radicle to appear within days, not weeks.
Below are concise, actionable parameters for the common methods used by home growers and commercial nurseries.
- Temperature ranges: Aim for stable temps; daily swings slow or stall germination.
- Moisture language: Wet = standing water (avoid), damp = evenly moist but not saturated, moist = slightly wetter than damp.
- Success indicators: Visible white radicle, split seed coat, clean white root (no sliminess), steady growth into medium.
Quick procedural steps (3-step checklist):
- Prepare: use clean materials, pre-warm medium to
20–25°C(68–77°F). 2.
Monitor: check twice daily for moisture and early mold; keep environment humid but aerated. 3. Transfer: move to light only after a 2–3 cm radicle appears; plant root-down.
Common warning: Overwatering and low oxygen are the most frequent killers; if seeds turn black or smell foul, toss and restart.
Quickly compare germination parameters across common methods for instant decision-making
| Method | Temp (°C/°F) | Moisture level | Light requirement | Days to germinate |
|---|---|---|---|---|
| Paper towel | 20–25°C / 68–77°F | Damp (no pooling) | Dark until root appears | 1–4 days |
| Direct soil/medium | 20–25°C / 68–77°F | Moist (slightly wetter) | Dark under soil; light after emergence | 2–7 days |
| Starter plugs (rockwool/coco) | 20–24°C / 68–75°F | Damp to moist | Dark/light doesn’t matter until sprout | 2–5 days |
| Scarification / acid soak | 20–25°C / 68–77°F | Damp after treatment | Dark until radicle | 1–7 days |
| Cold stratification + warm-up | 2–8°C / 35–46°F (strat), then 20–25°C / 68–77°F | Damp during stratification | Dark during strat; then standard | 7–21+ days (varies) |
Understanding these principles shortens trial-and-error and makes success rates reliably higher.
> Key Takeaway: ## Chapter 1 — Seed Biology and Viability
Understanding cannabis seed biology helps you realize that viability hinges on its structure and development timing. A mature, viable seed contains three core parts: a well-formed embryo, nutritive tissue…
Chapter 1 — Seed Biology and Viability
Understanding cannabis seed biology helps you realize that viability hinges on its structure and development timing. A mature, viable seed contains three core parts: a well-formed embryo, nutritive tissue (endosperm or cotyledons in cannabis), and a protective seed coat. Dormancy doesn’t mean failure; it is a survival tactic affected by physical and physiological signals, mainly seed coat permeability, temperature changes, and moisture levels.
Mature versus immature seeds
- Mature seed: dark, hard, glossy — embryo fully developed and desiccated to a stable moisture content; germinates reliably when conditions are right.
- Immature seed: pale, soft, dented — embryo may be underdeveloped; prone to rot or failed germination even if moisture and temperature are ideal.
- Practical sign: drop a seed between fingernails—mature seeds resist cracking and have a uniform internal color.
Seed coat thickness and water uptake
- Thick seed coat: slows water imbibition, enforces physical dormancy; often beneficial for transport and storage but may require scarification or prolonged moist stratification to germinate.
- Thin seed coat: permits rapid water uptake and quicker germination, but increases susceptibility to fungal attack during poor storage.
Dormancy cues — temperature and moisture
- Temperature stratification: many seeds respond to alternating temperatures; a warm period followed by cool cues the embryo to break dormancy. For cannabis, mimicking diurnal shifts of
20–28°Cday /10–16°Cnight can improve uniformity.
- Moisture regimes: cyclic wet-dry exposure can induce or relieve dormancy; continuous high moisture without oxygen increases rot risk. Maintaining substrate at field capacity without saturation is the practical goal.
- Light sensitivity: some seeds are photoblastic; cannabis shows variable responses — testing parental line tendencies helps refine protocols.
Practical examples and checks
- Float test caveat: floating seeds often are low density (possible immaturity), but sinking isn’t a perfect viability guarantee.
- Cut test: split a suspicious seed; a healthy embryo is firm and light-colored, not translucent or hollow.
- Storage tip: maintain seeds at
~4–6°Cand low humidity to preserve dormancy without degrading viability.
Understanding these biological levers—maturity, coat properties, temperature and moisture responses—lets growers predict germination behavior and choose targeted treatments like cold stratification, gentle scarification, or optimized hydration cycles. This knowledge shortens troubleshooting time and increases first-cycle success.
> Key Takeaway: ## Chapter 2 — Preparation: Storage, Sorting, and Testing
How you prepare before planting decides if good genetics will lead to strong plants. Store seeds to minimize metabolic activity, sort them to separate likely winners from losers, and run…
Chapter 2 — Preparation: Storage, Sorting, and Testing
How you prepare before planting decides whether good genetics lead to strong plants. Store seeds to reduce metabolic activity, sort them to identify the best seeds, and perform quick viability checks to avoid wasting space on dead or weak seeds. Below are practical storage standards, a simple viability protocol, and guidance on salvaging older seed lots.
Storage methods and their expected seed longevity benefits (cannabis seed storage longevity)
| Storage method | Temp range | Humidity control | Expected longevity (months/years) |
|---|---|---|---|
| Room temp in paper envelope | 18–24°C |
None / ambient (30–60% RH) | 6–36 months |
| Airtight jar + desiccant | 10–20°C |
Silica gel to ~20–30% RH | 1–5 years |
| Refrigeration (4°C) | 1–5°C |
Airtight + desiccant (≈20–30% RH) | 4–8 years |
| Freezing (-18°C) | -18°C (deep freeze) |
Vacuum-sealed + desiccant (<10% RH preferred) | 10–20+ years |
Practical, repeatable viability checks
- Wet paper towel (standard germination test)
- Place 10–20 seeds on a moist paper towel, fold, seal in a zip bag, keep at
20–24°C.
- Inspect daily for radicle emergence up to 14 days; count germinated seeds. 3.
Germination rate = (germinated / tested) × 100%. 2. Float test (quick screen)
- Interpretation: seeds that sink usually have higher internal density and are more likely viable; floating seeds can still germinate but are lower probability.
- Method: place seeds in room-temperature water for 2 hours, swirl, remove floating seeds — test both groups in a germination test rather than discarding immediately. 3. Cut test (destructive; use on very small batches)
- Procedure: bisect seed; healthy embryos appear pale, firm, and well-formed — dark, hollow, or desiccated tissue indicates failure.
When to discard, when to salvage
- Use normally: ≥80% germination in test.
- Selective use: 40–80% — plant more per hole or use priming methods (
cold stratification, osmotic priming) to improve uniformity. - Discard or relegate to experiments: <40% — keep as backup for breeding trials, but don’t plan production runs from this lot.
Example protocol to rescue aging seeds
- Run a
10–20 seedgermination test. 2.
If 40–70% germinated, perform a 12–24 hour soak in 1/4 strength hydrogen peroxide solution, then sow; or apply a brief 4°C cold shock for 24–48 hours before sowing. 3.
Lot ID: S12345 Test date: 2025-06-01 Tested: 20 seeds Germinated: 12 (60%) Action: Osmotic priming + increase sow density 1.5×Understanding these practices reduces wasted cycles and improves predictability during scaling. When storage, sorting, and testing become routine, planning and inventory accuracy improve along with crop outcomes.
Chapter 3 — Step-by-step Germination Methods
> Key Takeaway: Germination success relies on controlled moisture, consistent temperature, and gentle handling. Two effective methods for small-scale and home seed starting are the paper towel / plate method for fast, visible results and direct sowing into a medium…
Germination success relies on controlled moisture, consistent temperature, and gentle handling. Two effective methods for small-scale and home seed starting are the paper towel / plate method for fast, visible results and direct sowing into a medium to reduce transplant shock and improve hygiene. Below are precise, actionable steps, risks, and practical tips that experienced growers use every season.
Paper towel / plate method — fast, visible, high-control This method gives the grower direct visibility of the radicle and allows selection of only viable seeds, but it demands strict sanitation and careful handling during transfer.
- Prepare materials: two clean plates, paper towels, distilled water, tweezers or a small spoon, and
spray bottle. - Sanitize surfaces and hands; use a diluted
3% hydrogen peroxiderinse on tools if available. - Moisten two layers of paper towel — not dripping — and place seeds spaced 2–3 cm apart.
- Cover with the second plate to create a dark, humid chamber; keep at
20–22°C(68–72°F) with stable humidity. - Check every 12–24 hours. Transfer when the radicle reaches about
2–5 mm— any longer increases risk of root damage.
Warnings and mitigation:
- Sanitation is essential: Contaminated towels lead to damping-off; discard and start over if slime or mold appears.
- Transfer risk: Hold seed by the edges of the shell or use a scooped spoon; never pinch the radicle. Pre-moisten the planting hole to minimize air pockets.
Direct sowing into soil or medium — lowest transplant shock Direct sowing avoids the vulnerable transfer phase and is forgiving when done with the right medium and moisture regime.
- Ideal seed depth: 0.5–1 cm (about two to four times seed diameter).
- Medium texture: loose, well-aerated mix that retains moisture without compaction.
- Moisture management: Keep medium evenly moist but not waterlogged; allow the top few millimetres to dry slightly between waterings to prevent fungal growth.
- Heat mats: Useful when ambient temps are below
20°C; set to20–25°Cand monitor closely to avoid overheating seedlings.
> Grower community testing consistently shows faster emergence with stable bottom heat in cooler environments.
Practical examples:
- If using coco coir: pre-wet to field capacity and sow at 0.5–1 cm.
- If using starter plugs: place seed in the central depression, keep humidity dome on until cotyledons open.
Mediums (soil, coco, peat, starter plugs) for germination pros/cons
| Medium | Drainage | Nutrient availability | Ease of transplant | Recommended use-cases |
|---|---|---|---|---|
| Light seedling soil | Good | Low (starter charge) | Easy | Beginners, organic grows |
| Coco coir | Excellent | Low (needs nutrient schedule) | Moderate | Hydro or controlled feeding |
| Peat/perlite mix | Good | Low to moderate | Moderate | Balanced moisture retention |
| Rockwool/starter plugs | Excellent | Neutral (inert) | Very easy | Cloning, commercial propagation |
Understanding these methods and matching them to your environment reduces losses and speeds reliable establishment. When each step is executed with attention to sanitation, moisture, and temperature, germination moves from guesswork to predictable production.
Chapter 4 — Advanced Techniques and Problem Solving
> Key Takeaway: Advanced seed treatments are targeted interventions: scarification, stratification, and carefully controlled chemical treatments rescue specific physiological barriers to germination. Use scarification when the seed coat physically prevents water…
Advanced seed treatments are targeted interventions: scarification, stratification, and carefully controlled chemical treatments rescue specific physiological barriers to germination. Use scarification when the seed coat physically prevents water uptake; use cold stratification when a species requires a winter cue; and reserve chemical treatments for surface pathogens or when physiology refuses standard methods. These techniques increase germination rates when matched to the underlying problem, but they demand strict safety and control to avoid killing seeds or exposing handlers to hazards.
Scarification: mechanical and chemical approaches
- When to use: Hard-coated seeds that remain buoyant or show no swelling after 48–72 hours in water. Mechanical scarification: Light abrasion with a fine file or sanding paper until a thin window in the seed coat appears—stop once the lighter inner layer shows; avoid nicking the embryo. Chemical scarification (acid): Concentrated sulfuric acid (
H2SO4) speeds permeability for very hard coats (rare in cannabis; more common in legumes).
Typical protocol for legumes: sulfuric acid 95–98% for 10–30 minutes, followed by immediate neutralization and long rinsing. For cannabis, chemical acid scarification is rarely necessary and not recommended for home use. Safe acid/bleach soak protocols: For surface sterilization, use 5–10% household bleach (NaOCl) for 1–3 minutes, followed by at least three rinses in sterile water; for suspected stubborn surface fungi, 1% hydrogen peroxide soak for 5–10 minutes can help.
Always neutralize acids by diluting into large water volume and dispose according to local regulations. Wear eye protection, acid-resistant gloves, and work under a fume hood or outdoors.
Cold stratification: simulating seasonal cues
- When to use: Seeds from cold-adapted or wild relatives that require a dormant period—manifested as zero germination despite proper moisture and warmth. 1. Place seeds in moist sterile medium (peat/perlite) inside a sealed bag.
- Refrigerate at
2–5°C (36–41°F)for 2–12 weeks depending on genetics; check weekly for mold. 3.
After stratification, move to optimal germination temperature and light. Tip: Use 1:10 bleach rinse pre-stratification to limit fungal growth; maintain slightly moist, not saturated, medium.
5–1% sodium hypochlorite for 1–3 minutes; 1% hydrogen peroxide for short soaks. Rinse thoroughly. Gibberellic acid (GA3) can break physiological dormancy in some species—typical concentrations range from 100–500 ppm` applied as a soak for 12–24 hours; test on a small batch first.
- Warnings: Overexposure to sterilants or growth regulators damages embryos. Never mix acids and bleach; always add acid to water when diluting, not water to acid.
Appropriate advanced treatment per problem (old seeds, hard coat, fungal issues) and safety notes
| Issue | Recommended treatment | Procedure summary | Safety precautions | Success expectation |
|---|---|---|---|---|
| Hard seed coat | Mechanical scarification; very rarely chemical acid | Light sanding/file until thin window; soak 12–24h | Wear gloves/eye protection; avoid deep cuts to embryo | Moderate–high if done carefully |
| Aged/slow seeds | Extended soak + warm stratification | 12–24h soak, then 20–25°C warm, keep moist; trial GA3 100–250 ppm |
Test small batch; avoid rotting from over-soaking | Improved germination but variable |
| Surface fungal contamination | Bleach or H2O2 surface sterilization |
5–10% NaOCl 1–3 min or 1% H2O2 5–10 min; rinse 3× |
Use gloves, eye protection; work ventilated | High reduction in surface fungi |
| Cold-dormant genetics | Cold stratification (refrigeration) | 2–5°C for 2–12 weeks in moist medium; monitor |
Sterile medium; periodic checks for mold | High for species with true dormancy |
Understanding and applying these methods selectively yields better germination without unnecessary risk, and preserves seed viability for future batches.
Chapter 5 — Transplanting, Early Care, and Disease Prevention
> Key Takeaway: Transplant when seedlings show stable root development and vigorous first true leaves; moving them too early or too late both raise stress and disease risk. For most cannabis seedlings grown from seed or seedling plugs, a visible root/radicle length…
Transplant when seedlings show stable root development and vigorous first true leaves; moving them too early or too late both raise stress and disease risk. For most cannabis seedlings grown from seed or seedling plugs, a visible root/radicle length of roughly 2–4 cm (about the length of a small cotton swab or a finger segment) is a reliable landmark for safe transplanting. At that stage the root system is established enough to reorient toward new soil without collapsing, but still compact enough to avoid root-bound shock.
How to transplant safely (step-by-step)
- Prepare the new container — Fill with pre-moistened, lightly aerated medium and a small reservoir (if using pots) so roots find moisture immediately. 2.
Water the seedling gently — Water the original plug so the soil holds together; moist media reduces root disturbance. 3. Loosen and lift — Use two fingers or a small dibber: press the plug from below or tease the root ball gently at the edges.
Avoid pulling on the stem. 4. Set depth correctly — Plant so the top of the root ball sits level with surrounding medium; for plants with a very short hypocotyl, planting slightly deeper can stabilize the stem.
- Backfill and firm — Lightly firm medium around the root ball to eliminate air pockets but do not compact. 6.
Initial water and shelter — Apply a light, even watering and place under reduced light intensity or filtered sun for 48–72 hours.
Handling delicate seedlings
- Gentle gripping: hold by the leaf fan or root plug, never by the stem.
- Minimize exposure: keep roots shaded and out of wind; root desiccation causes rapid wilt and fungal vulnerability.
- Reduce nutrient shock: use a low-EC starter solution or plain water for the first three days, then transition to light feeding.
First-week environment and watering strategy
- Humidity balance: maintain 60–70% relative humidity for the first 48–72 hours to reduce transpiration.
- Light management: begin with 50–70% of your normal intensity and raise gradually over 5–7 days.
- Watering cadence: water shallowly and frequently for 3–5 days to encourage root spread near the surface, then shift to deeper, less frequent cycles as roots deepen.
Disease prevention starts at transplant: clean tools, fresh medium, and avoiding overwatering cut root rot and damping-off risk. Choosing high-quality seeds and a reliable germination process reduces early variability and stress, which in turn lowers disease incidence. When these practices are applied consistently, young plants recover faster and establish more uniform canopies.
Chapter 6 — Troubleshooting Checklist and Case Studies
When germination stalls or seedlings fail, the fastest wins are diagnostic clarity and a methodical response. Below is a practical troubleshooting flow that maps symptoms to likely causes, prescribes immediate actions, and lists prevention steps. Use this as an operational checklist during the critical first 14 days: it separates recoverable problems from situations that require re-seeding or disposal.
Map symptom to cause and corrective action for fast troubleshooting (cannabis seed germination troubleshooting)
Table: Section Content — Symptom, Probable cause, Immediate action & more
| Symptom | Probable cause | Immediate action | Prevention |
|---|---|---|---|
| No germination after 14 days | Seed non-viable, stored too dry/hot, or consistently low moisture | Dissect one seed: if dry/crumbly, discard batch; if soft but white radicle absent, try warm soak 20–24°C for 12–24h then paper towel method |
Proper storage: airtight, cool (4–8°C), 30–40% RH; pre-soak sensitive or older seeds |
| Seeds rot or smell | Over-saturation, poor drainage, contaminated medium (fungal/bacterial) | Remove all affected seeds; discard medium; sterilize tray and tools with 10% bleach or hydrogen peroxide rinse; start fresh with sterile medium |
Use moistened but not soaked paper towels, excess water removal, sterile tools, good airflow |
| Seedlings emerge weak/leggy | Low light, excess heat, overcrowding, over-watering | Increase light intensity and duration, lower canopy to 5–10 cm from seedlings, reduce watering frequency, transplant to individual cells if crowded |
Provide strong, cool light (LEDs ~18–24″ for young plants), maintain 20–24°C, follow watering schedule |
| Uneven germination across batch | Variable seed age/viability, inconsistent moisture/temperature during soak | Isolate non-germinated seeds for second pass; apply consistent pre-soak and paper-towel germination for remaining seeds | Batch-test small sample before large seeding; store seeds by harvest date and label clearly |
Step-by-step diagnostic flow (use when multiple symptoms appear)
- Confirm environmental readings: temperature, relative humidity, tray drainage. 2.
Inspect seeds: firm vs. mushy; perform a tactile germination check. 3.
Isolate affected units: stop cross-contamination by separating trays. 4. Apply targeted corrective (sterilize if rot, adjust light if legginess).
- Decide: if >30% of batch shows structural rot or mold, re-seed.
Case examples (realistic, anonymized)
- Example 1 — Batch of 50: 40% failed after 7 days. Cause: tray lids closed, high humidity → fixed with increased vents, full recovery for remainder. * Example 2 — Small grow: all seedlings leggy at day 10.
Cause: single 150W HPS too distant → swapped to LED and reduced distance, vigor returned.
Contamination signs that require disposal: foul sour or rotten odor, visible fuzzy white/green/black mold expanding rapidly, soft slimy seeds. When those appear, dispose of medium and seeds, sterilize equipment, and re-seed; partial salvage is risky and often reintroduces pathogens.
A disciplined diagnostic checklist saves time and seed stock. With consistent environmental control and sanitation, germination success rates rise substantially and re-seeding becomes the exception rather than the rule.
Resources, Supplies, and Where to Buy Quality Seeds
Start with the right small investments and germination becomes predictable. Reliable germination is less about luck and more about repeatable micro-environment control: consistent bottom heat, stable humidity, clean media, accurate water chemistry, and trustworthy seeds. Below are the practical tools, a starter-kit checklist, recommended reading, and an expanded comparison of the essential physical items you’ll use every day.
Essential tools and quick checklist
- Heat control: Research from VIVOSUN shows that a small heat mat can maintain
20–26°C(68–79°F) at the seed level. Humidity control: clear humidity dome or propagation tray to keep RH high until true leaves appear. Medium & plugs: sterile starter plugs or a light seedling mix — consistent texture matters more than fancy brands.
- Water chemistry: reliable pH meter (calibrate regularly) and a simple TDS/EC meter if using nutrients. * Sanitation: According to ROYALQUEENSEEDS, using
70%isopropyl alcohol, gloves, and clean trays helps avoid damping-off pathogens.
Put seeds in pre-moistened plugs in a clean tray. 2. Apply gentle bottom heat and use a dome for 24–72 hours.
- 2` for most cannabis seedlings) and water lightly.
Recommended reading and reference pages
- Textbooks: classic greenhouse propagation texts and basic horticulture manuals covering seed physiology and damping-off prevention.
- Extension pages: university extension publications on seed germination and sterilization methods are practical, actionable references.
- Grower guides: up-to-date propagation articles and germination protocols from reputable seed suppliers and horticulture blogs.
And compare essential germination tools and resources with why/how to use them
Table: Section Content — Item, Why it’s useful, Key specs to look for & more
| Item | Why it’s useful | Key specs to look for | Approx price range |
|---|---|---|---|
| Heat mat | According to VIVOSUN, it provides stable bottom heat to speed germination | Low wattage, thermostat-compatible, 7–10W/sq ft | $15–$60 |
| Humidity dome | Maintains high RH without misting | Clear ABS, ventable lid, fits standard trays | $5–$25 |
| pH meter | Ensures water/medium pH in target range | Auto-calibration, replaceable probes, ±0.01 accuracy | $20–$120 |
| Starter plugs / soil mix | Stable, sterile environment for radicle growth | Peat-free options, 28–50mm plugs, uniform density | $8–$30 (pack) |
| Sterilization supplies | Prevents fungal/bacterial losses | 70% isopropyl, diluted bleach for tools |
$3–$15 |
| Seedling tray (cells) | Holds plugs, improves drainage | 18–72 cell, reusable PP plastic | $5–$25 |
| Propagation thermostat / controller | Keeps heat mat at set temp | Digital, ±1°C control, probe included | $25–$90 |
| Mister / spray bottle | Gentle, uniform moisture without overwatering | Fine mist sprayer, 500–1000 mL | $3–$15 |
Good equipment and the right reading material make germination routine and repeatable, so teams spend time optimizing later stages rather than troubleshooting seedlings.
Conclusion
To achieve predictable germination, focus on key factors such as keeping a consistent temperature, managing moisture levels, and using a reliable substrate. Growers who switched from random methods to a simple checklist—pre-soaking seeds when needed, maintaining stable warmth, and using clean, well-draining media—often experience fewer failed starts and quicker, more even growth. Practical examples from both small indoor setups and commercial germination rooms show that standardizing a single protocol (rather than troubleshooting after failure) reduces lost trays and shortens time to transplant readiness.
If you have lingering questions—like what if the substrate shows mold, how long should seeds soak, or when to switch from dome to airflow—address them in the same way you’re tackling this process: inspect and replace contaminated media, limit soaking to the strain’s recommended window, and move to gentle airflow as soon as radicles show. For growers ready to implement a repeatable system, begin by documenting one repeatable seed-start routine, test it across three trays, and adjust only one variable at a time. com) as an option to supply and troubleshooting.
Take those three small steps now—standardize, test, and iterate—and the next round of seedlings will prove the difference.