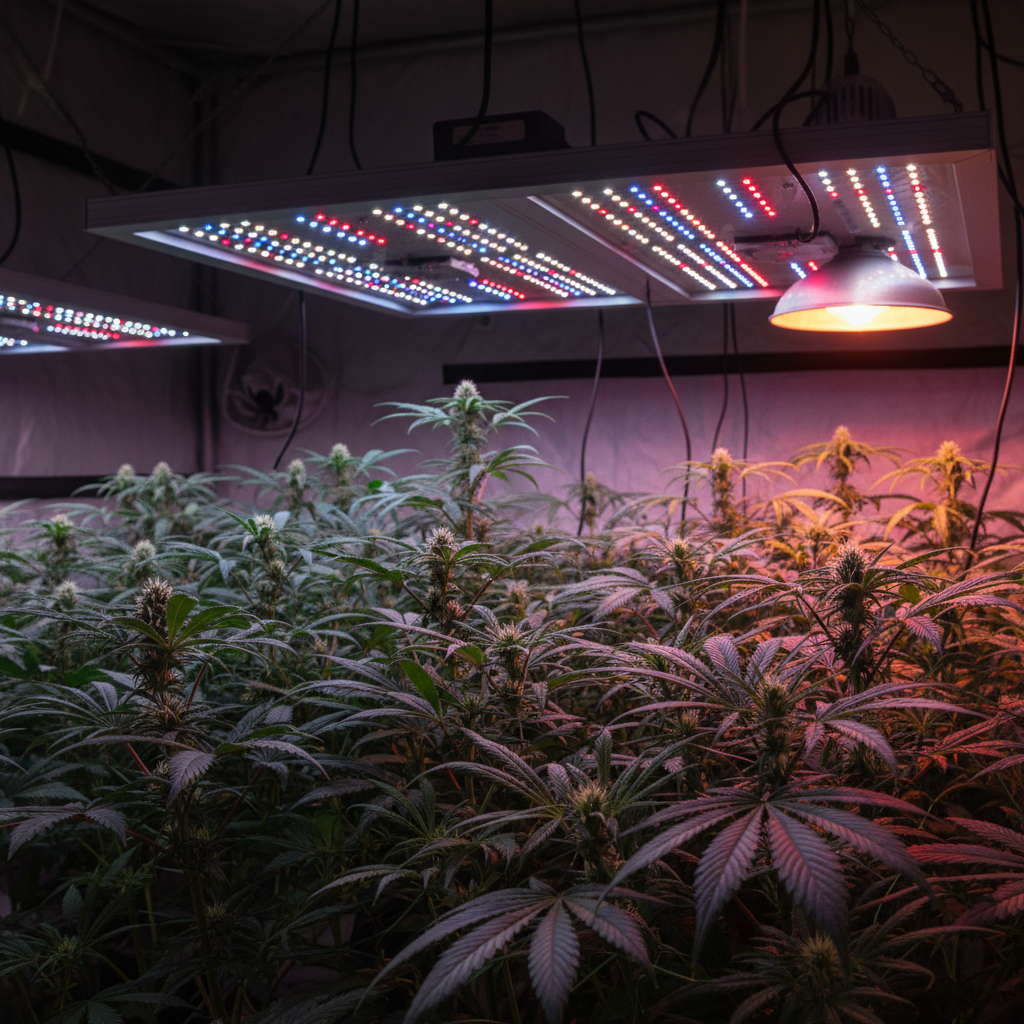
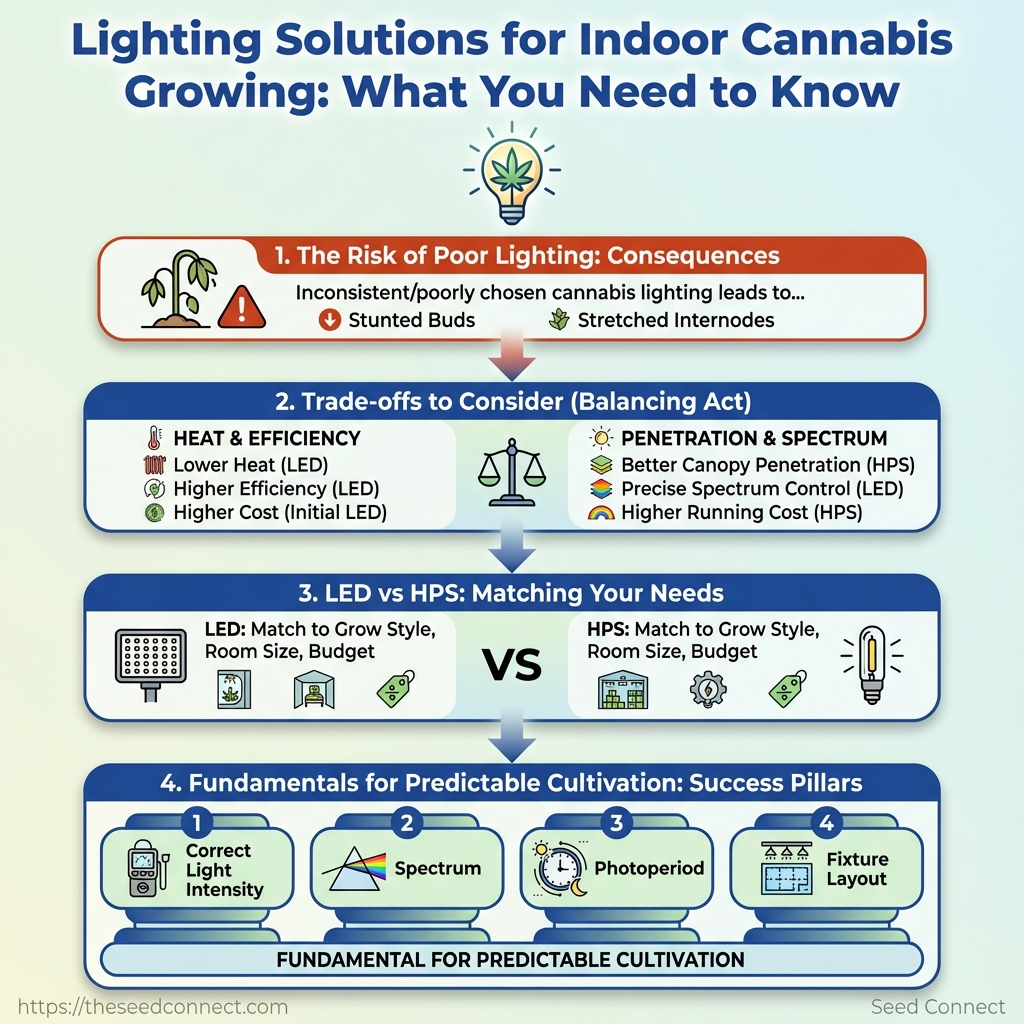
Stunted buds and stretched internodes often trace back to one invisible variable: inconsistent or poorly chosen cannabis lighting. Growers recognize the frustration of perfect nutrients and climate, only to watch plants underperform because the light spectrum, intensity, or placement was wrong.
Choosing between different systems exposes a maze of trade-offs in heat, efficiency, canopy penetration, and spectrum control. Practical decisions about indoor growing lights change harvest timing, terpene expression, and electrical costs more than most realize.
Comparing LED vs HPS is less about winning a technology debate and more about matching a light to a grow style, room size, and budget. Get the fundamentals right—light intensity, spectrum, photoperiod, and fixture layout—and the rest of the cultivation puzzle becomes far more predictable.
How Cannabis Plants Use Light: Basics You Must Know
Cannabis depends on three distinct light variables: spectrum, intensity, and photoperiod. Spectrum shapes how the plant allocates resources and develops structure; intensity (measured as PPFD) determines how much usable light reaches the canopy; and photoperiod tells photoperiod strains when to switch from vegetative growth to flowering. Understanding and controlling these three factors lets a grower influence stretch, leaf-to-stem ratio, cannabinoid production potential, and final yield.
Light spectrum: what wavelengths do what
- Blue (400–500 nm): Encourages compact, bushy growth and strong leaf development.
- Red (620–700 nm): Drives flowering responses and can increase bud density when abundant during bloom.
- Far-red (700–750 nm): Modulates shade responses and can accelerate flowering transitions when used at dusk.
- Full-spectrum (broadband): Mimics natural sunlight and supports balanced growth across stages.
What this means is that vegetative growth benefits from higher blue ratios, while flowering benefits from increased red energy—though too much red without enough blue can produce lanky plants.
Light intensity: PPFD and practical measurement
- PPFD definition:
PPFD(photosynthetic photon flux density) measures µmol/m²/s of photons in the 400–700 nm range that actually hit the plant surface. - Why PPFD matters: It’s the proper metric for plant-usable light; lumen or lux are poor proxies for photosynthesis.
- How to measure: Use a quantum PAR meter placed at canopy height for representative readings.
- Place the meter at canopy level where most growth occurs.
- Take readings across the canopy in a grid pattern and average them.
- Adjust fixture height or dimming until target PPFD ranges are met for the stage.
Photoperiod: controlling flowering
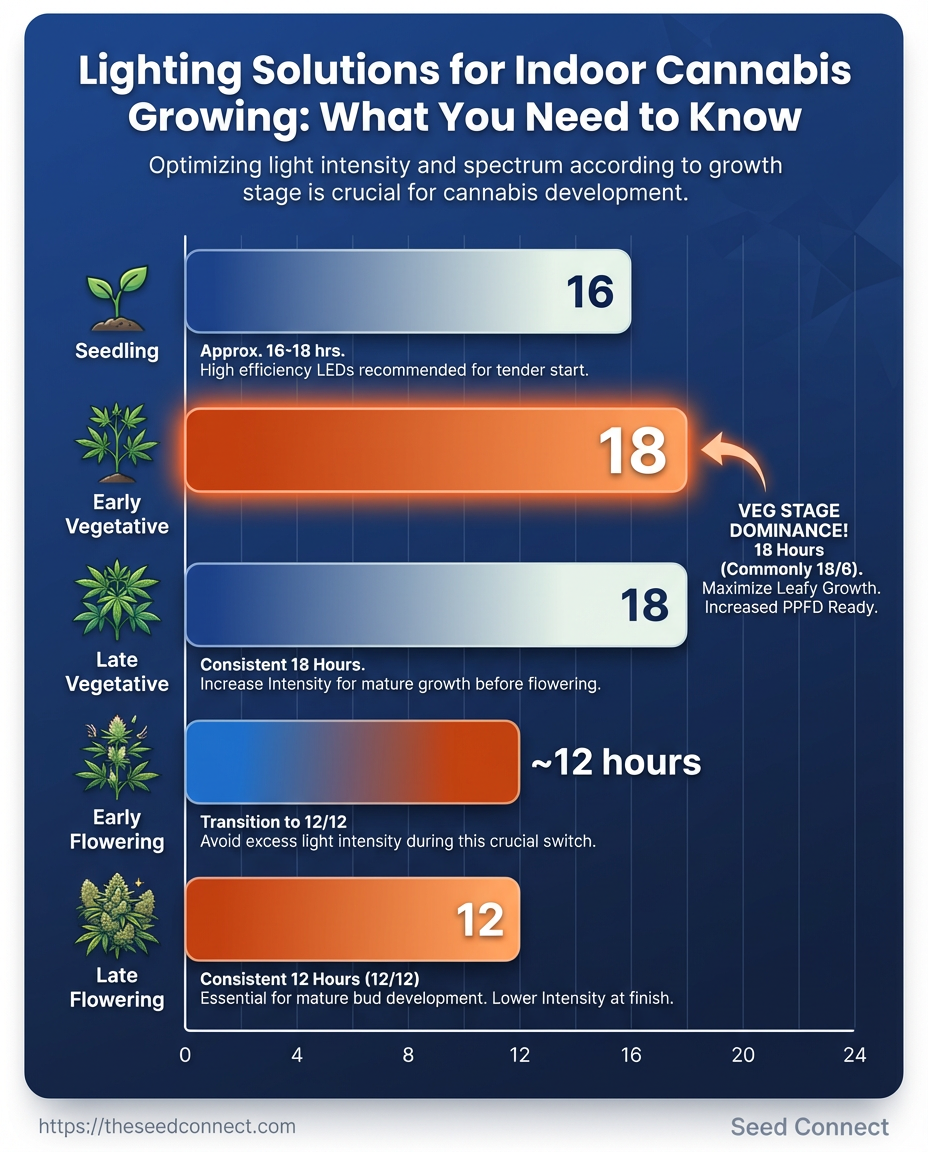
- Photoperiod sensitivity: Most common cannabis strains are short-day (photoperiod) plants—reducing daily light from ~18 hours to ~12 hours triggers flowering.
- Autoflowers: These are day‑length independent and flower by age rather than light schedule.
- Practical rule: Maintain stable, uninterrupted dark periods during flowering; even brief light leaks can delay or revert flower development.
Summarize recommended PPFD and spectrum ranges by growth stage (seedling, veg, flower)
Summarize recommended PPFD and spectrum ranges by growth stage (seedling, veg, flower)
| Growth Stage | Recommended PPFD (µmol/m²/s) | Spectrum Emphasis (nm) | Typical Photoperiod |
|---|---|---|---|
| Seedling | 100–200 | 450–500 (blue-heavy) | 18–24 h light |
| Early Vegetative | 200–400 | 430–500 (balanced blue) | 18 h light / 6 h dark |
| Late Vegetative | 400–600 | 430–660 (full-spectrum) | 18 h light / 6 h dark |
| Early Flowering | 600–800 | 620–660 (red emphasis + full-spectrum) | 12 h light / 12 h dark |
| Late Flowering | 800–1000 | 620–700 (strong red, some far-red) | 12 h light / 12 h dark |
Key insight: Increasing PPFD through veg into bloom raises potential photosynthetic capacity, while shifting the spectrum toward red and preserving consistent dark periods signals and supports robust bud development.
Practical tips: increase intensity gradually to avoid light stress, favor full-spectrum LEDs in multi-stage setups, and preserve true darkness during flowering. Understanding these principles accelerates setup decisions and reduces guesswork in both small and commercial grows. This approach keeps control where it matters—light, not luck.
Overview of Light Types: LED, HPS, CFL, and CMH
LEDs, HPS, CFLs and CMH lamps each occupy a clear niche in indoor cannabis culture: LEDs deliver spectrum control and efficiency, HPS delivers raw flower-stage intensity and penetration, CFLs keep costs low for seedlings and small grows, and CMH (Ceramic Metal Halide) offers a high-quality full-spectrum alternative that closely mimics sunlight. The practical choice depends on room size, heat tolerance, budget, and whether spectrum tuning or raw PPFD is the priority.
How each light performs for cannabis
LED: Offers high electrical efficiency, programmable spectrum, and low running heat. Modern fixtures reach ~2.0–2.8 µmol/J in real-world tests, making them the best choice when energy per photon, spectrum tailoring, and longevity matter.
HPS: Still the benchmark for dense flowering canopy penetration and proven yields. HPS fixtures are less efficient per photon than top LEDs but provide strong red/IR output that drives bud production.
CFL: Cheap, low-heat, and easy to use. Best for seedlings, clones, and micro-grows where canopy penetration and long-term efficiency are not primary concerns.
CMH: Delivers a broad, natural spectrum with good PAR output and relatively low color degradation over life. Good mid-way option for growers wanting full-spectrum light without the premium of top-tier LEDs.
Practical factors to weigh
- Canopy penetration: HPS scores highest for deep penetration; LEDs compete well when paired with tight arrays.
- Heat management: LEDs and CFLs run cooler; HPS and CMH require stronger ventilation.
- Lifespan & maintenance: LEDs last longest; CFLs need frequent replacement.
- Budget: CFLs lowest upfront; LEDs highest upfront but lowest operating cost over years.
Provide a quick decision matrix comparing energy usage, heat, lifespan, upfront cost, canopy penetration, and ideal use-case for each light type
| Feature | LED | HPS | CFL | CMH |
|---|---|---|---|---|
| Energy Efficiency (W per µmol) | ~0.36–0.50 W/µmol (2.0–2.8 µmol/J) | ~0.56–0.63 W/µmol (1.6–1.8 µmol/J) | ~0.90–1.11 W/µmol (0.9–1.1 µmol/J) | ~0.59–0.67 W/µmol (1.5–1.7 µmol/J) |
| Heat Output | Low | High | Low | Medium-High |
| Lifespan (hours) | 40,000–60,000 | 15,000–24,000 | 8,000–12,000 | 12,000–20,000 |
| Upfront Cost | High | Medium | Low | Medium-High |
| Ideal Use-case | Energy-conscious, spectrum control, multi-stage | High-yield flowering rooms, deep canopy | Seedlings, clones, budget micro-grows | Full-spectrum veg/flower, boutique quality |
Key insight: LEDs lead on efficiency and lifespan while HPS remains a strong option for budget-conscious growers chasing deep canopy penetration; CFLs suit tiny setups, and CMH offers a balanced full-spectrum middle ground.
Examples and real-world considerations
- Many commercial rooms still deploy HPS in flower because the fixtures are cheap and penetrating.
- Home growers shifting to LEDs see lower electricity bills and simpler cooling setups.
- Small-scale propagators prefer CFLs for their gentle, low-heat light during early stages.
Understanding these differences lets a grower match lighting to space, heat capacity, and yield goals. Choosing the right lamp type simplifies environmental control and maximizes the value of quality seeds.
Choosing the Right Light for Your Space and Goals
Selecting the correct fixture begins with a simple calculation: match the light output to the canopy area and the crop’s PPFD needs. For flowering cannabis, plan for 450–750 µmol/m²/s at canopy level depending on genetics and target yield. The fixture type (LED vs HPS), mounting height, and spacing determine whether that PPFD is achieved efficiently without overheating the room or stressing plants.
PPFD: Photosynthetic Photon Flux Density; the measure of useful light (µmol/m²/s) hitting the canopy.
Canopy area: The horizontal surface area of plant tops receiving light; usually equal to the tent footprint for even coverage.
Converting canopy area into required light output
- Measure canopy area in square feet.
- Convert to square meters (1 ft² = 0.0929 m²).
- Multiply area (m²) by target PPFD (
µmol/m²/s) to get total µmol/s needed. - Divide the total µmol/s by a fixture’s PPF (µmol/s) to find the number of fixtures required.
Practical example: For a 4′ x 4′ tent (1.49 m²) targeting 600 µmol/m²/s, total required output ≈ 894 µmol/s. A 600W high-efficiency LED with ~2200 µmol/s PPF would more than cover the area, but distribution and mounting height determine how many fixtures and what spacing will actually hit the canopy evenly.
Fixture choice, heat and mounting considerations
LEDs — Higher efficiency, lower canopy heat, closer mounting heights, better spectrum control. HPS — Higher radiant heat, deep red-rich spectrum, often cheaper upfront for wattage. Mounting height: LEDs typically 12–24″ above canopy; HPS needs 24–36″+ depending on reflector and wattage. Spacing: Use multiple smaller fixtures for even PPFD rather than one oversized lamp that creates hot and cold spots.
Budget and environmental constraints
Budget-first grows: Larger HPS rigs may give high lumen-per-dollar but require robust ventilation. Low-heat or compact spaces: Quality LEDs reduce HVAC costs and allow reduced hanger clearance. Target yield tradeoff: Pushing PPFD over 700 µmol/m²/s yields diminishing returns unless genetics and CO₂ are upgraded.*
Sample light sizing guidance for common tent sizes and expected canopy area
Sample light sizing guidance for common tent sizes and expected canopy area
| Tent Size (ft) | Canopy Area (ft²) | Recommended PPFD Range (µmol/m²/s) | Estimated LED Wattage | Estimated HPS Wattage |
|---|---|---|---|---|
| 2′ x 2′ | 4 | 450–600 | 150–200W | 250W |
| 3′ x 3′ | 9 | 450–650 | 250–350W | 400W |
| 4′ x 4′ | 16 | 500–700 | 400–600W | 600–1000W |
| 5′ x 5′ | 25 | 500–700 | 600–900W | 1000–1500W |
| 10′ x 10′ | 100 | 450–700 | 2500–4000W | 3000–6000W |
Key insight: Smaller spaces benefit most from efficient LED fixtures that concentrate PPFD without excessive heat; larger canopies often require multiple fixtures sized for overlap to maintain even PPFD across the canopy.
Precise fixture selection comes down to matching PPF and distribution to your canopy, then balancing cost and heat management. Choosing the right light makes cultivation more predictable and keeps environmental systems from becoming the limiting factor.
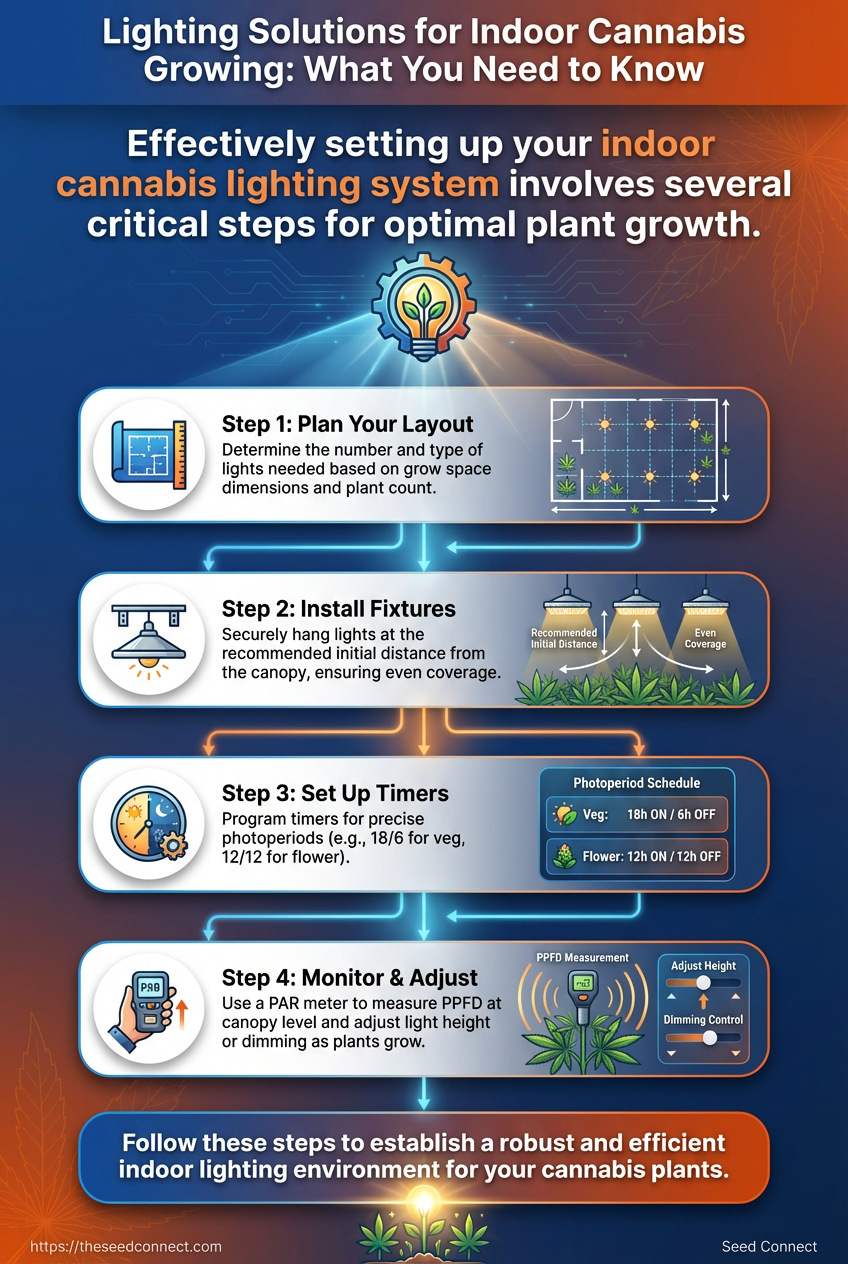
Step-by-Step: Setting Up Your Indoor Lighting System
Start by planning the layout and expected light output before buying fixtures; a measured approach prevents hotspots, unexpected electrical loads, and early rework. Choose the lamp technology that matches your canopy goals—modern LED fixtures offer higher efficacy and lower heat per photon, while HPS still produces high PAR per dollar in some setups. Measure and control light with PPFD, not subjective brightness, and build the electrical and mounting plan around worst-case load and service access.
Basic electrical knowledge: Understand circuit ratings, GFCI/grounding basics, and local code requirements.
Grow area dimensions: Measure usable canopy in square feet/meters and ceiling height.
Target crop stage: Decide flowering canopy PPFD (commonly 600–900 µmol·m⁻²·s⁻¹) and veg targets (200–400 µmol·m⁻²·s⁻¹).
Tools & materials
- Fixture(s): Choose LED, HPS, or hybrid models based on efficiency and heat budget.
- Light meter or PAR sensor: For PPFD mapping.
- Dimmer/ballast/driver: Match the fixture technology.
- Mounting hardware: Adjustable ratchets, rails, or crossbars.
- Electrical supplies: Correct gauge wire, breakers, GFCI outlets, surge protection.
- Thermal control: Fans, ducting, and exhaust if using high-heat HPS.
- Plan the layout and load calculations.
- Sketch canopy grid and mark fixture centers relative to plant spacing.
- Calculate total wattage and worst-case amperage; size circuits at 125% of continuous load.
- Select fixture models and mounting style to achieve even PPFD across the canopy.
- Install electrical circuits and outlets per code; include a dedicated breaker and GFCI protection.
- Mount fixtures with adjustable hangers and level each unit to avoid tilt-related hot/cold spots.
- Perform an initial PPFD map at target height using a PAR meter; record values at grid points.
- Adjust fixture height and dimming to achieve target PPFD range while keeping uniformity ratio ≤1.4.
- Run a thermal test under full power for several hours; verify exhaust capacity and ambient temps.
- Lock settings, label circuits, and document target heights/PPFD for each growth stage.
Practical examples and notes
Example — small 4×4 canopy: Four 300W LEDs spaced on a 2×2 grid hitting ~700 µmol·m⁻²·s⁻¹ at 30–35 cm.
Example — HPS retrofit: Replace a single 1000W HPS with two 600W LEDs to reduce heat and improve uniformity.
Measure PPFD and adjust distance rather than guessing—height changes have an exponential effect. Electrical safety is non-negotiable: undersized wire, loose connections, or overloaded breakers create fire risk and loss of crop. Understanding these principles lets teams deploy reliable, efficient lighting systems that hit target light levels and maintain a safe, repeatable environment.
Optimizing Light Use: Timers, Dimming, and Spectrum Tuning
Effective light scheduling and output tuning start with a clear program: stable photoperiods via reliable timers, gradual intensity changes during transitions, and spectrum adjustments tailored to vegetative versus flowering physiology. Use a good digital timer or a smart controller to enforce consistent cycles, employ dimming to reduce stress and heat during sensitive stages, and shift spectrum toward red-dominant output as plants move into bloom. This reduces stretch, improves canopy penetration, and extends fixture life by avoiding constant max-output operation.
Practical controller choices and why they matter
- Reliable timers: Use digital timers with battery-backed clocks for predictable
18/6or12/12cycles. - Smart controllers: Wireless controllers allow phased-on, sunrise/sunset ramping, and per-fixture dimming for canopy optimization.
- Dimming capability: Dimming at 10–80% reduces heat load and electrical draw while prolonging LEDs/HID ballasts.
- Spectrum tuning: Blue-heavy spectra support compact veg structure; increasing red (2700–3000K or dedicated 660nm) improves bud formation.
Step-by-step: ramping into flower (practical example)
- Reduce photoperiod to
12/12on day one of transition. - Over the next 5–7 days, lower intensity by 10–15% per day to avoid light shock and allow stomata/photoreceptors to acclimate.
- Increase red spectrum contribution progressively—either by switching channels on the fixture or adding supplemental red LEDs—until target flowering spectrum is reached by day 7.
- Once on full
12/12, slowly return intensity to production levels over 3–5 days while monitoring canopy temperature and leaf responses.
Photoperiod: The daily light/dark cycle length controlling developmental signals.
Spectrum tuning: Adjusting the relative amounts of blue/red/UV/infrared light to influence morphology and secondary metabolite production.
Dimming and fixture longevity
Dimming both reduces operating temperature and eases electrical stress on drivers and ballasts. For LED fixtures, running at 70–90% can extend mean time between failures and allows higher PPE when full power is needed for short bursts during critical periods.
Recommended timer and control settings for each growth stage and common fixture features to look for (dimming, spectrum control, wireless)
Recommended timer and control settings for each growth stage and common fixture features to look for (dimming, spectrum control, wireless)
| Growth Stage | Photoperiod | Typical Light Intensity Strategy | Controller Feature Recommended |
|---|---|---|---|
| Seedling | 18/6 or 20/4 |
Low PPFD (50–150 µmol/m²/s) near edge of canopy | Basic digital timer, soft-start ramping |
| Vegetative | 18/6 |
Moderate PPFD (300–600 µmol/m²/s) with blue-rich spectrum | Smart controller, spectrum blue boost, dimming |
| Transition | Gradually shift to 12/12 |
Step-down intensity then step-up red content | Programmable ramping, per-fixture dim control |
| Flowering | 12/12 |
High PPFD (600–1000+ µmol/m²/s) with red-dominant spectrum | Multi-channel spectrum control, thermal monitoring |
Key insight: Matching photoperiod, intensity, and spectrum through programmable controllers reduces plant stress during transitions, improves canopy uniformity, and lets growers squeeze more life and output from fixtures by avoiding constant full-power operation.
Understanding and applying these controls allows precise, repeatable crops and reduces unexpected cycles or heat events. When implemented correctly, scheduling and spectrum tuning turn lighting from a fixed cost into an adaptive tool that improves both yield quality and equipment lifespan.
Troubleshooting Common Lighting Issues
Lighting problems usually present as visible stress long before the plant’s physiology is permanently altered. Start by observing where the symptoms appear (top of canopy vs lower leaves), then isolate whether the cause is light intensity/distance, spectrum, or an unrelated factor like nutrients or pests. Adjust distance and intensity first—changing feed schedules or adding pesticides without ruling out light will waste time and often make issues worse.
Diagnosing quickly: what to look for
- Leaf bleaching: Bright white or yellow at the top of the canopy, often with crisp margins.
- Stretching / long internodes: Tall, spindly growth with large gaps between nodes.
- Uneven canopy growth: Patches of vigorous plants next to stunted ones under the same light.
- Lights flickering or failing: Intermittent output, buzzing ballasts, or visible flicker.
- High canopy temperatures: Leaves feel hot to the touch and may curl or show heat stress.
Immediate steps to isolate light problems
- Turn lights to a maintenance height that is known safe for the fixture and strain.
- Measure light intensity with a PAR meter or smartphone app for a quick estimate.
- Check fixture run temperatures and airflow; touch only after powering down.
- Inspect electrical connections, dimmer settings, and ballast drivers for visible faults.
- Compare top vs lower leaves and check for pests or nutrient deficiency signs before adjusting feeding.
When light is the confirmed cause
- If bleaching/top-crown damage: Raise the light 15–30 cm (6–12 in) or reduce output by 10–25%.
- If stretching: Increase intensity or lower lights, or change to a higher Blue-spectrum during veg.
- If uneven canopy: Reposition lights, add reflectors, or use supplemental fill lights to even distribution.
- If lights flicker: Power down, unplug, and inspect ballasts/drivers and timers; replace faulty units immediately.
- If canopy temperature is high: Improve ventilation, add inline fans, or raise light distance; avoid cooling plants by overwatering.
Light burn: Tissue necrosis from excess irradiance and heat.
Photoperiod stress: Flowering disruption caused by irregular dark periods.
PAR (Photosynthetic Active Radiation): The useful light spectrum for photosynthesis.
Quick reference: symptom vs likely cause vs immediate fix (cannabis lighting troubleshooting light burn stretch fix)
| Symptom | Likely Cause | Immediate Diagnostic Step | Fix / Next Step |
|---|---|---|---|
| Leaf bleaching (top of canopy) | Excess intensity / heat | Measure PAR at canopy; feel leaf surface temperature | Raise light 15–30cm; reduce output; improve airflow |
| Stretching / long internodes | Low intensity / spectrum imbalance | Check stand height vs recommended PAR; inspect spectrum | Lower light or increase intensity; use more blue light in veg |
| Uneven canopy growth | Poor light distribution | Map PAR across canopy in grid | Reposition fixtures; add reflectors or supplemental LEDs |
| Lights flickering | Electrical/driver failure | Observe when flicker occurs; swap fixture to test | Replace driver/ballast; secure connections; use surge protection |
| High canopy temperatures | Insufficient cooling / close fixture | Measure ambient and leaf temperatures | Increase ventilation; raise lights; add AC or exhaust fan |
These diagnostics prioritize adjusting light distance and intensity before changing nutrients or pest interventions, reducing misdiagnosis and crop loss.
Understanding and correcting lighting problems quickly keeps plants productive and avoids unnecessary nutrient changes or pesticide use. When adjustments are systematic—measure, isolate, change one variable—resolution is faster and more reliable.
📥 Download: Indoor Cannabis Lighting Solutions Checklist (PDF)
Tips for Success, Maintenance, and Energy Savings
Consistent maintenance and deliberate energy-management choices keep fixtures performing and operating costs down. Start by treating lighting systems as living equipment: schedule monthly checks, measure actual PPFD instead of trusting labels, and use dimming/scheduling to match plant stages. Doing so preserves lumen output, reduces heat stress on the canopy, and cuts electricity bills without hurting yields.
Practical maintenance habits
- Clean reflectors and lenses: Remove dust and film to restore light transmission and uniformity.
- Verify electrical connections: Tighten terminal blocks and check for corrosion to prevent driver stress.
- Monitor driver temperatures: Elevated driver temps shorten lifespan—ensure proper ventilation.
- Rotate measurement points: Measure
PPFDgrid points monthly to track light degradation. - Document changes: Keep a simple log of bulb/module hours, cleaning, and settings.
Energy-saving strategies that don’t sacrifice yield
- Calibrate spectrum and intensity for each growth stage using
PPFDtargets. - Implement dimming schedules: reduce output during dark hours and lower veg intensity by 20–30% overnight to save power.
- Use reflective materials and canopy training so photons hit usable leaf area rather than wasted space.
- Integrate smart timers and occupancy or ambient-light sensors to avoid unnecessary run-time.
- Opt for high-efficacy LEDs with quality drivers to deliver more usable light per watt.
When to replace modules and bulbs
- Drops in PPFD: Replace when average canopy
PPFDfalls >15–20% from baseline. - Driver anomalies: Replace drivers that show voltage drift or repeated fault cycling.
- Visible degradation: Replace lenses or modules with discoloration that reduces transmission.
Monthly maintenance tasks, frequency, and expected time required
| Task | Frequency | Time Estimate | Purpose / Benefit |
|---|---|---|---|
| Clean fixtures and reflectors | Monthly | 15–45 min per fixture | Restores light transmission and uniformity |
| Check electrical connections and drivers | Monthly | 20–40 min per fixture | Prevents shorts, reduces driver stress |
| Measure PPFD across canopy | Monthly | 30–60 min per room | Tracks light degradation and uniformity |
| Replace bulbs or modules as needed | Annually or as indicated | 30–90 min per fixture | Maintains target light levels and spectrum |
| Inspect for heat buildup and airflow issues | Monthly | 20–30 min per room | Prevents hotspots and extends component life |
Key insight: Regular, short maintenance sessions prevent major failures and keep effective light output high; targeted replacements based on PPFD and driver health yield better ROI than calendar-only changes.
Understanding these practices lets teams lower operating costs and keep plants in optimal light without adding complexity. When applied consistently, maintenance and smart scheduling turn lighting from a cost center into a controlled variable that supports uniform yields.
Conclusion
After walking through how cannabis plants use light, the practical differences between LEDs and HPS, and the steps for setting up and tuning a system, the path forward is clear: focus on consistent, correctly positioned light and match spectrum to growth stage. Growers who switched from old HPS fixtures to modern LEDs reported reduced heat stress and 15–25% lower energy bills, while another small indoor setup that optimized canopy height and dimming schedules stopped experiencing stretched internodes almost overnight. Those examples underline the value of small, targeted changes.
If you’re asking which system suits your room, whether to prioritize spectrum or raw lumen output, or how to cut heat without sacrificing intensity, start with these actions: measure your canopy PAR across the tent, set timers to mimic appropriate photoperiods, and choose an LED or HPS based on budget, heat tolerance, and flowering goals. For parts, seed sourcing, or hands-on support with optimizing light schedules, consider resources like the Seed Connect grower guides at TheSeedConnect and their seed selection pages for genetics that respond well to your chosen lighting. Take these steps this week: map light intensity, adjust fixtures to target PAR, and run a two-week trial with dimming changes to see measurable differences.