That sinking feeling in week three is familiar to anyone who’s made cannabis growing mistakes.
Plants look fine one day and limp the next.
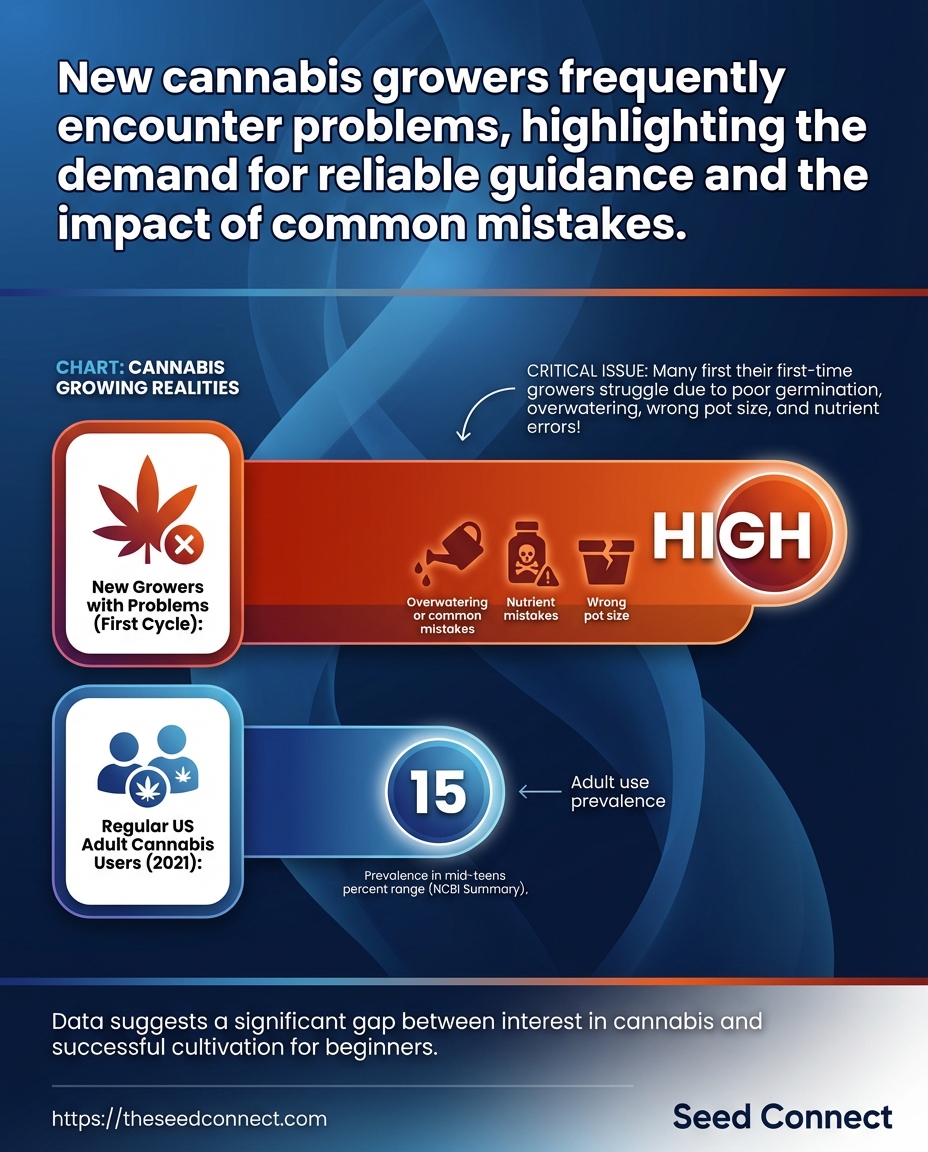
About 70% of new growers hit problems during their first grow cycle, mainly due to nutrient mismanagement.
Watering schedules and dosing often cause more harm than good.
About 1.96 million adults reported using cannabis regularly in 2021, so demand for reliable guidance is rising.
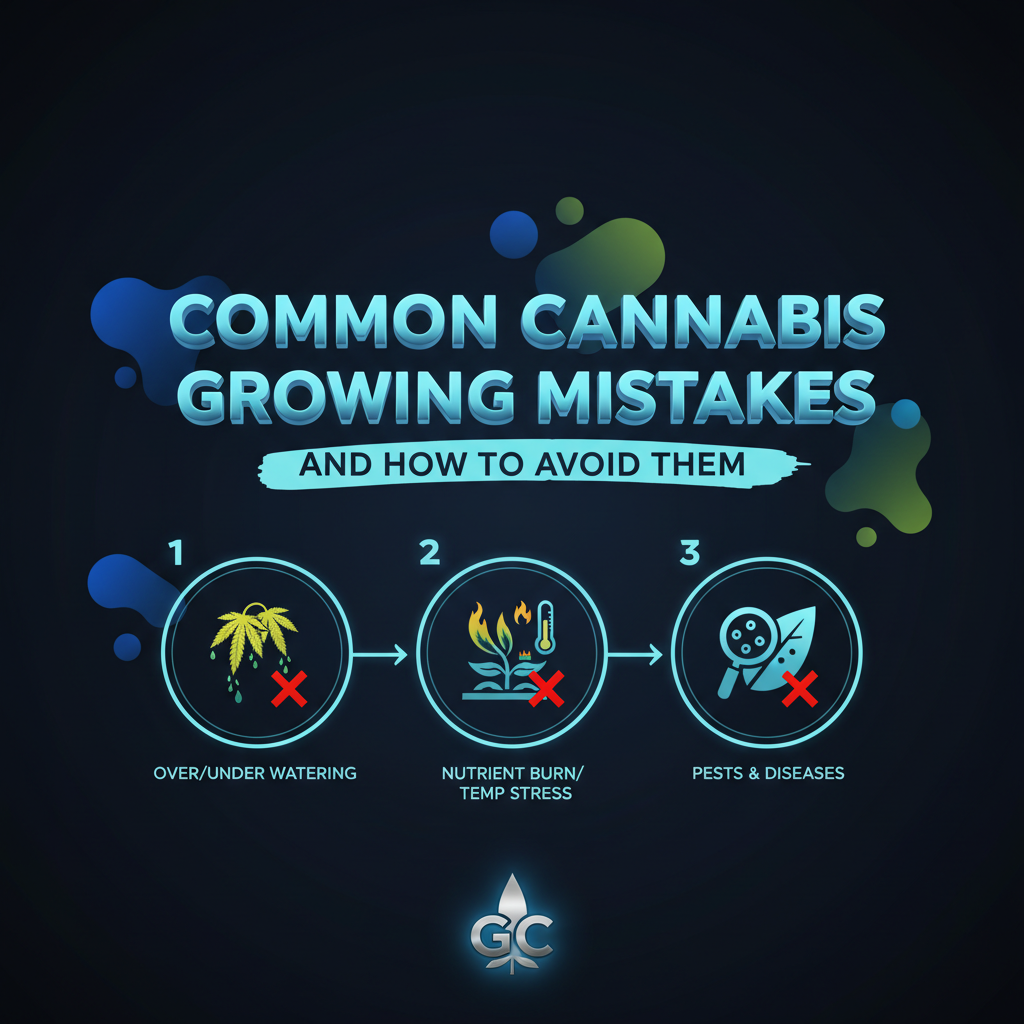
The usual culprits are predictable: overwatering, nutrient burn, inadequate lighting, and ignoring pH.
In soil, a pH between 6.0 and 7.0 keeps nutrients available.
Underpowered lights produce lanky, low-yield plants.
Small course corrections early save entire harvests and months of frustration.
Practical growing tips and clarity about common cultivation errors turn that first chaotic grow into a reliable routine.
Table of Contents
-
Watering mistakes: too much, too little, or at the wrong time
-
Light, temperature, and humidity: environment mistakes that cost yields
-
Training, pruning, and structural mistakes that reduce canopy performance
Why growers make these mistakes (and why it matters)
Ever spend months nursing a crop only to end up with sparse buds and seedlings that never took off? That frustration is common, and it’s usually a string of small errors that add up. Most new growers hit the same three bottlenecks: watering habits, nutrient dosing, and lighting choices.
These issues manifest as slow growth, yellowing leaves, and weak harvests that don’t meet expectations.
Industry voices like High Times and companies such as Humboldt Seed Company and FoxFarm identify these recurring problems in their grow guides.
The stakes extend beyond a single failed plant; all of these contributing factors compound, and new growers must navigate them carefully to avoid frustration and loss.
Seeds and genetics: start with the right foundation
Genetics set the template for everything your plants will do.
Choose the right seed and you’re buying vigor, predictable flowering time, pest and mold resistance, and the cannabinoid profile you want.
Pick the wrong genetics and no amount of careful feeding or perfect light will save the harvest.
Match strain traits to your grow space, skill level, and final goals before you click “buy.” Seed quality matters more for new growers than any single piece of equipment.
Since roughly 70% of new growers hit trouble their first cycle, starting with reliable seeds and a clear description reduces early-stage risk.
Choosing seeds that match your goals and environment
Think about space and timeline first.
Outdoor growers need strains with disease and cold tolerance; small indoor tents favor compact, predictable strains.
Consider these quick checks before buying:
-
Grow environment: Choose strains known for outdoor resilience or indoor compact habits.
-
Flowering time: Pick strains with shorter flowering for tight seasonal windows.
-
Type match: Decide between feminized for predictability or autoflower for fast, hands-off cycles.
-
Potency profile: Prioritize THC/CBD targets that fit the intended use.
-
Disease resistance: Look for breeder notes on mold and pest resistance.
Feminized: Seeds bred to produce only female plants, reducing male culls and saving time. Autoflower: Seeds that switch to flowering on age, not light schedule, ideal for fast or stealth grows. Photoperiod: Traditional seeds that require a change in light cycle to flower, useful when you want full control.
Common seed-related mistakes — buying poor-quality stock, misreading descriptions, and ignoring guarantees
Many growers buy the cheapest pack and end up with weak genetics or mixed traits.
Others skim descriptions and miss critical notes on lineage or required training methods.
Misreading breeder claims leads to surprises — for example, assuming a strain is mold-resistant when it’s only tolerant under ideal conditions.
Ignoring guarantees removes your safety net if seeds fail.
What to watch for before purchase: breeder reputation (Humboldt Seed Company is a well-known example), clear lineage, and honest flowering times.
The infographic compares trustworthy seed traits like germination guarantee, known breeder reputation, and explicit flowering time against red flags like no guarantee and vague lineage.
Use it as a quick checklist while shopping.
How Seed Connect’s germination guarantee and support reduce early-stage risk
When seeds are backed by a germination guarantee, the financial and time risk of a failed start drops significantly.
Seed Connect’s guarantee and grower support mean you can document failures and get guidance or replacements rather than guessing what went wrong.
Follow this simple sequence if seeds don’t sprout:
-
Document: Take timestamped photos and note growing medium and temperature.
-
Contact support: Share the evidence and ask for specific troubleshooting.
-
Resolve: Accept replacement seed or credit per the guarantee terms, then retry with adjusted technique.
Using a guaranteed source lets you focus on learning real grow skills instead of recovering from early mistakes.
Start with genetics that match your room and goals, and you’ll remove half the variables before the first transplant.
Watering mistakes: too much, too little, or at the wrong time
Most growers learn the hard way that watering is more art than calendar.
Give a plant a liter on Monday and another on Thursday because “that’s the schedule,” and you can end up with slow roots or root rot.
Observing the plant and the pot will tell you more than a rigid timetable ever will.
Overwatering and underwatering often look similar at first—droops, slow growth, and discolored leaves—so a quick diagnostic routine saves hours and plants. A few simple checks separate the two problems fast and let you respond with confidence instead of guesswork.
Signs of overwatering vs. underwatering (quick diagnostics) Overwatering symptoms often start at the root zone and show on older leaves first.
Leaves may be soft, swollen, dark green, and hanging limp even though the soil surface is wet.
You might also smell stale soil or see fungus gnats—a sign of persistently damp medium.
Underwatering shows as crispy, dry leaf edges and wilting that improves briefly after watering.
New growth can be small and slow, and the pot will feel markedly light when lifted.
Roots may pull away from the container sides in severe cases.
A simple diagnostic routine takes under a minute:
-
Lift test: Pick up the pot — heavy means recently watered, light means time to water.
-
Finger test: Push your finger 1–2 inches into the medium—if it feels dry, water; if cool and damp, wait.
-
Surface cues: Cracked soil or dry top inch implies thirst; glossy, compacted topsoil suggests overwatering.
Practical schedule and soil checks to avoid common watering errors
|
Grow stage |
Typical pot size |
Medium |
Water frequency |
How to test (finger test / weight / moisture meter) |
|---|---|---|---|---|
|
Seedling |
<1 gal |
Seed-start mix (peat/perlite) |
Light misting daily or small pours every 2–3 days |
Finger: top 0.5″ moist; Weight: light lift; Meter: low reading (10–20%) |
|
Veg |
1–5 gal |
Potting soil with perlite |
Every 2–4 days depending on canopy size |
Finger: 1″ dry before watering; Weight: noticeable weight change; Meter: 20–40% |
|
Pre-flower |
5–10 gal |
Rich soil / amended mix |
Every 3–5 days, increase volume as roots fill |
Finger: 1–2″ dry; Weight: heavy when wet; Meter: 30–45% |
|
Flower |
>10 gal |
High-drain soil or coco |
Every 2–4 days with larger pours; monitor runoff |
Finger: 1–2″ dry; Weight: steady increase when watered; Meter: 35–50% |
|
Soil vs coco vs hydro |
Varies |
Soil: organic / Coco: washed coco / Hydro: inert |
Soil: less frequent, deeper; Coco: more frequent, smaller; Hydro: continuous/reservoir |
Finger: soil 1–2″ dry; Coco: moisture in top 1″; Hydro: monitor EC and reservoir level; Meter: medium-specific targets |
These checks combine common grower practice, breeder notes, and medium manufacturer guidance to put control back in your hands.
Adjust for room temp, pot color, and airflow—white pots dry slower than black ones.
Tools and quick habits that prevent watering stress
-
Moisture meter: quick
readof medium moisture helps remove guesswork. -
Digital scale: Lift consistency: weigh pots after a thorough watering to learn the wet vs dry weight.
-
Watering can with narrow spout: Targeted pours prevent splashing and overwatering around stems.
-
Runoff rule: Water until ~10–20% runoff occasionally to prevent salt buildup.
-
Routine check: Daily 30‑second walk to lift and finger-test each pot.
Use the routine and tools above and you’ll catch water stress before it bites.
Small habits—lift, poke, measure—prevent the most common cultivation errors and keep plants moving toward full, healthy growth.
Nutrients and pH: feeding without overdoing it
Ever fed a plant until the leaf tips crisped and then wondered whether it was burn or a deficiency? That confusion is why many growers pile on more fertilizer—and make things worse.
Feeding cannabis is less about quantity and more about timing, balance, and chemistry.
Most nutrient problems come from three slips: overfertilizing, skipping pH checks, and misreading symptoms. Learn to tell high-salt burn from true deficiencies, and you’ll prevent weeks of lost vigor and wasted fixes.
70% of new cannabis growers encounter problems during their first grow cycle, and improper nutrient management is a leading cause.
How to spot and correct common nutrient deficiencies fast
|
Symptom |
Likely nutrient issue |
Immediate fix |
Preventive step |
|---|---|---|---|
|
Yellowing between veins on older leaves |
Magnesium deficiency |
Foliar spray with diluted Epsom salts (about |
Add dolomite or chelated Mg; keep soil pH 6.2–6.8 |
|
Interveinal chlorosis on new growth |
Iron deficiency |
Apply chelated iron foliar spray; lower pH toward |
Maintain pH 6.0–6.5 and use complete micro mix |
|
Tip burn and leaf curl |
Nutrient burn (excess salts) |
Flush with pH-balanced water and cut feed to 1/4 strength |
Feed conservatively; monitor EC/ppm |
|
Purple stems or slow growth |
Phosphorus deficiency (or cool temps) |
Raise P in feed and ensure nights aren’t too cold |
Keep temps stable and correct P during transitions |
|
Spots or necrosis |
Calcium or potassium deficiency |
Add Ca/Mg supplement and potassium-rich feed |
Maintain Ca/Mg balance; steady pH and buffered media |
|
Overall pale older leaves |
Nitrogen deficiency |
Low-dose nitrogen feed during veg |
Steady N schedule in veg; reduce in flower |
|
Brown crispy edges |
Potassium deficiency |
Add potash or bloom formula |
Keep K adequate during flowering |
|
Stunted distorted new growth |
Zinc deficiency |
Low-rate foliar zinc chelate |
Avoid P overload; include micros |
|
Nitrogen excess / overfeed |
Flush and reduce feed strength |
Start at half-strength and measure EC |
|
|
Pale thin leaves, few laterals |
Boron / general micro shortage |
Dilute foliar micro containing boron |
Use a complete micronutrient program |
A quick read of that table should let you triage problems fast: foliar fixes for speed, root amendments for durability, and pH checks to make any feed actually available.
pH basics and a simple routine to keep feeds effective
Plants only absorb nutrients in a narrow pH band.
For soil, target 6.0–7.0, with a sweet spot around 6.3–6.8.
Outside that range, elements lock up even if they’re present.
-
Test runoff pH weekly with a reliable meter or strips.
-
When pH drifts >0.3 from target, adjust feed solution before watering.
-
Measure EC/ppm each feed; if EC climbs steadily, flush and reduce concentration.
-
Use foliar feeds for quick correction, root amendments for long-term fix.
-
Keep a small log: date, pH, EC, and any visible symptom.
Most feeding errors are cumulative.
Small, consistent checks stop big problems before they start.
Light, temperature, and humidity: environment mistakes that cost yields
Most crop failures aren’t from bad seeds — they come from a bad environment.
Light that’s too weak or too close, temps that swing wildly, and humidity left unchecked all shave ounces off a final harvest.
Tackle those three variables and the plants reward you with denser, healthier buds.
Start by thinking of the grow room as a simple climate system: light provides energy, temperature dictates metabolism speed, and humidity controls transpiration and disease risk.
When any of those drift, plant physiology changes quickly and yields drop before you notice.
You can fix most problems with observation, a couple of meters, and small control devices.
Below are practical settings and exact corrective actions to use at each stage.
Light placement, intensity, and schedules
Underlit plants: Underlit plants stretch, show pale lower nodes, and produce airy buds.
Move lights closer, increase hours in veg, or add supplemental fixtures. Light burn: Light burn shows bleached leaf tips and crispy margins, usually from too-high intensity or panels set too close.
Back the fixture, reduce intensity, and check canopy temperature. Wrong light schedule: Plants interpret light hours as seasons.
Using 18/6 for veg and 12/12 to trigger flowering is standard.
Mistimed schedules cause hermaphroditism or slow flower development.
Practical distances for common home fixtures: for many modern LED grow panels, seedlings start around 24–30 in from the canopy, vegetative plants at 18–24 in, and flowering at 12–18 in.
Treat manufacturer distances as a starting point and adjust by watching stretch and leaf color.
Temperature and humidity ranges by stage
Seedling/clone: keep day temps 68–77°F and RH 65–75%.
Vegetative: aim for day temps 70–85°F and RH 50–70%.
Flowering: keep day temps 65–80°F, lower RH to 40–50% early and 30–40% in late flower to prevent bud rot.
Avoid extremes by using fans for airflow, an exhaust and intake for exchange, and a portable AC or heater for persistent swings.
When humidity spikes, run a dehumidifier and improve circulation; when humidity crashes, add a humidifier or slow air exchange.
Monitoring tools and how to act when readings drift
-
Hygrometer/Thermometer: Place at canopy level; check daily and log changes.
-
PAR or light meter: Verify intensity across the canopy; move or dim fixtures where readings fall short.
-
Datalogger with alerts: Tracks swings and sends warnings so you fix issues before they stress plants.
-
Inline fan controller: Automates exhaust based on temps or humidity to stabilize the room.
-
Portable dehumidifier/humidifier: Quick correction tools for small rooms during flowering.
When a reading drifts, act in this order: confirm with a second device, correct the environment (move lights, change fan speed, or run humidifier), then observe over 24–48 hours for plant response.
Calibration and placing sensors at canopy height make the corrections reliable.
Small environmental fixes compound.
Keep lights, temps, and humidity predictable and most cultivation errors evaporate.
Pests and diseases: early detection and simple controls
Pests rarely arrive out of nowhere.
Usually they hitch a ride on a new fan filter, a borrowed pot, or a stressed plant that can’t fight back.
Small oversights—dirty tools, crowded canopies, or skipping routine checks—turn tiny problems into infestations fast.
New growers already face a steep learning curve; about 70% encounter issues in their first cycle, and pests are a common culprit.
Catching problems early saves time and yield.
The next sections show which pests to watch for, a straightforward scouting checklist, quick containment steps, and when to call in outside help. Spider mites: Tiny, fast-breeding arachnids that cause stippling and webbing on leaves.
They explode under warm, dry conditions and hide on undersides. Aphids: Soft-bodied insects that cluster on new growth and excrete sticky honeydew.
They invite mold and attract ants. Thrips: Slender, ragged-leaf feeders that leave silvery streaks and spread some viruses.
They’re hard to see without a loupe. Whiteflies: Small white moth-like insects that flutter up when disturbed and weaken plants through sap feeding.
They breed quickly indoors. Fungus gnats: Larvae feed on roots in wet, organic soils and stunt young plants.
Overwatering and rich media invite them. Powdery mildew: A fungal disease that forms white powder on leaves and buds.
It loves stagnant air and high humidity swings.
Routine scouting checklist and containment basics
Scouting five minutes per plant, twice weekly, prevents surprises.
Look at leaf undersides, new growth, soil surface, and the base of stems.
-
Inspect daily: glance at canopy movement, smell, and leaf condition.
-
Undersides check: flip a few leaves for mites, eggs, or aphids.
-
Sticky traps: place yellow/blue cards to monitor flying pests.
-
Soil surface: look for larvae or fungus gnat adults.
-
Record findings: jot date, pest, location, and treatment tried.
-
Isolate suspicious plants: move them to a quarantine area immediately.
This clip shows a live scouting run: finding mites, using a magnifier, and safe removal steps.
Watch the spray technique and leaf-flipping method for practical detail.
Containment basics — step-by-step
-
Isolate the plant to stop spread.
-
Prune heavily infested leaves and bag them for disposal.
-
Wash stems and leaves with a gentle stream or
0.5%insecticidal soap solution. -
Increase airflow and reduce humidity to discourage pests and mildew.
-
Apply an approved biological control or repeat soap/soap-free treatment every 3–7 days until clean.
When to call for expert help versus DIY treatments
Minor, localized infestations respond well to quarantine, pruning, and repeated soap or neem applications.
DIY works if you catch issues early and the crop is small.
Call an expert when infestations cover multiple plants, pests persist after two treatments, or you suspect systemic disease.
Serious mold on buds or widespread root rot needs professional diagnosis.
For strain-specific advice and grower support, platforms like https://theseedconnect.com can be a useful resource.
Early detection and simple, consistent checks keep most problems from becoming disasters.

Training, pruning, and structural mistakes that reduce canopy performance
A single bad cut can hollow out an otherwise healthy canopy.
Growers commonly over-prune or top at the wrong time, and the result is fewer bud sites, stretched nodes, and plants that never recover their vigor.
Fixing structural errors is mostly about timing and restraint.
Make deliberate cuts during the vegetative window, pick training methods that match your experience, and use supports that protect heavy buds instead of tearing them down.
This section walks through the most damaging mistakes—what they do to the canopy, how to avoid them, and concrete, actionable steps to correct course.
Over-pruning, mistimed topping, and plant stress
Pruning is valuable when it redirects energy to the right places.
It becomes destructive when too much leaf area or too many branches are removed at once.
Topping too late is a common fault.
Topping after the plant has passed early vegetative growth forces it into recovery during stretch or flower, costing both yield and time.
A better rule: top aggressively only while you have several full nodes and at least two weeks of stable veg ahead.
Over-pruning reduces the plant’s photosynthetic capacity.
Severe removal right before or during flower causes stalled bud development and increased vulnerability to heat and pests.
-
Fix: make single, conservative cuts and wait for 7–14 days to see recovery before the next major prune.
70% — many new growers hit problems early in a first cycle; training and pruning mistakes add to that learning curve.
Low-stress vs high-stress training: who should use which method
Low-stress training (LST) bends and ties branches to open the canopy.
It’s forgiving and great for beginners or for strains with long internodes.
LST increases light penetration without major tissue damage.
High-stress training (HST) like topping, FIMming, or supercropping forces branching by wounding tissue.
HST can produce big results but requires timing and experience.
Use HST only if plants are vigorous, well-rooted, and you can keep them in veg long enough to recover. LST: Gentle, repeatable shaping suitable for most growers and autoflowers. HST: Higher reward, higher risk; best for experienced growers growing photoperiod strains with extended veg.
The diagram shows exact cut locations, timing windows, and tie points for LST, topping, and FIM cuts.
Use it as a quick reference when planning your next training session.
Staking and support mistakes during flower
A heavy colas collapsing under their own weight is avoidable.
Common errors are using thin ties that cut into stems, waiting until buds are sagging, or placing supports too late.
-
Prepare supports early.
Install trellis nets or staking during late veg so branches grow into them.
-
Use wide, soft ties and distribute load across multiple support points.
-
Inspect daily during peak trichome development; re-tie before sagging becomes stress.
-
Avoid single-point strain: tie two points instead of one.
-
Avoid wire ties: switch to soft garden tape or pantyhose to cushion stems.
-
Avoid late fixes: retrofit supports early to prevent bud damage.
Final thought: train with a plan, not angst.
Small, timely adjustments beat dramatic last-minute hacks every time.
Harvesting and curing: finishing mistakes that ruin quality
Most growers learn that a crop’s last two weeks matter more than they expect.
Harvest timing, the initial dry, and the cure determine aroma, smoothness, and perceived potency.
Getting any of those wrong can erase months of good work.
This section focuses on the three common finish-line failures: misreading trichomes, drying/curing the buds badly, and storing them poorly.
Each mistake is specific, easy to diagnose, and fixable with simple habits and the right tools.
Trichome cues and the harvest-timing traps
Reading trichomes is the most reliable harvest cue, but people trip up on interpretation and sampling.
Use a 30–60x loupe and examine multiple colas. Clear trichomes mean immature cannabinoids; cloudy/milky indicates peak THC; amber shows THC converting to CBN and a heavier, sedative effect.
Common misreads happen when growers check only pistils, or look at a single bud.
Pistils can mislead—some strains hold white pistils even when trichomes are ready.
Also avoid checking right after a large temperature spike; resin can look different after stress.
Practical checks:
-
Sample widely: inspect top, middle, and late-season buds.
-
Check at dusk: trichome resin often peaks later in the light cycle.
-
Record observations: note dates and trichome stages for each strain to refine timing next run.
Drying and curing mistakes that flatten flavor and reduce potency
Too-fast drying locks in chlorophyll and leaves a harsh, grassy smoke.
Too-slow drying invites mold and a musty flavor.
The cure is where terpenes stabilize; rushing it flattens aroma and can reduce perceived potency.
Follow these steps for a dependable finish:
-
Hang trimmed branches or rack buds in a dark room at
60–70°Fand45–55% RHfor 7–14 days.Check stems—if they snap, drying is done.
-
Move to jars when buds feel dry but slightly springy.
Aim for
58–62% RHinside jars. -
Burp jars daily for the first two weeks: open for 10–20 minutes to exchange air and release moisture.
-
After two weeks, reduce burping to twice weekly for another 2–4 weeks.
-
Long cures (6–12 weeks) deepen flavor and smoothness.
Patience pays more than small tweaks.
Simple storage tips to keep your harvest fresh longer
Store in amber glass jars, in a cool, dark place at 60–68°F.
Avoid plastic bags and direct light.
Use humidity packs to maintain 58–62% RH.
Don’t freeze buds—trichomes shatter.
For longer-term storage, keep jars steady in temperature and out of sunlight.
A consistent finish from harvest to jar protects terpenes and cannabinoids, so take the extra two weeks of care—your buds will reward you.
📥 Download: Download Template (PDF)
Troubleshooting checklist and action plan
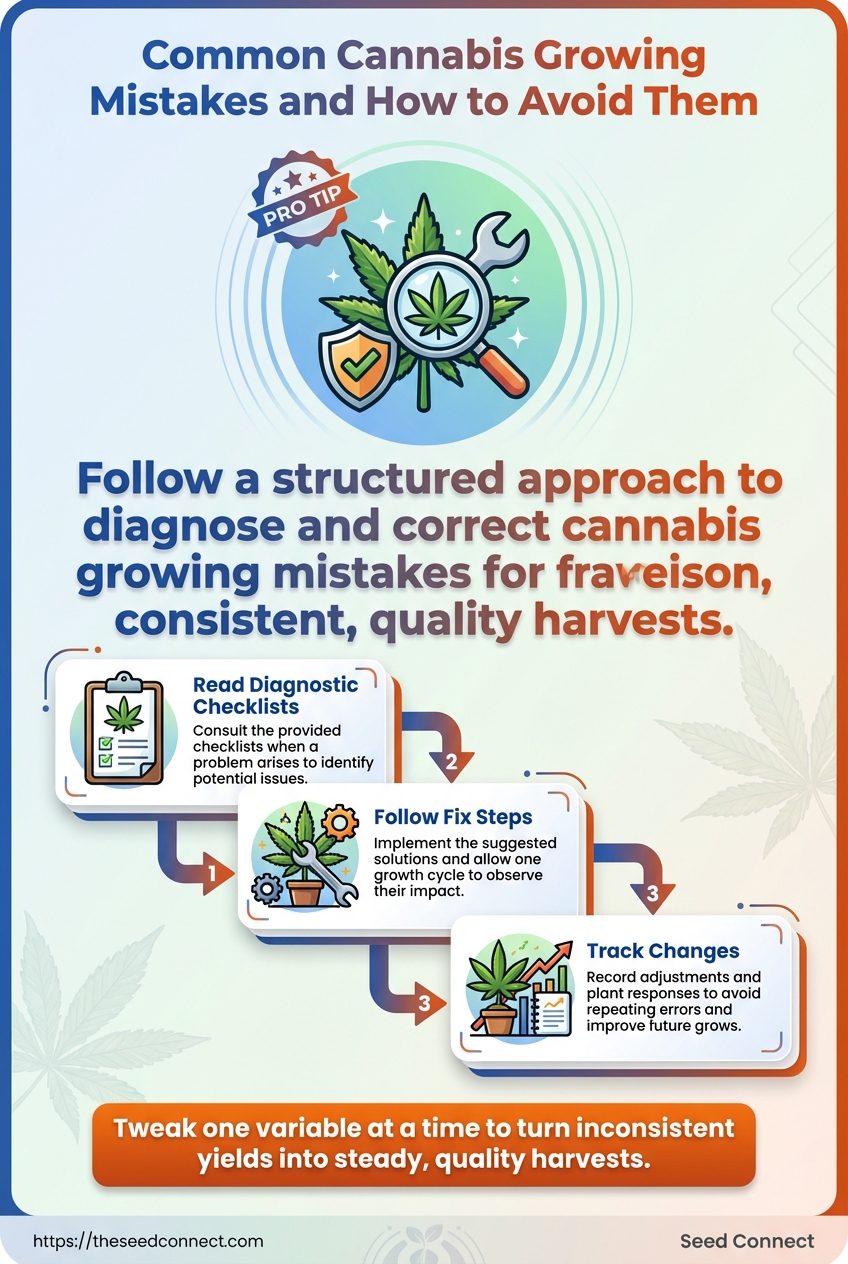
What do you do the moment a plant looks wrong? Slow, methodical triage wins more crops than frantic guessing.
Spend ten minutes observing, note patterns, and resist the urge to immediately change multiple variables.
A clear flow—diagnose, isolate, test, treat—keeps fixes targeted and prevents making the problem worse.
This approach also makes it easier to decide when to escalate to expert help or invoke guarantees.
Most new growers hit at least one major problem in their first cycle; a calm routine reduces repeat mistakes and saves time.
-
Diagnose: Walk the canopy and substrate.
Record symptoms, timing, and whether multiple plants show the same issue; set aside 10–30 minutes for this.
-
Isolate: Move affected plants or close off a tent zone to stop spread.
Isolation should be immediate when pests, mold, or fast-spreading rot are suspected.
-
Test: Run quick checks — pot weight for moisture,
pHof runoff, EC/PPM if available, sticky traps for pests, and a gentle root inspection if safe.Testing ranges from 5 minutes (moisture) to 48 hours (culture or lab results).
-
Treat: Apply the least invasive fix that addresses the tested cause.
Examples: adjusted watering schedule, targeted pruning to improve airflow, or a biological spray for mildew.
Monitor results for 72 hours and document changes.
Printable troubleshooting table: quick problems and immediate actions
|
Symptom |
Most likely cause(s) |
First-step action |
When to escalate to expert support |
|---|---|---|---|
|
Wilting with soft stems |
Overwatering / root rot (Pythium) / poor drainage |
Gently lift pot to check weight; inspect root zone for slimy brown roots; reduce watering and improve drainage |
If multiple plants show brown roots, foul odor, or rapid collapse |
|
Yellowing lower leaves |
Mobile nutrient deficiency (nitrogen) / waterlogged roots / natural senescence |
Test soil moisture and runoff |
If rapid spread despite correction or new growth is also pale |
|
White powder on leaves |
Powdery mildew / high humidity and poor airflow |
Isolate affected plants; remove heavily infected leaves; increase airflow and lower humidity |
If buds are affected or spread continues after two treatments |
|
Stunted growth after transplant |
Root-bound, transplant shock, compacted soil |
Carefully check root ball; loosen roots and repot to correct size; avoid heavy feeding for 3–7 days |
If roots are heavily damaged or multiple transplants fail to recover |
|
Bud rot signs (brown/soft center) |
Botrytis from high moisture or tight canopy |
Remove infected buds, improve airflow, lower humidity immediately |
If large colas are infected or humidity remains high despite changes |
Use this table as a pocket reference while you work.
Mark actions taken and results; that log becomes a troubleshooting history you can learn from.
When you still need a second opinion, platforms like https://theseedconnect.com offer expert grower support and germination guarantee guidance.
Their team can help interpret photos, recommend next steps, and advise on seed replacement if a genetics problem is suspected.
Keep the process simple, document each step, and escalate early when issues spread — you’ll save plants and time.
Conclusion
Make week three the turning point
That sinking feeling in week three usually points to one thing: the fundamentals.
Genetics, steady moisture, balanced feeding and a controlled environment together decide whether plants recover or decline.
Remember the watering and pH section — most sudden drops trace back to those simple factors rather than mysterious diseases.
When trouble shows up, a short, methodical check beats guesswork every time.
Follow the troubleshooting checklist: inspect soil moisture, test pH, glance under leaves for pests, and confirm light and humidity settings.
Tonight, do a 10‑minute troubleshooting walk‑through and fix the single most obvious issue before lights-out.
If genetics feel uncertain, starting with stronger seed stock will save weeks of headaches; tools like cannabis seeds for sale can help you source reliable varieties.
After that, pick one growing tip from this guide — consistent watering, a pH check, or one pruning move — and make it your habit for the next cycle.
Can you prevent the next cultivation error with a single simple change tonight?