(Build it in an afternoon—or grab one of the plug-and-play kits we’ve tested below.)
Looking to build a high-efficiency aeroponics DIY setup that delivers roots fast—without draining your wallet?
Whether you’re crafting your own DIY aeroponic cloner, experimenting with an aeroponic tower DIY, or just want to skip the headaches and grab a plug-and-play kit, this guide has you covered.
We’ll walk you through:
- What makes aeroponics so effective
- How to build your own system step-by-step
- The best DIY aeroponic kits for 2025
- HortiPots Kit
- PowerGrow Systems
- Clone King DIY System
Let’s get you cloning faster, cleaner, and more reliably—with a system you can build in a single afternoon.
Table of Contents
Why Growers Are Switching to DIY Aeroponics
If you’re still rooting cuttings in rockwool cubes or peat plugs, you already know the pain: slow strikes, random damping-off, and the constant “Is it rooting yet?” guesswork.
A DIY aeroponics system mists stems with oxygen-rich nutrient solution, cutting rooting time by 30-50 % and nearly eliminating losses.
Even better, you can build a basic 5-gallon bucket cloner for under $60—or unbox a fully-featured kit like the Clone King 36-Site in ten minutes flat.
Key benefits at a glance
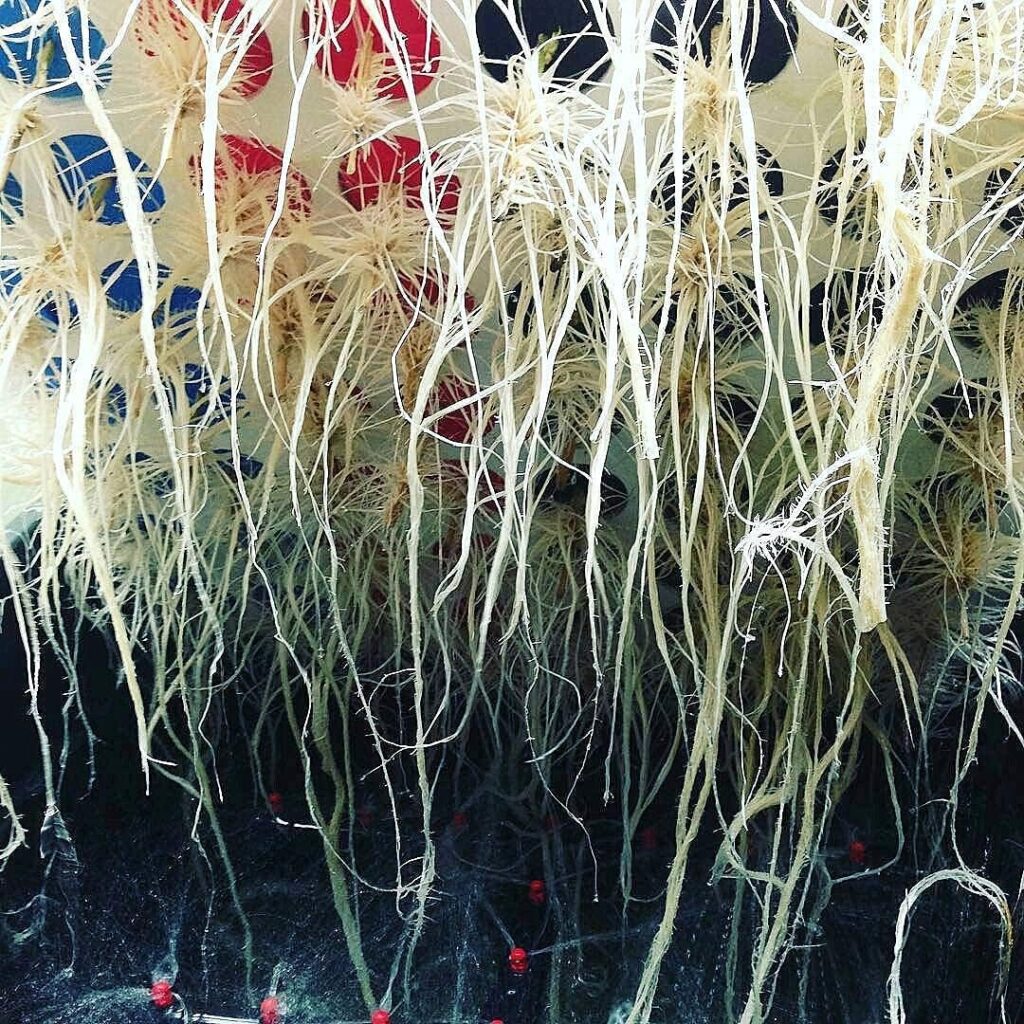
• Roots in 6-10 days (vs. 14-21 in media)
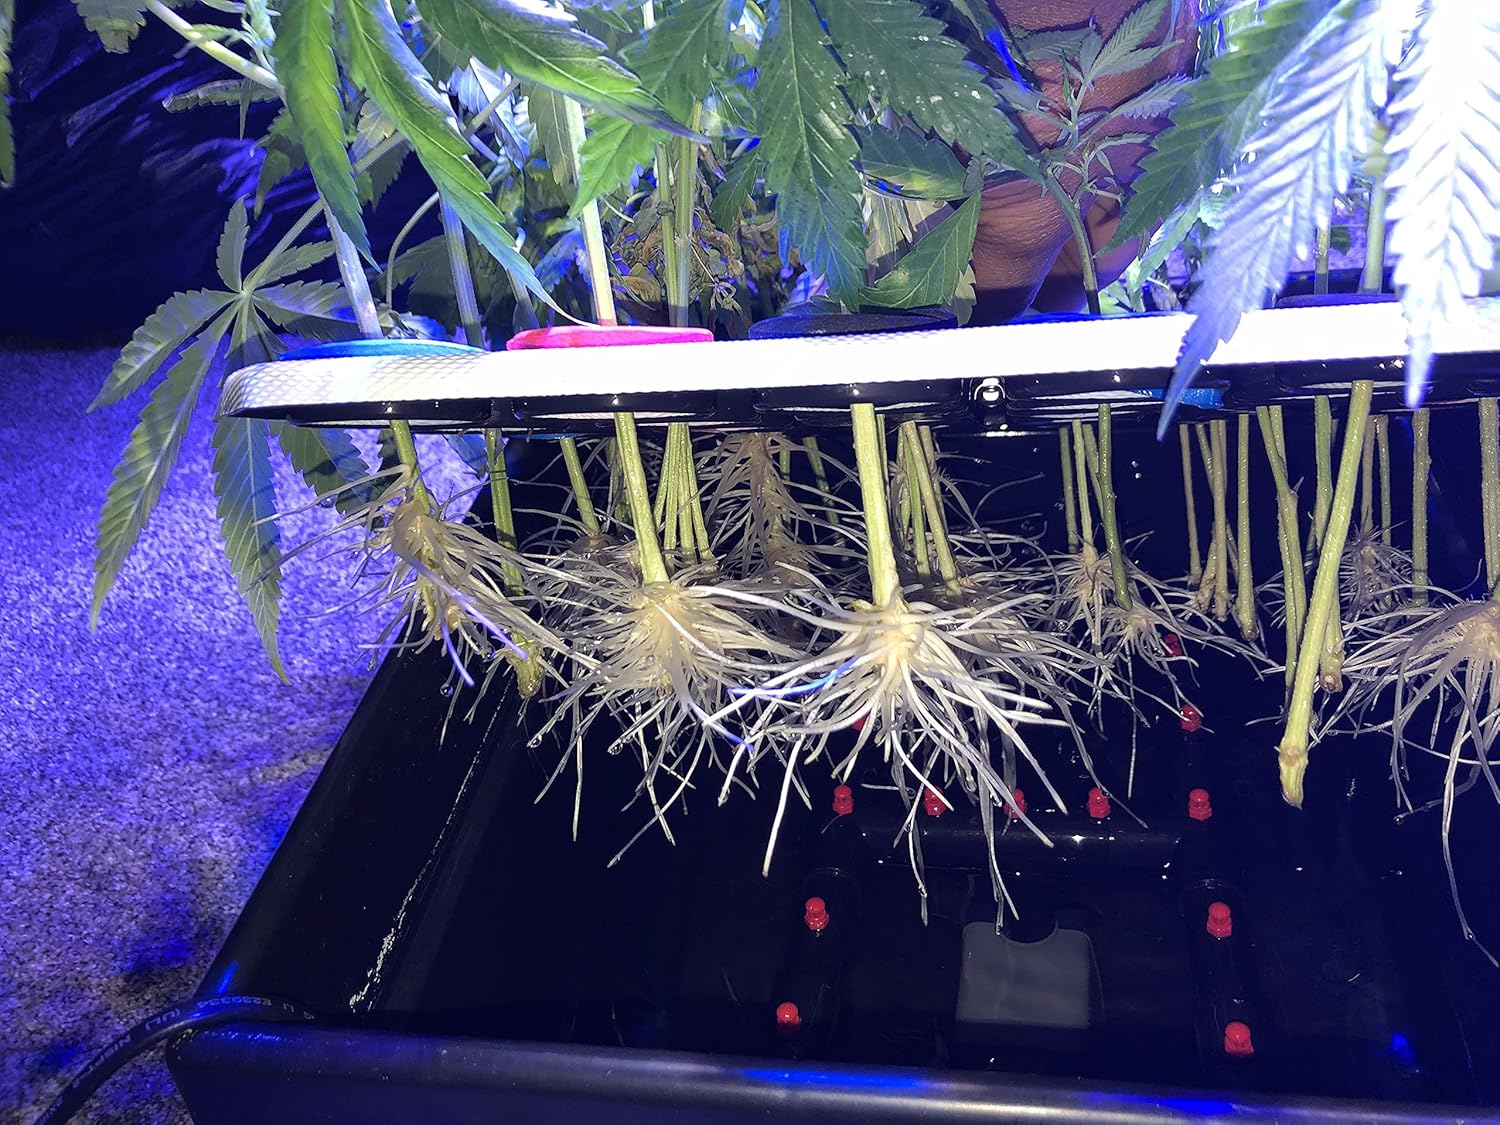
• Zero transplant shock—pure white, fuzzy roots
• Reusable for years; quick bleach clean-ups
• Scales from six cuttings to commercial racks
How Low-Pressure Aeroponics Works
Conventional hydro systems keep roots submerged; aeroponics suspends them in air and pulses a fine mist every few minutes.
That mist delivers two things plants crave most during propagation— water and oxygen—while minimizing disease-friendly moisture on leaves.
Low-pressure DIY units (the kind you’re building today) use a fountain pump and plastic mist nozzles.
They’re cheap, simple, and perfect for clones, seedlings, or a countertop DIY aeroponic tower garden full of herbs.
How to build your own system step-by-step
Building a DIY aeroponics system is a cost-effective and efficient way to cultivate plants by delivering nutrient-rich mist directly to their roots.
This method promotes faster growth and healthier plants compared to traditional soil-based cultivation. Here’s a step-by-step guide to setting up your own aeroponics system:
🧰 Materials You’ll Need
- Reservoir: A 5-gallon bucket or plastic tote to hold the nutrient solution.
- Lid: A matching lid for the reservoir, drilled with holes to accommodate net pots.
- Net Pots: 3-inch net pots to hold your plants.
- Submersible Water Pump: To circulate the nutrient solution.
- PVC Tubing: ½-inch tubing to distribute water from the pump to the misting nozzles.
- Misting Nozzles: 360-degree sprayers to mist the plant roots.
- Timer: To control the misting intervals.
- Nutrient Solution: A water-soluble fertilizer suitable for hydroponic systems.
- Starter Plugs: To support seedlings within the net pots.
🛠️ Step-by-Step Assembly Guide
- Prepare the Reservoir:
- Drill evenly spaced holes in the lid of your reservoir to fit the net pots.
- Ensure the holes are slightly smaller than the lip of the net pots for a snug fit.
- Install the Misting System:
- Attach the misting nozzles to the PVC tubing.
- Connect the tubing to the submersible pump.
- Place the pump inside the reservoir, ensuring it’s submerged when filled.
- Set Up the Timer:
- Connect the pump to a timer.
- Program the timer to activate the pump at regular intervals (e.g., 5 minutes on, 15 minutes off) to provide consistent misting.
- Prepare the Nutrient Solution:
- Fill the reservoir with water and add the appropriate amount of nutrient solution, following the manufacturer’s instructions.
- Mix thoroughly to ensure even distribution.
- Insert Plants:
- Place your seedlings into the starter plugs, then insert them into the net pots.
- Position the net pots into the holes on the reservoir lid, allowing the roots to hang freely inside the chamber
- Test the System:
- Plug in the timer and observe the misting cycle.
- Ensure that all nozzles are spraying evenly and that the mist reaches the plant roots.
🌿 Maintenance Tips
- Monitor Water Levels: Regularly check and maintain the nutrient solution level in the reservoir.
- Clean Components: Periodically clean the pump, tubing, and nozzles to prevent clogs and buildup.
- Inspect Plants: Keep an eye on plant health and adjust nutrient concentrations as needed.
By following these steps, you can successfully build and maintain a DIY aeroponics system that promotes rapid plant growth and efficient nutrient use.
DIY vs. Ready-Made—Cost, Time & Skill
| System | Parts Cost | Build Time | Rooting Window | Best For |
| 5-Gal Bucket Cloner | $45–60 | 1 hour | 7–10 days | Tent/closet grows |
| 30-Gal Tote (24-48 Sites) | $95–120 | 2–3 hrs | 7–10 days | Veg rooms, nurseries |
| Clone King 36-Site Kit | $130–160 | 10 min | 6–8 days | “No-drill” growers |
Quick-Buy Aeroponic Cloner Kits 🔗
Want a fast track to success without sourcing every piece yourself?
These DIY aeroponics kits are perfect for growers who want plug-and-play convenience or a solid base for a custom setup.
Here’s what we recommend in 2025:
🌿 HortiPots Aeroponic Cloner Kit (24-Site)
Best for: Growers who want a full system with humidity control and filtration out of the box.
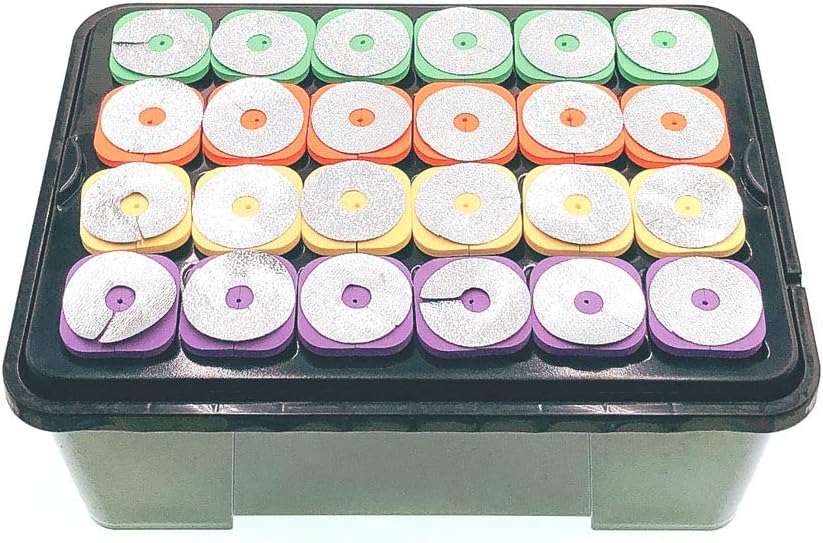
- 24 sites with soft, reusable neoprene collars
- 250 GPH pump provides strong, consistent misting
- Built-in humidity dome keeps the environment stable during the first 72 hours (a huge win for delicate cuttings)
- Recirculating filter helps maintain water quality between cleans
- Super easy for beginners and a great upgrade from basic bucket cloners
✅ If you want clean roots and high clone success without building from scratch, HortiPots is your go-to.
🛠️ PowerGrow Systems DIY Aeroponic Kit
Best for: DIYers who want total control and already have a 5-gallon bucket or reservoir.
- 369 GPH pump included
- Comes with spray manifold, collars, and tubing—you just add the container
- Super flexible for custom builds (great for creating your own aeroponic tower DIY system or testing layouts)
- A true “bare-bones” kit that’s ideal for experimental growers
✅ If you’re handy and want to build your own system affordably, this is the DIY aeroponic cloner to start with.
🚀 Clone King 36-Site DIY Aeroponic System
Best for: Growers cloning at scale who want a pre-assembled, high-output machine.
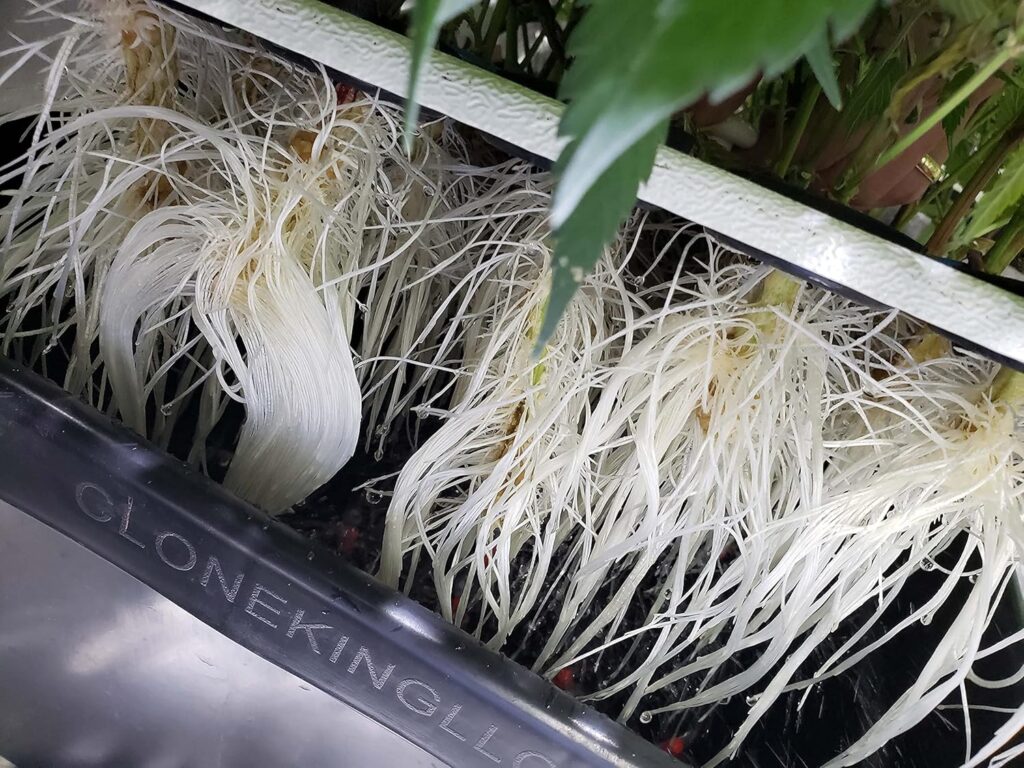
- 36 cloning sites = maximum output
- 525 GPH pump powers a high-pressure mist with wide coverage
- Pre-assembled and ready to run right out of the box
- Known for its near 100% success rate among hobby and commercial growers
- Perfect if you’re cloning multiple strains or prepping a grow room quickly
✅ If you want big results with minimal setup, Clone King is the heavy-hitter of DIY aeroponics.
Bottom line:
- Need convenience? Go with HortiPots
- Want flexibility? PowerGrow Systems is your DIY best friend
- Cloning big batches? Clone King 36 is hard to beat
Build #1 – 5-Gallon Bucket Aeroponics (60 Minutes)
Shopping list
- 5-gal opaque bucket + lid
- 250 GPH fountain pump
- ½-inch bulkhead, 360° mist nozzle
- 6 × 2″ net pots + neoprene collars
- Digital cycle timer (30 sec on / 5 min off)
- ½ tsp bleach (for first sterilise)
Steps
- Drill lid—six 2″ holes for net pots.
- Install bulkhead through lid, attach sprayer.
- Mount pump inside bucket, connect riser.
- Program timer (30 sec ON / 5 min OFF).
- Fill with 3 gal RO water + ¼-strength veg nutrients, pH 5.8.
- Insert cuttings, close lid, switch on.
Roots usually pop in 7–10 days; transplant when they reach 2–3″.
Build #2 – 30-Gallon Tote (2–3 Hours, 24–48 Sites)
Use the same technique, scaled up with ¾″ PVC manifold.
- Six 180° threaded sprinkler heads on risers
- 400-600 GPH pump for even pressure
- ¾″ PVC “H” manifold glued with primer + cement
- Bulkhead + barbed adapter through tote wall for pump cable
- 24–48 net-pot holes in the lid (use hole-saw jig)
Leak-proofing tip: Seat bulkheads on the inside gasket; smear a thin silicone bead on both sides before tightening.
Cloning Best Practices
| Variable | Target | Why |
| Water temp | 68-72 °F | Max dissolved O₂; inhibits pythium |
| pH | 5.8–6.0 | Ideal for micronutrient uptake |
| EC | 0.2–0.4 mS/cm | Enough food without burn |
| Light | T5 / 24 W LED, 18 hrs | Gentle PAR keeps leaves turgid |
| RH | 70–80 % first 3 days | Prevents wilting before roots |
Mist stems with 1 ml/L rooting solution on day 1 for an extra kick.
Cleaning & Maintenance
- Daily – verify spray pattern; top up RO water.
- Weekly – 2 ml/gal 3 % H₂O₂ shock.
- Between runs – 10 % bleach, 30 min circulate, rinse twice.
Clogged nozzles? Soak in vinegar overnight, poke with toothpick.
Troubleshooting Quick-Chart
| Symptom | Cause | Fix |
| Brown slime roots | Warm water, organics | Chill rez; add sterile additive |
| Wilted cuttings | Timer off cycle too long | 30 sec ON / 3 min OFF |
| One side not rooting | Uneven spray | Re-seat sprinkler, upgrade pump |
FAQ
Low vs. high pressure—does it matter?
Low-pressure (LP) <60 psi is fine for cloning; high-pressure (HP) 80-120 psi is overkill unless you’re running full aeroponic flowering.
Can I flower plants in this DIY tote?
Yes, but you’ll need a larger reservoir, chiller, and finer misters to prevent salt buildup.
How loud is the pump?
Submersible LP pumps are whisper quiet; place the bucket on foam to cut vibration.
Ready to Root in One Week?
Choose your path:
- Build it: follow the 5-gal or 30-gal guide above—total cost under $100.
- Buy it: unbox a tested kit and start cloning tonight.
👉 Grab the HortiPots 24-Site Kit for domed humidity control, or go big with the Clone King 36-Site—our fastest rooting champ.
Download our free PVC cut-list & nozzle-spacing template when you join the Grower’s List for monthly hydro hacks and gear discounts.
Happy cloning—and may every cutting grow a forest of white, fuzzy roots! 🌱🚀