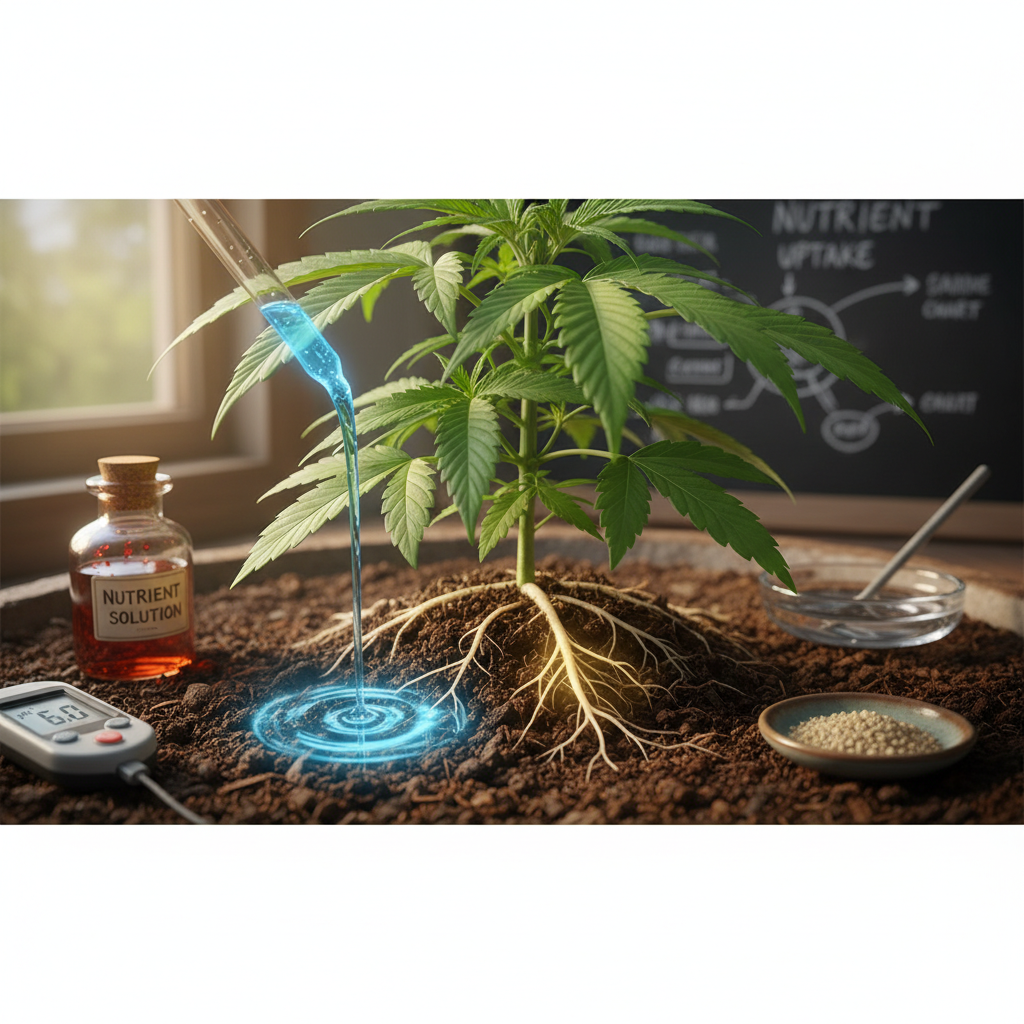
Plants that drop leaves the week after transplanting, yellowing that starts at the tips, and blooms that never fully fatten are symptoms every grower has learned to dread. Most of the time the culprit isn’t pests or genetics but pH — specifically how cannabis pH levels interact with your medium and nutrients. Understanding how those numbers shift in real time separates batches that thrive from ones that stall.
For small-scale and commercial cultivators alike, the difference between thriving soil and locked-out nutrients often comes down to soil pH for cannabis and the early vigor of seeds, especially when tracking feminized seed health through germination and the seedling stage. Readily correctable adjustments in pH can restore nutrient availability within days, while overlooking them can stunt growth for weeks. This piece starts with the practical checks and simple fixes that produce measurable results, no advanced gear required. []
What Is pH and Why It Matters for Cannabis
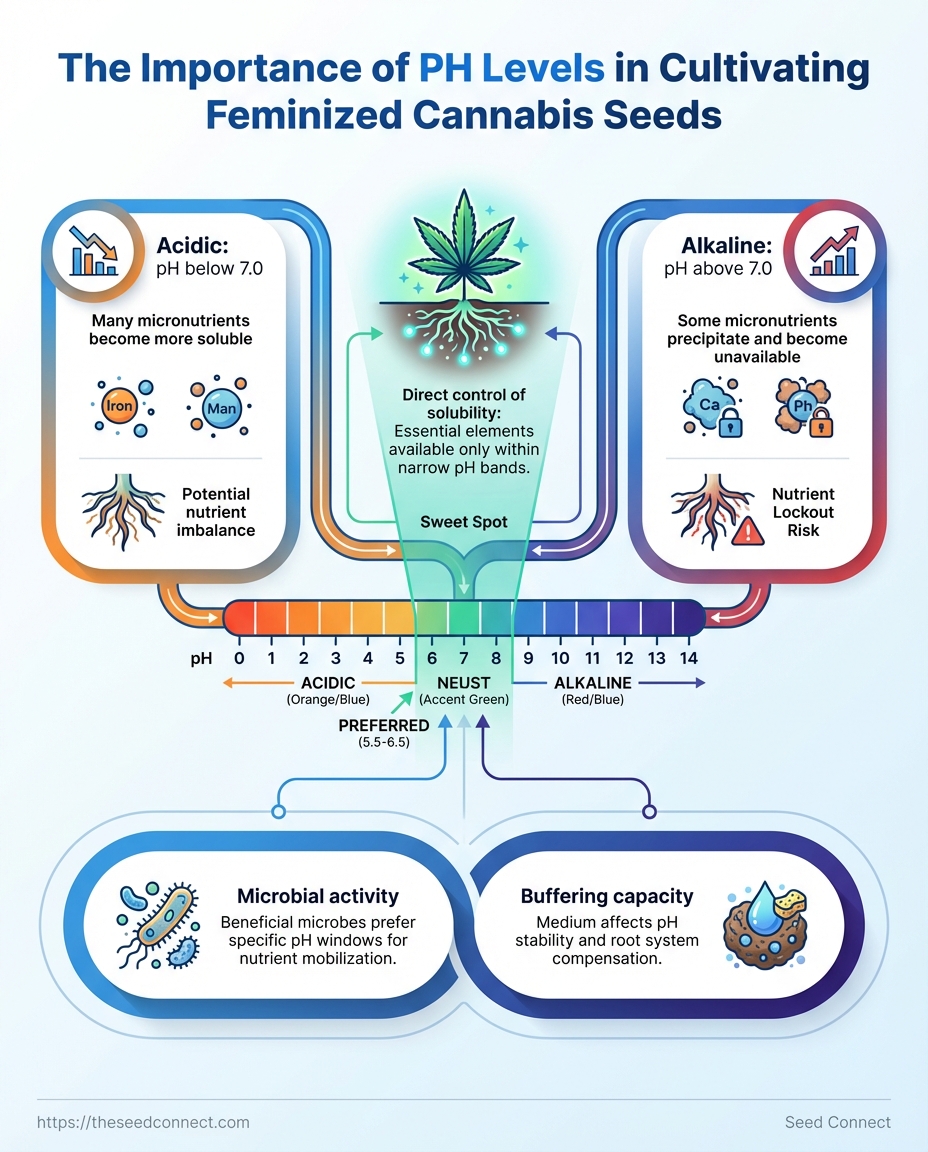
pH is the measure of hydrogen ion activity in a solution and it directly controls which nutrients are chemically available to a plant’s roots. For cannabis growers, that simple chemical shorthand governs whether plants can absorb nitrogen, phosphorus, potassium and micronutrients or whether those elements lock out and create nutrient deficiencies or toxicities. Keep in mind that lower pH = more acidic conditions and higher pH = more alkaline conditions; small shifts of a few tenths can change nutrient availability dramatically.
pH: The numeric scale (0–14) that indicates acidity or alkalinity; cannabis prefers a slightly acidic root zone.
Acidic: Conditions where pH is below 7.0; many micronutrients become more soluble.
Alkaline: Conditions where pH is above 7.0; some micronutrients precipitate and become unavailable.
How pH affects nutrient availability Direct control of solubility: Many essential elements are only plant-available inside narrow pH bands. Microbial activity: Beneficial microbes that mobilize nutrients prefer certain pH windows. * Buffering capacity: Growing medium determines how quickly pH swings and how much root systems can compensate.
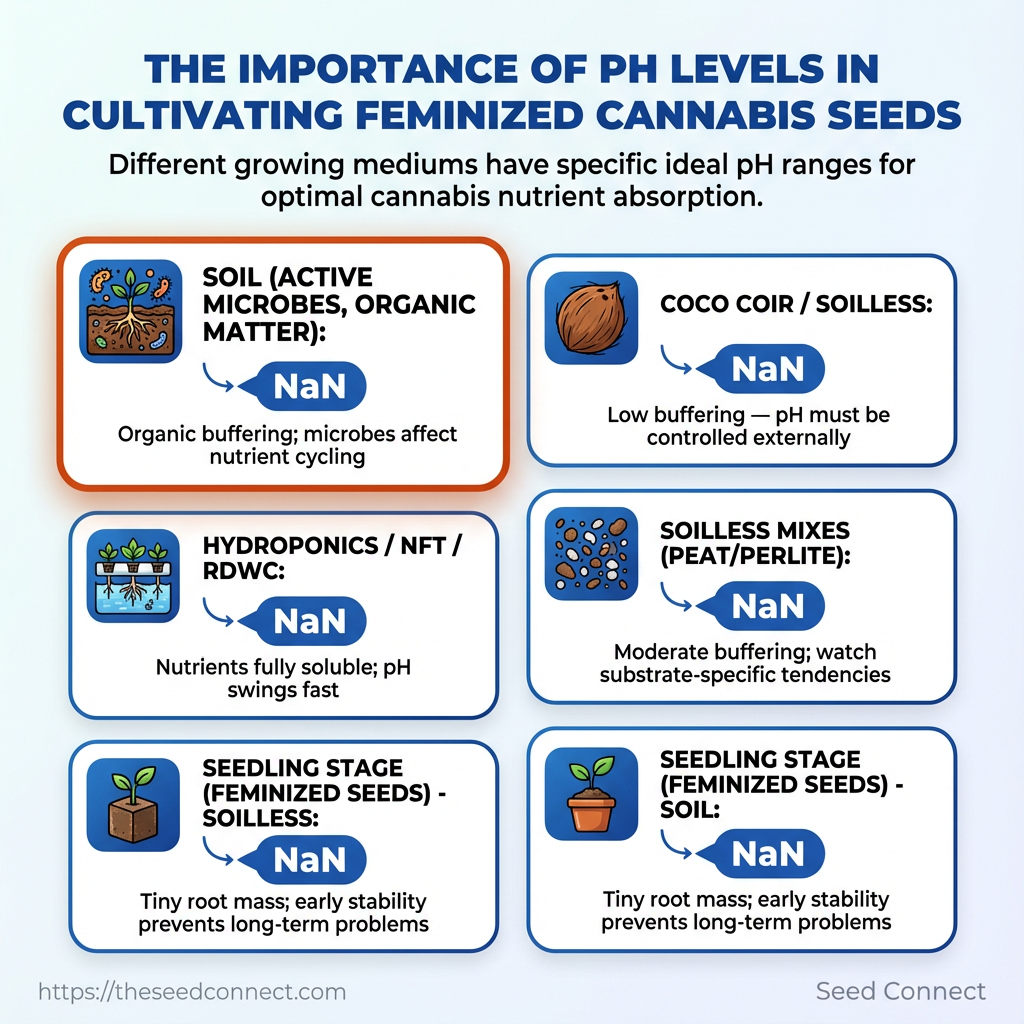
Typical target ranges for cannabis Soil (active microbes, organic matter): 6.0–7.0 Coco coir / soilless: 5.8–6.5 * Hydroponics / NFT / RDWC: 5.5–6.5
Why feminized seeds are especially sensitive Seedlings from feminized seeds have small, delicate root systems that lack buffering mass. Early pH imbalances rapidly alter nutrient uptake and can: stunt root development trigger early stretch or slowed vegetative growth * increase the risk of hermaphroditism when plants undergo stress during critical sex-determination phases
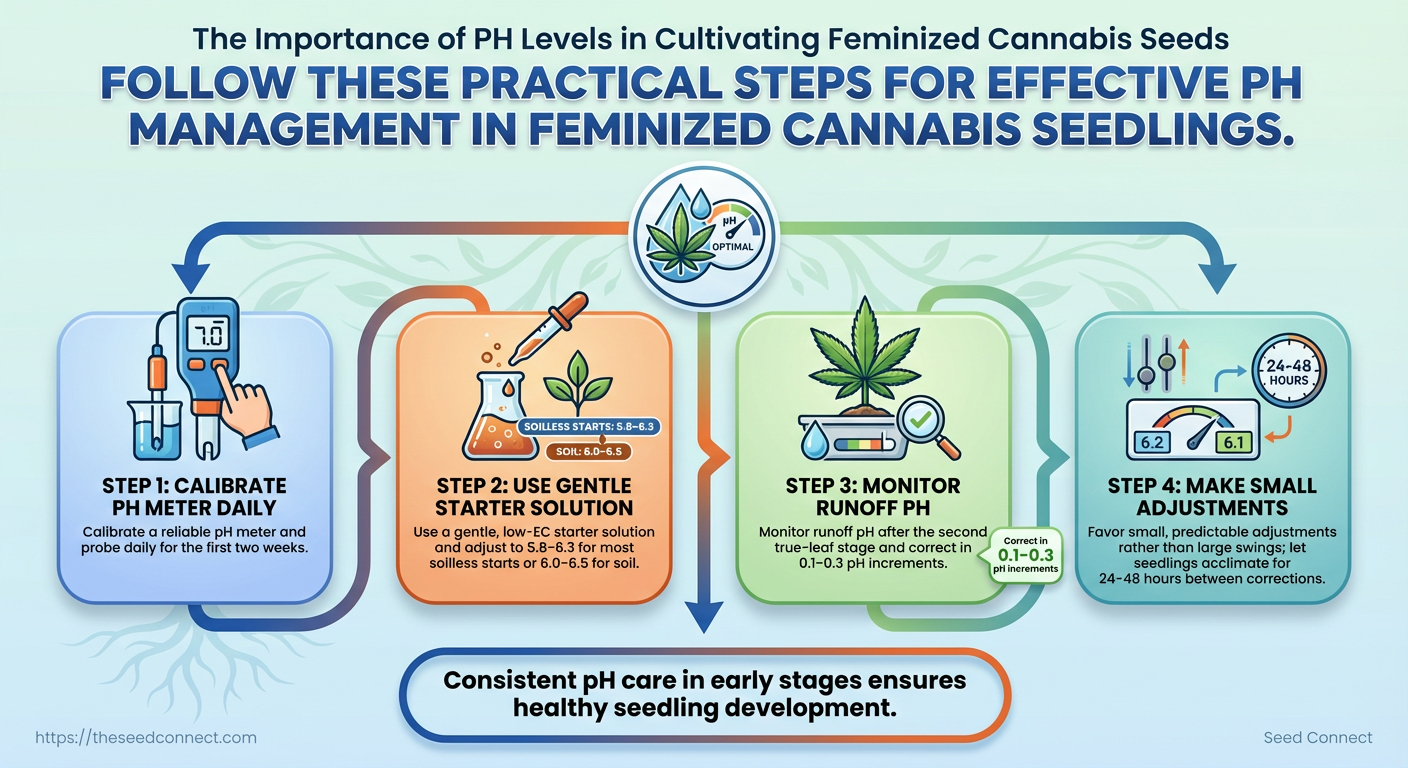
Practical first steps for seedling pH care 1. Calibrate a reliable pH meter and probe daily for the first two weeks.
- Use a gentle, low-EC starter solution and adjust to
5.8–6.3for most soilless starts or6.0–6.5for soil. - Monitor runoff pH after the second true-leaf stage and correct in 0.1–0.3 pH increments.
- Favor small, predictable adjustments rather than large swings; let seedlings acclimate for 24–48 hours between corrections.
Quick reference of ideal pH ranges and common symptoms by medium
| Growing Medium | Ideal pH Range | Common pH-Related Symptoms | Why it matters |
|---|---|---|---|
| Loam/Soil | 6.0–7.0 |
Yellowing older leaves, iron appearing okay then manganese toxicity | Organic buffering; microbes affect nutrient cycling |
| Coco coir | 5.8–6.5 |
Calcium/magnesium deficiency signs if pH too low | Low buffering — pH must be controlled externally |
| Hydroponics/NFT | 5.5–6.5 |
Rapid micronutrient lockouts and root browning | Nutrients fully soluble; pH swings fast |
| Soilless mixes (peat/perlite) | 5.8–6.5 |
Stunted growth, pale leaves from broadlock | Moderate buffering; watch substrate-specific tendencies |
| Seedling stage (feminized seeds) | 5.8–6.3 (soilless) 6.0–6.5 (soil) |
Slow emergence, malformed cotyledons, early sex-stress | Tiny root mass; early stability prevents long-term problems |
These principles make pH management a high-leverage practice: stable root-zone chemistry in the first weeks prevents a cascade of nutrient and developmental problems later. When seedlings start healthy and pH is consistent, subsequent nutrient decisions become far more predictable.
How pH Affects Nutrient Uptake: The Mechanism Explained
Soil pH controls which nutrients are chemically available near the root surface and therefore which ions a cannabis plant can actually absorb. Within a relatively narrow window, most macronutrients remain soluble and accessible; outside that window certain elements precipitate, bind to soil particles, or change valence and become inaccessible — a phenomenon commonly called nutrient lockout. Understanding the chemistry at the root-soil interface clarifies why identical feed programs produce healthy plants at one pH and deficient ones at another.
Soil chemistry and nutrient availability
Plants take up nutrients as dissolved ions. When pH shifts, the chemical speciation and solubility of those ions changes.
Nutrient lockout: When nutrients are present in the substrate but chemically unavailable to the plant because pH causes precipitation, adsorption, or change in oxidation state.
Acidic conditions: Increase solubility of metals such as iron (Fe), manganese (Mn), and aluminum (Al), which can lead to toxicities at low pH and secondary deficiencies of other elements.
Alkaline conditions: Reduce availability of iron, manganese, zinc (Zn), and phosphorus (P) through precipitation and stronger adsorption to soil colloids.
Common symptoms tied to pH-driven lockouts:
- Yellowing between veins on young leaves (interveinal chlorosis): often iron or manganese deficiency associated with high pH.
- Generalized pale growth and poor vigor: phosphorus or nitrogen uptake problems when pH is too high or too low.
- Leaf tip burn and dark, twisted leaves: micronutrient toxicities in very acidic media.
Root physiology and microbial interactions
Roots actively modify their rhizosphere pH via proton exchange and exudates to enhance uptake.
Root transporter response: Roots use H+ pumps to acidify the immediate soil, which increases availability of cations like Fe2+ and Mn2+. At the cellular level, transporter proteins such as H+-ATPases and ZIP family members change activity with external pH, altering uptake rates.
Microbial effects: Beneficial bacteria and mycorrhizal fungi improve nutrient access by chelating metals, mineralizing organic P, and expanding the effective root surface area. Those organisms have their own pH preferences; a disturbed pH suppresses beneficial microbes and reduces biological nutrient turnover.
Practical measures to protect the root microbiome and keep uptake efficient:
- Maintain stable pH: avoid swings greater than 0.5 units in a week.
- Use organic matter: supports microbial buffering and slow-release nutrient forms.
- Inoculate mycorrhizae selectively: improves P and micronutrient uptake in neutral-to-slightly-acid soils.
Map pH ranges to nutrient availability and typical visual symptoms for quick diagnosis
| pH Range | Nutrients Most Available | Nutrients Likely Locked Out | Typical Plant Symptoms |
|---|---|---|---|
| 5.0 – 5.5 | Fe, Mn, B, Cu (high availability) | P, Ca, Mg (reduced) | Dark green leaves, possible micronutrient toxicities; stunted growth |
| 5.6 – 6.5 | N, P, K, S, Ca, Mg (optimal balance) | Few; most micronutrients accessible | Healthy new growth, vigorous root development |
| 6.0 – 7.0 | N, P, K accessible; Ca, Mg available | Zn, Fe (begin to decline above 6.5) | Slight interveinal yellowing possible at upper end |
| 7.0 – 8.0 | Ca, Mg (more available) | Fe, Mn, Zn, P (deficiencies common) | Interveinal chlorosis, slow growth, weak flowering |
| Above 8.0 | Ca and some alkalinity-favored ions | Most micronutrients and P severely locked out | Severe yellowing, poor yield, leaf necrosis |
Key insight: Keeping soil pH in the 5.8–6.5 window for most cannabis grows maximizes nutrient availability while supporting a healthy microbial community. Practical interventions — steady pH management, organic buffering, and microbial support — restore uptake where lockout occurs and protect yields going forward.
Maintaining the right pH around the root zone preserves transporter function and keeps beneficial microbes active, so growers can focus on genetics and environmental control rather than chasing secondary deficiencies.
Measuring and Testing pH: Tools and Best Practices
Accurate pH measurement begins with the right tool and a reliable routine. For cannabis growers, that usually means choosing between digital meters for precision, strips or color kits for speed and cost, and soil probes for in‑media checks. Calibration, clean electrodes, and a consistent testing protocol separate guesswork from repeatable nutrient management; this section describes how to pick tools, calibrate and maintain them, then walk through step‑by‑step tests for water, nutrient solutions, runoff, and soil slurry. Follow these practices and logging habits to keep plant-available nutrients in the optimal 6.0–6.5 range for soil and 5.5–6.0 for soilless systems.
Tools: meters, strips, and kits
| Tool Type | Accuracy | Pros | Cons |
|---|---|---|---|
| Pen-style digital pH meter | ±0.01–0.1 pH | Portable, fast readings, replaceable electrodes | Requires regular calibration, electrodes fragile |
| Handheld bench meter | ±0.01 pH | Highest precision, advanced features, logging ✓ | Higher cost, less portable |
| pH test strips | ±0.5 pH | Cheap, no calibration, easy field checks | Low accuracy, color interpretation variance |
| Liquid colorimetric pH kit | ±0.2–0.3 pH | Affordable, visual comparison, good for quick checks | Subjective color matching, reagents can expire |
| Soil pH probe | ±0.05–0.2 pH | Measures in‑media directly, useful for spot checks | Needs frequent cleaning, accuracy varies by soil moisture |
> Accurate meters reduce nutrient lockout and crop variability; inexpensive strips are useful, but meters are the industry standard for consistent results.
Key insight: Digital meters deliver the control professional growers need while strips and color kits provide cost-effective spot checks for smaller or experimental grows.
Calibration and maintenance
Calibration: Use fresh pH 4.01, pH 7.00, and optionally pH 10.01 buffers and calibrate at the start of each week or before critical feeding events.
Cleaning: Rinse electrodes in distilled water; soak in electrode storage solution when idle.
Storage: Never store electrodes dry; short-term use requires storage solution to prevent reference drift.
Replacement: Replace electrodes every 6–18 months depending on use and care.
How to test: step-by-step protocols
- Prepare meter: rinse probe with distilled water and blot dry.
- Calibrate meter using buffer solutions at room temperature, following manufacturer sequence.
- For water/nutrient solution: collect sample in clean container, immerse probe, wait for stable reading (usually 10–30 seconds), record value.
- For soil slurry testing: mix 1 part soil with 2 parts distilled water, stir, let settle 15 minutes, decant and test supernatant with probe or kit.
- For runoff testing: collect runoff from pot drainage after a light feed or flush, test as you would nutrient solution.
- After testing: rinse probe, return to storage solution, log reading with context (time, temp, EC, nutrient mix).
Recommended testing schedule and logging practices
- Daily: Check reservoir pH in hydroponics and nutrient solution before lights on.
- Weekly: Calibrate meters; test runoff from representative plants.
- Biweekly: Perform soil slurry checks across multiple pots or beds.
- Logging: Record date, time, temperature, pH, EC/TDS, nutrient mix, and any plant observations.
Practical tool picks: budget growers should prioritize a quality pen-style meter with replaceable probes; pro operations benefit from bench meters with data logging and multi-parameter probes. Maintaining calibration discipline and consistent sampling technique is what turns a meter into a decision-making instrument that keeps feminized seed health consistent and predictable. Understanding these practices minimizes nutrient problems and keeps the grow focused on cultivar performance rather than troubleshooting baseline chemistry.
Adjusting pH: Correction Methods and Timing
Correcting pH requires a different approach depending on whether the crop is in soil, soilless mixes, or a hydroponic system; adjustments should be incremental, measured, and respectful of the system’s buffering capacity. For hydroponics, small, immediate tweaks using concentrated pH Down or pH Up products are routine because the solution responds quickly. In soil and soilless media, amendments change the root-zone over days to weeks; rapid large swings are harmful because soils buffer pH and plants need time to re-establish nutrient uptake.
Lowering vs raising: agents and safety
Phosphoric acid: Common commercial pH Down (acid). Useful in hydroponics and fertigation; acts fast when diluted properly. Generally safe for seedlings when heavily diluted and dosed conservatively.
Nitric acid: Industrial acid sometimes used in nutrient formulations. Very fast effect; not recommended for casual home use due to safety and corrosivity. Not safe for seedlings unless precisely dosed by experienced growers.
Citric acid: Organic weak acid (food-grade). Moderate speed; safer around young plants and in organic systems. May chelate some micronutrients slightly.
Potassium bicarbonate: Alkali (base), also fungicide in some contexts. Moderate speed raising pH, provides potassium—watch total K levels. Usually safe for seedlings in low concentrations.
Sodium bicarbonate: Alkali (base). Moderate-fast effect but introduces sodium, which accumulates and can harm roots; not recommended for repeated use or seedlings.
Practical timing, increments, and re-test protocol
- Test pH with a calibrated meter.
- Make an adjustment that moves pH by no more than
0.2–0.3units per application. - Wait appropriate time before re-testing.
- Repeat until target pH reached.
For hydroponics, wait 10–30 minutes and retest; the reservoir equilibrates quickly. For soilless media, wait 12–24 hours. For mineral soil, expect slower response—retest after 24–72 hours, and again at 5–7 days for full equilibration. Always document volumes and concentrations so adjustments can be repeated reliably.
Soil vs soilless and hydroponic correction strategies
Soil buffering and long-term amendments
Use elemental sulfur to gradually lower pH; lime (calcium carbonate) or dolomite to raise pH. These work over weeks; they change soil chemistry and should be planned between cycles.
Hydroponic immediate adjustments and flushing
Use commercial pH Up/pH Down for quick correction. If salts have accumulated, a controlled flush with fresh solution may be necessary; after flushing, re-balance nutrients and pH.
Decision checklist for growers: System type match: Hydroponic → fast-acting liquids; Soil → slow-release amendments. Plant stage: Seedlings → minimal, gentle changes only. Salt load: High EC → consider flushing before big pH shifts. Safety: Handle strong acids/bases with gloves and eye protection.
Common mistakes and practical example
A common error is large single-step corrections in soil that produce apparent pH normalization, then rebounds a few days later. For example, adding a concentrated acid to re-acidify soil may temporarily read pH 6.0, then return to 6.8 as the soil buffer reasserts itself. The correct approach: smaller doses and follow-up tests over several days.
Understanding appropriate agents, timing, and system-specific strategies prevents nutrient lockouts and promotes healthier feminized seed health outcomes for both seedlings and mature plants. When adjustments are deliberate and measured, pH becomes an asset rather than a recurring problem.
Common pH adjustment agents, safety, and suitability for seedlings vs mature plants
| Agent | Type (acid/base) | Speed of effect | Seedling safety |
|---|---|---|---|
| Phosphoric acid (pH Down) | Acid | Fast (minutes in solution) | Generally safe diluted; use low doses |
| Nitric acid | Acid | Very fast (minutes) | Not recommended for seedling use |
| Citric acid | Acid (organic) | Moderate (hours) | Safer for seedlings at low concentration |
| Potassium bicarbonate (pH Up) | Base | Moderate (minutes–hours) | Safe if low concentration; watch K levels |
| Sodium bicarbonate | Base | Moderate-fast (minutes–hours) | Not recommended for seedlings; sodium buildup risk |
Key insight: Choose agents matched to system and stage—fast-acting liquids for hydroponics, gentle organic acids for young plants, and slow soil amendments for long-term pH stability.
Troubleshooting Common pH-Related Problems
pH problems often mimic nutrient, water, or pest issues, so start by treating pH as the simplest, highest‑leverage variable to check. A small pH error prevents uptake of multiple nutrients at once, producing mixed symptoms—yellowing, spotty tissue, stunting—that can mislead diagnosis. Confirming pH (and its stability) narrows the field quickly and avoids unnecessary nutrient or pesticide interventions.
Rapid diagnostic approach (what to do first)
Check the run-off or media solution pH immediately with a calibrated meter; suspect pH-driven issues when readings fall outside 5.5–6.5 for soilless and 6.0–7.0 for soil. Take one quick corrective action, then monitor: quick flushing and rebalancing often resolves uptake issues without changing nutrient concentration.
- Calibrate and measure pH of input water and run-off.
- If run-off pH is off by >0.5 units, flush with pH‑corrected water.
- Adjust nutrient solution to target pH and re-check in 12–24 hours.
Symptom-to-cause mapping, immediate triage, escalation rules
Use symptom patterns to decide whether pH is the likely root cause or whether nutrient lockout/pests should be investigated.
pH swing: Rapid day/night pH fluctuations that correlate with symptom onset suggest buffering or microbiome problems rather than a single nutrient deficiency.
Locked nutrients: If multiple elements show deficiency signs at once, pH is the most probable shared cause.
When to escalate: If symptoms persist after 72 hours of corrected pH and stable EC, widen diagnosis to nutrient composition, root disease, or pests.
Preventative care and monitoring routine
- Daily checks during sensitive stages: Measure pH of input solution and run-off every day in seedling and late-flower phases.
- Bi-weekly checks during stable vegetative growth: Measure pH every 3–4 days once plants are established.
- Logging practice: Record pH, EC, temperature, and visible symptoms for each irrigation event.
Calibrate meters: Calibrate pH probes weekly. Buffering: Use appropriate buffers (peat, dolomite) for soil; use pH down/up for hydro with caution to avoid overshoot.
Symptom-to-cause quick reference for growers diagnosing pH-related issues
Symptom-to-cause quick reference for growers diagnosing pH-related issues
| Symptom | Likely pH Issue (low/high) | Immediate Action | Follow-up (24–72 hrs) |
|---|---|---|---|
| Interveinal chlorosis on new growth | High pH | Check run-off pH; flush with slightly acidic water (5.8) |
Re-measure run-off; if unchanged, check iron/micronutrient levels |
| Rust-colored spots on older leaves | Low pH | Test media pH; flush with neutral water (6.5) |
Watch for manganese toxicity signs; reduce acidity if toxicity appears |
| Stunted vegetative growth | High pH | Adjust nutrient solution to target pH; increase aeration | If growth doesn’t resume, test root health and EC |
| Purple stems | Low pH (or phosphorus lockout secondary) | Raise pH into range and ensure adequate P | If color persists, run tissue test for P and K |
| Nutrient burn-looking leaf tips | High pH (lockout causing localized necrosis) | Flush and rebalance nutrients; lower EC slightly | Monitor new growth for recovery; reassess feed strength |
Key insight: The table highlights that similar visual symptoms can result from either low or high pH depending on tissue age and nutrient mobility; measuring pH removes ambiguity and directs the correct immediate action.
Understanding and logging these checks reduces guesswork and prevents unnecessary interventions, which speeds recovery and protects feminized seed health over the full grow cycle. When pH routines are embedded into daily operations, problems are detected early and resolved with minimal plant stress.
Real-World Examples and Case Studies
Healthy seedlings respond quickly to simple corrections, and the two case studies below show how targeted pH fixes recover plants within days to weeks. Both examples start with observation, follow with fast diagnostics, and use conservative corrections to avoid shock. The soil case demonstrates slow-release buffering and a gradual lift from pH 5.0 to the optimal range, with visible greening in 4–7 days and full recovery by two weeks. The coco/hydro case shows how rapid pH swings can be tamed with controlled flushing and stabilizing additives, producing growth-rate recovery within 72 hours and root-zone stability in 7–10 days.
Case study: Soil grower fixes yellowing seedlings
A small-scale grower reported uniform yellowing of first true leaves at day 10 post‑germination. Testing revealed soil pH for cannabis at ~5.0, below the 5.8–6.5 range that promotes nutrient availability in most loam mixes.
Tools & materials
- pH meter: calibrated
- pH up solution: diluted, plant-safe
- Calcium-magnesium supplement: low-dose
- Clean water: at room temperature
Step-by-step correction
- Flush once with 2× pot volume of water adjusted to
pH 6.4. - Wait 24 hours and measure runoff pH.
- If runoff still below
6.0, apply a light feed: half-strength nutrient withpH 6.2and 50% of recommended Ca/Mg dose. - Monitor daily; repeat only if symptoms persist after 72 hours.
Outcome and metrics
- Visual improvement: first greening at 4–7 days.
- Height/leaf expansion: returned to normal rate by day 14.
- Final result: 95% recovery with no transplant or major stress.
Case study: Coco and hydroponic pH swing correction
Rapid nutrient uptake in coco and hydro systems often causes pH swings of 0.5–1.0 units within 24–48 hours, leading to lockouts.
When to flush: persistent swing >0.6 pH units over two measurements, or acute leaf-tip burning with erratic turgor.
Correction protocol
- Stabilize reservoir to target
pH 5.8–6.2for coco,pH 5.5–6.0for hydro. - Perform a controlled flush (10–20% reservoir replacement) using solution at target pH.
- Add a buffering additive (low-dose) and recheck after 2 hours.
- If swings continue, replace full reservoir and inspect EC, root health, and media.
Outcome and recovery metrics
- Short-term: leaf firmness and transpiration normalize within 48–72 hours.
- Root-zone: clear white roots and stable pH seen by day 7–10.
- Yield impact: minimal when corrected early; prolonged swings reduce growth rate noticeably.
Internal link opportunity: link to germination guarantee and expert-support pages for troubleshooting seedling issues. Understanding these corrective steps prevents small pH problems from becoming crop-wide setbacks and keeps plants on a steady growth trajectory.
Common Misconceptions and Myth-Busting
Short-lived pH swings aren’t harmless. Even brief exposure to extreme pH can trigger nutrient lockouts, root burn, and stunted seedlings that never fully recover. Seedlings and young transplants are the most vulnerable because their root systems have limited buffering capacity and low biological activity. Rapid, informed action prevents permanent damage.
Myth: pH extremes are safe if temporary Fact: Short-term extremes often leave lasting effects. Roots exposed to pH < 5.5 or pH > 7.0 can suffer cell damage and microbial disruption within hours. For seedlings this can mean slowed root branching and reduced uptake for the rest of the lifecycle. Safe immediate steps to mitigate damage:
- Test pH and EC immediately with calibrated tools.
- If pH is extreme, perform a partial flush with water at the correct pH to remove concentrated salts and reset the root zone.
- Apply a gentle, low-strength recovery feed only after pH is back in range to avoid compounding stress.
- Monitor daily for new leaf growth and signs of recovery before returning to full-strength feeding.
- Test substrate pH and runoff pH.
- Correct pH first with gentle adjustments.
- Re-test before adding nutrient solutions.
Myth: Organic always fixes pH problems Fact: Organic amendments are effective long-term buffers but act slowly. Compost, kelp, worm castings and biochar change cation exchange capacity and microbial communities over weeks to months. They do not provide immediate pH correction in a crisis. Use organic amendments as part of a preventative soil pH strategy but not as an emergency pH fixer.
Myth: More nutrients will solve pH problems Fact: Adding more fertilizer when pH is off often worsens lockouts. Excess salts increase osmotic stress and can precipitate unavailable nutrient forms. The correct diagnostic order prevents wasted inputs:
Practical examples and checks
- Seedling scenario: A 7-day-old seedling showing pale tips after a pH swing—flush with pH 6.0 water, hold feed to 25% strength for 3–5 days, then resume normal schedule.
- Established plant: If older plants show interveinal chlorosis, test both substrate and runoff; address pH before chasing micronutrients.
Definitions
pH buffering: The substrate’s capacity to resist pH change; organic matter increases buffering over weeks.
Nutrient lockout: A physiological state where nutrients are present but chemically unavailable due to pH or ionic imbalance.
Understanding these distinctions keeps corrective actions precise and prevents well-intentioned fixes from creating bigger problems. When pH is treated as the diagnostic priority, interventions become faster, less wasteful, and more effective.
📥 Download: pH Management Checklist for Feminized Cannabis Seeds (PDF)
Actionable Checklist: pH Management Plan for Feminized Seeds
Maintaining correct pH through each growth stage prevents nutrient lockout, reduces stress on developing feminized plants, and preserves the genetic potential those seeds deliver. Start with a clear schedule, reliable testing tools, and a simple record-keeping habit; consistent small checks beat sporadic, aggressive corrections. Below is a stage-by-stage checklist with specific actions, monitoring cadence, and practical record-keeping steps tailored for feminized seed health.
Tools & materials to have on hand
pH meter: Calibrate daily for best accuracy.
pH test kit (color or strips): Backup for spot checks.
Calibrating solutions: pH 4.0 and pH 7.0 for meters.
pH up / pH down: Use concentrated formulations designed for horticulture.
Water source: Know your tap/RO baseline (measure before mixing nutrients).
Logbook or digital sheet: Record pH, EC/TDS, time, solution mix, and observations.
Stage-by-stage pH checklist (actionable steps)
- Pre-germination (seed soak)
- Measure soak water pH and adjust to
5.6–6.0. - Soak duration 12–24 hours; discard and rinse seeds in fresh pH-balanced water.
- Record water source, pH before and after adjustment, and soak time.
- Seedling (first 2–3 weeks)
- Target medium pH
5.8–6.3(soilless) or6.0–6.8(soil). - Check runoff pH twice weekly.
- Note leaf color and growth rate; log every measurement.
- Vegetative
- Maintain
5.8–6.3for hydro/soilless,6.0–6.8for soil. - Check input solution pH before each feeding; check runoff weekly.
- Use small corrections (0.1–0.2 pH) rather than large swings.
- Pre-flower transition
- Monitor weekly; stabilize pH toward mid-range for chosen medium.
- Increase observation frequency if any nutrient symptoms appear.
- Document any fertilizer changes and corresponding pH shifts.
- Flowering (late-stage)
- Maintain stable pH; avoid frequent big adjustments.
- Check run-off pH twice weekly; pay attention to bud set and leaf tips.
- Keep detailed notes on flushes and final weeks’ pH values.
Record-keeping template (one-line items)
Date: YYYY-MM-DD
Stage: Seedling / Veg / Flower
Input pH: Example 6.0
Runoff pH: Example 6.4
EC/TDS: Example 1.2 mS/cm
Notes: Any symptoms, nutrient changes, or corrective actions
Printable stage-by-stage checklist and tools/resources to use at each stage
| Growth Stage | Key pH Actions | Tools/Products Suggested | Check Frequency |
|---|---|---|---|
| Pre-germination (seed soak) | Adjust soak water to 5.6–6.0; rinse seeds after soak |
pH meter, pH 4/7 calibration, clean container |
Before soak; once |
| Seedling (first 2–3 weeks) | Keep medium 5.8–6.3 (soilless) or 6.0–6.8 (soil); measure runoff |
pH strips + meter, gentle nutrients | Input pH each feed; runoff twice weekly |
| Vegetative | Maintain mid-range, pre-feed pH checks, small corrections | Digital pH meter, pH up/down, EC meter |
Input each feed; runoff weekly |
| Pre-flower transition | Stabilize pH; monitor after nutrient changes | pH meter, logbook, balanced transition feed | Weekly; increase if symptoms appear |
| Flowering (late-stage) | Maintain stability; avoid large pH swings; check runoff | Reliable meter, flush solutions, low-salt feeds | Runoff twice weekly; daily if problems occur |
Key insight: The checklist shows that frequency of checks increases during early establishment and late flowering, while the goal throughout is consistency rather than aggressive correction. Simple tools and a concise log capture trends that prevent chronic issues and protect feminized seed health.
Understanding and recording pH consistently removes guesswork and preserves vigor in feminized plants. When these small, routine checks become habit, nutrient problems are easier to prevent than to fix.
Conclusion
Plants that drop leaves after transplanting or show tip yellowing usually point back to pH and nutrient availability; practical fixes often resolve problems faster than wholesale changes to feeding schedules. A few concrete lessons emerge from the examples above: when a commercial greenhouse corrected its irrigation water and stabilized substrate pH, yellowing stopped within a week; a small-scale indoor grow recovered bud development after switching to a buffered nutrient mix and monitoring runoff. Addressing questions growers commonly have—How often should I test pH? Calibrate meters weekly and test feed and runoff each watering. What pH range for soil? Aim for a slightly acidic window that supports nutrient uptake, and modify gently—abrupt swings cause more harm than good. For feminized seed health, stable early-stage pH dramatically reduces stress and improves uniformity.
Start with these three immediate actions: test and calibrate your meter, adjust feed water to the target range, and track runoff pH for two weeks. If problems persist, consider substrate changes or switching to reliably produced seeds and germination support; resources like The Seed Connect’s germination guarantee and grower guides can streamline diagnosis and replacement when needed (see The Seed Connect germination resources). Consistent pH management pays dividends—small, regular checks keep plants vigorous, maximize nutrient uptake, and protect the health of feminized seeds through every stage.