
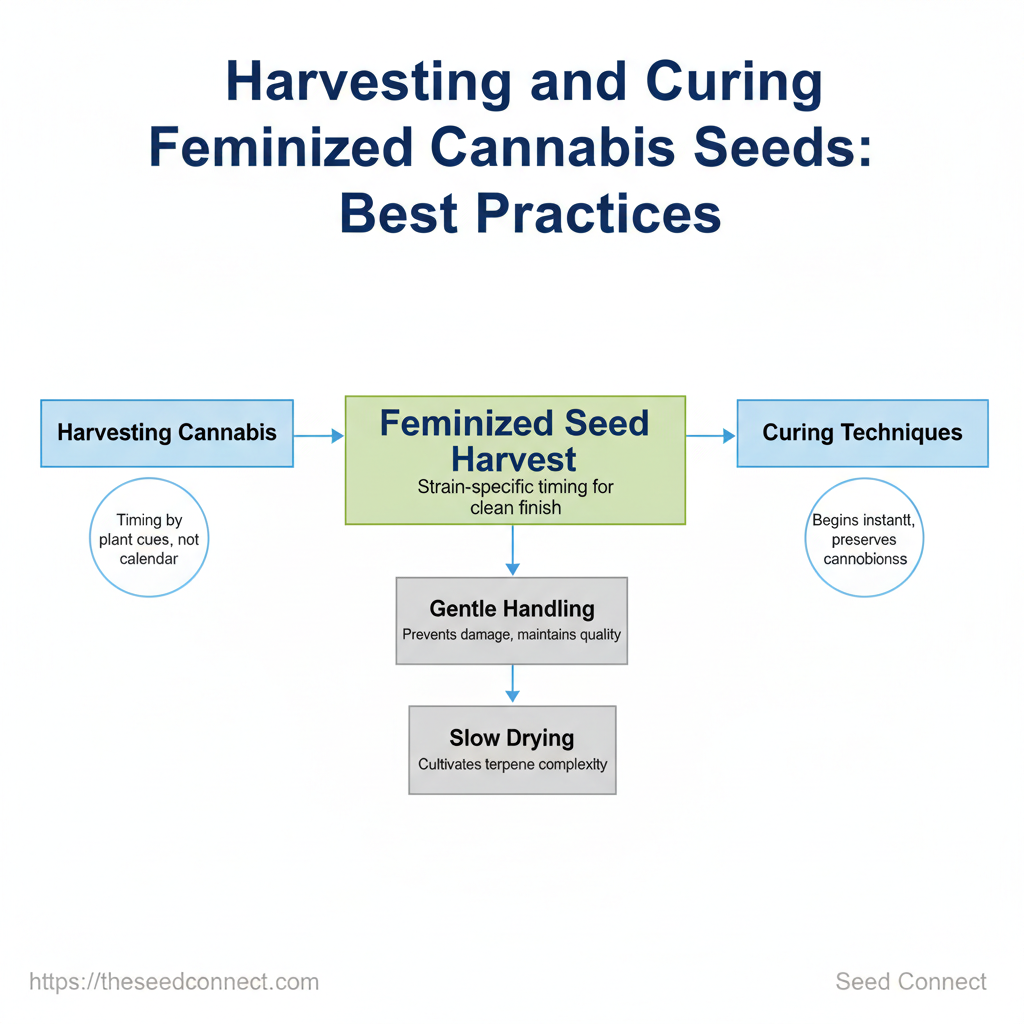
Cloudy trichomes and floppy colas at harvest time are a familiar disappointment for growers who timed their cutoffs by calendar instead of plant cues. When harvesting cannabis happens too soon or without a clear drying plan, aroma, potency, and smoke quality all slide downhill within weeks. Small mistakes during that first 48 hours — rough handling, uneven cuts, or inadequate airflow — turn weeks of careful cultivation into a mediocre cure.
Proven growers treat harvest as a controlled operation, not a single chop-and-forget moment, because curing techniques begin the instant scissors meet stem. Attention to trichome color, flange cuts, and gentle manicuring preserves cannabinoids; patient, slow drying cultivates terpene complexity. Even varietal choices matter — planning the feminized seed harvest schedule around strain-specific flowering windows lets cultivars finish cleanly and respond predictably to curing.
Table of Contents
What You’ll Need / Prerequisites
Start with the right kit and a few practiced skills: harvesting cannabis cleanly depends as much on preparation as timing. Prepare clean cutting tools, a controlled drying space, and basic humidity control; combine those with the ability to read trichomes and maintain steady temperature/humidity and harvest-to-cure losses drop dramatically. Tools, materials, and benefits at a glance:
Drying surface or rack: maximizes airflow and prevents bud compression.
Curing containers and humidity control: preserve terpenes and avoid mold during cure.
PPE and sanitization: keeps harvest microbial load low and preserves product quality.
Monitoring tools: a reliable hygrometer/thermometer for consistent drying and curing.
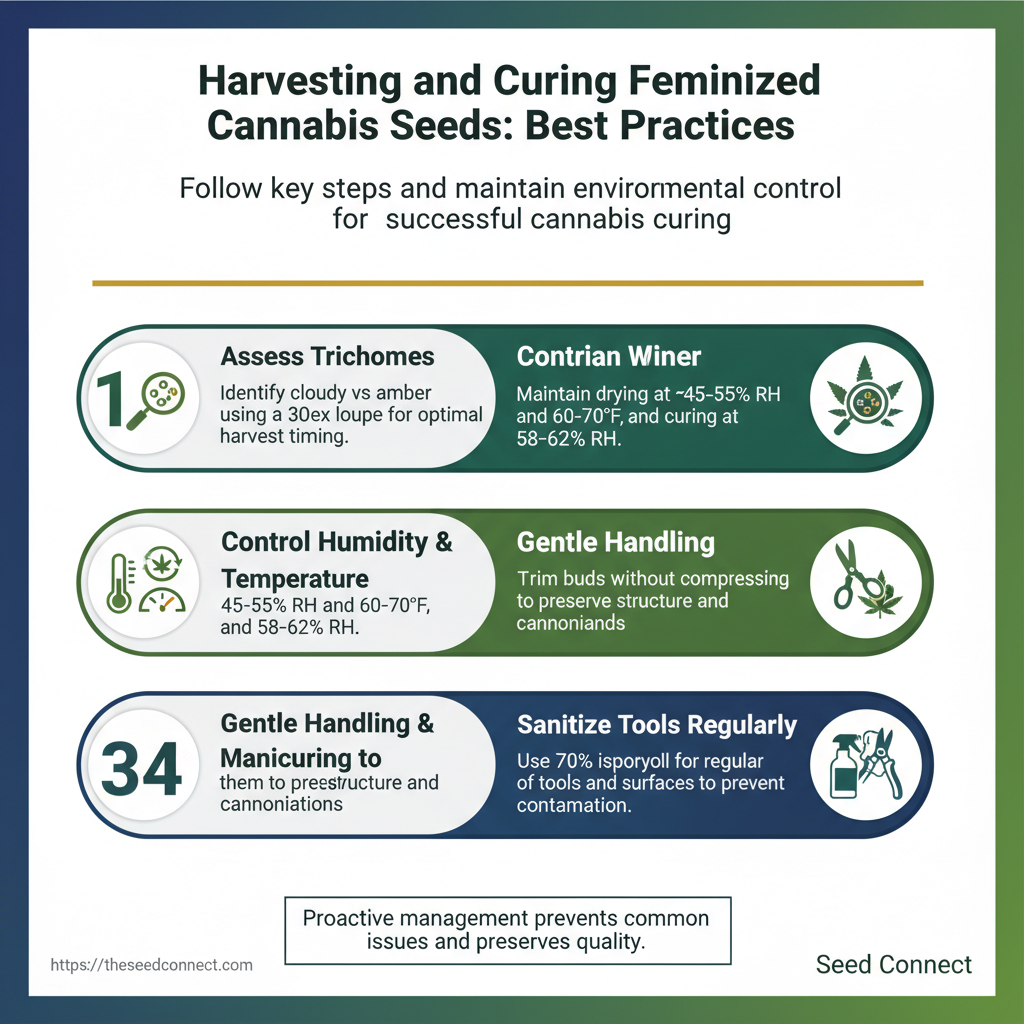
1. Trichome assessment: can identify cloudy vs. amber trichomes using a 30–60x loupe. 2. Humidity & temperature control: able to hold drying at ~45–55% RH and 60–70°F. 3. Gentle handling & manicuring: comfortable trimming without compressing buds. 4. Sanitation routines: regular cleaning with 70% isopropyl and avoiding cross-contamination.
1. Preparation and harvesting: 1–3 hours for a small grow (per plant variations). 2. Drying: 5–10 days depending on environment. 3. Curing: minimum 2–4 weeks for basic improvement; optimal profiles take 6–8 weeks. Difficulty: Moderate — requires steady environmental control and practiced trimming; beginners should allow extra time for learning trichome assessment.
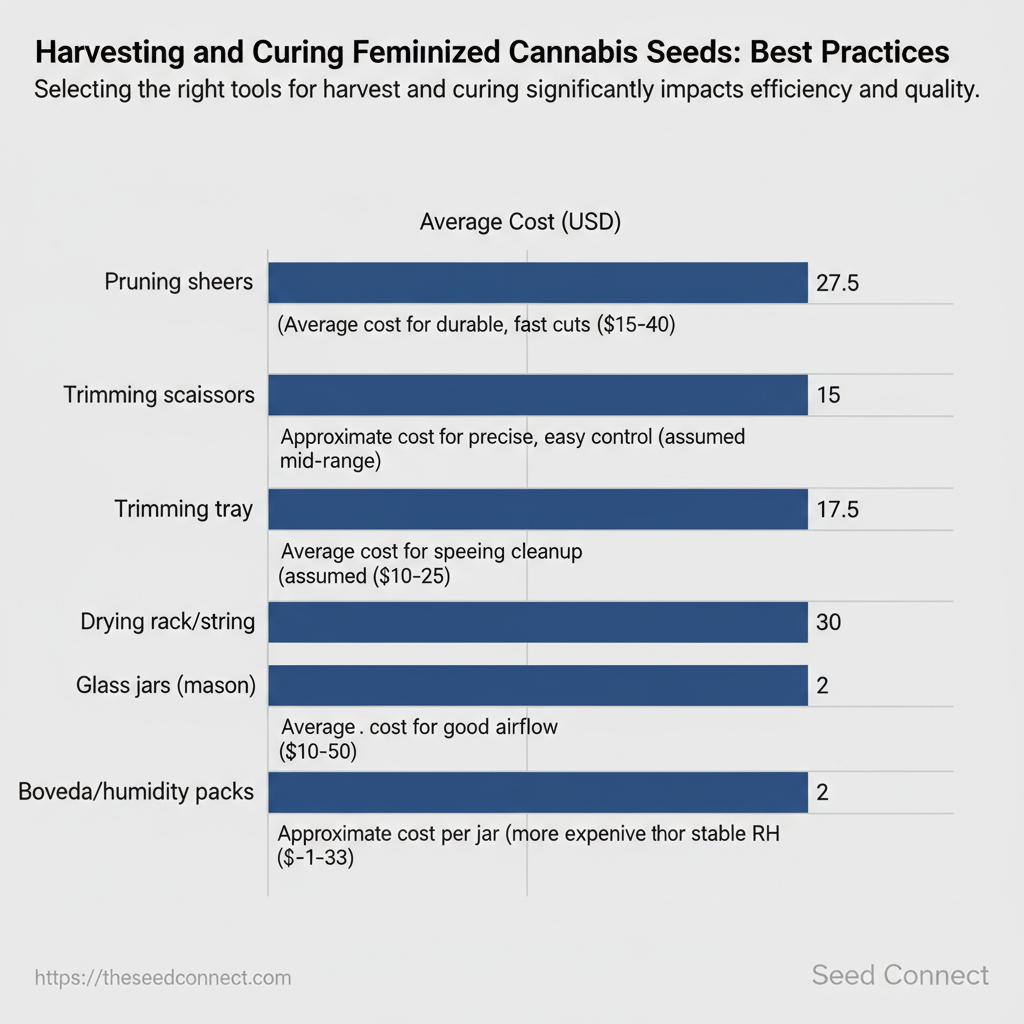
Tools and materials (why choose each, pros/cons, cost/complexity) Tools and materials (why choose each, pros/cons, cost/complexity) | Item | Purpose | Pros | Cons | |—|—|—|—| | Pruning shears | Cut branches cleanly | Durable, fast cuts | Higher cost ($15–$40) | | Trimming scissors | Manicure buds | Precise, easy control | Slower for large harvests | | Trimming tray | Catch trim/keeps workspace clean | Speeds cleanup, reusable | Small upfront cost ($10–$25) | | Disposable gloves | Hygiene during trim | Low contamination risk, cheap | Wasteful, recurring cost | | Drying rack/string | Hang branches/buds | Good airflow, scalable | Takes space; basic models $10–$50 | | Brown paper bags | Quick dry for small buds | Cheap, absorbs moisture | Inconsistent drying; risk of loss | | Glass jars (mason) | Long-term curing | Airtight, reusable | More expensive than bags | | Boveda/humidity packs | Maintain jar RH (58–62%) | Stable RH, plug-and-play | Pack replacement cost ($1–$3/pack) | | Hygrometer (digital) | Monitor RH in jars/room | Accuracy, records | Calibration sometimes needed | | Sanitizing solution (70% isopropyl) | Clean tools/surfaces | Proven antimicrobial, cheap | Flammable; handle safely | Key insight: The right combination balances cost, scalability, and quality control. For small growers, prioritizing sharp trimming tools, glass jars, a decent digital hygrometer, and 70% isopropyl for sanitation yields the biggest quality gains per dollar. For larger operations, invest more in durable shears, multi-tier drying racks, and automated humidity control to reduce labor and loss. Understanding these prerequisites makes the rest of the harvest process predictable and repeatable; that consistency is what produces reliably high-quality cured flower.
What Actually Happens to Cannabis From Seed to Harvest?
Time Estimate, Difficulty Level, and Success Criteria
Harvesting and curing typically takes between two and eight weeks after the plant reaches maturity; the precise timeline depends on the strain, whether plants are from feminized seeds or autoflowers, and the chosen drying/curing method. Expect a drying window of about 5–14 days and an initial curing period of minimum 2 weeks, with 4–8+ weeks preferred to fully preserve terpenes and stabilize moisture. Difficulty registers as moderate: the steps are straightforward but require attentive humidity control and mold prevention to hit consistent success metrics.
Timeline and measurable outcomes
Cut & hang dry (5–14 days): branches dry until stems snap and bud moisture reaches 10–12% by weight.
Jar curing (2–8+ weeks): daily burping first two weeks, then weekly; target bud moisture content >60% relative humidity inside jar.
Ready for consumption (4–8+ weeks): terpene profile and smoothness measurably improved.
Difficulty factors and how they affect success
Airflow and temperature: maintain 18-21°C during drying to preserve terpenes.
Bud density: dense buds need longer drying and closer mold inspection.
Practical example: a feminized seed strain that flowers in 9 weeks may reach harvest at Week 10; hang-dry for 10 days at 20°C/50% RH, then jar-cure for 6 weeks—resulting in a slow, even burn and preserved terpene aroma.
Success criteria (measurable)
Terpene preservation: discernible aroma intensity after 4–6 weeks curing.
Moisture stability: jars maintain 58–62% RH without molding for at least 2 weeks.
Visual/texture: stems snap; buds retain slight springiness, not wet or brittle.
Include a simple checklist or moisture/temperature log when implementing this timeline; for more on drying and curing techniques, see the practical steps at GrowMag’s harvest guide (https://growmag.com/feature/harvest-101-2/). When these controls are applied consistently, outcomes are repeatable and quality improves with each cycle. Understanding these timeframes and controls reduces losses and preserves the characteristics that make each strain valuable.
Pre-Harvest Checks and Final Flushing
Begin final preparations by stopping nutrients and flushing the medium with plain water 7–14 days before the planned cut — strain genetics and medium dictate the exact window. At that point the focus shifts from pushing growth to stabilizing the plant so sensory cues (trichomes, pistils, aroma) become reliable indicators for timing harvest and optimizing cure quality.
Flush timing: Flush with plain pH-balanced water 7–14 days before harvest; shorter flushes for sensitive strains, longer for heavy-feeding phenotypes.
Water quality: Use filtered or RO water adjusted to the medium’s typical pH (5.8–6.2 for hydro/soil-less, 6.0–6.8 for soil) to avoid reintroducing salts.
Repeat flush: Run 2–3 reservoir volumes through soil or medium and let drainage clear; in coco/hydro, change reservoir and run clear water cycles until EC drops.
Final environmental checklist
Temperature stability: Keep daytime temps 20–24°C (68–75°F) and night delta ≤5°C to prevent trichome degradation.
Airflow: Maintain gentle airflow around buds; avoid high-speed fans that can strip resin.
Inspection and decision tools
Pistil evaluation: Prioritize pistil color alongside trichomes — aim for desired balance of white-to-brown pistils based on cultivar and desired effect.
Record keeping: Photograph buds with timestamped images and note strain, flush start, and environmental readings to compare phenotypes and refine timing for future feminized seed harvests.
Practical examples
Example — sativa-dominant: Flushed 7–10 days, higher clear/cloudy trichome window, harvested earlier to preserve uplift.
Common problems to watch for include slow-draining media (extend flushing cycles) and sudden temperature swings (delay harvest if trichomes look stressed). Recording conditions and outcomes for each run accelerates learning across strains and maximizes results when working with feminized seeds. Understanding these checks reduces guesswork and improves consistency from harvest to cure.
Step-by-Step Harvest: Cutting and Manicuring
Harvest when trichomes show the desired milky/amber mix and pistils have mostly curled; timing determines potency and effect, so plan the cut accordingly. Sanitize tools, work quickly, and handle buds gently to preserve fragile trichomes — that’s the practical baseline before any snip is made.
Clean tools: Wash scissors, shears, trays with isopropyl alcohol; let evaporate.
Prepare workspace: Low light, clean surface, paper towels, labeled trays for each plant.
Personal prep: Wear nitrile gloves to reduce resin loss and contamination.
Inspect trichomes: Use a 30–60x loupe; aim for mostly milky with some amber for balanced effects. Industry guides describe week ranges, but visual inspection is decisive — see When to Harvest Cannabis | Harvesting, Drying, Trim and ….
Whole-plant vs branch cut: Cut whole plant at base for dry trim; cut branches for wet trim or staged drying.
Support buds: Lay branches on a flat tray to avoid crushing dense colas.
Dry trimming — gentler: Hang whole branches to dry first; preserves shape and can reduce terpene loss.
The trend demonstrates many growers prefer wet trimming for small spaces and dry trimming for quality-focused small-batch runs. Practical example: wet trim saves time when multiple plants share drying racks, while dry trim often yields cleaner-looking finished buds.
Use gentle motions: Pinch stems, not bud calyxes; avoid rubbing surfaces.
Tools: Sharp shears reduce tearing; micro-sweep brushes can remove loose sugar leaves without damage.
Hang branches: Dark room, 50–60% RH, 60–70°F for 5–14 days depending on density.
Monitor: Check stems snap test and watch mold; adjust airflow and humidity as needed. For practical visuals and method notes, consult Harvesting Cannabis: Trimming & Storing.
Troubleshooting: if buds feel wet after 7 days, increase airflow and lower RH; if trichomes appear dull, you likely overhandled buds. For feminized seed harvests, the same steps apply — allow extra attention to trichome timing for high-THC phenotypes. Understanding these steps reduces handling losses and improves final quality; when executed consistently, harvest and manicuring become predictable parts of the grow cycle. This workflow shortens turnaround while protecting potency and appearance.
Drying Best Practices: Environment and Monitoring
Aim for a controlled, gentle dry: keep temperature low and relative humidity moderate so terpenes and cannabinoids remain intact while preventing mold. For most indoor rigs, maintain 16–21°C (60–70°F) and 45–55% relative humidity, with steady, gentle airflow that moves air without directly blowing on the buds. These conditions slow moisture loss enough for even drying over 7–14 days and preserve aroma and potency. Why those ranges matter
Terpene preservation: Cooler temps limit volatile terpene evaporation.
Mold prevention: Mid-range RH reduces condensation cycles that encourage fungal growth.
Practical environment setup
Set fans for indirect circulation: angle a fan so it moves room air without pointing at the buds.
Use a small humidifier/dehumidifier with a hygrometer to keep RH stable; log readings twice daily.
Daily checks and logging
Evening check: measure RH/temperature and record values.
Record: time of harvest, branch length, initial weight, daily RH/temp—this creates a dataset for refining future harvests.
Dryness tests: stem snap vs. bend
Bud bend test: smaller stems will bend slightly before snapping; if the stem flexes and doesn’t crack after 5–7 days, continue drying. Use both tests together—snap on the main stem plus tacky-but-not-wet buds is the target.
Small-scale and outdoor notes
Outdoor harvests: bring cut branches into a shaded, ventilated shelter immediately; ambient RH will often be higher, so shorten hanging times and increase airflow cautiously.
Alternative: use a cardboard box tent with desiccant packets for micro-batches—test frequently to avoid over-drying.
Industry references demonstrate these final steps are as important as earlier stages in producing quality cured flower (Harvesting Cannabis: Trimming & Storing). Regular checks and logging turn drying from guesswork into repeatable process improvements. Understanding and applying these controls improves consistency and reduces losses at harvest time.
Curing Process: Jarring, Burping, and Long-Term Curing
Start jar curing once buds are dry to the touch but stems still have slight snap — this preserves terpenes and continues gentle moisture redistribution. Use airtight glass jars and a disciplined burping routine to move moisture from the bud interior to the jar headspace and ultimately to stable long-term storage conditions. Proper curing converts a freshly dried harvest into smooth, flavorful flower ready for consumption or sale.
Choose jars: Use clear or amber glass mason jars in 250–1,000 ml sizes; smaller jars for smaller yields prevent over-compression.
Sanitize: Wipe jars and lids with isopropyl alcohol and dry fully.
Pack gently: Place trimmed buds upright and loosely; leave ~10–20% headspace to allow air exchange without squashing trichomes.
Schedule: Open each jar twice daily for the first week, then once daily during week two.
Action: Fan out the buds for 1–2 minutes and inspect for mold or over-dry spots.
Log humidity: Record jar RH with a digital hygrometer — aim for 62% steady internal humidity initially; log time, RH, and any odor notes.
Reduce burps: Move to every 48–72 hours after stable RH for 7–10 days.
Use humidity packs: Add a 62% Boveda or similar pack when jar RH fluctuates by ±3%. Replace packs if they harden or shift beyond specification.
Rotate jars: Rotate position in storage weekly to equalize temperature exposure.
Practical examples and data points
Real grow routine: Many small-scale growers use 250 ml jars for sample buds and 1,000 ml jars for bulk, logging RH in a simple spreadsheet for consistency.
Labeling and long-term storage
Storage: Store jars in a cool, dark place at 15–20°C; avoid direct light and temperature swings.
Suggest building a curing checklist and an RH log template for repeatability. When executed methodically, this curing routine consistently preserves potency and flavor over months of storage.
Storing, Labeling, and Maintaining Potency Over Time
Store cured flower and seeds with the same objective: slow chemistry, stable environment, clear provenance. For cured cannabis, maintain cool temperatures, dark conditions, and stable relative humidity to slow terpene and cannabinoid degradation. For seeds, prioritize cool, dry, and dark conditions to preserve germination viability. Prerequisites
Digital hygrometer/thermometer with logging or spot-check capability.
Opaque, airtight containers (glass jars with silicone seals or vacuum-sealable Mylar bags).
Labeling system (printed labels or a small thermal printer) and a simple tracking spreadsheet or database.
Storage schedule and environmental targets
For long-term seed storage: refrigerate at 4–10°C in 30–40% RH with desiccant; check quarterly for moisture ingress and viability tests annually.
Short-term transport: move in a cool, padded container and return to controlled storage within 24–48 hours.
Labeling convention and metadata to record
Bold: Strain/Genetics — include breeder name and phenotype notes.
Bold: Harvest date — YYYY-MM-DD.
Bold: Cure completion date — when stable RH achieved.
Bold: Moisture/RH at pack — record measured RH.
Bold: Storage location — fridge ID or vault number.
Bold: Notes — any visible issues, terpene profile, potency test results.
When to recondition vs. discard
Discard: visible mold, off-odors (musty/rot), or irreversible cannabinoid degradation (very brown/crumbly bud).
If in doubt, perform a small lab or rapid test; conservative disposal protects consumers and reputation. Periodic checks schedule
Monthly for first 3 months: smell, RH, and seal integrity.
Quarterly thereafter: full inspection and spot potency testing.
Annual seed germination test for stored seeds.
Practical references and tools
For timing and staged harvest guidance, see the drying and curing timeline overview at Thunderbird Disco — https://www.thunderbirddisco.com/blog/when-to-harvest-cannabis-drying-trimming-curing
Careful labeling and a disciplined check schedule preserve both potency and provenance, and they make compliance, quality control, and customer trust far easier to manage. When this system is in place, handling decisions become routine rather than reactive.
Troubleshooting Common Issues
Mold, overdry buds, pests, and aroma loss are the most frequent problems after harvest — each one has clear signs and corrective steps that can salvage quality or tell you when to discard product for safety. Read symptoms quickly, act decisively, and document changes so future harvests improve.
Identifying mold vs. trichome sheen
Mold looks like fuzzy, powdery growth with irregular patches and can be gray, white, or brown; trichomes are crystal-like glands that glint uniformly over buds. Inspect under a 10–30x loupe and smell: moldy flowers often have a musty, damp odor versus the sharp, terpenic scent of healthy cured cannabis.
Smell cue: mold = damp/musty; healthy = citrus/pine/earthy terpenes.
Tactile cue: moldy areas can feel slimy or powdery; trichome-rich buds are sticky and dry-to-the-touch.
Immediate containment and drying adjustments for suspected mold
Quarantine the room and increase ventilation without blowing directly on buds. Aim for 60-65°F and 45-55% RH for the room.
Accelerate drying carefully: use a gentle dehumidifier or increase airflow with a fan placed to move air past, not onto, hanging buds. Avoid rapid oven-like drying. Expected outcome: slow moisture reduction over 24–72 hours reduces active mold growth.
If only a small subset shows contamination, consider harvesting and re-curing the rest while discarding heavily affected buds.
Rehydration steps for overdry buds
Damp paper towel method (short-term): place a small moist towel in a sealed container separated by a mesh rack for 6–12 hours — monitor closely to avoid new mold.
Expected outcome: buds regain pliability and terpene aromatics improve within 24–72 hours.
Fixes for uneven curing
Re-cure: place mixed lots into jars with a 62% humidipack and burp twice daily for 3–7 days, then reduce to once every 2–3 days.
Practical example: a harvest showing dry outer popcorn buds and dense moist colas can be normalized in 5–10 days with re-sorting and staged humidification.
Pests and aroma loss
Aroma recovery: rehydration and gentle re-cure often restore lost terpenes; oxidation from light/heat is irreversible.
When to discard for safety
Discard any buds with widespread fuzzy growth, a distinctly moldy smell, or visible mycelial networks — these are unsafe for inhalation. Err on the side of caution; consumer safety takes precedence. Further reading on drying and curing best practices is available in industry harvesting guides such as the GrowMag drying and curing overview (https://growmag.com/feature/harvest-101-2/). Understanding these steps reduces loss and preserves terpene-rich, market-ready product.
Tips for Success and Pro Tips
Maximize aroma, potency, and consistency by treating harvest and cure as a controlled, repeatable process rather than a one-off task. Keep a dedicated harvest and cure journal for each strain and phenotype, record precise harvest dates, trichome observations, drying temperature and humidity, jar weights and hygrometer readings, and results from small sample jars. Test small jars from the same harvest at staggered cure intervals to determine the sweet spot for terpene retention versus cannabinoid maturation. These practices turn subjective “smell and feel” judgments into data-driven decisions that improve outcomes every cycle. Practical steps to capture and preserve terpenes and cannabinoids
Dry gently, 18–21°C and 45–55% RH: Rapid drying denatures terpenes; aim for a slower finish that leaves stems pliable but not damp.
Cold-curing for volatile terpenes: After initial dry, cure a subset of buds at 2–6°C for 1–4 weeks to lock in delicate volatiles—use vacuum-sealed jars and monitor for condensation.
Minimize handling: Trim with sharp shears and avoid excessive squeezing; protect trichomes by working under indirect light and cold conditions.
Measurement, tools, and routine
Small-sample testing: Cure three identical 60–90 g samples and open one weekly to compare aroma and harshness.
Standard operating notes: Use a simple template in your journal: strain/phenotype → harvest date → dry RH/temp → jar RH → cure days → sensory notes.
Troubleshooting common issues
Flattened aroma: If aroma is muted post-cure, try a brief cold-curing phase or lower jar RH to 58–60% for two weeks.
Inconsistent potency between phenotypes: Compare journal entries to isolate variables—nutrients, microclimate, and harvest timing are usual culprits.
Use feminized seed harvest planning to align phenology with your cure calendar; note that seeds from reliable suppliers with germination guarantees reduce variability at the start of the cycle. Suggested assets: a harvest & cure checklist, a small-sample test log, and a calibrated hygrometer purchasing guide. Understanding these practices reduces variance between runs and elevates both aroma and potency across harvests.
Safety, Legal, and Ethical Considerations
Never assume harvesting or possession laws are uniform; confirm legal status where you live before the first cut. Local statutes determine whether you can legally harvest, how much you may possess, where you may store it, and what documentation or licensing is required. Conducting a simple legal check up front prevents criminal exposure and protects neighbors and property owners.
Verify jurisdiction rules: Check municipal, county, and state/province laws for possession limits, allowable plant counts, and permitted cultivation locations.
Confirm documentation needs: Some areas require medical cards, registration, or permits for personal grows; have those ready before harvesting.
When unsure, consult a lawyer: If your situation is borderline (rental agreements, multi-unit housing, cross-border transport), get legal advice.
Safe storage and labeling
Environmental control: Maintain 60–65% relative humidity and 18–21°C (64–70°F) temperature for long-term storage to preserve terpenes and cannabinoids. Use a calibrated hygrometer and Boveda-style humidity packs when needed.
Discrete labels: Use non-descriptive labels in sensitive jurisdictions — include harvest date, strain code, and test batch rather than the word cannabis if discretion is required.
Disposal of contaminated or illegal product
Never compost or flush: Do not introduce contaminated plant material into composts, public waste, or drains where it could enter the environment.
Document the process: Photograph and log disposal steps when required by local rules or landlord agreements.
When to involve medical or legal professionals
Legal escalation: Retain counsel before responding to enforcement actions, searches, or landlord notices.
Practical checklist to keep on harvest day
Refer to harvest timelines and drying/curing guidance from established how-to resources such as Harvesting, Drying, Trim and Curing guidance and practical trimming methods in Harvest 101 (GrowMagazine). Understanding these safety, legal, and ethical practices reduces risk and preserves product quality while keeping neighbors and teams protected. When these steps are handled proactively, teams can focus on producing consistent, compliant results.
Conclusion
Cloudy trichomes and limp colas are avoidable when timing and technique align with plant cues. Remember to confirm trichome color before cutting, perform a final flush if nutrients still show, and begin low-temperature drying within 24–48 hours to preserve terpenes. The walkthrough above — from pre-harvest checks and final flushing to careful manicuring, steady drying, and patient jar burping — turns an uncertain harvest into repeatable quality. For example, growers who waited for predominantly cloudy trichomes and then cured for four weeks reported markedly smoother smoke; another follow-through showed that consistent 60–65°F drying preserved aroma while reducing mold risk.
If you’re wondering when to harvest, start with trichome inspection rather than calendar dates; if you ask how long to cure, aim for a minimum of two weeks, with best results often at four to eight weeks; for storing, keep jars cool, dark, and properly labeled. As GrowMag demonstrates, careful trimming and proper storage materially affect potency and flavor. For professional-grade seeds and germination support that match these methods, consider resources at The Seed Connect (seed selection and support).
Next steps: inspect trichomes tonight, set a controlled drying space, and plan a minimum two-week cure with scheduled burping. These three actions will turn harvest anxiety into consistent, shelf-stable yields.