

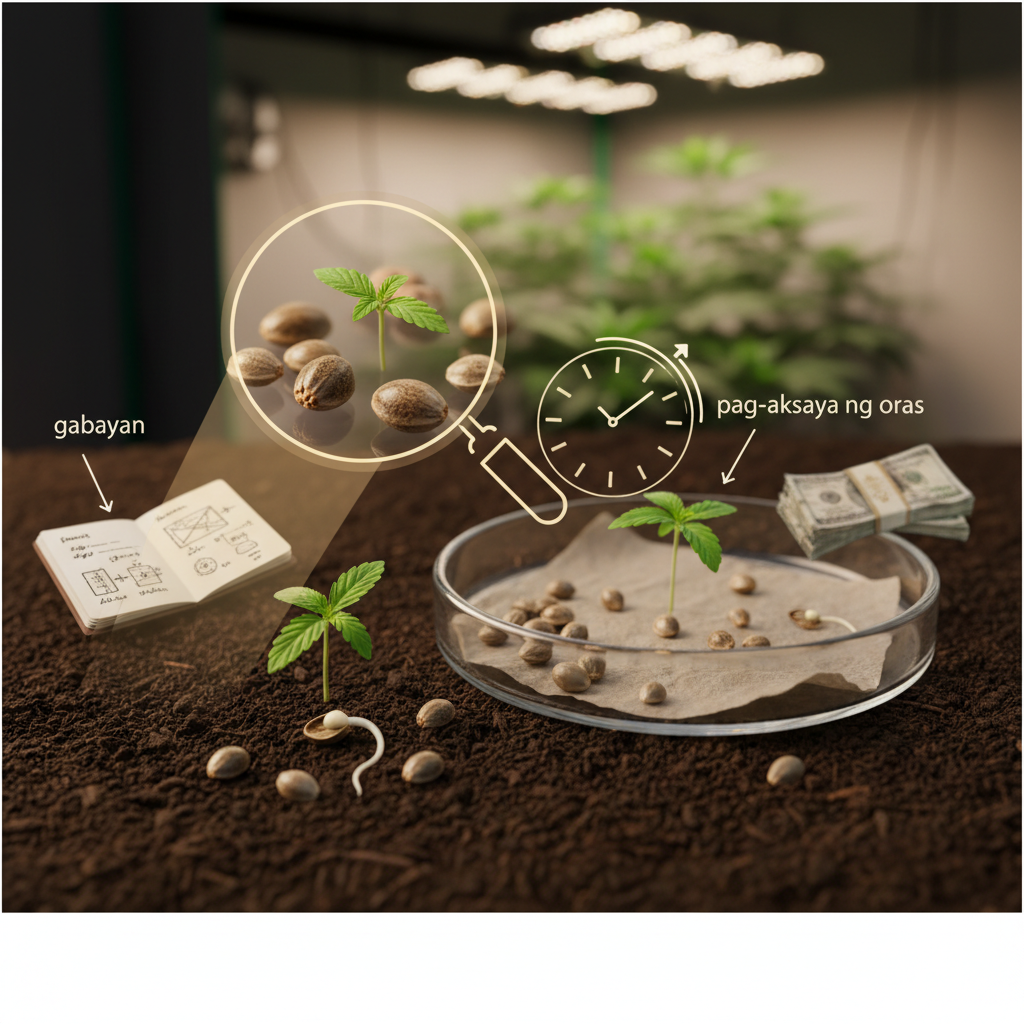
Many cultivation plans get stuck before making a key decision: which seeds to trust. Growers often experience unpredictable germination, unstable genetics, and disappointing yields. These issues arise because seed selection is often treated as an afterthought instead of a key decision. Choosing the right cannabis seeds changes the economics of a grow room, reduces wasted time, and makes compliance and quality control far simpler.
Let’s dive into evaluating seeds based on genetics, viability, and supplier integrity; you’ll see how these factors directly impact your harvest predictability and cost per gram. Picture a medium-scale grow that shifts from mixed, unknown genetics to a consistent breeder line — harvest variability drops and processing becomes far more efficient.
- How genetic stability impacts cannabinoid and terpene consistency
- Practical germination checks that separate good seeds from poor ones
- Supplier vetting: what to require and what to avoid
- Breeder types and how they affect yield, THC/CBD profiles, and risk
- Simple post-purchase tests that save weeks and dollars
The sections ahead combine practical checks, supplier scrutiny, and cultivation implications so selection becomes a strategic advantage rather than a gamble. Read on to select seeds that align with production goals and regulatory realities.
> Key Takeaway: ## How Cannabis Genetics Affect Your Grow
Genetics set the limits for your grow, impacting potency, flowering time, plant structure, disease resistance, and crop consistency.
How Cannabis Genetics Affect Your Grow
Genetics set the limits for your grow, impacting potency, flowering time, plant structure, disease resistance, and crop consistency. Choosing the right lineage helps you set a clear foundation for your grow; understanding parent strains and breeder selection leaves less to chance.
Growers face a daily issue of phenotype variability. Even identical seed packets can grow plants with significant differences in stretch, terpene expression, and resin production. This happens unless the genetics are stabilized or carefully chosen.
Breeding lineage and what it implies
- Lineage clarity: Well-documented parentage signals expected traits such as typical flowering time, average THC (
%) ranges, and dominant terpene profiles. * Stability vs. novelty: Stabilized lines offer uniformity across a batch; experimental hybrids prioritize novel traits at the cost of predictability.
- Risk signals: Wide, mixed lineage often predicts higher phenotype variability and more culling during selection.
Phenotype variability and canopy management 1., “3–4 distinct pheno types”); plan canopy layout and pruning accordingly. 2.
Match training to genetics: tall, sativa-leaning phenos need topping and SCROG; compact, indica-leaning pheno respond better to LST and defoliation. 3. Select for uniformity in commercial grows: when uniform harvest timing and consistent bud size matter, prioritize stabilized, feminized genetics or clones.
Breeder notes, lab tests and due diligence
- Breeder notes: Read these for dominant traits, grower tips, and common pheno descriptions — they explain what to expect and which traits are outliers.
- Lab testing:
THC/CBDassays and pesticide screenings validate potency claims and safety; look for COA availability. - Germination guarantees & support: Seed sources that back seeds with germination guarantees and grower support reduce financial risk when genetics are uncertain.
Practical examples
- Example 1 — Stabilized High-THC Indica: Predictable 8–9 week flower, uniform plant height, 90% similar phenos — low labor and synchronized harvest.
- Example 2 — Experimental Sativa Hybrid: Two dominant phenos (tall resinous / short high-terpene); requires selective culling and staggered harvest windows.
> Phenotype variability can increase labor and reduce batch consistency if genetics aren’t matched to the operation’s tolerance for risk.
Understanding strain lineage and phenotype behavior lets teams set realistic timelines, staffing, and post-harvest expectations; growers who align genetics with their workflow consistently see higher operational efficiency and product consistency.
> Key Takeaway: ## Seed Types: Feminized, Regular, Autoflower — Pros and Cons
Feminized, regular and autoflower seeds serve distinct grower goals: maximize usable buds, preserve genetics or speed production and stealth. Choosing the right seed type depends on what…
Seed Types: Feminized, Regular, Autoflower — Pros and Cons
Feminized, regular and autoflower seeds serve distinct grower goals: maximize usable buds, preserve genetics or speed production and stealth. Choosing the right type of seed depends on what you value most: yield efficiency, breeding options, or how long the growing cycle will be. Each type has trade-offs in reliability, cost, and growing method.
Feminized seeds
- What they are: Seeds bred to produce only female plants so every seed has flowering potential.
- Why growers use them: Eliminates the need to identify and cull males; higher space and nutrient efficiency.
- Example practical note: Commercial cultivators and first-time home growers favor feminized seeds for predictable canopy planning.
Regular seeds
- What they are: Natural male and female seeds used when breeders want pollen or to maintain genetic diversity.
- Why breeders choose them: Essential for crossing, stabilizing phenotypes and seed production.
- Example practical note: Keep ~10–20% extra plants to account for males if growing regulars for bud harvest.
Autoflower seeds
- What they are: Varieties that switch to flowering by age (typically ~3–4 weeks) rather than photoperiod — often derived from Cannabis ruderalis crosses.
- Why they matter: Fast cycles (often 8–12 weeks seed-to-harvest) and compact size for discreet grows.
- Example practical note: Ideal for multiple outdoor harvests per season or small indoor stealth setups.
Practical considerations and cultivation tips
- Space and planning: Feminized seeds maximize canopy use; autoflowers require separate nutrient/light plans because veg time is short. 2.
Breeding needs: Use regular seeds when you intend to breed or preserve landrace traits. 3. Cost vs.
yield: Feminized seeds often cost more per unit but reduce wasted space; autoflowers may yield less per plant but shorten time-to-harvest.
Side-by-side comparison of feminized, regular, and autoflower seeds to help growers select based on goals
| Seed Type | Typical Lifecycle | Best For (Use Cases) | Pros | Cons |
|---|---|---|---|---|
| Feminized | 10–16 weeks seed-to-harvest (photoperiod) | Yield-focused growers, commercial runs | All female plants, efficient canopy use, predictable yields | More expensive, not for breeding |
| Regular | 10–16 weeks (photoperiod) | Breeders, genetic preservation | Genetic diversity, required for crosses, cheaper seed price | ~50% males unless sexed, more work |
| Autoflower | 8–12 weeks (age-triggered) | Fast cycles, stealth grows, multiple outdoor harvests | Fast harvests, compact, less light management | Lower yield per plant, less stretch, can be sensitive to nutrients |
| Fast-flowering variants | 7–10 weeks | Speed-focused growers | Very short cycles, quick turnover | Often lower final size, sometimes reduced potency |
| Ruderalis crosses | 8–12 weeks | Beginners, small-space growers | Naturally autoflowering genetics, hardy | Typically lower THC in pure ruderalis; used for hybrids |
> Key Takeaway: ## How to Vet Seed Suppliers and Breeders
Vetting suppliers helps ensure quality. Look for strong reputations, clear genetics, and solid guarantees to tell apart reliable breeders from those to avoid. Focus on verifiable claims (lab…
How to Vet Seed Suppliers and Breeders
Vetting suppliers helps ensure quality. Look for strong reputations, clear genetics, and solid guarantees to tell apart reliable breeders from those to avoid. Focus on verifiable claims (lab tests, clear lineage) and written buyer protections (specific germination terms, return windows). Practical vetting reduces risk, saves time, and protects crop outcomes.
What to check and how to score vendors
- Reputation: Search multiple review channels and community forums; consistent, older presence usually indicates reliability. Transparency: Demand
lineagedetails and lab reports; vague descriptors like “strong genetics” are a red flag. Guarantees: Prefer explicit, written germination guarantees with replacement or refund terms and reasonable claim windows.
- Customer service: Responsive, documented support and clear shipping/refund policies reduce friction for cross-border orders. Packaging & shipping: Discreet packaging and clear tracking reduce loss; look for carriers and insurance options.
Step-by-step vetting process
- Visit supplier site and locate lab reports or COAs; save PDFs for records. 2.
Cross-check customer reviews on at least three independent forums or marketplaces. 3. Confirm germination terms: required conditions, claim window, proof required.
- Ask direct questions to support (turnaround time, photos of parents, stability of phenotype). 5.
Score each supplier across the checklist below and prioritize those scoring 4–5.
Practical examples
- A vendor posting third-party
COAsfor THC/CBD and contaminant panels demonstrates lab-verified quality. - A seller offering a “90-day germination guarantee — replacement seeds only” is preferable to vague promises.
- Active replies on community threads and a documented return policy indicate operational reliability.
Feature matrix to score and compare seed suppliers on trust signals and buyer protections (best seed suppliers germination guarantee)
| Supplier Feature | Why It Matters | What to Look For | Quick Score (0-5) |
|---|---|---|---|
| Lab Certificates (THC/CBD/Contaminants) | Verifies potency and safety | Third-party COAs, batch numbers, PDF download | 4 |
| Germination Guarantee | Protects buyer investment | Written % or replacement policy, claim window (days) | 4 |
| Genetics Transparency | Predictability of phenotype | Full lineage, parent photos, phenotype stability notes | 3 |
| Shipping / Discreet Packaging | Reduces loss and legal risk | Tracking, insured options, plain packaging | 4 |
| Customer Reviews & Reputation | Real-world performance signal | Multi-site reviews, forum threads, longevity >3yrs | 4 |
Understanding these vetting principles accelerates confident purchasing decisions and reduces downstream surprises when starting a grow. When applied consistently, this approach makes supplier selection a repeatable, low-risk process.
Legal & Ethical Considerations When Buying Seeds Globally
> Key Takeaway: Buying cannabis seeds from other countries requires knowing two legal situations: the law where the seller is located and the law where the buyer will receive and use the seeds. Many countries permit the sale and possession of seeds but still…
Buying cannabis seeds from other countries requires knowing two legal situations: the law where the seller is located and the law where the buyer will receive and use the seeds. Many countries permit the sale and possession of seeds but still criminalize cultivation; others ban any importation. Treat seeds not as neutral merchandise but as items that can trigger customs, regulatory, and criminal processes.
Laws and practical risks to assess
- Legal status mismatch: Some jurisdictions allow
possessionbut prohibitcultivation— owning seeds may be lawful while germinating them is not. - Customs interception: International shipping is routinely inspected; packages containing seeds can be seized, destroyed, and reported to local authorities.
- Civil and criminal exposure: Penalties range from fines and forfeiture to criminal charges, depending on volume, intent, and local statutes.
- Regulatory compliance: Agricultural and biosecurity rules sometimes restrict seed import to prevent pests, diseases, or non-native genetics entering ecosystems.
- Ethical sourcing: Buying from illicit suppliers supports black-market networks; choose transparent vendors with traceable provenance and clear shipping policies.
A simple risk-assessment workflow
- Check local statutes — read the exact wording on
possession,import,sale, andcultivation. - Contact customs or a legal advisor — ask whether personal seed imports are allowed and what documentation is required.
- Verify seller policies — require explicit shipping guarantees, discreet packaging, and compliance statements.
- Prefer domestic sourcing when unsure — buying from a local licensed supplier reduces interception risk and legal exposure.
Practical examples
- A grower in Country A found seeds legal to buy but illegal to germinate; they switched to purchasing from a licensed domestic nursery that sells clone plants under a medical license.
- Buyers importing small lots without paperwork had packages detained at customs and received fines; switching to local suppliers eliminated the problem.
Choosing a compliant supplier
Prioritize vendors who publish clear shipping policies, declare origin, and offer a germination guarantee tied to compliant delivery. For many growers, reputable sellers with expert support and transparent practices — including domestic options like licensed nurseries or licensed online suppliers — are the safest path.
Understanding and acting on these legal and ethical factors reduces operational risk and protects both the grower and the larger community. When compliance is built into purchasing decisions, teams can focus on cultivation quality rather than regulatory exposure.
How to Test and Verify Seed Quality (Germination, Visual, Float Test)
> Key Takeaway: To check seed quality, start with simple tests that easily help you spot good genetics versus bad lots. The best way to test seeds at home is the paper-towel germination test.
To check seed quality, start with simple tests that easily help you spot good genetics versus bad lots. The best way to test seeds at home is the paper-towel germination test. This method simulates the moisture and warmth seeds need to germinate. Visual inspection and the float test can quickly sort seeds but won’t provide definite answers.
A sensible workflow combines a visual pre-check, a quick float triage only when needed, and a controlled paper-towel germination run for any seed batch destined for the grow tent.
Breeders and retailers that offer a germination guarantee (for example, our offerings at TheSeedConnect) often recommend the same approach: visualize → triage → verify with moisture and warmth.
- Paper-towel germination: Step-by-step
- Moisten two paper towels with distilled or filtered water; squeeze out excess.
- Place 10 seeds spaced on one towel, fold, then cover with the second towel.
- Seal in a plastic bag or place in a shallow container; keep at
21–25°C(70–77°F). - Check twice daily for moisture; roots often appear in 24–96 hours.
- Transfer immediately to medium when radicle reaches 1–2 cm.
Visual inspection: look for hardness (firm to slight thumb pressure), color (mottled brown/grey with a darker seam), and sheen (dull sheen suggests maturity). Float test: place seeds in room-temperature water for 1–4 hours. Floating seeds often indicate low density, but some viable seeds float briefly and sink later; treat float test as indicative rather than conclusive.
Practical tips: avoid prolonged soaking (>24 hours) to prevent hypoxia; always label tests with strain and date; run controls using seeds known to germinate to validate conditions. For commercial or high-value batches, test 20–30 seeds per lot to estimate germination percentage statistically.
Expected germination timelines and success rates under common testing methods
| Test Method | Expected Timeline | Success Rate Range | When to Repeat or Contact Seller |
|---|---|---|---|
| Paper-towel germination | 24–96 hours (radicle visible) | 70–98% (under ideal conditions) | If <70% after 7 days, repeat test; contact seller if persistent |
| Direct soil germination | 2–10 days (sprout emergence) | 60–95% (depends on medium) | If <60% after 14 days, repeat with paper-towel; contact seller |
| Pre-soak + paper-towel | 12–72 hours soak then 24–96 hours to radicle | 75–98% (good for older seeds) | If <75% after 7 days, repeat; contact seller for warranty |
| Float test | 1–4 hours observation | Not reliable (varies widely) | If many float and fail paper-towel, contact seller |
Understanding these checks speeds decision-making and protects grow schedules; when results are borderline, repeat under controlled conditions before discarding genetics or filing a claim. This process reduces wasted time and ensures valuable seeds reach their potential.
Storage, Handling, and Long-Term Seed Viability
> Key Takeaway: Long-term viability is less about mystery and more about having a consistent environment: it needs to be cool, dark, and dry. Temperature, relative humidity, and stability are the three variables that determine how long a seed remains capable of…
Long-term viability is less about mystery and more about having a consistent environment: it needs to be cool, dark, and dry. Temperature, relative humidity, and stability are the three variables that determine how long a seed remains capable of germinating. Avoiding thermal and humidity cycling prevents internal condensation, fungal colonization, and the slow metabolic breakdown that kills viability over time.
Best storage practices and setup
- Temperature control: Store seeds at stable, low temperatures —
4°C(refrigerator) is common for multi-year storage, while short-term storage at15–20°Cworks for under a year. Humidity management: Maintain~30–40% RHin the storage micro-environment. Desiccant packets (silica gelwith humidity indicator) are simple and reliable.
- Light exclusion: Use opaque containers; UV and visible light accelerate aging. Stable environment: Avoid places with daily temperature swings (near doors, windows, heating vents). * Labeling: Label every container with strain name, batch number, and packing date to preserve traceability and the germination guarantee window.
- Prepare airtight containers (glass jars with gasket seals or high-barrier Mylar bags).
- Add an appropriate amount of desiccant and a humidity indicator card.
- Insert clearly labeled seed packets with dates and genetic notes.
- Place containers in a stable cold location (refrigerator or dedicated seed cooler), avoiding frequent opening.
Practical handling guidance: always open storage in a low-humidity room, handle seeds with clean, dry hands or tweezers, and minimize how often a packet is opened. Repeated exposure to ambient air and warmth is the single biggest killer of long-term viability. When transporting or shipping seeds, insulate them against temperature spikes and cushion to prevent physical damage to the seed coat.
> “Cool, dry, stable conditions slow metabolic degradation in seeds.”
Example: a grower stored seeds in 4°C glass jars with indicator silica for five years and retained >70% germination rates compared with the same strain stored at room temperature, which dropped below 40% in the same period. For peace of mind, align storage practices with supplier guarantees — Theseedconnect offers a germination guarantee and expert support, making it straightforward to match on-farm procedures to supplier recommendations. Implementing these steps preserves both genetic value and future flexibility for breeding or commercial runs.
Understanding and applying these practices reduces loss and keeps seed inventories ready when planting windows open.
Buying Strategy: Budgeting, Sizing an Order, and Sample Testing
Begin by testing genetics on a small scale and create a simple cost model. This way, your decisions are based on actual results, not assumptions. A smart buying strategy combines a short sample phase for testing (looking at phenotype, vigor, and terpene profile) with a clear calculation of unit costs. This should include realistic germination rates and a budget for replacing any failed seeds.
Practical rules of thumb and considerations
- Start small: order a 5–10 seed sample or a single small pack to evaluate phenotype stability and grower fit before committing to bulk. Calculate realistic unit cost: use
cost ÷ (seed count × expected germination rate)to estimate cost per viable plant. Factor hidden costs: include shipping, failed runs, and labor when sizing orders for commercial planning.
- Use sample packs to test consistency: evaluate 6–8 plants for phenotype spread; more than that is unnecessary for an initial read. Scale with confidence: move to breeder bulk when at least two consecutive grows show stable traits.
- Budgeting step-by-step
- Set a target number of final plants (e.g., 20 flowering females).
- Choose conservative germination and sex ratios (autoflowers:
expected_germ = 0.85; feminized photoperiod:expected_germ = 0.80). - Order seeds =
ceil(target_plants / expected_germ) × safety_factor(1.05–1.2). - Re-evaluate after the sample run; if phenotype match is strong, scale to bulk with a germination guarantee.
Illustrative cost breakdown for sample packs vs. bulk orders and expected per-plant cost after germination rates (cannabis seed cost per plant bulk vs sample)
| Order Type | Typical Seed Count | Average Price Range | Expected Germination Rate | Estimated Cost per Viable Plant |
|---|---|---|---|---|
| Sample pack | 5 seeds | $15–$30 | 70–90% | $3.33–$8.57 |
| Small pack | 10 seeds | $35–$60 | 75–88% | $4.24–$8.00 |
| Bulk order | 50 seeds | $150–$300 | 80–90% | $3.33–$7.50 |
| Breeder bulk discount | 100 seeds | $250–$500 | 82–92% | $2.72–$6.10 |
| Wholesale lots | 500+ seeds | $900–$2,000 | 85–92% | $2.30–$4.71 |
Practical examples: a craft grower testing three varieties uses three 5-seed samples (total $60) to choose one strain, then orders a 50-seed bulk once two grow cycles confirm stability. A commercial operator runs a 20-plant pilot, measures actual germ rates and runtimes, and then negotiates breeder bulk pricing with a germination guarantee.
Understanding these principles helps teams move faster without sacrificing quality. When budgeting and sizing orders this way, growers control risk while reducing long-term cost per viable plant.
Troubleshooting, Red Flags, and When to Ask for a Replacement
Start by treating a failed germination or poor seed performance as a process, not a rush decision. Documenting conditions and following an escalation workflow preserves your options and usually speeds a successful resolution with the seed supplier.
Common early red flags: seeds that are brittle or crushed, visible mold, a germination rate far below expectations, or inconsistent growth across an otherwise identical batch. These signs warrant careful documentation before discarding anything.
Escalation workflow (step-by-step)
- Immediate documentation: Photograph the unopened package, all labeling (strain, batch/lot number, date received), and the seeds themselves on a neutral background within 24–48 hours of detecting the issue. 2.
, soaked for 24 hours, moved to 72°F germination chamber). Include photos of your setup. 3.
Attempt standardized retest: Run a controlled retest of 5–10 seeds using a widely accepted method (paper towel or peat pellets), noting step-by-step actions and outcomes over 7–14 days. 4. Contact seller with concise report: Send a single message with the documentation bundle (photos + environment log + retest results) and a clear ask—replacement, refund, or technical guidance—while citing the seller’s claim window.
- Escalate if necessary: If first-contact support is unresponsive within the stated timeframe, follow the seller’s escalation protocol (support ticket, then manager). Keep all correspondence timestamps.
Documentation checklist (what to include)
- Photos of packaging: unopened box + labels + batch/lot number. Close-ups of seeds: show size, damage, discoloration. Germination timeline: dates, methods used, and daily observations.
- Environmental logs: temperatures, humidity, lighting, and substrate used. Communication log: copies of emails/messages and timestamps. Outcome summary: number tested vs.
number germinated, and any abnormalities.
Examples that speed resolution: a timestamped photo showing mold in the sealed packet plus a 7-day retest result often triggers an immediate replacement; a clear log demonstrating correct technique and conditions makes technical support useful instead of defensive.
Including germination-guarantee details and expert-support options in initial contact reduces friction and shortens resolution time. Understanding and following these steps saves time and preserves access to replacements when warranted.
Conclusion
By now it should be clear which choices move a cultivation plan from wishful thinking to predictable results: favor stabilized genetics, validate germination with small tests, and design environmental controls that match the seed’s profile. Growers who prioritized those steps reported consistently higher germ rates and more uniform canopies; commercial operations improved downstream trimming and drying efficiency simply by sourcing stable, documented genetics, while home growers avoided a season of loss by testing a single tray before committing to a full run.
- Choose stabilized or proven strains with clear lineage and germination guarantees.
- Test small batches first, record germination rates, and adjust media or moisture accordingly.
- Standardize environment metrics (temperature, humidity, light schedule) to match seed needs.
Next steps: run a controlled germination test this week, log results in a simple spreadsheet, and if sourcing new genetics, compare supplier guarantees and customer feedback. For professional seed sourcing and germination support, consider The Seed Connect’s seed catalog and germination guarantees at The Seed Connect — Seed Catalog & Support (https://theseedconnect.com). Taking these concrete actions turns uncertainty into repeatable outcomes and keeps the next season firmly on schedule.