

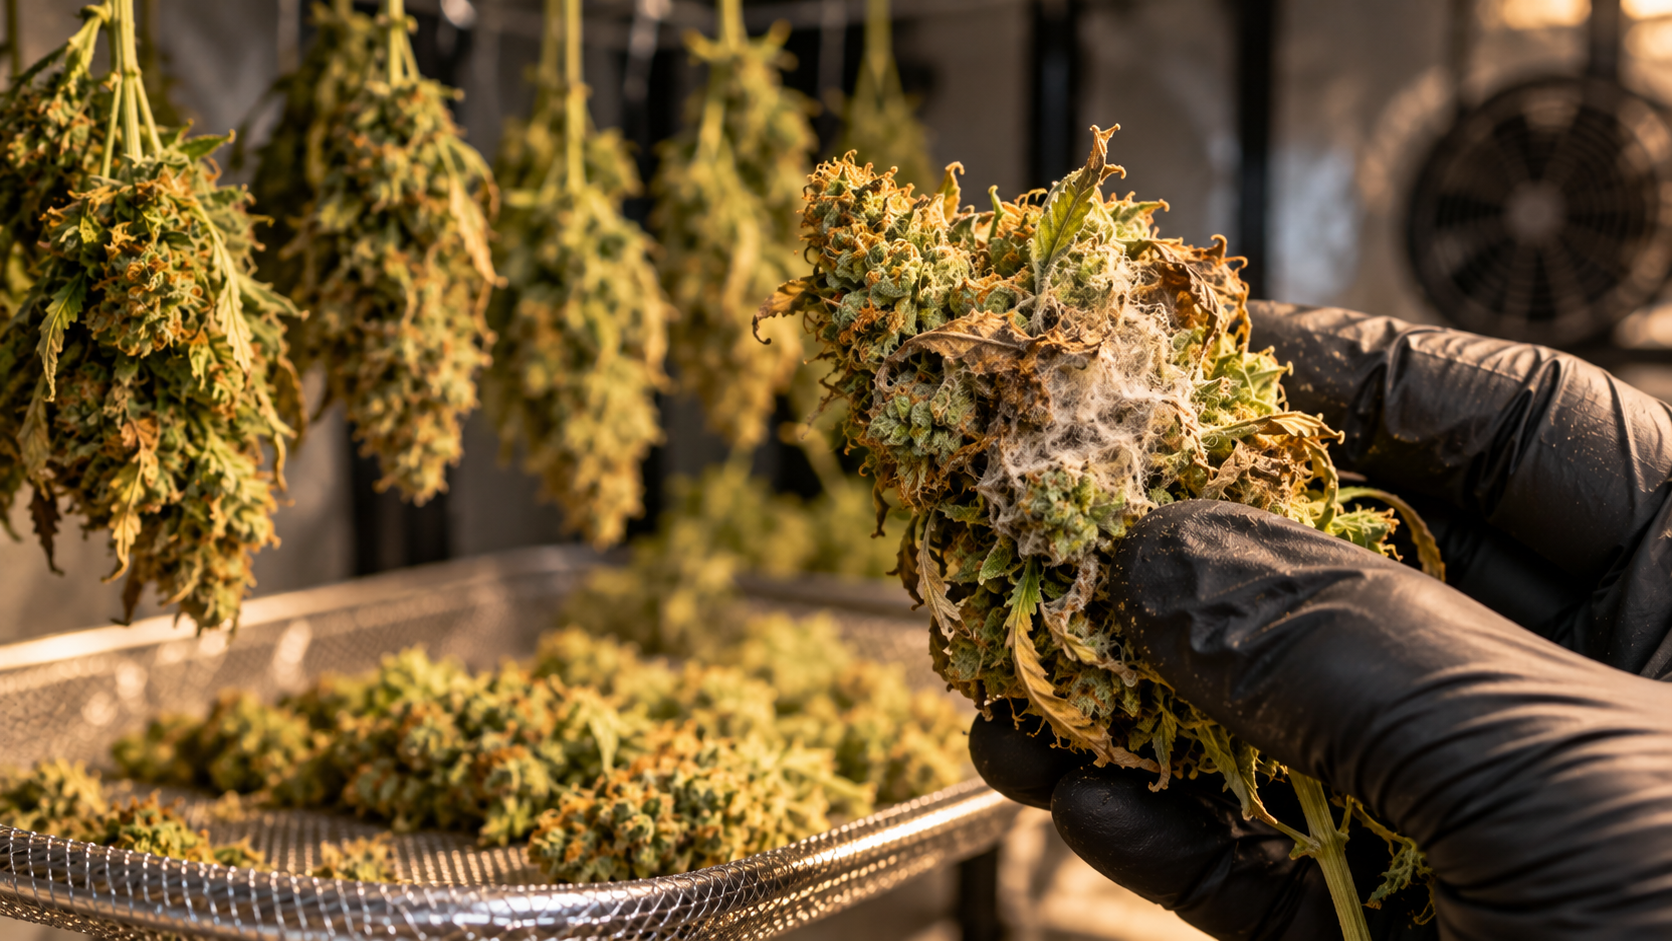
Finding bud mold after harvest can make your stomach drop, especially after spending months getting your plants to harvest.
But don’t panic and throw everything away just yet.
First, separate any suspicious buds from the rest of your harvest. Look for white or gray fuzzy growth, brown or gray material inside dense buds, or an unusual musty smell. If a bud is visibly moldy, don’t smoke, vape, or cook with it. Discard it and carefully inspect the flower that was drying or stored nearby.
One moldy bud doesn’t automatically mean your entire harvest is ruined. What matters now is identifying the problem quickly, checking the remaining flower, and fixing the conditions that allowed mold to develop.
Key Takeaway:
- Separate suspicious buds immediately. Mold can continue developing after harvest when moisture remains trapped in flower and drying or storage conditions favor fungal growth.
- Don’t try to rescue visibly moldy cannabis for consumption. Removing the fuzzy section doesn’t guarantee that the rest of the flower is free from contamination.
- Check the rest of your harvest and your drying conditions. Excess moisture, poor air exchange, dense buds, and sealing flower too early can create conditions where mold becomes a problem.
Table of Contents
What Does Bud Mold Look Like After Harvest?
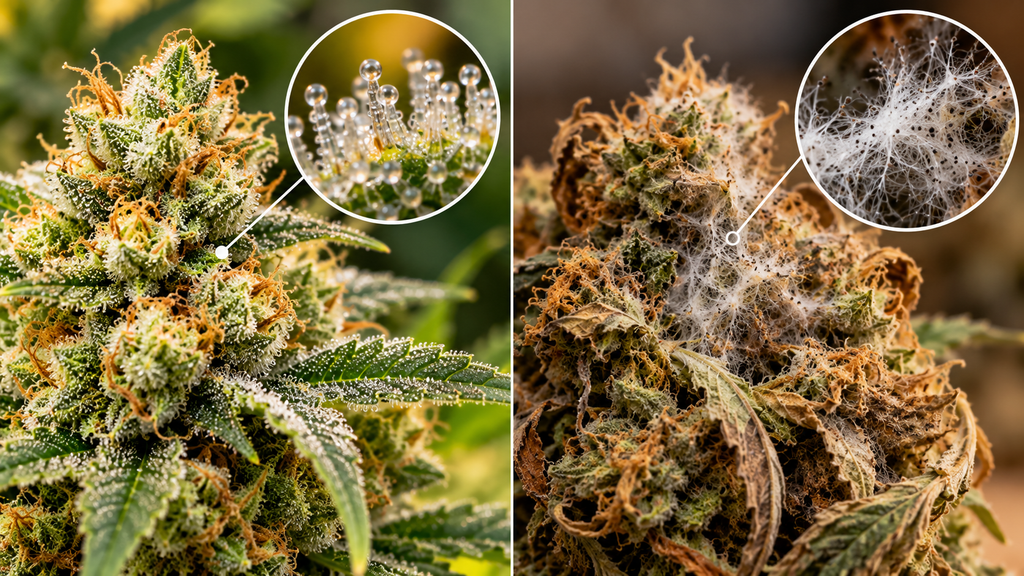
Not every white spot on cannabis is mold.
Healthy cannabis buds naturally contain trichomes—the tiny, crystal-like structures that can make mature flower look frosty. If you’re new to growing, those crystals can sometimes cause unnecessary concern.
Mold usually looks different.
Here are some signs worth investigating:
| What You Notice | What It Could Mean |
|---|---|
| White or gray fuzzy patches | Possible mold |
| Gray/brown material inside the bud | Possible bud rot |
| Musty or mildew-like odor | Possible microbial growth |
| Unusually soft or damp areas | Moisture problem; inspect carefully |
| Fine webbing around flower | Could indicate pests rather than mold |
| Sparkling, evenly distributed crystals | Likely normal trichomes |
The biggest warning sign is fuzzy or web-like growth that doesn’t look like the surrounding trichomes.
Dense buds deserve extra attention. Mold can develop internally before becoming obvious from the outside.
Gently inspect suspicious flowers in good lighting. If the outside looks questionable, check inside the dense portion rather than assuming the flower is healthy because most of its surface looks normal.
And don’t rely entirely on smell. A musty odor can be a warning, but visual inspection matters too.
What Should You Do If You Find Mold After Harvest?
If you’ve just discovered mold, this is the section that matters most.
1. Separate the Moldy Buds
Move visibly affected flower away from the rest of your harvest.
Avoid repeatedly handling or shaking suspicious buds around unaffected cannabis.
If several branches are hanging close together and one shows obvious mold, inspect the neighboring flowers carefully.
2. Inspect the Rest of Your Harvest
Don’t assume one moldy bud means everything is ruined—but don’t assume everything else is safe either.
Check buds that:
- were touching the affected flower
- were drying close to it
- are particularly large or dense
- still feel unusually damp
- were stored in the same container
Break open a few of the larger buds and inspect the center.
This is particularly important because the outside can sometimes feel relatively dry while the interior retains more moisture.
3. Discard Visibly Moldy Flower
This is where some internet advice becomes risky.
You may see people recommending that you simply cut away the moldy section and use the rest.
That’s not something we’d recommend.
Don’t try to rescue visibly moldy buds by:
- cutting away only the visible mold
- washing the flower
- microwaving it
- baking it
- turning it into homemade edibles
- making a home extraction from it
If flower is visibly moldy, the safest option is to discard the affected material.
4. Check Your Drying Environment
Finding several moldy buds suggests that you need to look beyond the individual flower.
Check your:
- relative humidity
- temperature
- airflow
- spacing between branches
- drying speed
- remaining moisture in the buds
If you’re unsure whether your process is correct, our detailed guide on how to dry and cure cannabis buds walks through drying conditions, airflow, checking flower and moving into curing. The guide recommends controlled conditions and stresses that drying endpoints aren’t perfectly standardized, so monitoring the flower matters more than blindly following a calendar.
Can You Smoke Bud With Mold on It?
No. If cannabis is visibly moldy, don’t smoke or vape it.
The fact that you’re burning cannabis doesn’t make contamination something you should ignore.
The CDC explains that mold exposure can cause symptoms such as coughing, wheezing, sore throat, stuffy nose and irritated eyes or skin. People with asthma or mold allergies can experience stronger reactions, while people with weakened immune systems or chronic lung disease may face additional risks.
That doesn’t mean everyone exposed to a tiny amount of mold will become seriously ill.
It means there isn’t a good reason to knowingly inhale visibly contaminated material.
If you develop significant respiratory symptoms or become unwell after mold exposure, seek appropriate medical advice.
Why Does Cannabis Develop Mold After Harvest?
Harvesting the plant doesn’t immediately remove all the water inside the flowers.
Freshly harvested cannabis contains substantial moisture, which has to leave gradually during drying. The goal is to remove enough moisture for stable storage without creating conditions favorable to microbial growth.
Problems can arise when:
- buds are packed too closely together
- the drying environment remains excessively humid
- air exchange is inadequate
- dense flowers retain moisture internally
- flower is sealed into containers too early
- contaminated plant material enters the drying area
- storage conditions allow moisture to accumulate
This is why drying isn’t simply about hanging plants for a certain number of days.
Different buds can dry at different rates.
A small airy flower may be ready before a huge dense cola hanging beside it.
The Seed Connect’s harvesting guide also discusses post-harvest handling and warns that sealing flower too early can contribute to mold problems.
Mold During Drying vs. Mold During Curing
Mold can show up at different stages, and understanding when it appeared can help you figure out what went wrong.
Mold During Drying
If mold develops while your cannabis is hanging or sitting on drying racks, moisture may be leaving the flower too slowly.
Check for overcrowded branches, stagnant air and environmental conditions that are keeping the harvest wet for too long.
Don’t respond by pointing a powerful fan directly at your buds.
Gentle air circulation and appropriate air exchange are different from blasting flower with a fan, which can dry the outside too quickly.
Mold During Curing
Mold discovered inside a curing container often suggests the flower was sealed while it still contained too much moisture or that storage conditions became unsuitable.
That’s why buds shouldn’t move into airtight containers just because their surfaces feel dry.
Our drying and curing guide recommends checking flower daily during drying and monitoring moisture carefully during the early cure rather than relying on a fixed number of days.
Think of it this way:
Drying removes moisture. Curing isn’t supposed to rescue cannabis that is still excessively wet.
Is the Whole Harvest Ruined If You Find One Moldy Bud?
Not necessarily.
Finding one isolated moldy flower doesn’t prove that every other bud is contaminated.
But every flower that shared the same drying or storage environment deserves a closer inspection.
If you find one affected bud, check the flowers around it first. Then inspect several larger, denser buds from different parts of the harvest.
If you’re repeatedly finding mold in different locations, you have a much bigger problem than one isolated flower.
For commercial cannabis, visual inspection also shouldn’t be treated as a replacement for any microbial testing required by the applicable regulations.
How to Prevent Bud Mold After Harvest
The best time to deal with post-harvest mold is before you ever see it.
Inspect Before Drying
Don’t knowingly hang badly rotted or obviously moldy flowers beside healthy ones.
Inspect your harvest as you cut and trim it.
Give the Buds Some Space
Packing wet branches tightly together makes it harder for moisture to leave the flower and surrounding air.
Leave enough room for gentle air movement around the harvest.
Monitor Temperature and Humidity
Don’t rely on how the room “feels.”
Use a thermometer and hygrometer so you can actually see what’s happening.
The Seed Connect’s guide to wireless environmental monitoring explains how sensors can help growers monitor temperature and humidity rather than guessing.
Maintain Gentle Air Circulation
You want to avoid stagnant, humid pockets around the flowers.
But don’t point a strong fan directly at the buds in an attempt to dry them as quickly as possible.
Controlled drying matters more than maximum airflow.
Don’t Rush Buds Into Jars
This is one of the most important points.
If the flower still contains excessive moisture, sealing it inside an airtight container can create a much more favorable environment for spoilage.
If buds become noticeably damp again after being placed into curing containers, take that as a warning rather than hoping they will “cure through it.”
Keep Checking During the Cure
Curing shouldn’t be a set-it-and-forget-it process, particularly at the beginning.
Check:
- humidity
- texture
- smell
- condensation
- unusual discoloration
- visible fungal growth
If something suddenly smells musty or the flower becomes unexpectedly damp, investigate it immediately.
Bud Mold After Harvest: The Bottom Line
Finding bud mold after harvest doesn’t automatically mean your entire crop belongs in the trash.
But it does mean you should act quickly.
Separate and discard visibly moldy buds, inspect nearby flower carefully, and check the environment where the cannabis was dried or stored.
Most importantly, don’t try to turn visibly moldy cannabis into something consumable just to avoid losing part of your harvest. The CDC’s guidance on mold exposure makes clear that mold can irritate the respiratory system and can be particularly problematic for people with allergies, asthma or certain underlying health conditions.
Then focus on preventing the same problem next time: controlled drying, adequate spacing, gentle air circulation, moisture monitoring and careful curing.
After months of growing, those final post-harvest steps aren’t an afterthought. They’re part of protecting the harvest you’ve already worked for.