Want bigger, healthier cannabis plants? Start with cannabis humidity control.
Proper humidity ensures faster growth, prevents diseases, and boosts potency. Here’s a quick guide for ideal humidity at each stage:
- Seedlings (65-70% RH): High humidity helps young plants absorb water through leaves.
- Vegetative Stage (40-70% RH): Moderate humidity supports root absorption and strong growth.
- Flowering (40-50% RH): Lower humidity prevents mold and improves bud health.
- Late Flowering (30-40% RH): Dry conditions increase resin production and potency.
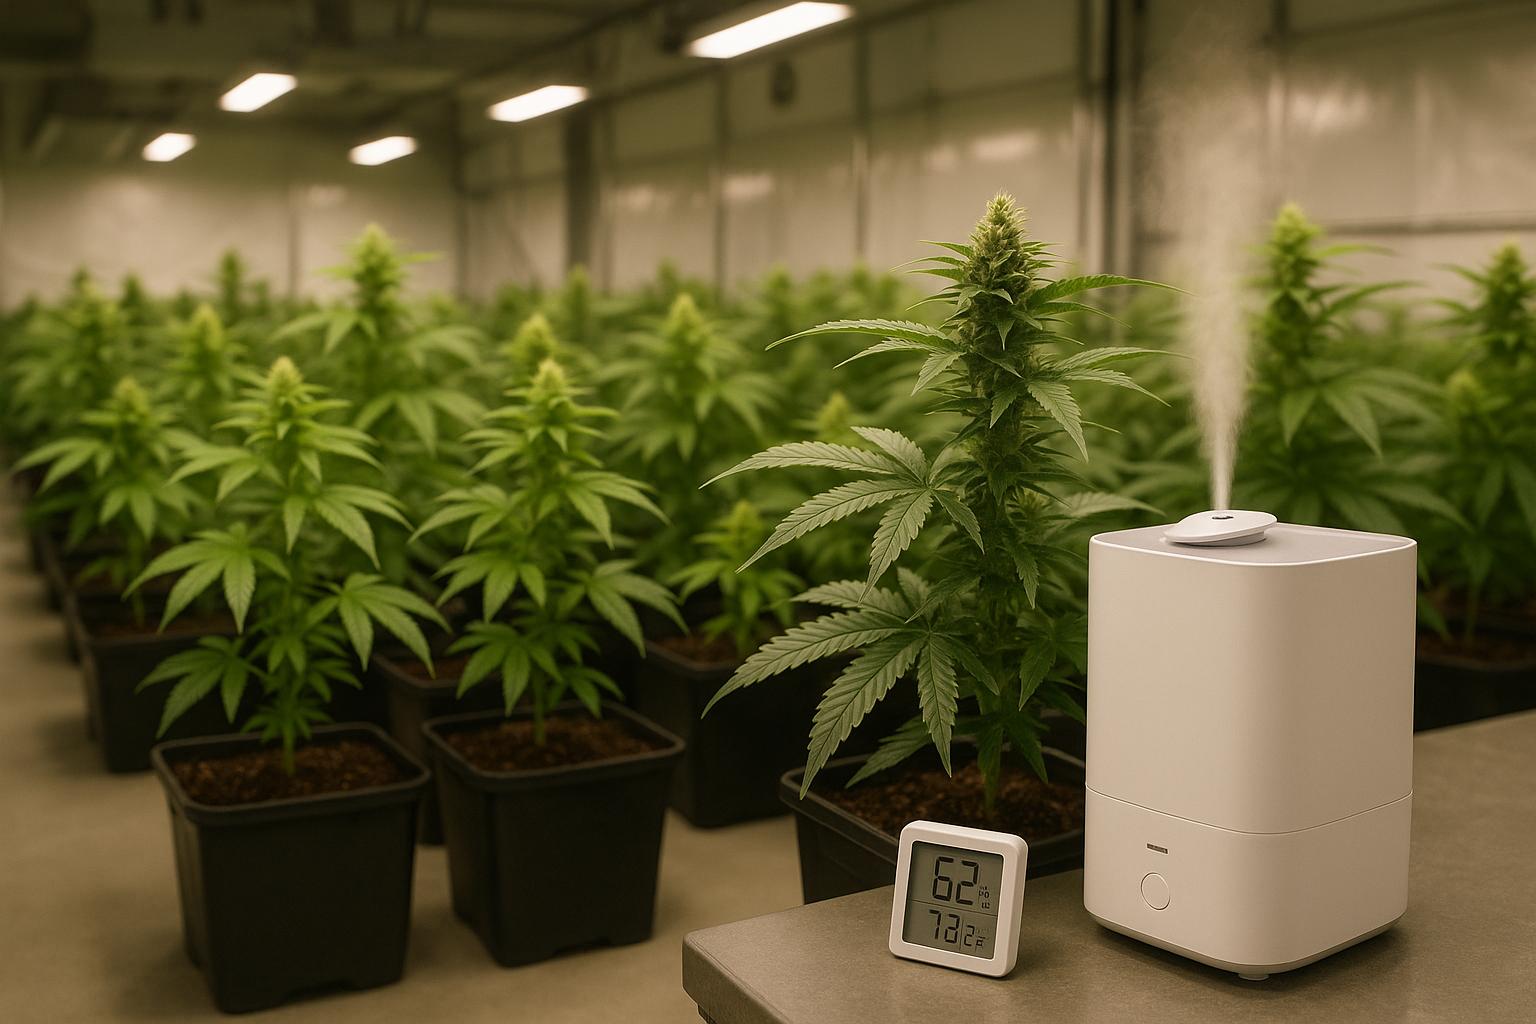
Use tools like digital hygrometers, humidifiers, dehumidifiers, and ventilation systems to maintain these levels.
Gradual adjustments and daily monitoring are key. Advanced techniques like Vapor Pressure Deficit (VPD) optimization and automated controllers can take your grow to the next level.
| Stage | Humidity Range | Key Benefit |
|---|---|---|
| Seedling | 65-70% | Supports leaf water absorption |
| Vegetative | 40-70% | Promotes strong growth |
| Flowering | 40-50% | Prevents mold, improves buds |
| Late Flowering | 30-40% | Boosts resin and potency |
Tip: Keep airflow steady and avoid sudden changes to protect your plants. Ready to grow? Let’s dive in.
Regulating Humidity in a Cannabis Grow Facility
Humidity Requirements by Growth Stage
Cannabis plants thrive when humidity levels are tailored to their growth stage. At each phase, their water absorption shifts – starting with leaf absorption in the early stages and moving to root absorption as they mature. Understanding and managing these changes is key to healthy growth and maximizing yields.
Seedling Stage: High Humidity (65-70% RH)
In the seedling stage, humidity levels should stay between 65-70%. At this point, young plants rely on their leaves to absorb water since their root systems are still developing. A moisture-rich environment ensures they stay hydrated and promotes rapid cell growth.
This stage typically lasts 2-3 weeks from germination. Keep temperatures at 70-75°F to maintain proper humidity and reduce the risk of fungal issues.
Vegetative Stage: Moderate Humidity (40-70% RH)
As plants move into the vegetative stage, their humidity needs drop to a range of 40-70%. This shift supports their transition to absorbing water primarily through their roots, while also encouraging stronger stems and broader leaves. Depending on the strain and your growing goals, this phase can last anywhere from 3 to 16 weeks.
Using a digital hygrometer to monitor humidity is crucial during this stage. Gradual adjustments ensure steady growth and prepare plants for the next phase. As flowering approaches, tighter control over humidity becomes increasingly important.
Flowering Stage: Controlled Humidity (40-50% RH)
Once in the flowering stage, maintaining humidity between 40-50% is critical. Lower humidity levels help prevent mold and mildew, which can easily develop in dense flower clusters where moisture can accumulate. Proper air circulation combined with these controlled levels ensures healthy bud development and increases density.
Late Flowering and Harvest: Low Humidity (30-40% RH)
In the final weeks before harvest, reduce humidity to 30-40%. This drier environment protects resin glands, preserves terpene profiles, and stimulates resin production. The plants respond to the reduced moisture by producing more resin as a natural defense, enhancing both potency and flavor.
To avoid stressing the plants, gradually lower humidity over the last 2-3 weeks of flowering. Sudden drops can cause plants to close their stomata, limiting CO₂ intake and slowing photosynthesis. A steady transition ensures a high-quality final yield.
| Growth Stage | Optimal Humidity | Duration | Key Benefits |
|---|---|---|---|
| Seedling | 65-70% | 2-3 weeks | Supports water absorption via leaves |
| Vegetative | 40-70% | 3-16 weeks | Promotes strong structural growth |
| Flowering | 40-50% | 8-12 weeks | Prevents mold and supports bud health |
| Late Flowering | 30-40% | 2-3 weeks | Boosts resin production and potency |
Careful humidity adjustments at every stage are essential. Gradual changes allow plants to adapt naturally, ensuring optimal growth and a robust harvest.
Tools for Monitoring and Adjusting Humidity
Controlling humidity effectively requires the right tools to measure, monitor, and adjust moisture levels throughout your grow cycle. Having accurate equipment ensures you can maintain the ideal environment for your plants at every stage. Let’s dive into the essential tools that can help you manage humidity like a pro.
Digital Hygrometers and Smart Sensors
Digital hygrometers are your go-to devices for getting precise humidity readings. When shopping for one, aim for models with an accuracy of ±2%. For example, the ThermoPro TP49 Digital Hygrometer is a budget-friendly option at $9.99, offering reliable readings and an 18-month battery life. If you prefer a larger display, the ThermoPro TP55 ($13.59) features an easy-to-read touchscreen.
For those who want more advanced capabilities, smart sensors are a game-changer. These devices provide real-time updates straight to your smartphone. The Govee Bluetooth Digital Hygrometer Set ($25.99) not only allows remote monitoring but also stores up to two years of cloud-based data, making it easier to track long-term humidity trends. Meanwhile, the AC Infinity CLOUDCOM Smart Thermo-Hygrometer (starting at $21.99) integrates seamlessly with automated climate control systems, providing precise adjustments when needed.
To get the most accurate readings, place your hygrometers at the same height as your plant canopy. In larger grow rooms, using multiple sensors can help you spot microclimates and maintain consistent conditions for all your plants.
Next, let’s look at humidifiers and dehumidifiers to help you fine-tune moisture levels.
Humidifiers and Dehumidifiers
Once you’ve measured your grow room’s humidity, the next step is adjusting it with the right equipment. The choice between humidifiers and dehumidifiers depends on your grow room’s baseline humidity and the specific needs of your plants at different stages.
- Dehumidifiers are essential during the flowering stage when you need to maintain relative humidity (RH) between 40–50%. Refrigeration-based models are great for larger, warmer spaces, while desiccant dehumidifiers work well in cooler environments and use less energy.
- Humidifiers, especially cool mist models, are ideal during the seedling stage to increase moisture without adding heat. In cooler grow rooms, warm mist humidifiers can be helpful, but keep in mind they consume more energy and can raise the ambient temperature.
For hands-free operation, humidistats are invaluable. These devices automatically activate your equipment when humidity levels drift outside the desired range. For smaller setups, the Titan Controls Eos 2 Digital Humidity Controller ($109.69) provides precise control. If you’re managing a commercial-scale operation, the Anden Wall Mounted Digital Humidistat ($551.22) is built for larger spaces.
| Equipment Type | Best For | Price Range | Key Benefits |
|---|---|---|---|
| Basic Digital Hygrometer | Small grows, budget-conscious | $7–15 | Simple, reliable readings |
| Smart Hygrometer | Remote monitoring | $22–26 | App connectivity, data logging |
| Humidity Controller | Automated systems | $50–550 | Hands-off operation |
Ventilation Systems and Air Circulation
Cannabis humidity control doesn’t stop at measuring and adjusting moisture levels. Proper airflow is just as important to maintain a healthy environment. Without good ventilation, stagnant, humid air can lead to mold and mildew problems.
- Exhaust fans help remove humid air, while intake fans bring in fresh, drier air. A great option is the AC Infinity CONTROLLER 67 Temperature and Humidity Fan Controller ($49.99), which adjusts fan speeds automatically based on current readings.
- Oscillating fans ensure consistent air movement across your plant canopy, preventing moisture from settling on leaves and buds. Position these fans to create gentle airflow without directly blasting your plants.
To maximize efficiency, seal any gaps in your grow room to reduce air leaks. For long-term insights, consider using data loggers to record environmental conditions. These logs can help you identify patterns and fine-tune your setup based on the specific needs of different strains or seasonal changes.
“If it’s too humid in your bloom phase (above 60%), you will need to use a dehumidifier to bring it down to 40–50% humidity.” – Happy Hydro
Step-by-Step Cannabis Humidity Control Guide
Once you’ve got the right tools in place, it’s time to focus on practical ways to manage humidity during each stage of growth. With your monitoring tools ready, follow these straightforward steps to adjust humidity effectively.
How to Lower Humidity
Here are some effective ways to reduce humidity in your grow space:
- Use dehumidifiers: Dehumidifiers are your go-to tool for lowering humidity. If your grow room is warm (above 70°F), refrigerant-based dehumidifiers are more energy-efficient. For cooler spaces (below 65°F), desiccant-based units work better since they don’t rely on condensation.
- Improve ventilation: Exhaust and intake fans can help remove excess humidity. For instance, the Mars Hydro ventilation fan series, launched in August 2024, offers intelligent cooling and filtration systems tailored for grow tents, making airflow management easier.
- Adjust watering practices: Overwatering can lead to waterlogged soil and higher humidity. Water less frequently, ensure proper drainage, and remove standing water from saucers and reservoirs. Watering early in your light cycle also helps prevent overnight humidity spikes.
- Prune lower foliage: Trimming the lower parts of your plants improves airflow and reduces moisture released through transpiration.
- Space out plants: Avoid overcrowding to promote better air circulation and minimize moisture buildup.
How to Increase Humidity
If you need to raise humidity, try these methods:
- Use a humidifier: Choose a humidifier with a large water tank to reduce frequent refills. Place it in the center of your grow space for even mist distribution. Cool mist units are generally effective, but warm mist humidifiers can be useful in colder environments (though they consume more energy).
- Manual misting: Spray the walls of your grow tent (not the plants) in the morning and evening for a temporary humidity boost.
- Damp towels and water containers: Hang damp towels near intake fans or place open containers of water around the room. Gradual evaporation will increase moisture in the air.
- Keep soil moist: Lightly moisten the surface of your growing medium to encourage evaporation and elevate humidity.
- Add more plants: If you have space, introduce additional plants. A mix of mature and young vegetation can naturally increase humidity through transpiration.
- Reduce ventilation temporarily: Lower fan speeds or close some vents to trap moisture, but be careful not to create stagnant air, which can lead to other problems.
Quick Reference for Growth Stages
Here’s a handy guide to target humidity levels and quick adjustment methods for each stage:
| Growth Stage | Target Humidity | Quick Adjustment Method |
|---|---|---|
| Seedling | 75-85% | Use a humidifier and reduce ventilation |
| Vegetative | 45-55% | Maintain balanced ventilation |
| Flowering | 35-45% | Dehumidifier with increased airflow |
| Late Flowering | 30-40% | Strong dehumidification and pruning |
Daily Monitoring and Maintenance
Keeping a consistent routine is key to maintaining stable humidity levels. Here are some tips for daily upkeep:
- Check hygrometer readings: Monitor your humidity levels daily and compare them to the targets for your plant’s growth stage. Focus on patterns rather than reacting to every small fluctuation.
- Make gradual adjustments: If humidity is slightly off, use moderate settings on your dehumidifier or humidifier instead of extreme changes, which could stress your plants.
- Watch for plant signals: Look for visual signs like droopy leaves, slow growth, or early mold, which can indicate issues with humidity or airflow.
- Seal your grow space: Inspect for air leaks around doors, windows, and vents. A well-sealed area helps maintain consistent conditions.
- Group plants wisely: Position plants to take advantage of natural transpiration while avoiding overcrowding.
- Time watering strategically: Water early in the light cycle to allow excess moisture to evaporate during the day, reducing the chance of overnight humidity spikes.
sbb-itb-5407682
Advanced Humidity Management Techniques
Once you’ve got the basics of cannabis humidity control down, these advanced techniques can help you fine-tune your indoor growing environment for better results.
Using Vapor Pressure Deficit (VPD)
Vapor Pressure Deficit (VPD) is a game-changer for growers aiming to optimize plant transpiration and nutrient uptake. Essentially, VPD measures the gap between how much moisture the air can hold and how much it actually holds. This influences plant processes like transpiration, stomatal function, CO₂ absorption, and overall stress levels.
Pay attention to leaf VPD, as the temperature of leaves is typically lower due to transpiration. To calculate it accurately, measure leaf temperature with an infrared thermometer and gather air condition data using a digital hygrometer.
Here’s a quick guide to ideal leaf VPD values based on growth stages:
| Plant Cycle Stage | Min Leaf VPD (kPa) | Max Leaf VPD (kPa) | Temperature (°F) | Relative Humidity (%) |
|---|---|---|---|---|
| Propagation / Early Veg | 0.8 | 1.0 | 70 | 60 |
| Late Veg / Early Flower | 1.0 | 1.2 | 75 | 50 |
| Mid / Late Flower | 1.2 | 1.6 | 75 | 40 |
Aim to keep leaf VPD between 0.8–1.2 kPa. Fluctuations beyond 0.4 kPa can lower yields by as much as 20%. Use a VPD chart or an online calculator to determine your current levels and adjust temperature and humidity accordingly. If your VPD is too low, you could face issues like root rot and mold. On the flip side, a high VPD can lead to leaf curl and tip burn caused by excessive transpiration.
This approach ties environmental control directly to plant health, making it a great addition to your existing humidity management methods.
Combining CO₂ Systems with Cannabis Humidity Control
Adding CO₂ to your grow room can increase yields, but it requires careful coordination with cannabis humidity control. At CO₂ levels between 1,200 and 1,500 ppm, cannabis plants can handle higher temperatures – up to 95°F – which directly impacts humidity levels.
In sealed grow rooms with CO₂ enrichment, heat and moisture build up quickly. To avoid problems like mold, keep humidity below 60% RH. Many growers find success with a hybrid system: combining CO₂ enrichment with an exhaust fan running at a moderate pace. For example, grower Judaz shared on THCFarmer.com in 2017 that after a decade of testing sealed-room setups, he achieved over 3 pounds per light using a hybrid system with Gavita fixtures. This was a noticeable improvement compared to 2.3–2.5 pounds per light in fully sealed environments.
Also, make sure to turn off your CO₂ system at night. Plants use much less CO₂ when transpiration slows down in cooler nighttime conditions, which also helps prevent unnecessary humidity buildup.
By integrating CO₂ management into your humidity strategy, you can create a more stable and productive growing environment.
Automated Climate Controllers
If you’re ready to take your grow room management to the next level, automated climate controllers can handle the fine-tuning for you. These systems use sensors to monitor conditions and automatically adjust fans, humidifiers, dehumidifiers, heaters, and CO₂ systems in real time.
You can find options ranging from $129 to over $2,500. Many of these systems include features like data logging, VPD calculations, and the ability to manage multiple rooms with different environmental needs – perfect if you’re growing plants at various stages of development.
Automation ensures consistent adjustments, reacting faster to environmental changes than manual methods. This helps prevent harmful VPD swings, which can reduce yields by up to 20%. Plus, modern controllers often have built-in VPD programming, automatically keeping your temperature and humidity at ideal levels throughout each growth phase.
Key Takeaways
Cannabis humidity control is a game-changer when it comes to growing cannabis indoors. From the seedling stage all the way to harvest, maintaining the right humidity levels is crucial for healthy growth and avoiding common problems.
Daily monitoring is non-negotiable. A reliable digital hygrometer is your best friend for keeping tabs on humidity levels. Pair it with dehumidifiers, humidifiers, and ventilation systems to make adjustments as needed. Without proper control, issues like bud rot, white powdery mildew, and nutrient deficiencies can derail months of hard work.
Investing in tools for humidity management is worth it. By keeping humidity levels in the ideal range, your plants can open their pores effectively, absorb more CO₂, and grow faster – all of which lead to better yields in both quality and quantity.
Once you’ve got daily adjustments under control, you can dive into advanced techniques to fine-tune your environment. For example, maintaining leaf VPD (vapor pressure deficit) between 0.8 and 1.2 kPa can significantly reduce yield loss. Automated climate controllers, while requiring an upfront investment, provide consistent conditions and respond faster to changes than manual adjustments ever could.
Pair these climate control strategies with top-tier genetics for the best results. Starting with quality seeds is just as important as maintaining the right environment. Companies like Seed Connect offer premium cannabis seeds and expert support to help you succeed.
FAQs
How do I control humidity levels for cannabis plants at different growth stages?
Managing humidity levels in your grow room is crucial for cultivating healthy cannabis plants. These levels should shift according to the plant’s growth stage to ensure the best results.
- Seedling stage: Keep humidity between 65% and 70%. This range helps seedlings develop strong roots and prevents them from drying out.
- Vegetative stage: Lower the humidity to about 50% to 60%. This adjustment encourages the growth of sturdy stems and vibrant, healthy leaves.
- Flowering stage: Reduce humidity further to 40% to 50%. This is key to avoiding mold and bud rot, which can ruin your harvest.
To stay on top of cannabis humidity control, consider using tools like dehumidifiers, maintaining proper ventilation, and sealing the grow room to minimize moisture changes. Regular monitoring will help you maintain the perfect environment for your plants to thrive.
What are the advantages of using automated climate controllers to manage humidity in indoor cannabis grow rooms?
Automated climate controllers bring several major benefits when it comes to managing humidity in indoor cannabis grow rooms. Their ability to deliver accurate and steady control of humidity levels is crucial for protecting your plants from mold, mildew, and other potential threats. Keeping the humidity in the right range ensures a healthier environment for your plants, supporting robust growth and better yields.
Another advantage is the convenience these systems offer. By automatically adjusting humidity using real-time data, they cut down on the need for constant manual checks, saving both time and effort. Plus, they help reduce the chances of human error. Many of these systems can also integrate seamlessly with other climate control tools, providing a streamlined approach to maintaining the perfect growing conditions. With automation handling the hard work, you can dedicate more attention to other aspects of cultivation while still ensuring your plants flourish.
What is Vapor Pressure Deficit (VPD), and how does it affect cannabis plant growth?
Vapor Pressure Deficit (VPD) and Its Role in Cannabis Growth
Vapor Pressure Deficit (VPD) measures the gap between the moisture currently in the air and the maximum amount of moisture the air can hold at a given temperature. For cannabis plants, VPD is a critical factor, as it directly influences transpiration – the process that helps plants absorb nutrients and stay healthy.
Getting VPD right means tailoring it to the plant’s growth stage. During the vegetative stage, aim for a VPD range of 0.8 to 1.2 kPa. For the flowering stage, a slightly higher VPD of 1.2 to 1.6 kPa is ideal. If the VPD is too high, plants can lose moisture too quickly, leading to dehydration. On the flip side, a low VPD can result in excess humidity, which may cause problems like mold or root rot.
To keep VPD in check, tools like VPD charts and environmental controls are invaluable. By carefully monitoring and adjusting temperature and humidity, you can create an environment that supports healthier plants and boosts yield potential.