


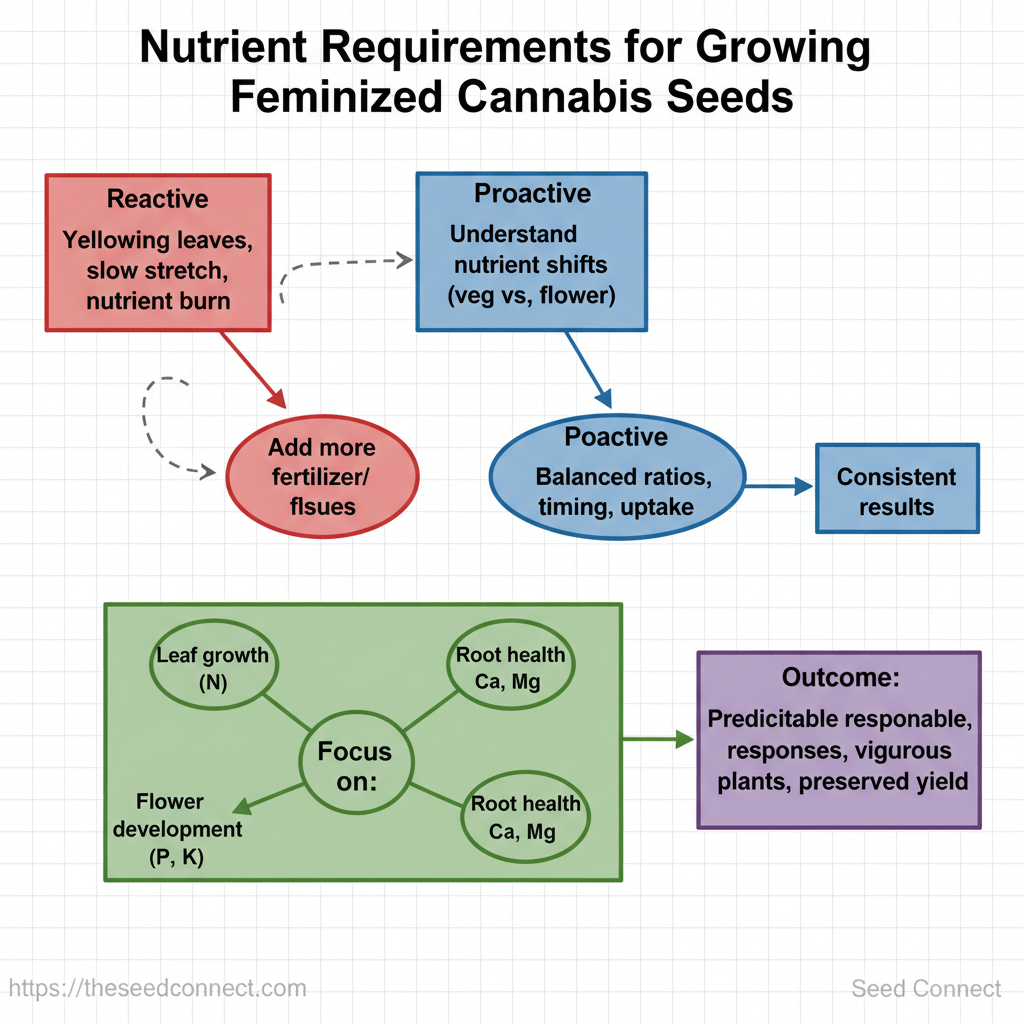
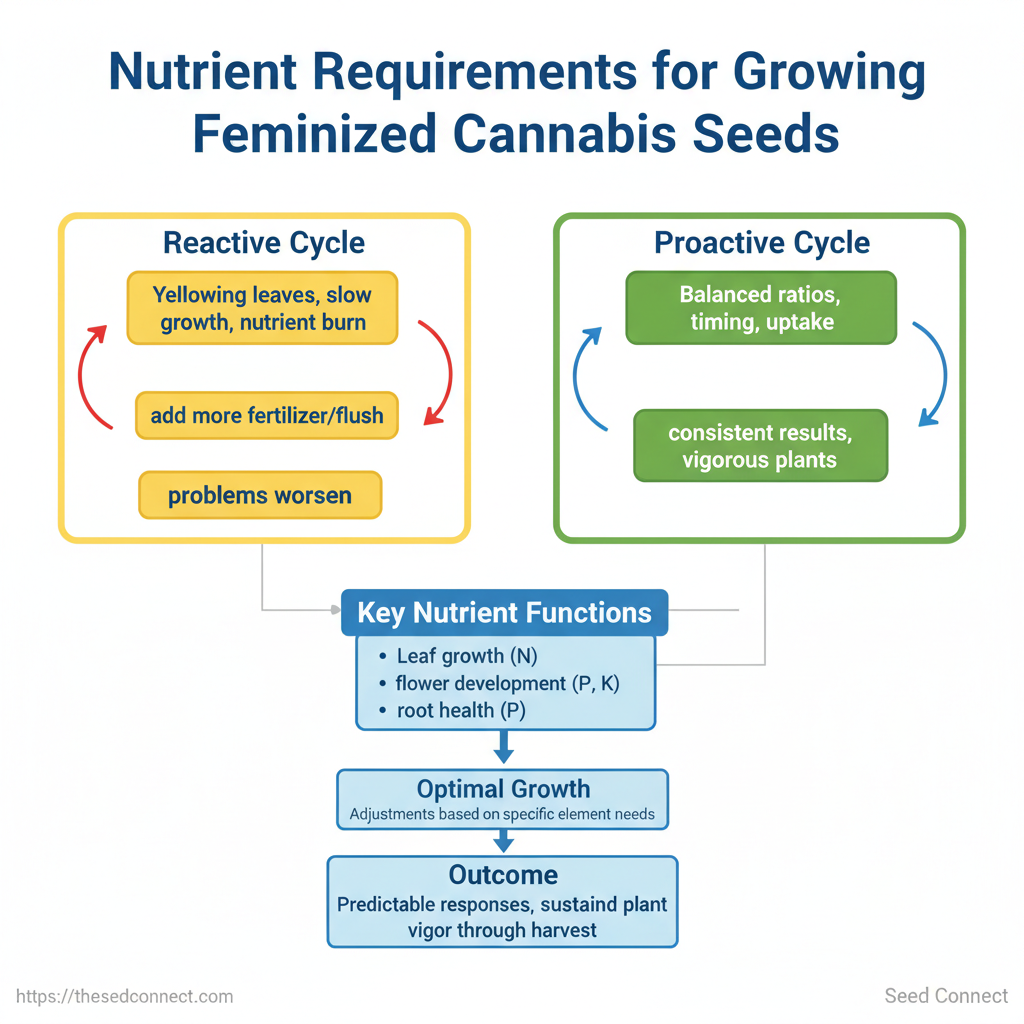
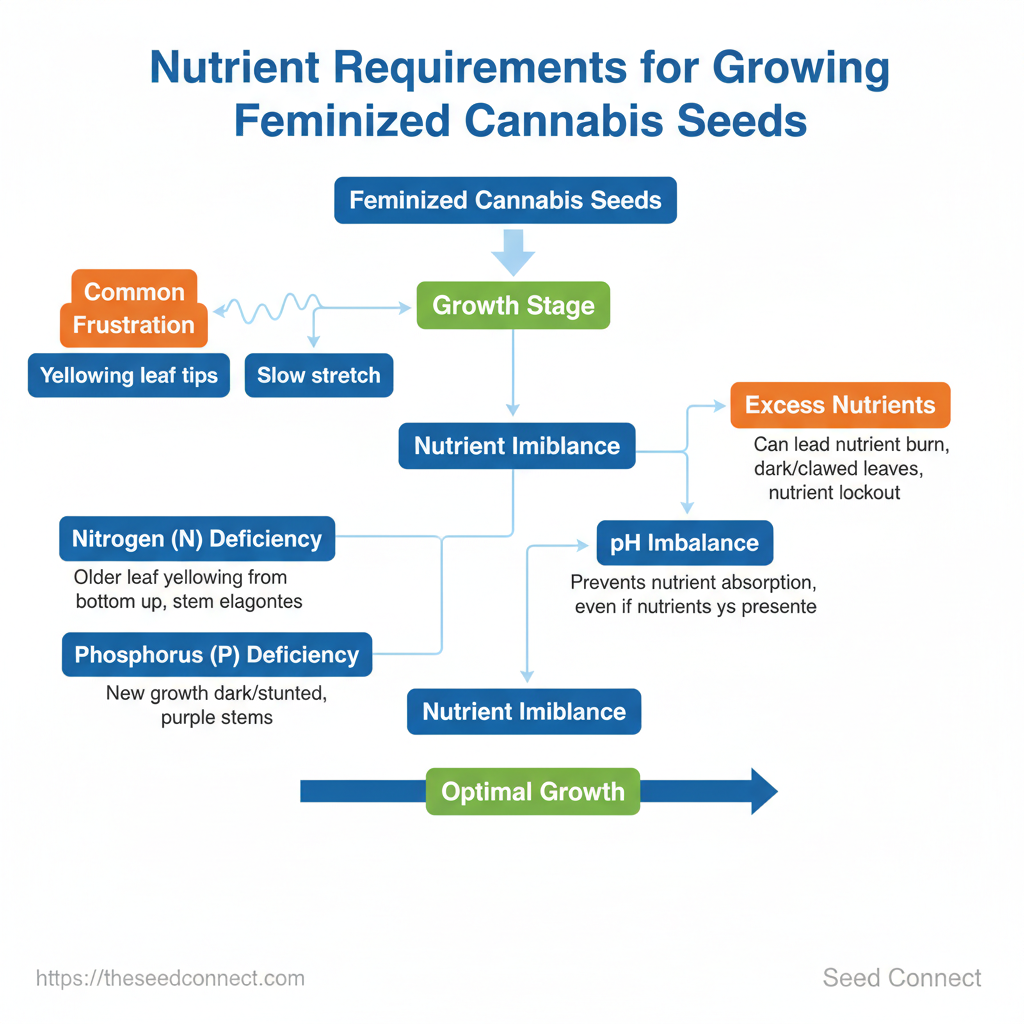
Yellowing leaf tips, slow growth, and nutrient burn in the first few weeks are common headaches for home growers. When these problems happen while feeding feminized seeds, many growers think about adding more fertilizer or flushing the medium. However, this often makes the situation worse. Knowing how cannabis nutrients change in the vegetative and flowering stages can help you avoid issues and increase your yield.
Balanced ratios, timing, and nutrient uptake are what lead to consistent results. It’s not about secret additives or constant adjustments. Focusing on which elements drive leaf growth, flower development, and root health clarifies which adjustments to make when growth stalls. The right approach to optimal growth nutrients turns fluctuations into predictable responses and keeps plants vigorous through harvest.
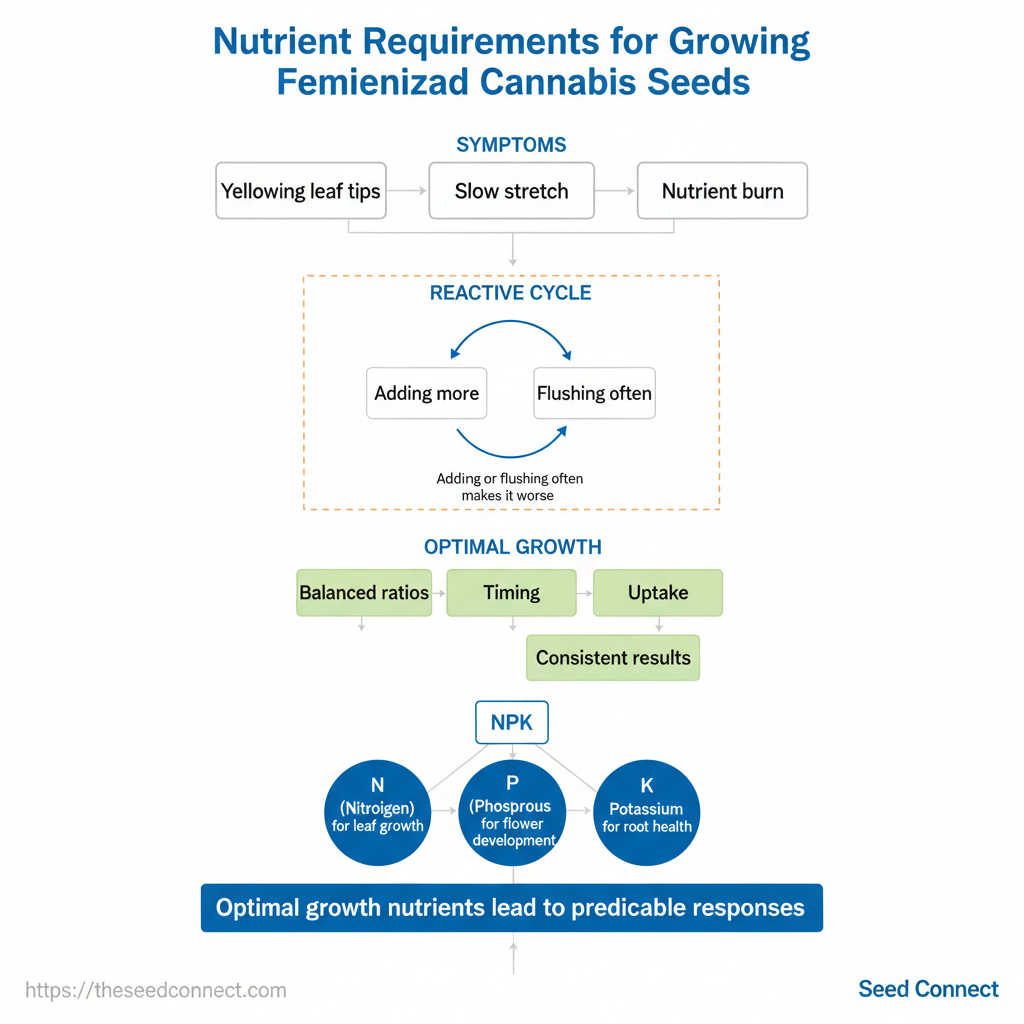
Understanding Nutrient Basics for Your Feminized Cannabis
Feminized cannabis plants follow the same…
Understanding Nutrient Basics for Your Feminized Cannabis
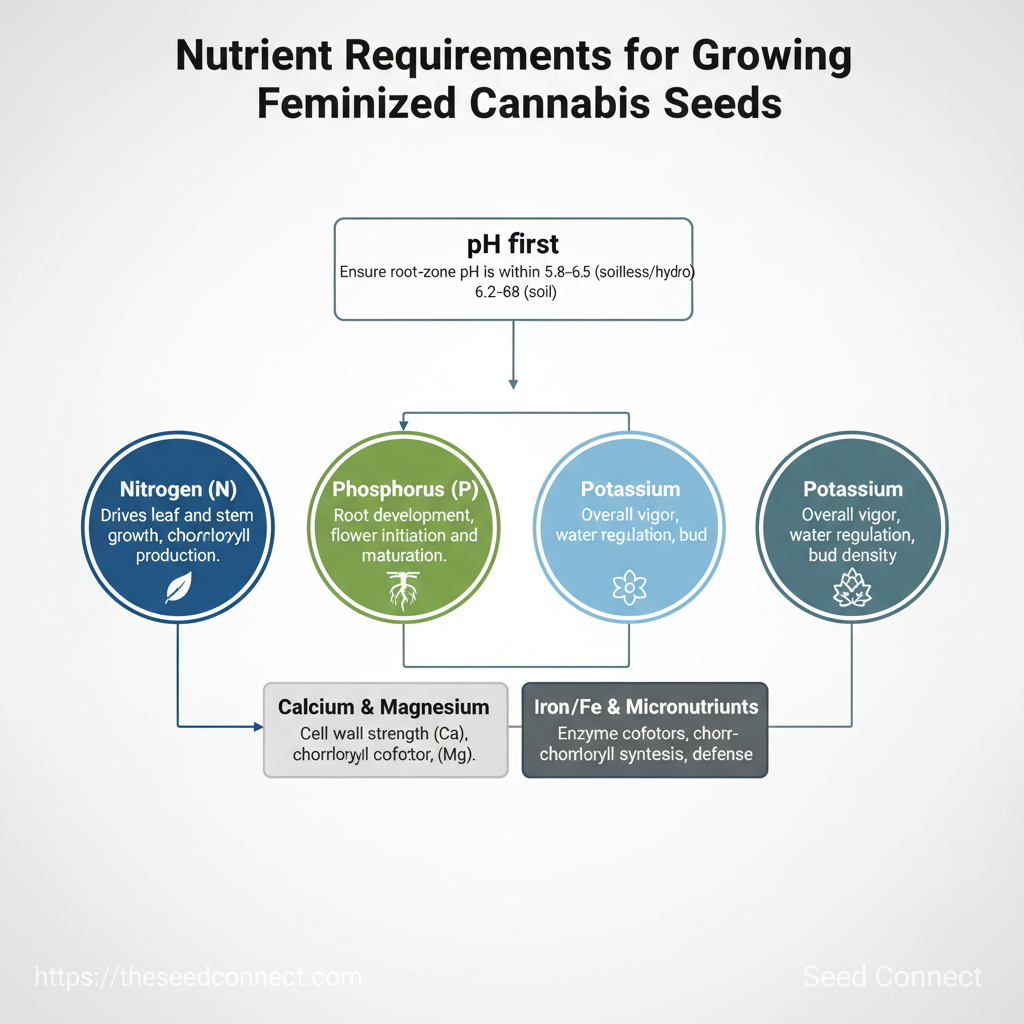
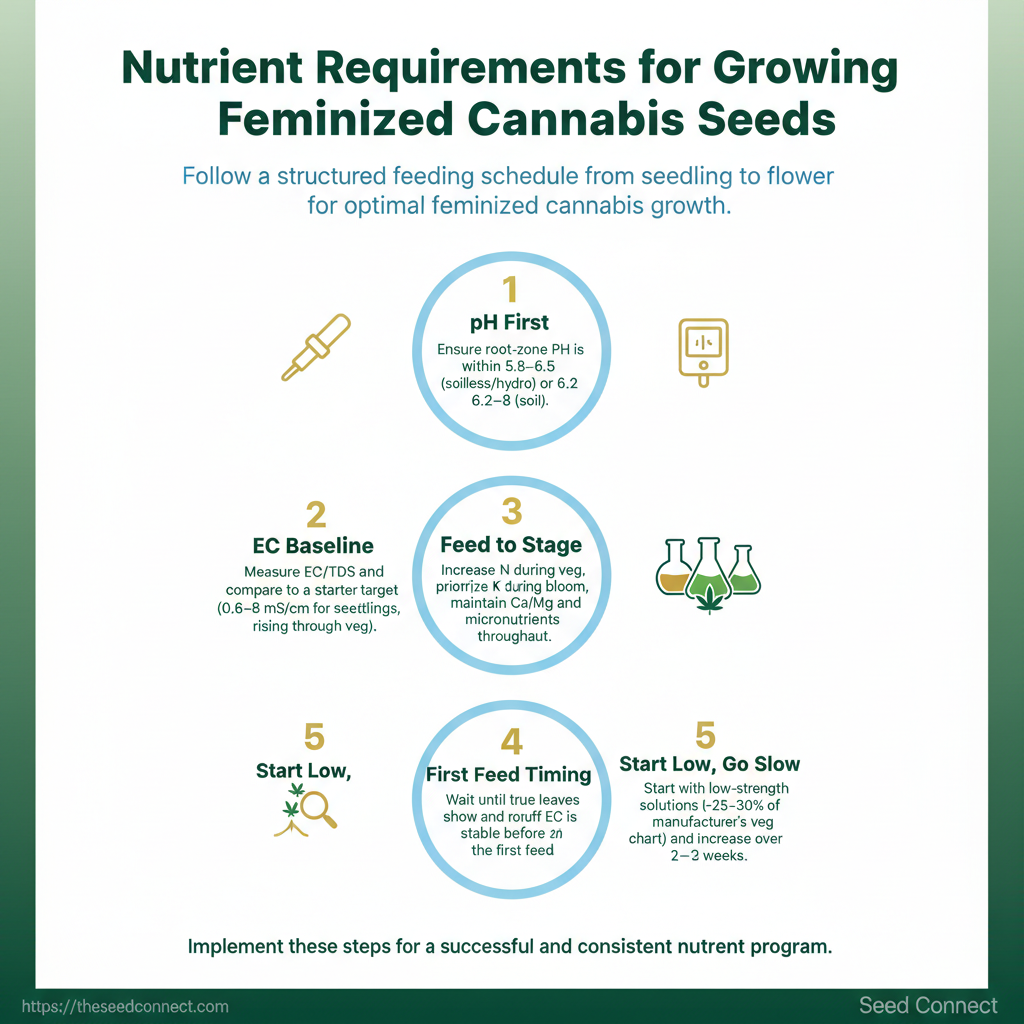
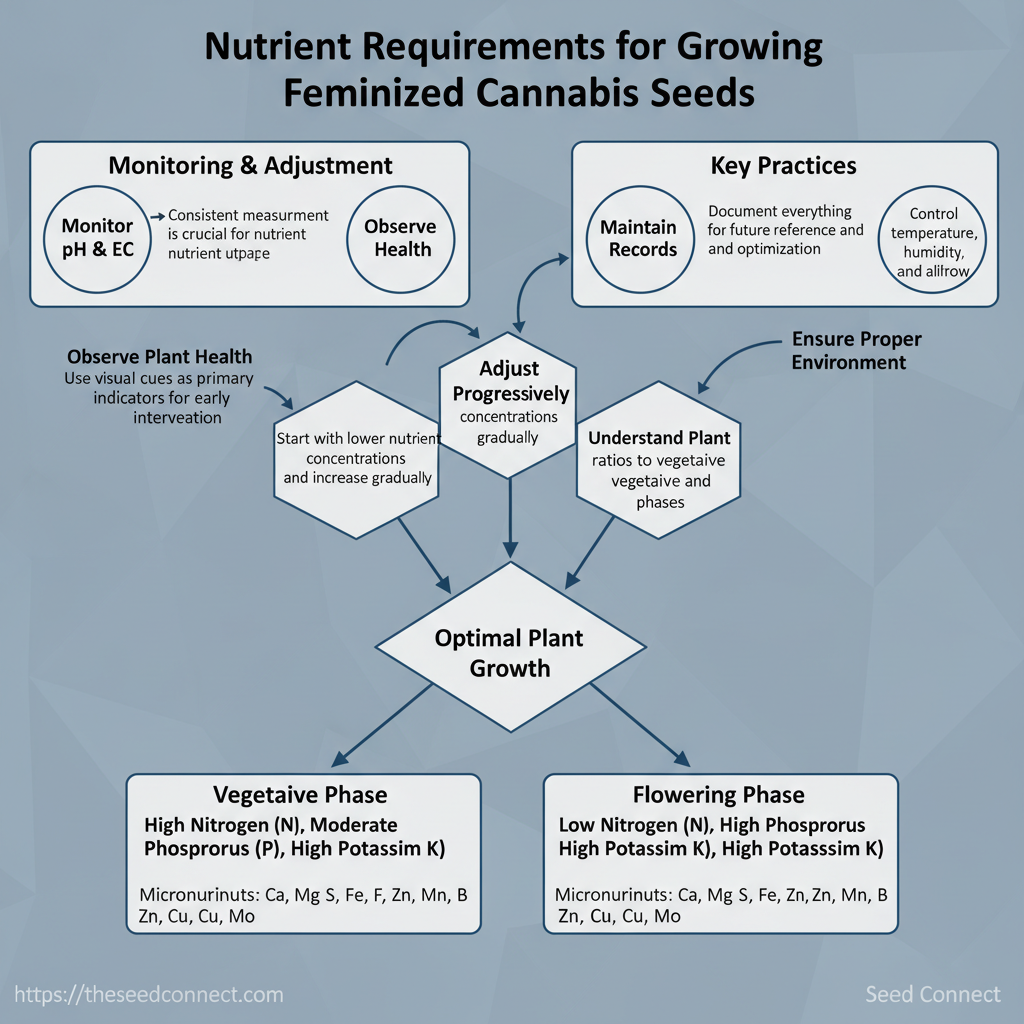
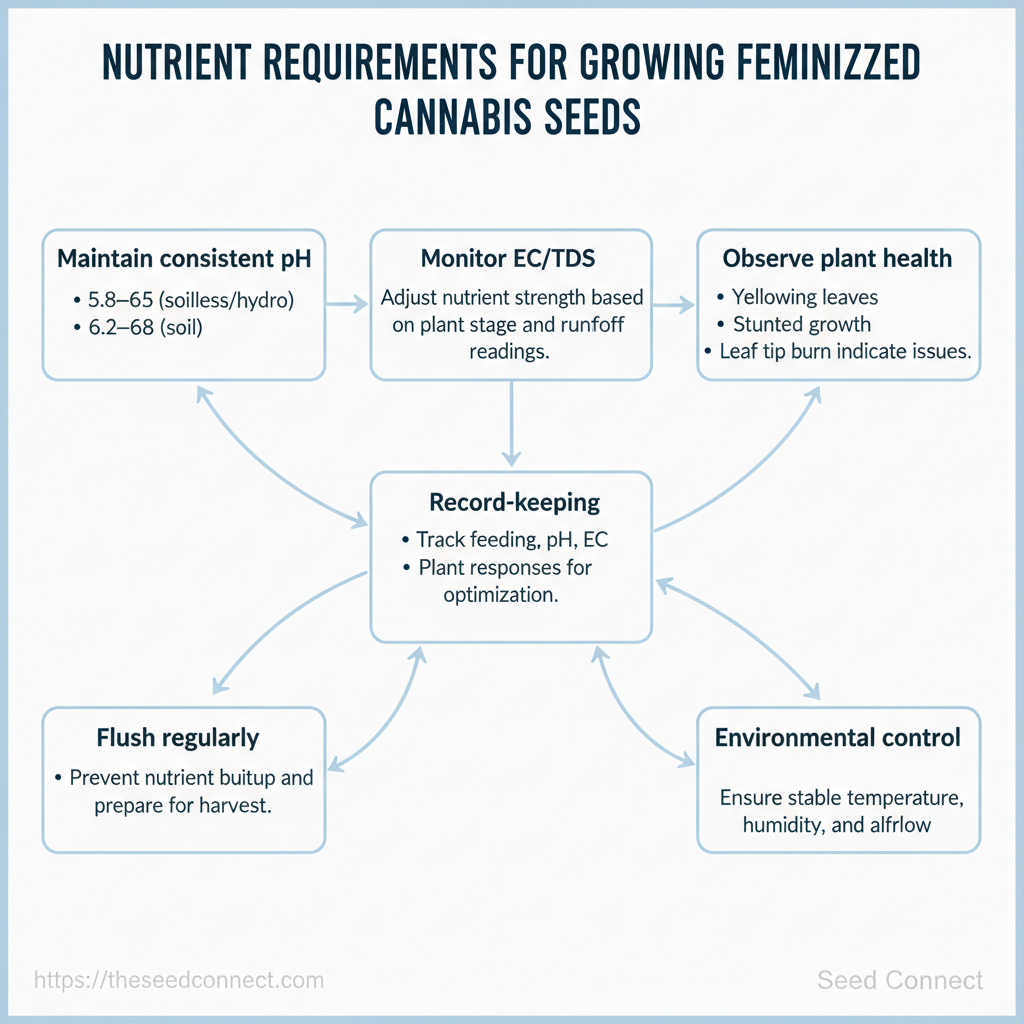
Feminized cannabis plants require nutrients like regular plants, but their stable female genetics make nutrient timing and balance easier to manage. If you’re feeding feminized seeds, the key is simple: give your plants the right macronutrients in the right ratios during their vegetative and flowering phases. Also, keep secondary and micronutrients available in small, usable amounts. Check substrate pH and solution EC before the first feed so nutrients are actually absorbable.
High-level roles and checks
- pH first: According to Cannabis Fertilization Requirements at Each Stage of Growth (cannabisbusinesstimes.com), ensure root-zone pH is within
5.8–6.5(soilless/hydro) or6.2–6.8(soil). - EC baseline: Measure EC/TDS and compare to a starter target (
0.6–0.8 mS/cmfor seedlings, rising through veg). - Feed to stage: Research from Cannabis Nutrients: Why, How, And When To Feed Your … (royalqueenseeds.com) shows that increase N during veg, prioritize P and K during bloom, maintain Ca/Mg and micronutrients throughout.
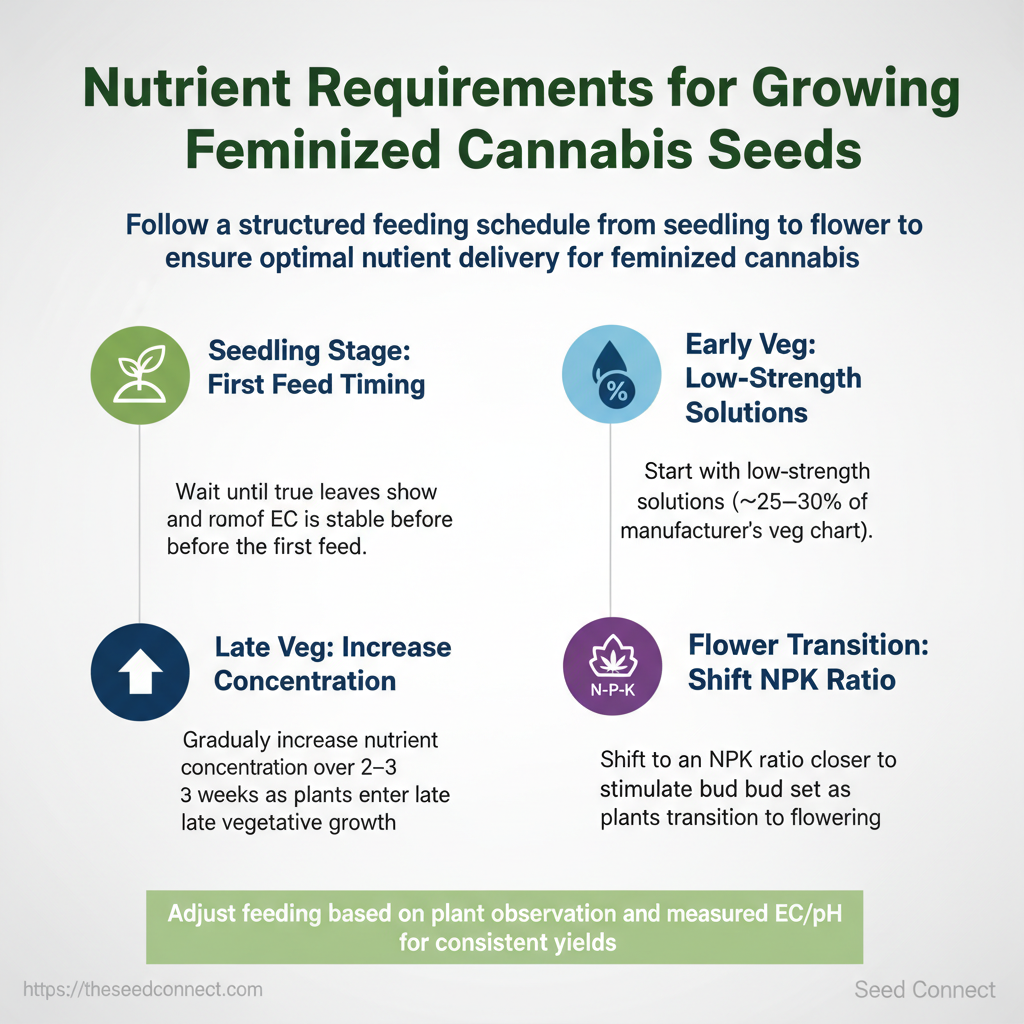
- First feed timing: Wait until true leaves show and runoff EC is stable.
- Start with low-strength solutions (
~25–30%of manufacturer’s veg chart). - Increase concentration over 2–3 weeks as plants enter late veg.
Practical examples and reminders
- Example — Early veg: Use an NPK ratio like
3-1-2with balanced Ca/Mg and chelated micros. - Example — Flower transition: Shift to an NPK closer to
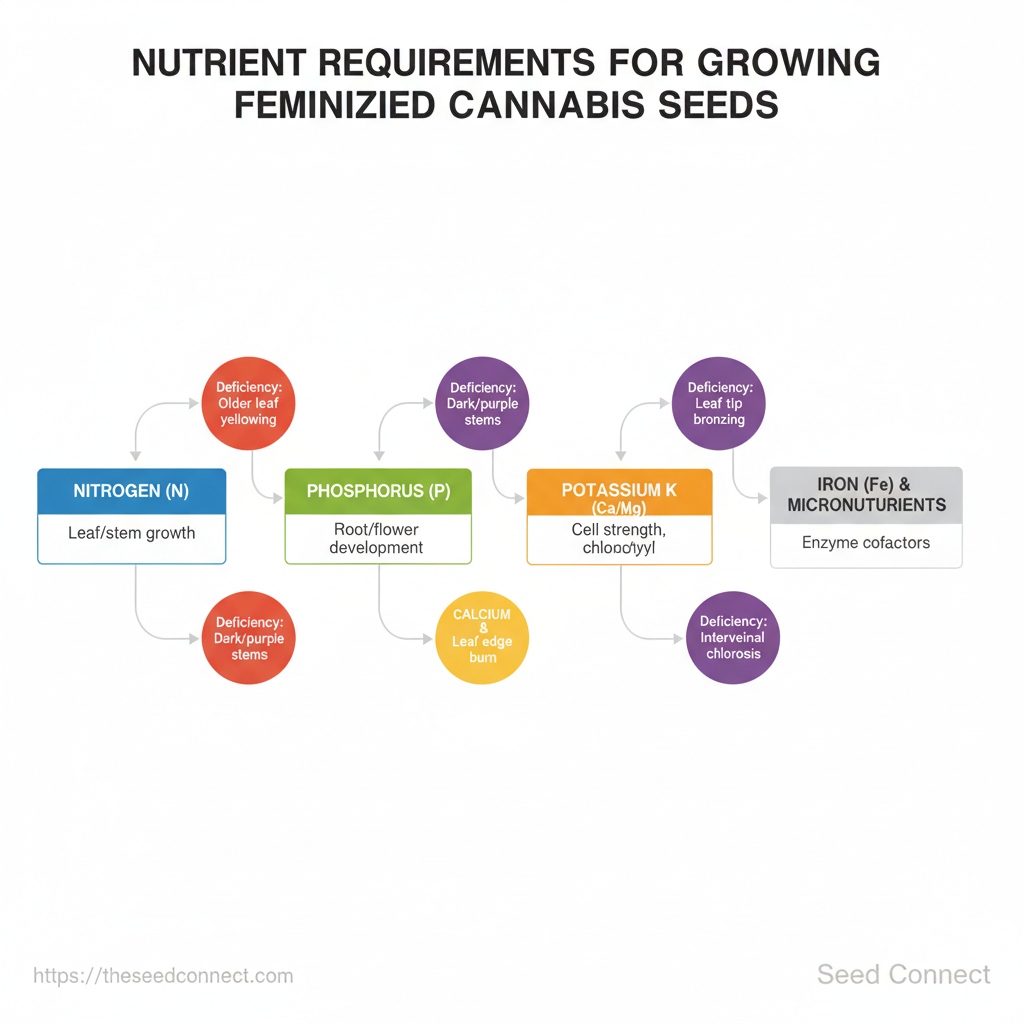
1-3-3to stimulate bud set. - Tip: If leaves yellow from the bottom up and stem elongates, suspect nitrogen deficiency; if new growth is dark and stunted with purple stems, check phosphorus and pH.
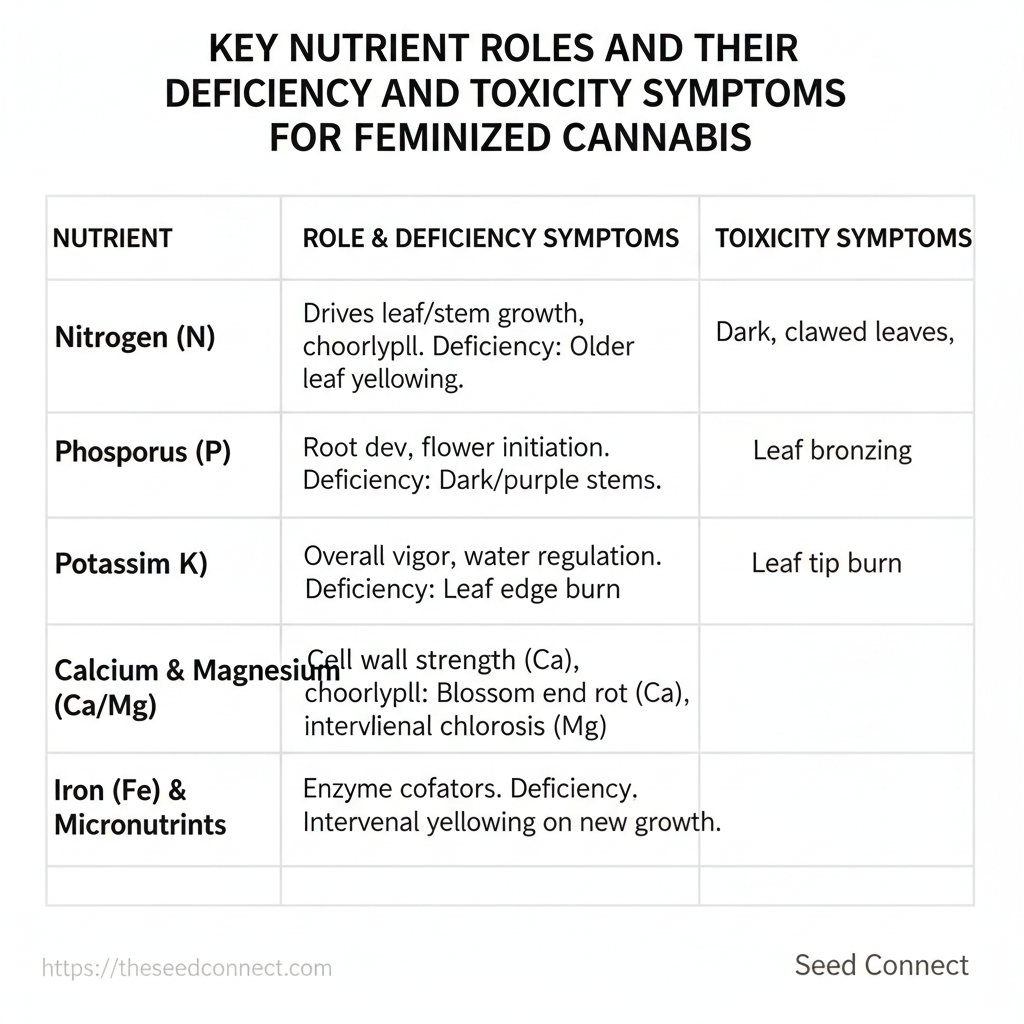
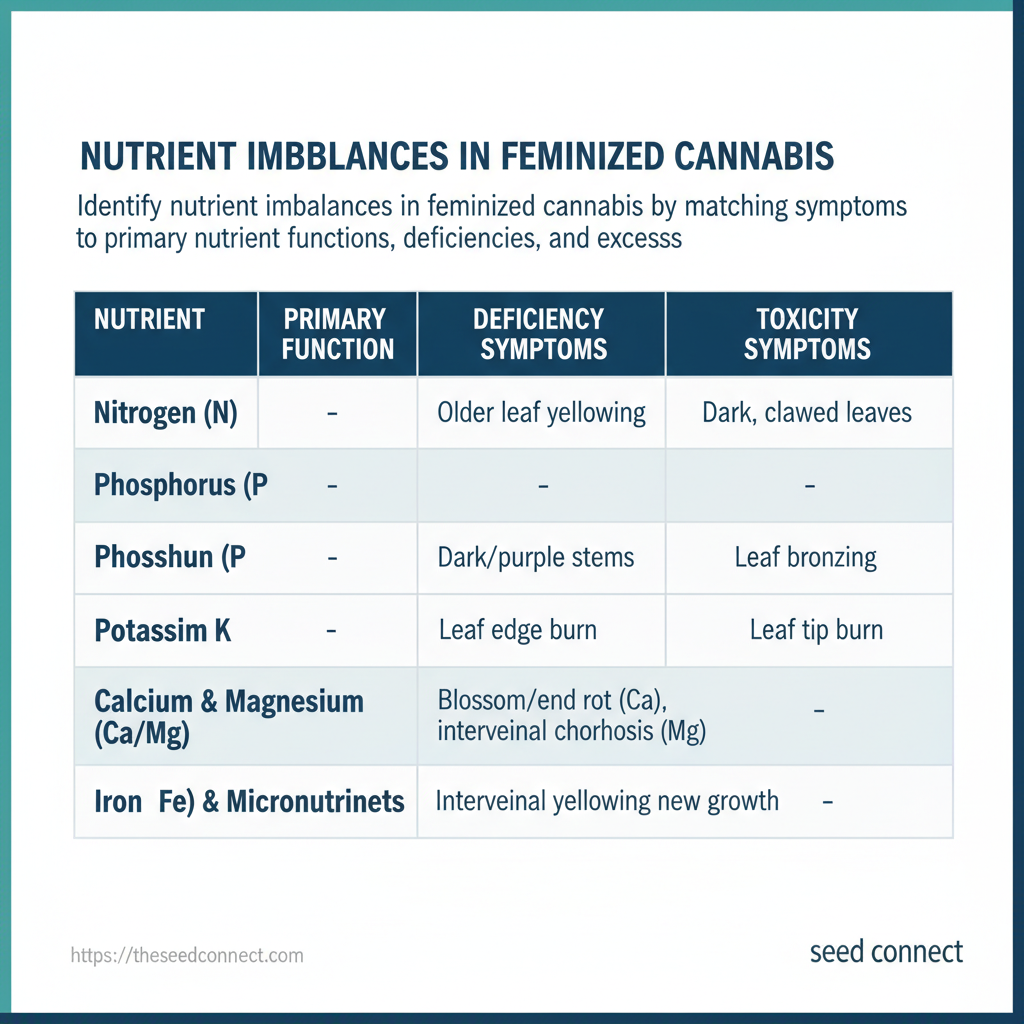
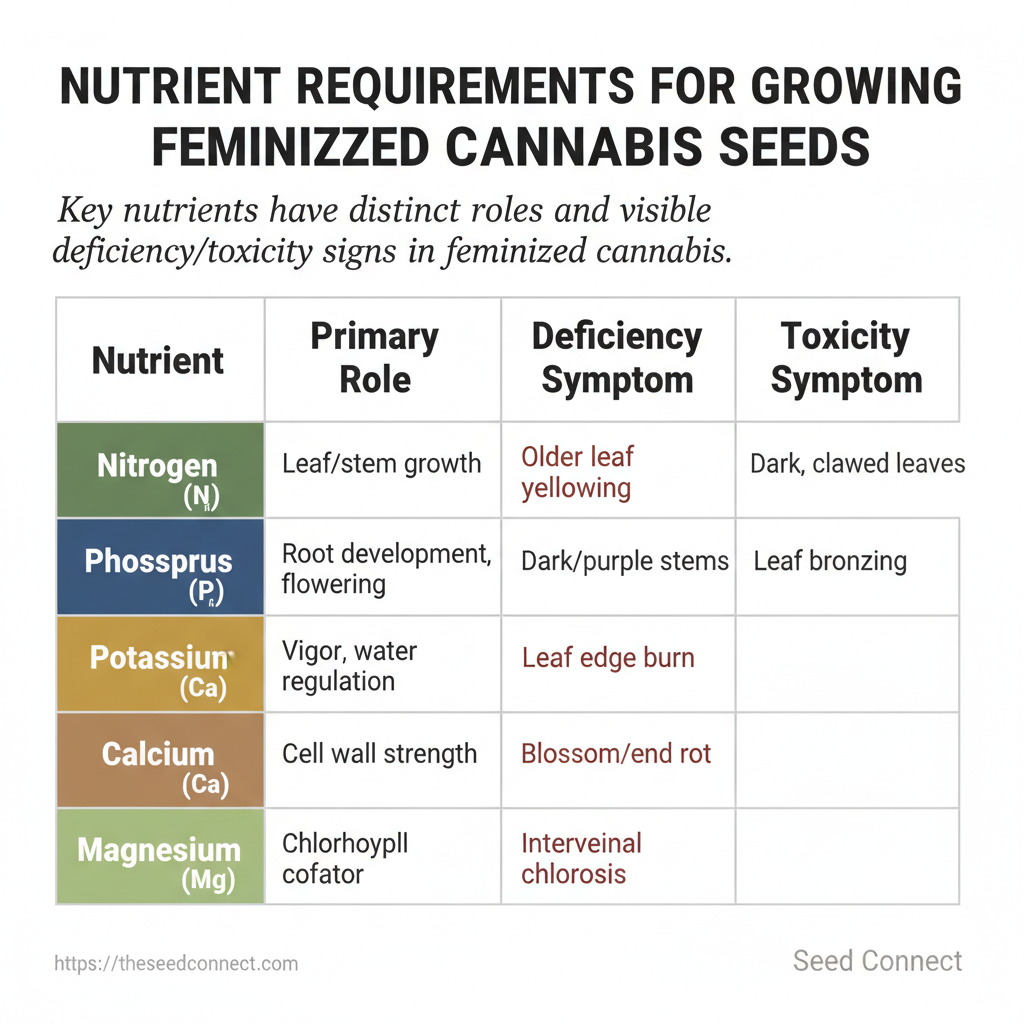
Side-by-side reference of nutrient roles, deficiency signs, excess signs, and toxicity cues (use as a quick diagnostic tool for feeding feminized seeds and plants)
| Nutrient | Primary Function | Deficiency Symptoms | Toxicity/Excess Signs |
|---|---|---|---|
| Nitrogen (N) | Drives leaf and stem growth, chlorophyll production | Older leaf yellowing, slow veg growth | Dark, clawed leaves; nutrient lockout |
| Phosphorus (P) | Root development, flower initiation and maturation | Dark/purple stems, slow flowering, small buds | Leaf bronzing, reduced uptake of Fe/Cu |
| Potassium (K) | Overall vigor, water regulation, bud density | Leaf edge burn, weak stems, poor bud development | Leaf tip burn, reduced Mg uptake |
| Calcium & Magnesium (Ca/Mg) | Cell wall strength (Ca), chlorophyll cofactor (Mg) | Blossom/end rot, interveinal chlorosis | High Ca causes Fe/Zn deficiency; excess Mg rarely toxic |
| Iron (Fe) & Micronutrients | Enzyme cofactors, chlorophyll synthesis, defense | Interveinal yellowing on new growth, poor development | Dark leaf speckling; micronutrient toxicity rare but mobile imbalances occur |
What You’ll Need — Tools, Media & Prerequisites
You need a solid set of meters, the right growing media, precise…
What You’ll Need — Tools, Media & Prerequisites
You need good meters, suitable growing media, accurate records, and basic cultivation skills to achieve consistent results. For nutrient management and predictable plant responses, invest in accurate pH and EC/TDS meters, know how your chosen medium changes feed schedules, and log seed batch and breeder recommendations before you start. These foundations reduce guesswork when dialling in cannabis nutrients and when feeding feminized seeds or autoflowers.
- Essential handheld tools:
- pH meter: calibrated regularly; target
5.8–6.2for soil-less,6.0–6.8for soil. - EC/TDS meter: tracks soluble salts; useful for measuring nutrient strength.
- Reliable scale: for weighing dry amendments and measuring solution concentrates.
- Thermo-hygrometer: monitors ambient temperature and relative humidity.
- Quality lights and ballast: rated for the space and crop stage.
- Media and amendments you must choose first:
- Soil: buffered, slower feed schedule; pH swings are damped by organic matter.
- Soilless mixes (coco, peat blends): more frequent, precise nutrient dosing required.
- Hydroponic systems: fastest uptake, tightest control—nutrient solution management is critical.
- Amendments: cal-mag, beneficial microbes, and buffering agents depend on media choice.
Skills and knowledge to acquire before planting:
- Basic nutrient literacy: understand N–P–K balance and secondary elements. Calibration routine: daily EC checks and weekly pH calibration. Feed schedule adaptation: know that feeding feminized seeds follows different timelines than photoperiod plants; autoflowers need gentler early nutrition.
- Recordkeeping discipline: log seed batch, breeder notes, germination date, nutrient strengths, and EC/pH readings.
Practical examples and setup guidance:
- Example record entry: Breeder X — Batch 2025A; germinated 2025-06-01; week 2 EC
0.6→ week 4 EC1.2; pH maintained5.9. - Time estimate: initial setup and calibration — 1–2 hours; weekly maintenance — 15–45 minutes.
- Difficulty level: beginner to intermediate — basic meters and media understanding make this approachable.
Include a simple checklist or comparison table showing media, typical feed frequency, and starting EC values to speed decisions. Recording seed provenance and breeder recommendations—whether for feminized cannabis seeds, autoflowers, or high-THC genetics—prevents costly missteps later. Understanding these prerequisites gets the technical variables under control so nutrient decisions become deliberate instead of guesswork.
Step-by-Step Feeding Schedule — Seedling to Flower (Numbered Steps)
Start feeding with a light…
Step-by-Step Feeding Schedule — Seedling to Flower (Numbered Steps)
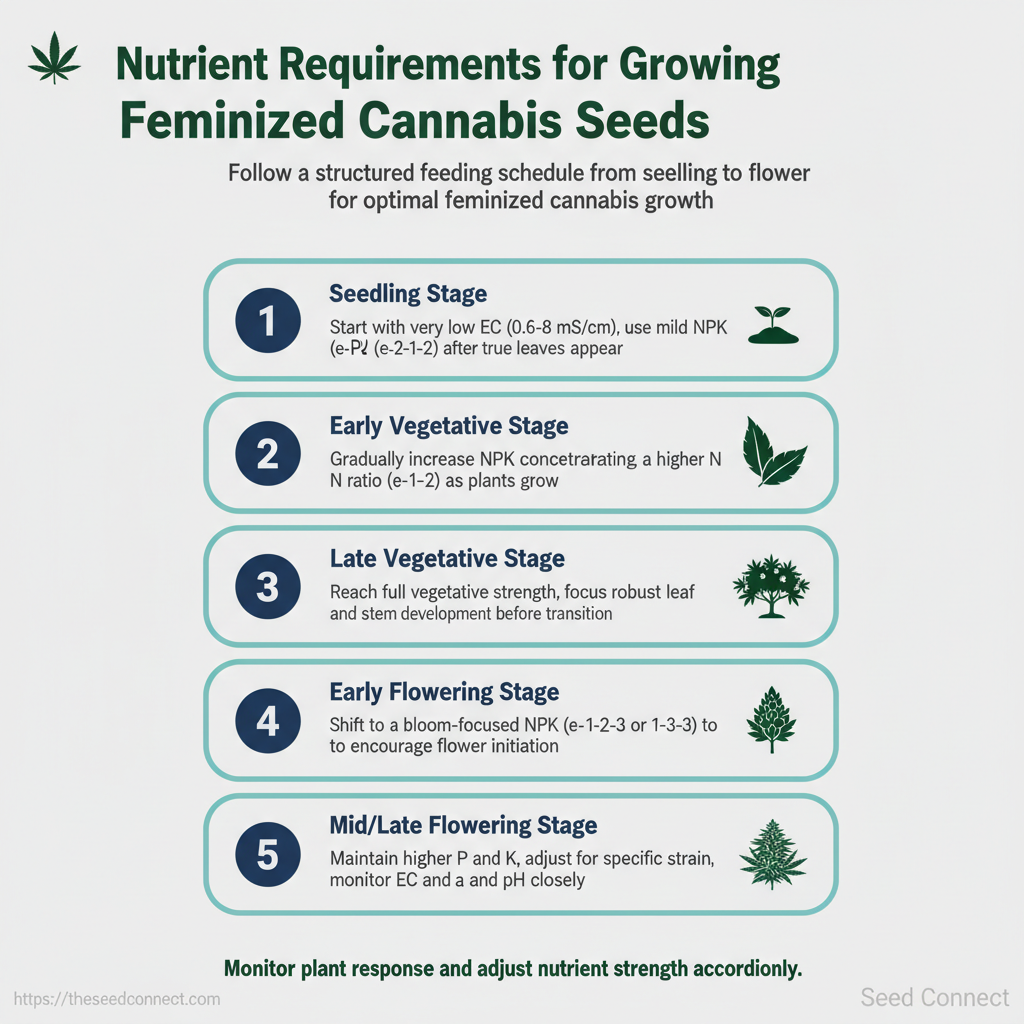
Start feeding with a light hand and progress by clear, observable triggers rather than calendar days alone. This schedule maps nutrient strength, pH, EC ranges and NPK emphasis across the six critical stages so feeding feminized seeds yields predictable, vigorous development without nutrient lockout.
- Seedling (Week 1–2)
- Feed strength:
10–25%of manufacturer chart. - pH/EC targets: soil
pH 6.0–6.5, coco5.8–6.2, hydro5.5–6.0; EC0.4–0.8 mS/cm. - NPK focus: According to 3 4 2 Nutrient Ratio: The Key to Healthy Cannabis Seedlings (blimburnseeds.com), low N, trace microelements.
- Transition trigger: 2–3 true leaves, stable growth rate, no yellowing.
- Expected outcome: steady root establishment; avoid salts build-up.
- Early Vegetative (Weeks 2–4)
- Feed strength:
30–50%. - pH/EC targets: soil
6.0–6.8, coco5.8–6.2, hydro5.6–6.0; EC0.8–1.2 mS/cm. - NPK focus: Research from 18 Cannabis Nutrients First-Time Growers Need to Know (humboldtseedcompany.com) indicates to increase N for leaf/stem growth.
- Transition trigger: vertical stretch, 4–6 nodes, healthy leaf expansion.
- Late Vegetative (Weeks 4–8)
- Feed strength:
60–80%. - pH/EC targets: soil
6.2–6.8, coco5.8–6.2, hydro5.8–6.0; EC1.0–1.6 mS/cm. - NPK focus: high N, balanced P/K.
- Transition trigger: desired canopy size reached, first pre-flower pistils may appear or grower initiates flowering by light schedule.
- Pre-Flower / Transition (1–2 weeks)
- Feed strength:
70–90%. - pH/EC targets: soil
6.0–6.6, coco5.8–6.2, hydro5.6–6.0; EC1.4–1.8 mS/cm. - NPK focus: reduce N, increase P/K to support bud set.
- Transition trigger: pistils clearly visible; stretch slowing.
- Flowering (Weeks 3–8+ of bloom)
- Feed strength: ramp to
80–100%for peak bloom; reduce late-season nitrogen. - pH/EC targets: soil
6.0–6.5, coco5.8–6.2, hydro5.8–6.0; EC1.6–2.2 mS/cm(reduce slightly for sensitive strains). - NPK focus: high P/K, moderate Ca/Mg, microelements for terpene/trichome production.
- Transition trigger: pistils brown/amber trichomes (start final flush decision).
- Flush (Last 1–2 weeks)
- Feed strength:
0%(plain pH-balanced water) or10%if using bloom boosters conservatively. - pH/EC targets: keep pH stable; EC <
0.6 mS/cm. - NPK focus: remove salts to improve final taste/smoothness.
- Transition trigger: harvest when trichomes at desired color.
Warnings and practical notes
- Avoid overfeeding: start low and increase gradually; persistent tip burn and slow uptake indicate salt build-up or lockout.
- Nutrient lockout signs: interveinal chlorosis, sudden pH/EC swings, and stalled growth — perform media flush and test runoff EC/pH.
- Measurement is non-negotiable: monitor
ECandpHin feed and runoff each change.
Visual schedule mapping growth stage to pH, EC, NPK emphasis, feed strength (%), and duration in weeks
| Growth Stage | Weeks | pH (Soil/Coco/Hydro) | EC (mS/cm) Range | NPK Focus |
|---|---|---|---|---|
| Seedling | 1–2 | 6.0–6.5 / 5.8–6.2 / 5.5–6.0 | 0.4–0.8 | Low N, micros |
| Early Vegetative | 2–4 | 6.0–6.8 / 5.8–6.2 / 5.6–6.0 | 0.8–1.2 | Increase N |
| Late Vegetative | 4–8 | 6.2–6.8 / 5.8–6.2 / 5.8–6.0 | 1.0–1.6 | High N, balanced P/K |
| Pre-Flower (Transition) | 1–2 | 6.0–6.6 / 5.8–6.2 / 5.6–6.0 | 1.4–1.8 | Reduce N, raise P/K |
| Flowering | Weeks 3–8+ | 6.0–6.5 / 5.8–6.2 / 5.8–6.0 | 1.6–2.2 | High P/K, Ca/Mg |
| Flush | Last 1–2 | Maintain stable pH | <0.6 | Plain water (remove salts) |
pH and EC in feed and runoff prevents lockout and helps dial nutrient mixes for specific feminized seeds. When executed consistently, this approach minimizes stress and maximizes yield and terpene expression. Understanding these controls lets experienced growers push performance without risking crop health.
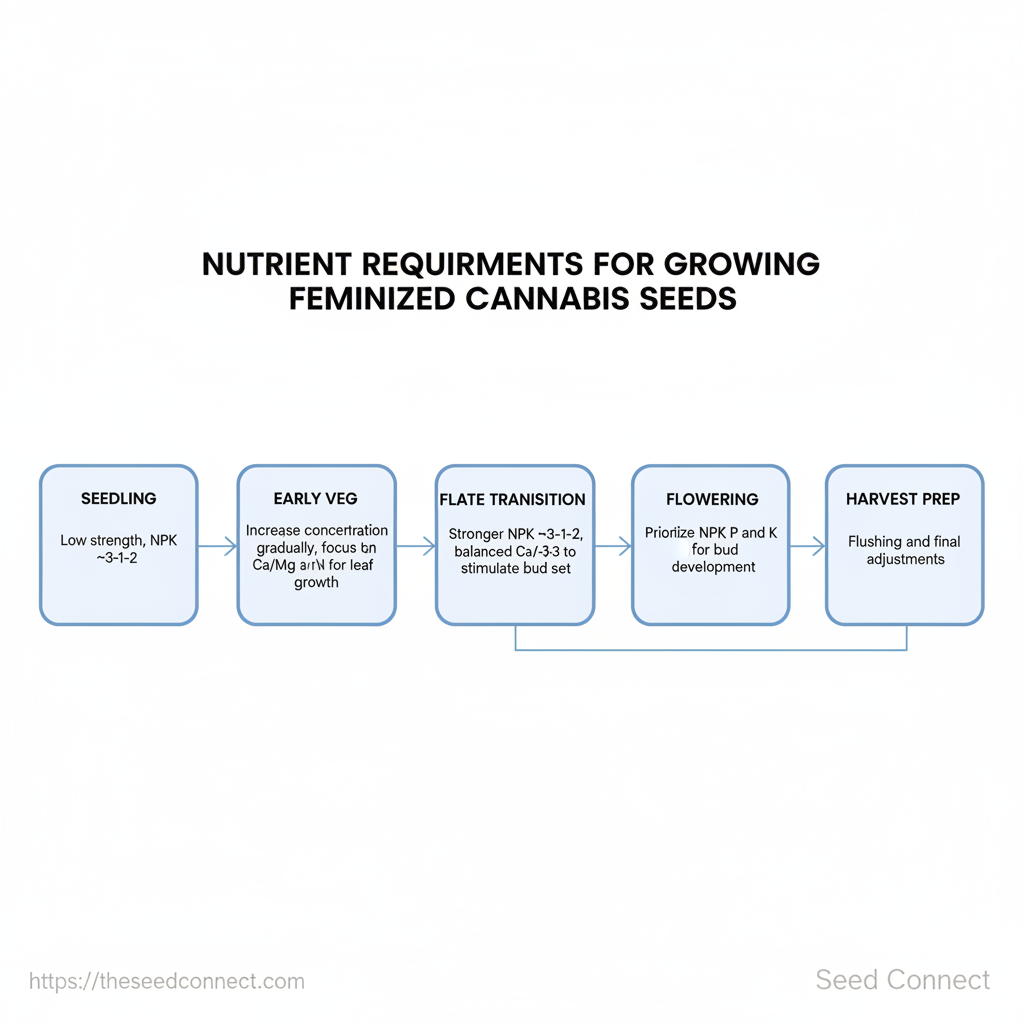
Key Takeaway: Begin by mixing a complete nutrient solution for your plants: dissolve the base nutrients first, then stir in the secondary and micro additives, adjust the pH, and check the electrical conductivity. Doing the sequence correctly prevents nutrient…
Mixing & Delivering Nutrients Correctly
Begin by mixing a complete nutrient solution for your plants: dissolve the base nutrients first, then stir in the secondary and micro additives, adjust the pH, and check the electrical conductivity. Doing the sequence correctly prevents nutrient lockouts, precipitation and inconsistent dosing that stunt growth—especially important when feeding feminized seeds to maximize early vigor.
- Step-by-step mix order (follow this every time)
- Fill the reservoir with pre-filtered water at the target temperature (
18-22°C). - Add base macronutrients first (NPK solutions or balanced grow formulas) and stir until fully dissolved.
- Add secondary elements & micros (calcium, magnesium, iron) because they stay soluble when added after the base.
- Add organics or chelates (bud boosters, humic acids) last; these often bind if added too early.
- Measure and adjust pH after everything is dissolved — never before — then recheck EC/TDS and top up water to desired volume.
- Water temperature: keep solutions between 18–22°C (65–72°F) to maintain dissolved oxygen and reduce pathogen risk. Warmer reservoirs drop dissolved oxygen and encourage root pathogens.
- pH control: adjust pH after full mixing using
pH up/pH down; for most media, target 5.8–6.2 in hydro and 6.0–6.8 in soil. - EC/TDS recheck: changing pH can alter EC slightly—measure again and correct to target ppm for stage (seedling, veg, bloom).
Application methods and when to use them
- Root feeding (drip, flood & drain, reservoir): Best for: steady, complete nutrition; Use when: day-to-day feeding, hydro systems, large plants.
- Foliar feeding (sprays): Best for: fast correction of micronutrient deficiencies and boosting during stretch; Use sparingly: not a replacement for root feeding and avoid in high light/heat.
- Flushes: When needed: salt build-up or prior to harvest; How: use plain water at reservoir temp with pH balanced, then restore nutrients.
Reservoir hygiene and practical checks
- Weekly: drain, clean, and disinfect reservoirs with mild peroxide or approved disinfectant.
- Daily: top up with fresh, cooled water; check
pH,EC, and temperature. - Common mistake: adding pH before mixing — this causes inaccurate dosing and precipitates.
Suggested tools and checklists: digital pH meter, EC meter, temperature probe, mixing paddle, and a simple checklist that records date, volume, pH, EC, and temp for each change.
Consistent mixing order and clean delivery systems prevent nutrient imbalances and protect roots—those practices translate directly into healthier plants and better results when feeding feminized seeds for optimal growth nutrients.
Key Takeaway: Check the basics first: test the pH and EC right away when you notice symptoms. Then, figure out what’s going on by looking at symptom patterns instead of guessing.
Diagnosing Nutrient Problems — Troubleshooting Common Issues
Check the basics first: test the pH and EC right away when you notice symptoms. Then, figure out what’s going on by looking at symptom patterns instead of guessing. Most nutrient issues stem from either incorrect solution strength (EC), locked-out elements caused by pH swings, or true deficiencies from inadequate micronutrients. Follow a stepwise corrective routine, document each action, and wait 48 hours to judge response.
Prerequisites
- Tools needed: pH meter, EC/TDS meter, chelated micronutrient mix, flush solution (pH-balanced water), notebook or digital log.
- Time estimate: 10–30 minutes to test and treat a single plant; 48–72 hours to evaluate effects.
Step-by-step troubleshooting (apply in sequence)
- Test pH and EC: measure runoff and reservoir; record values. 0).
- If EC is >20% above target or salts visible, flush with pH-balanced water; re-check EC after drainage. 3.
If pH is out of range, correct slowly—adjust reservoir pH and top up with balanced nutrient mix. 4. For isolated micronutrient symptoms (interveinal chlorosis, purple veins) add a chelated micro mix foliar or root feed; avoid overdosing.
- Document every change, photograph affected leaves, and wait 48 hours before further interventions.
Practical examples and tips
- Yellowing lower leaves: often nitrogen remobilization or slightly low EC; expect subtle improvement in 3–7 days after correction.
- Leaf tip burn: immediate sign of salt build-up; flushing usually removes burnt progression but not existing necrosis.
- Purpling stems: can be genetics or phosphorus stress—check temperature and P levels before adding P-heavy feed.
Quick-reference of symptom, likely cause, immediate fix, and preventive measure
| Symptom | Likely Cause | Immediate Fix | Prevention |
|---|---|---|---|
| Yellowing lower leaves | Nitrogen deficiency or natural senescence | Increase N slightly; check EC/pH | Balanced N in veg, staged feeds |
| Leaf tip burn (brown edges) | Salt build-up / high EC | Flush with pH-balanced water | Frequent runoff testing; lower EC |
| Purpling stems or veins | Cold stress or P shortage | Warm root zone; moderate P feed | Maintain temps; stage-appropriate P |
| Slow growth despite feeding | Root health issue or pH lockout | Inspect roots; adjust pH; mild root drench | Root hygiene; correct pH range |
| Blossom deficiencies (powdery, small buds) | Micronutrient or Ca/Mg imbalance | Add chelated micros; supplement Ca/Mg | Complete bloom nutrient program |
Documenting actions and waiting 48 hours prevents chasing phantom problems and reduces plant stress. When adjustments are deliberate and recorded, diagnosis becomes faster and corrective cycles shorten.
Key Takeaway: Start by treating nutrient management as a system rather than a checklist: feeding feminized seeds successfully depends on balancing soil biology, soluble minerals, and timing. Introduce beneficial microbes early to mobilize locked nutrients, use…
Tips for Success & Pro Tips for Experienced Growers
Start by treating nutrient management as a system rather than a checklist: feeding feminized seeds successfully depends on balancing soil biology, soluble minerals, and timing. Introduce beneficial microbes early to mobilize locked nutrients, use silica to strengthen cell walls before stress events, and reserve high-PK boosters for mid-flower to amplify bud development. Keep meticulous logs for every feed change and always run small compatibility tests before mixing concentrated products.
Practical, actionable steps
- Apply a mycorrhizal or microbial inoculant during the first root development stage to increase P uptake and root mass. 2.
Add a potassium silicate product at low strength through veg to build stem thickness and pest resilience. 3. Save concentrated bloom PK boosters for week 3–6 of flower; earlier use can push growth at the expense of structure.
- Mix one-quarter strength of new mixes in a jar and watch for precipitates or pH swings for 24 hours. 5.
Record product, batch, dose, pH, EC, runoff ppm, and plant response for every feed.
Advanced strategies and supplements
- Beneficial microbes:** Purpose: nutrient mobilization and root health — apply at transplant and periodically. Silica (Si): Purpose: structural strength and stress mitigation — use through veg and early flower. Cal‑Mag: Purpose: prevent Ca/Mg lockouts, especially with reverse-osmosis water — add as needed based on tissue tests.
- Bloom PK boosters: Purpose: drive flower weight — use weeks 3–6 of flower at controlled doses. Foliar micronutrient sprays: Purpose: quick correction of deficiencies — use in low light and low concentration for targeted fixes.
Troubleshooting tips
- If you see leaf margin burn after a feed change, reduce EC by 10–20% and flush lightly; review the last added supplement.
- If foliar spray causes spotting, reduce concentration to half and spray at dawn/dusk only.
- If mixes precipitate, stop and re-test at lower strengths — insoluble salts indicate incompatibility.
Time estimates
- Establish microbial populations: 1–4 weeks to see root improvements.
- Silica benefits: structural gains visible within 2–3 weeks of continuous use.
- PK response: measurable bud density changes from week 4 of flower onward.
Recommend common supplements with short use-case and timing for feminized cannabis
| Supplement | Purpose | When to Use | Dosage Notes |
|---|---|---|---|
| Mycorrhizae / Microbial inoculants | Increase P uptake, root mass | At transplant and every 4–8 weeks | Typical: apply per product label; hobbyists use 1–3 g/root ball or follow liquid rates |
| Silica (Si) | Improve stem strength, stress resistance | Continuous veg → early flower | Typical: 50–150 ppm (e.g., 0.5–2 mL/L depending on product) |
| Cal‑Mag supplement | Prevent Ca/Mg deficiencies with RO/well water | Throughout veg and early flower as needed | Typical: 1–5 mL/L or 1–3 tsp/gal; reduce if tap water already contains Ca/Mg |
| Bloom PK boosters | Drive flower size and resin production | Week 3–6 of flower (mid-flower window) | Typical: start at 25–50% label strength, ramp to manufacturer recommendation if plants tolerate |
| Foliar micronutrient sprays | Quick correction of micronutrient deficiencies | As corrective sprays in veg and early flower | Typical: dilute to 0.1–0.2% solution; spray in low light, avoid bud contact |
Understanding and applying these principles shortens the learning curve and keeps crops predictable. When growers adopt this systemized approach, nutrient issues become easier to diagnose and fixes are faster to validate.
Harvest Prep: Flushing and Final Nutrient Adjustments
As you enter the last week of your crop, have a solid plan in place. Flushing clears out leftover salts and fertilizers that can affect terpenes and make your smoke harsh. Also, make those last nutrient adjustments to keep your buds dense and resin-rich. Timing and method vary by medium; the objective is a clean runoff EC close to your baseline and visually healthy trichomes and pistils at harvest.
- Flush protocols by medium
- Soil (light mixes): Begin flushing 7–14 days before harvest. Run 2–3x pot volume of water through the media over several sessions to gradually wash salts without shocking the plant.
- Soilless coco: Start 5–10 days before harvest. Coco holds more salts — use a longer, steadier flush (3–4x pot volume) and measure runoff EC between sessions.
- Hydroponics/Deep Water Culture: Flush/reserve-replace 24–72 hours before harvest by swapping nutrient solution to plain water or very low-strength finish solution; shorter window because roots are directly bathed.
- Outdoors in large pots/ground: Flush 10–21 days before harvest depending on rainfall and soil depth; multiple soak-and-drain cycles mimic natural rain leaching.
- Plan water volumes: aim for
2–4×container volume total, spread over several irrigations rather than a single shock. - Target runoff EC: depends on starting EC — aim for runoff within ~0.3–0.5 mS/cm of your input water EC for soil/light mixes; for coco, target runoff EC ≤ 0.8–1.0 mS/cm if you typically run 1.2–2.0 mS/cm during veg/flower. Hydro systems should approach
0.4–0.8 mS/cmin the final reservoir. - Use RO water strategically: switching to
reverse osmosisor very low-EC municipal water for the final flush shortens the time needed to reach target runoff and removes hard-water minerals that bind to salts.
Final nutrient adjustments
- Low P, moderate K: in last 1–2 weeks reduce phosphorus, maintain or gently increase potassium to support sugar formation and bud firmness.
- Silica and micronutrients: continue silica up to harvest; reduce chelated micros only if runoff EC stays high.
- Carb feeds and bloom boosters: stop 7–10 days before harvest to avoid excess residues; if using, taper rather than cut cold.
Practical examples and logging
- Example log entry: Day -10: flush with RO water 3× pot volume → runoff EC 0.9 mS/cm; buds appear swollen, trichomes mostly cloudy.
- Troubleshoot: if runoff EC remains high after 3 flushes, root-bound plants may need repotting or flush with slightly warmer water to increase solubility.
Recording baseline data speeds future decisions. Use a simple harvest_log.csv template:
csv date,day_to_harvest,medium,input_EC (mS/cm),runoff_EC (mS/cm),notes 2025-08-01,-10,coco,1.6,0.95,"blooming, cloudy trichomes"Understanding these protocols shortens the finishing window and improves smoke quality without compromising yield. When executed with consistent EC records and careful observation, final nutrient management reliably elevates terpene clarity and overall bud quality.
📥 Download: Feminized Cannabis Nutrient Management Checklist (PDF)
Ongoing Record-Keeping, Testing & Scaling Your Feeding Plan
Keeping consistent records, performing targeted tests, and following scaling rules make a nutrient program predictable as the number of plants increases. For each run, log the same fields, use tissue tests to reveal hidden imbalances, and scale by volume while preserving mixing sequence and aeration standards. These methods lower guesswork, avoid problems for the whole crop, and make feeding feminized seeds easier to repeat in future cycles.
- Set the logging baseline (time: 10–15 minutes daily)
- Essential fields: date/time, strain, growth stage, reservoir volume, nutrient brand and dose, EC/pp m, pH, water temp, ambient temp/RH, observed plant symptoms.
- Version control: number each feed solution (
Feed_v1.0) and save mixes as templates for repeat runs. - Sample snapshots: photograph representative plants weekly; store with log entry.
Routine testing that matters
- Tissue tests: send one composite leaf sample per 10–20 plants to detect mobile nutrient deficits before foliar symptoms appear.
- Reservoir checks: measure pH and
ECat fill and daily; recordppmas well if usingCFvsPPMstandards. - Water quality baseline: test source water for alkalinity and chlorine monthly, adjust recipes accordingly.
> Tissue testing often identifies mobile nutrient deficiencies before foliar symptoms appear, enabling corrective feed adjustments without overfeeding.
Scaling rules for volume and aeration
- Maintain mixing order: add base nutrients first, then micros, then pH adjusters — this prevents lockouts and precipitates.
- Scale by concentration, not by ingredient weight alone: when doubling reservoir volume, double ingredient mass but maintain final EC target.
- Aeration increases with size: larger reservoirs need proportionally more oxygen — plan for redundancy.
Practical examples
- Small grow (1–10): 15–20 L reservoir, weekly full mix, daily checks, hand-aeration via air stone.
- Medium (10–50): 100–300 L reservoir, top-up every 2–4 days, twice-daily monitoring, 1–2 pumps and larger air blowers.
- Large (>50): multiple 1,000+ L reservoirs or split tanks, daily fresh mix or continuous dosing, continuous monitoring with sensors and backup aeration.
Tools and templates to add to the workflow
- Digital log template: CSV with timestamped entries and photo links.
- Feed calculator:
final_mass = target_EC / master_stock_EC reservoir_volume(use consistent units). - Checklist: pre-mix verification, aeration test, sensor calibration.
Quick guide comparing small (1-10 plants), medium (10-50), and large (>50) grow nutrient management differences
| Grow Size | Reservoir Volume | Mix Frequency | Monitoring Frequency | Special Considerations |
|---|---|---|---|---|
| Small (1–10) | 10–25 L | Weekly full mix | Daily check (pH/EC) | Manual aeration, simple backups |
| Medium (10–50) | 100–300 L | Refill/top-up every 2–4 days | Twice-daily checks | Larger air pumps, blended dosing |
| Large (>50) | 1,000+ L (or split tanks) | Daily mix or continuous dosing | Continuous sensors, alerts | Redundant aeration, automated dosing |
Understanding these record-keeping and scaling practices enables predictable, repeatable feeding across runs and plant counts. When implemented consistently, they transform nutrient management from reactive troubleshooting into a controlled process that supports optimal growth nutrients and reliable results when feeding feminized seeds.
Conclusion
With a few cycles under your belt, spotting yellowing tips, slow growth, or nutrient burn will feel second nature — and totally fixable! Follow the feeding schedule, keep accurate ppm/EC and pH records, and adjust ratios rather than chasing single-micronutrient fixes; growers who corrected early nitrogen lockout by reducing feed strength and raising pH saw canopy recovery within a week. To get consistent results when feeding feminized seeds, focus on steady cannabis nutrient management. Start with low strength for seedlings, increase N-P-K during vegetative growth, and switch to bloom formulas with calcium and magnesium during flowering for the best growth nutrients.
Next steps: calibrate your meter and log every feed, reduce concentration by 20% when symptoms appear, and practice a 48–72 hour flush before harvest. Industry data suggests that small, repeatable habits lead to practical successes — like one indoor gardener who doubled their bud density by adopting a precise mixing routine, or a small commercial grower who minimized deficiencies by standardizing their feed batches. com) for varieties with predictable nutrient responses.
Take these actions this week: check pH, update your next three feed recipes, and note any plant responses — the pattern shows that disciplined monitoring produces the most reliable harvests.