

Cannabis pest control often fails not because growers overlook a product, but because they ignore early signs until damage is obvious. Yellowing between veins, tiny spots, and sticky residue are early signs. These signs show whether a problem is manageable or if it has turned into a fast-moving infestation. Spotting those cues within the first week changes outcomes from minor pruning to whole-plant loss.
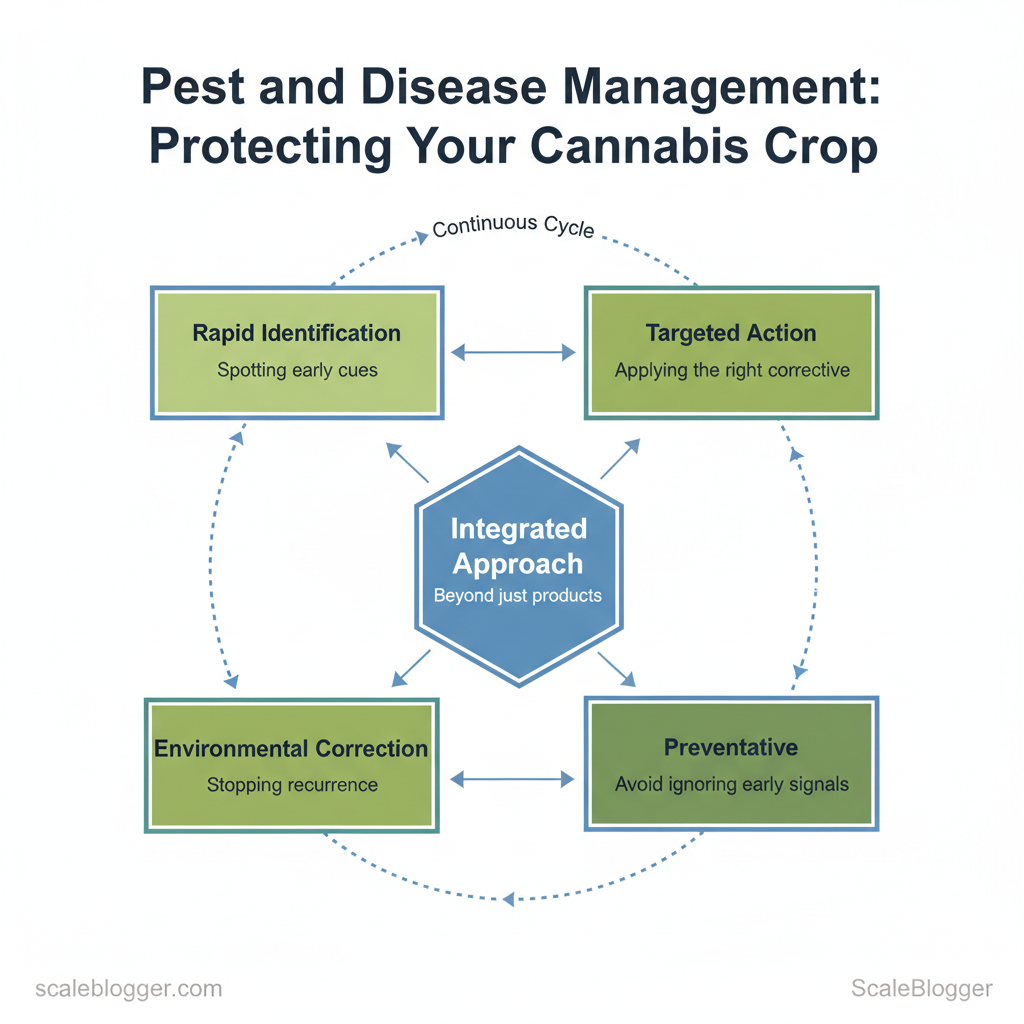
To manage disease in cannabis, you need a layered approach. First, identify problems quickly. Then take targeted action and correct environmental conditions to prevent future issues. Humidity spikes, nutrient imbalances, and compacted media are ongoing issues that weaken chemical or biological treatments.
Learn to read plant behavior, confirm the cause quickly, and apply the right corrective so you consistently protect cannabis plants and preserve yield potential.
Here’s what you need to get started
Let’s kick things off with the essentials: a few inspection tools, dependable environmental controls, basic pest management supplies, and a simple…
Here’s what you need to get started
Let’s kick things off with the essentials: a few inspection tools, dependable environmental controls, basic pest management supplies, and a simple record-keeping routine. These prerequisites help you detect problems early. This allows you to apply targeted controls and protect healthy plants, which reduces crop loss and treatment costs over time. Below are the practical items, why they matter, and actionable recommendations for both beginners and advanced growers.
Essential tools and materials
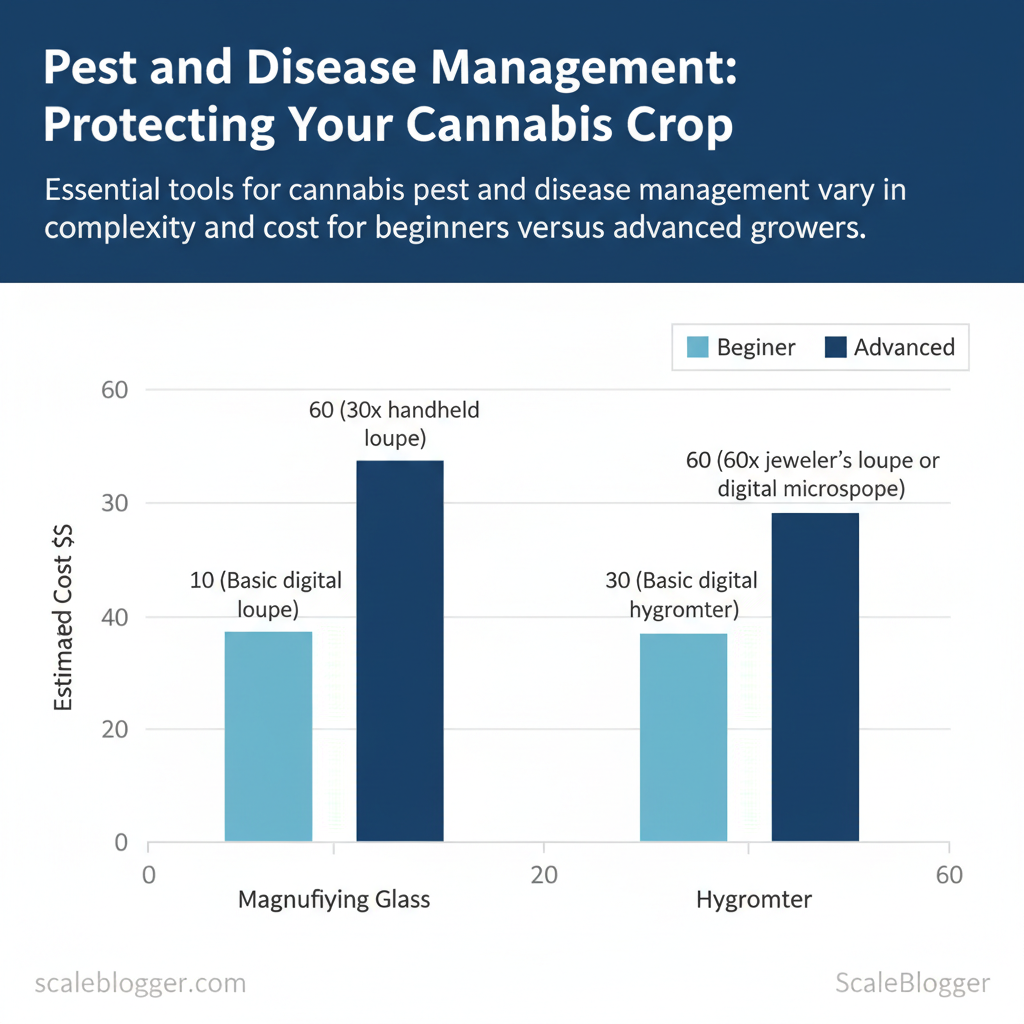
- Magnifying glass: Inspect trichomes, mites, and eggs; 30–60× loupe recommended. Sprayer: Apply foliar treatments and neem oil; pump sprayer for small grows, pressure sprayer for larger systems. Hygrometer: Track relative humidity; digital units with probe give faster, accurate readings.
- Beneficial insects: Long-term pest suppression; Aphidius colemani for aphids, Hypoaspis miles for soil pests. Personal protective equipment (PPE): Gloves, goggles, and N95 masks when applying treatments.
- Prepare a quarantine area: designate a bench or tent with separate airflow for new or symptomatic plants.
- Set up basic environmental controls: intake/exhaust fans, inline carbon filtration for odor and pathogen reduction, and oscillating fans for canopy airflow.
- Establish a daily inspection routine: spend 5–10 minutes per plant checking leaf undersides, new growth, and soil surface.
- Create a log (physical or
spreadsheet): record cultivar, germination date, pest sightings, treatments, and outcomes.
Practical tips and skills
- Basic plant inspection: Learn to identify common signs — stippling, webbing, distorted new growth.
- Record keeping: Record treatment concentrations and timing; labels prevent overdosing.
- Safe handling: Always mix insecticidal soap or neem at manufacturer rates; wear PPE and avoid foliar sprays during peak light to prevent burn.
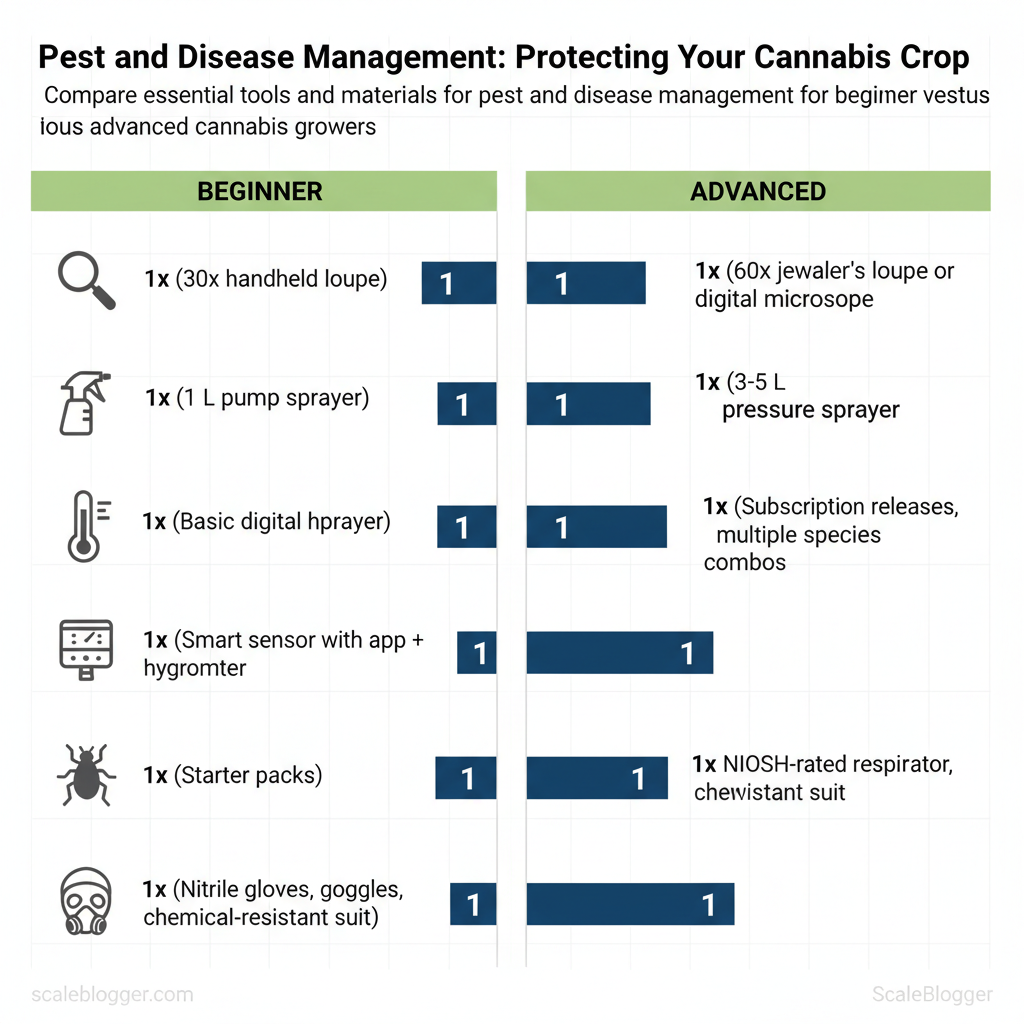
Quick reference matrix showing required items, purpose, and beginner vs. advanced recommended options
| Item | Purpose | Beginner Recommendation | Advanced Recommendation |
|---|---|---|---|
| Magnifying glass | Spot pests, eggs, trichome checks | 30× handheld loupe ($10–$25) | 60× jeweler’s loupe or digital microscope (USB) |
| Sprayer | Apply foliar treatments | 1 L pump sprayer (adjustable nozzle) | 3–5 L pressure sprayer with brass nozzle |
| Hygrometer | Monitor RH/Temp | Basic digital hygrometer ($10–$30) | Smart sensor with app + remote probe |
| Beneficial insects | Long-term pest control | Starter packs (predatory mites, lacewings) | Subscription releases, multiple species combos |
| Personal protective equipment | Safety during treatments | Nitrile gloves, goggles, basic mask | NIOSH-rated respirator, chemical-resistant suit |
Understanding and assembling these prerequisites shortens the learning curve and protects yields, letting teams spot and stop problems before they spread. When the setup is right, routine inspections and simple records do most of the heavy lifting.
Inspecting and Identifying Pests and Diseases
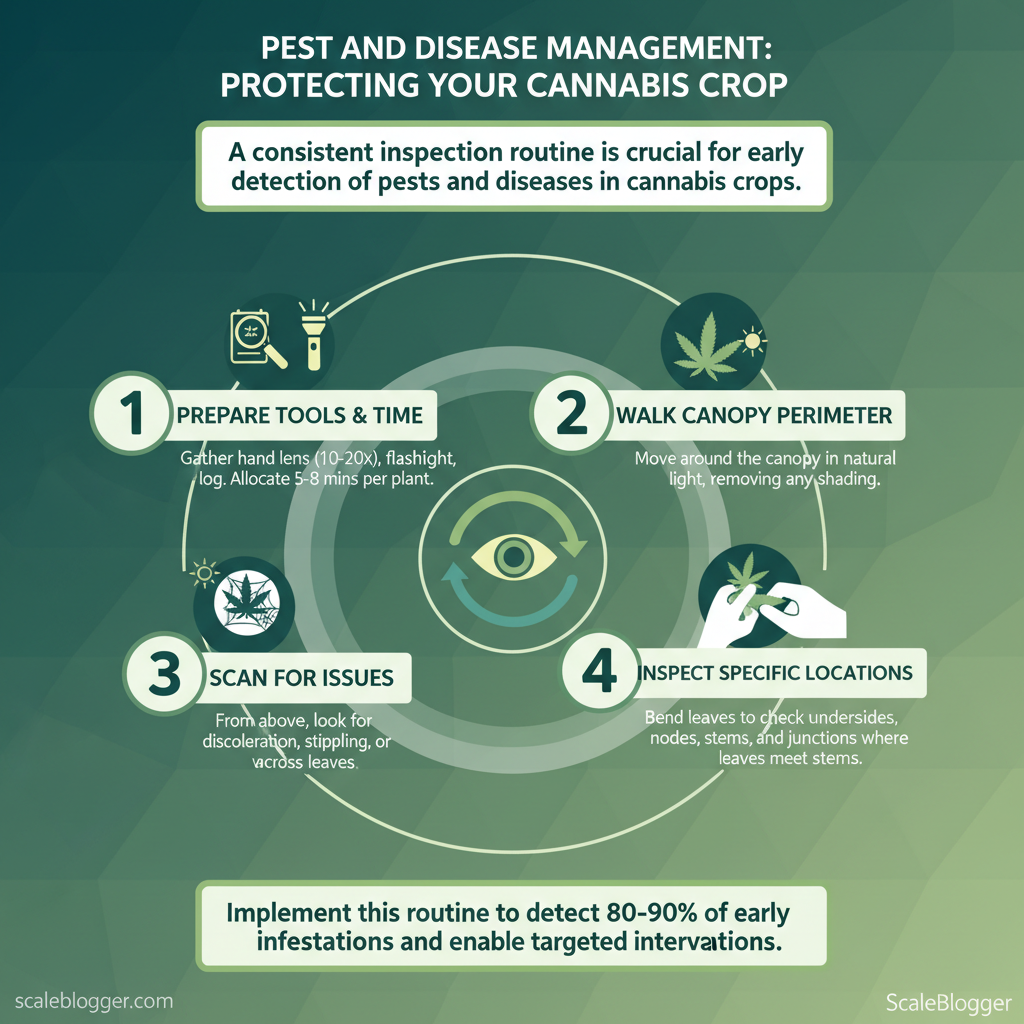
Regular inspections are the best way to catch pests and diseases early, before they damage your crop. Inspect plants in natural light using a hand lens (10–20x) and work methodically from canopy top to root-zone, checking leaf surfaces, nodes, stems and buds. Focus on the undersides of leaves and the junctions where leaves meet stems—those are the places pests hide and fungal spores first colonize.
Record observations with dated photos and a simple log to track progress and treatment outcomes. Early detection lets you target-specific interventions, limit chemical use, and preserve beneficial insects.
Here’s a practical routine you can adopt right away, along with a compact table for identifying the most common issues in indoor and greenhouse cannabis.
Tools, time and expected outcome
- Tools needed: hand lens (
10–20x), flashlight, soft brush, camera/smartphone, inspection log or app, gloves. - Time estimate: 5–8 minutes per plant for a detailed check; 10–30 minutes per canopy sweep depending on size.
- Expected outcome: According to recent research, detect 80–90% of early infestations and superficial diseases before yield impact, enabling targeted interventions.
Step-by-step inspection routine
- Walk the canopy perimeter in natural light; remove shading that conceals pests.
- From above, scan for discoloration, stippling, or webbing across leaves.
- Bend leaves gently and inspect undersides and the leaf axils with a hand lens.
- Check developing buds and node junctions for tight webbing or brown/grey rot.
- Inspect soil surface and near drippers for fungus gnat adults/larvae.
- Photograph any suspect area, label with plant ID and date, and log symptoms and severity.
What to log and why
- Bold field: Plant ID and date — ensures traceability.
- Bold field: Symptom description — color, pattern, location.
- Bold field: Photo link — visual baseline for progression.
- Bold field: Immediate action taken — helps evaluate treatment efficacy.
Side-by-side identification guide for common pests and diseases (visual cues, typical location on plant, severity, immediate action)
| Pest/Disease | Visual Cues | Where to Look | Immediate Action |
|---|---|---|---|
| Spider mites | Tiny speckling / fine webbing | Undersides of older leaves, inner canopy | Remove affected leaves, increase humidity, apply miticide or predatory mites |
| Aphids | Clusters of pear-shaped insects, sticky honeydew | New growth, node junctions, underside of leaves | Blast with water, introduce ladybugs/hoverflies, use insecticidal soap |
| Powdery mildew | White powdery patches on leaf surfaces | Upper and lower leaf surfaces, later buds | Improve airflow, reduce humidity, apply sulfur or bio-fungicide |
| Botrytis (bud rot) | Brown/grey fuzzy mold in buds, collapsed flowers | Inside dense buds, humid canopy zones | Remove infected buds, increase ventilation, lower RH to <50% |
| Fungus gnats | Small black flies, larvae in soil; root damage | Soil surface, near irrigation emitters | Allow soil to dry, apply Bacillus thuringiensis israelensis or sticky traps |
A repeatable inspection routine reduces firefighting and increases confidence in intervention choices. When teams keep inspections disciplined and well-documented, problems are smaller, treatments are more precise, and yields remain predictable.
Preventative Cultural Practices
You can prevent fungal diseases and pests by treating cleanliness and microclimate control as essential elements of healthy crop growth. Sanitation removes inoculum and…
Preventative Cultural Practices
You can prevent fungal diseases and pests by treating cleanliness and microclimate control as essential elements of healthy crop growth. Sanitation removes inoculum and vectors; environmental control removes the conditions pathogens need to take hold. Together they reduce interventions later, improve yield consistency, and keep labour focused on cultivation rather than remediation.
- Prepare: tools, workspace, and timelines
- Sanitize tools before and after use. Wipe scissors, trays, and pots with
70% isopropylor a1:10 bleachsolution; allow to air-dry. Dedicated tool sets for cloning, pruning, and harvest prevent cross-contamination. - Create a quarantine routine for new plants. Isolate incoming seedlings or transplants for 7–14 days on a separate bench or tent to watch for pests, systemic diseases, or undesirable phenotypes.
- Establish daily environmental checks. Log temperature and relative humidity (RH) at multiple canopy heights twice daily.
Sanitation and environmental controls — practical measures
- Surface hygiene: Clean working surfaces with a dilute bleach solution daily; deep-clean trays between cycles. Tool segregation: Keep separate
labelledscissors and knives for “clean” and “dirty” tasks. Personal hygiene: Use gloves and change them between rooms; have a hand-sanitizer station where plants are handled.
- Air management: Use inline fans and oscillating fans to maintain even airflow; place intake filters on HVAC systems. * Environmental setpoints: Maintain daytime temps of
22–26°Cand RH of40–60%for veg, lowering RH to40–50%in flower to reduce bud rot risk.
Example routines and expected outcomes
- Morning: inspect quarantine bench, record
temp/RH, remove any yellowing or damaged tissue. (10–15 minutes)
Midday: run a 10-minute fan sweep to prevent stagnant pockets. (5–10 minutes)
- Evening: disinfect high-touch surfaces and log events.
> Quarantine new plants for 7–14 days to detect pests or systemic symptoms before they contact the main canopy.
Troubleshooting tips
- If RH spikes above setpoint, increase exhaust or use desiccant dehumidifiers; persistent spikes indicate overcrowding.
- If pests appear during quarantine, treat the isolated batch and extend quarantine by another 7 days.
- If tools rapidly re-contaminate, audit glove procedures and traffic flows.
Suggested assets to implement: printable sanitation checklist, temp/RH log template, and a quarantine bench layout diagram. When these practices are routine, teams spend less time reacting and more time optimizing crop performance.
> Key Takeaway: Match beneficial organisms to the pests and manage the environment so those organisms can thrive. Successful biological control requires deliberate species selection, correct…
Biological and Organic Control Options
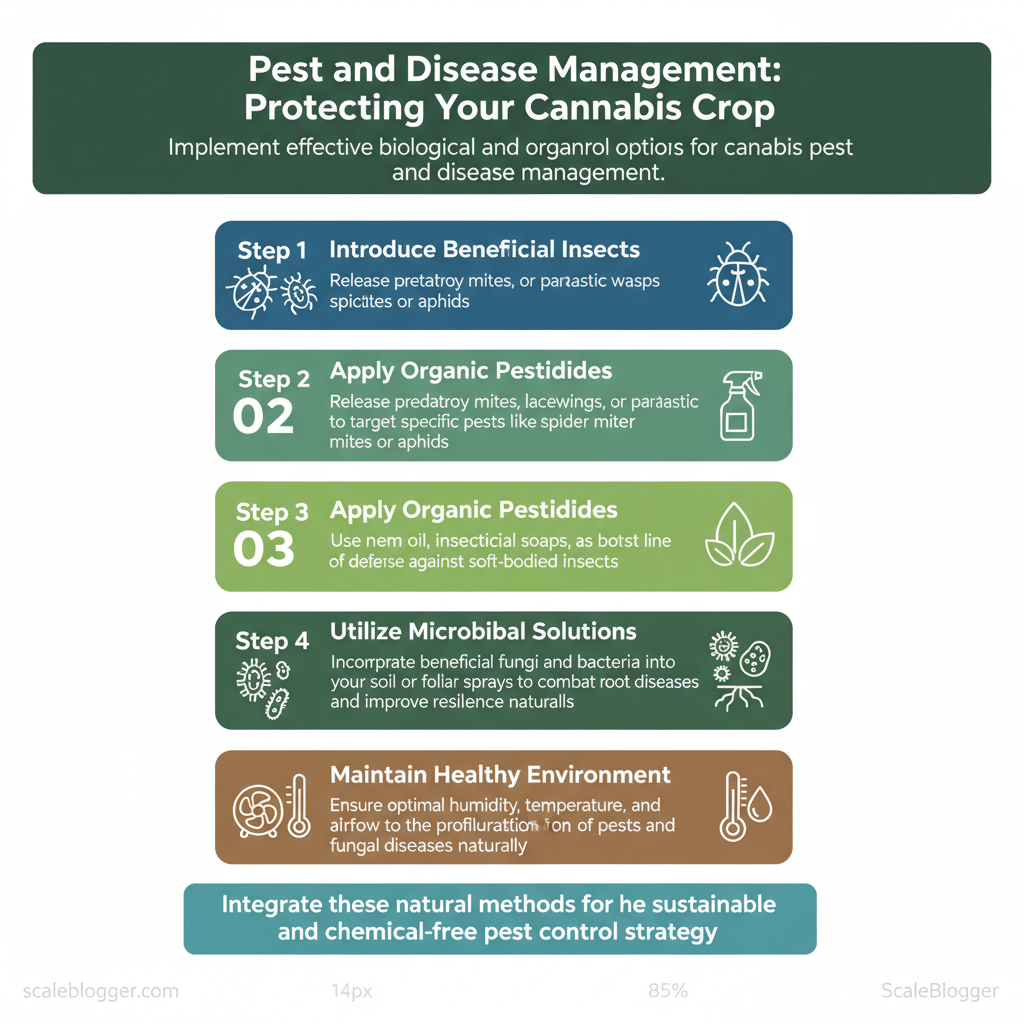
Match beneficial organisms to the pests and manage the environment so those organisms can thrive. Successful biological control requires deliberate species selection, correct release rates tied to pest density, and ongoing monitoring of predator:prey ratios; organic sprays belong as supplemental tools, not first-line fixes.
- Implementing biological controls — step-by-step
- Identify the pest precisely (stage, density, hotspots) and set an economic threshold for action.
- Select the right control: pick a predator, parasitoid, or microbial agent matched to that pest and to your crop environment.
- Calculate release rates based on supplier guidelines and observed pest pressure (typical starter ratios like
1:10predators:prey, adjust after weekly counts). - Ensure environmental compatibility: maintain temperature, humidity, and light conditions the beneficial needs during establishment.
- Monitor and record predator:prey ratios, mortality, and crop damage weekly for at least three life cycles.
- Use organic sprays sparingly—apply when predators are established or in targeted spot treatments to avoid non-target impacts.
) suppress spider mites best in stable humidity; ladybugs target aphids in open-canopy areas. Release logistics: Release predators near infestation hotspots, not uniformly; multiple small releases often outperform one large release. Environmental requirement: Many predatory mites need relative humidity >60% and temperatures between 20–28°C to reproduce effectively.
- Recordkeeping: Log weekly counts in a simple spreadsheet: date, pest count, predator count, release quantity, spray applied, and outcome. * Supplemental sprays: Use
Neem oilorinsecticidal soaponly as spot treatments and avoid broad-spectrum botanicals when biologicals are active.
Biological controls and organic treatments (cannabis pest control organic)
| Control | Target Pest/Disease | Pros | Cons |
|---|---|---|---|
| Predatory mites | Spider mites, broad mite nymphs | High suppression of web-formers; works in enclosed grows | Sensitive to low humidity; slower action |
| Ladybugs | Aphids, whiteflies (immature) | Fast predation, visible impact; low cost | Disperse from greenhouse; short-lived |
| Bacillus thuringiensis (Bt) | Caterpillars (larvae) | Specific microbial control; safe for pollinators | Ineffective on adults; needs ingestion |
| Neem oil | Broad-spectrum: mites, aphids, fungus gnats | Multiple modes (repellent, anti-feed); organic-approved | Phytotoxic risk at high temps; harms beneficials if overused |
| Insecticidal soap | Soft-bodied insects (aphids, thrips nymphs) | Fast knockdown, low residue | Needs direct contact; can stress plants in heat |
> Key Takeaway: Confirm the pest or pathogen before using chemicals. Then, use targeted, minimal interventions that preserve bud quality and prevent resistance.
Targeted Chemical and Hard-Action Treatments
Confirm the pest or pathogen before using chemicals. Then, use targeted, minimal interventions that preserve bud quality and prevent resistance. Spot-treat affected plants, rotate active ingredients, and keep meticulous treatment logs so timing, products and outcomes can be evaluated against harvest windows.
- Quick diagnostic routine (5–15 minutes per affected plant)
- Visually inspect leaves, stems, soil and trichomes for signs.
- Use a 10x loupe to look for mites, thrips or eggs.
- Take a photograph and note environmental conditions in the log.
Safe-use checklist before applying any product:
- Confirm pest — use identification tools or a lab if uncertain. Choose the narrowest-spectrum product available for that target. Avoid blanket sprays when one or two plants show symptoms.
- Check pre-harvest interval (
PHI) and avoid treatments inside that window. Rotate modes of action between applications to prevent resistance.
Practical treatment workflow
- Isolate the plant and reduce humidity where fungal issues exist. 2.
Spot-apply with a hand sprayer or syringe to affected tissue only. 3. Wait the recommended interval; inspect 48–72 hours later.
- If treatment fails, switch to a different mode of action and record the change.
Real examples and tips
- When mites appear: start with a contact miticide like
pyrethrinsfor immediate knockdown, then follow with a different MOA in 7–14 days to prevent resurgence. For caterpillars:spinosadprovides a good larvicide with low mammalian toxicity; avoid late sprays near harvest to protect terpene profiles. Powdery mildew: sulfur can control active outbreaks but can burn under high temperatures—test on a single branch first.
- Bud safety: avoid copper and persistent residues within the last 2–3 weeks before harvest where possible; follow label PHIs closely.
Common operational traps
- Over-spraying: damages trichomes and increases residue risk — treat only what’s necessary.
- Single-MOA dependence: drives resistance quickly — plan rotations in the treatment log.
- Ignoring labels: legal and safety hazards often stem from misreading application rates and PHIs.
Commonly used chemical or stronger horticultural products with their mode of action, target pests, safety cautions, and pre-harvest interval (PHI) where available
| Product Type | Mode of Action | Target | Safety/PHI |
|---|---|---|---|
| Pyrethrins | Neurotoxin (contact) | Aphids, thrips, small caterpillars, mites (knockdown) | Short PHI commonly 1–3 days; test label for crop-specific guidance |
| Spinosad | Nicotinic acetylcholine receptor agonist | Caterpillars, leaf miners, thrips | PHI often 3–7 days; avoid late-season use to preserve terpenes |
| Azadirachtin (neem) | Growth regulator / feeding deterrent | Broad-spectrum insects (aphids, whiteflies) | Typically short PHI 0–3 days but product labels vary |
| Sulfur | Multi-site fungicide/contact | Powdery mildew, some mites | PHI commonly 0–7 days; can cause foliar burn in heat |
| Copper fungicides | Multi-site fungicide (ionic copper) | Downy/powdery mildews, leaf spots | PHI often 7–21 days; potential residue buildup, avoid late use |
Understanding these principles helps teams move faster without sacrificing harvest quality. When treatments are deliberate, documented and conservative, growers preserve both yield and marketable cannabinoid/terpene profiles.
> Key Takeaway: When a pest or pathogen shows up, act quickly and methodically: isolate the problem, remove what you can, apply targeted treatments, then verify eradication through repeated…
Treating Specific Common Problems (Action Plans)
When a pest or pathogen shows up, act quickly and methodically: isolate the problem, remove what you can, apply targeted treatments, then verify eradication through repeated inspections. The following action plans convert that principle into concrete steps for two of the most common issues: spider mites and powdery mildew.
Spider Mites — Action Plan (20–40 minutes initial, repeat inspections for 2–3 weeks)
- Isolate the plant immediately to prevent spread.
- Remove heavily infested leaves and dispose of them offsite or in sealed bags.
- Wash remaining foliage with a gentle stream of water to remove adults and webbing.
- Apply a combined control strategy:
- Biological control: release predatory mites (e.g., Phytoseiulus persimilis) following label rates.
- Chemical control: use miticides with rotation between modes of action; follow manufacturer intervals.
- Physical control: use
70–90°Ftemperature swings and increased humidity short-term to stress pests (avoid prolonged humidity during bloom). - Clean the environment: vacuum nearby surfaces, replace sticky traps, and sanitize tools and trays.
- Confirm eradication with repeated inspections every 3 days for 2–3 weeks, using a 10x magnifier to check undersides of leaves.
Expected outcome: Visible reduction in webbing and live mites within 48–72 hours after combined treatment; full eradication typically requires multiple treatment passes over 2–3 weeks.
Troubleshooting: If mites reappear, check neighboring plants and HVAC intake filters; resistance is common, so switch miticide classes and increase biological control density.
Powdery Mildew — Action Plan (15–30 minutes per plant, ongoing humidity control)
- Prune and remove all visibly infected tissue; cut well into healthy growth to be safe.
- Improve microclimate: increase airflow with oscillating fans, and reduce relative humidity to
40–50%during lights-on. - Apply fungicidal sprays appropriate to the growth stage:
- Vegetative: broader options including sulfur and bicarbonates.
- Flowering: select OMRI-listed or manufacturer-approved products safe for bud contact; adhere strictly to pre-harvest intervals.
- Implement a preventative spray schedule for susceptible strains after treating an outbreak.
- Monitor weekly and treat early signs immediately (white, powdery spots on upper leaf surfaces).
Expected outcome: New lesions should stop forming within 7–10 days when microclimate and fungicide strategy are aligned.
Troubleshooting: Persistent mildew usually signals poor airflow or a reservoir (clipped leaves, humid corners). Increase pruning and consider replacing dense canopy varieties with more open-structure genetics.
Suggested assets: a printable checklist for inspection rounds, a spray-rotation template, and a small table comparing predatory mites and miticides for quick decision-making. Understanding these practical steps reduces downtime and preserves yield integrity. When consistently applied, these action plans keep outbreaks small and manageable so cultivation stays predictable and productive.
Monitoring, Record-Keeping, and Long-Term IPM Strategy
Effective monitoring and record-keeping are the backbone of a resilient IPM program: set clear numerical thresholds that trigger action, log consistently, review trends monthly, and iterate the plan based on outcomes. Successful teams treat monitoring as a repeatable process — not an ad-hoc check — so early issues are caught, treatments are measured, and resistance or recurring hotspots are identified.
- Setting monitoring protocols and thresholds (15–30 minutes per grow area, daily/weekly cadence)
- Define numeric thresholds for common pests/diseases: e.g.,
>3 aphids/plantor>5% leaf area with necrosis. - Standardize inspection frequency: vegetative: twice weekly; flower: three times weekly; post-harvest: weekly.
- Use consistent units and formats: counts per plant, percent leaf area, and location codes (e.g.,
Bed-A3,Rack-2).
Practical monitoring workflow
- Inspect assigned zone, record findings in the log. 2.
Compare against thresholds; if exceeded, apply the approved treatment. 3. Enter treatment details and set a Follow-up Date based on chemical or biological product reapplication intervals.
Essential monitoring record fields
- Date and time: precise timestamp for trend analysis. Plant ID/Location: consistent location codes. Symptom/Pest: concise description using agreed vocabulary.
- Treatment Applied: product name, rate, and applicator initials. * Follow-up Date: scheduled re-check or retreat window.
> A 2023 study from Pest and Disease Management For Cannabis Plants indicates that structured logging and monthly reviews reduce widespread outbreaks by catching localized problems early.
Sample threshold template (use in digital logs)
Threshold: Aphids >3/plant → Action: Introduce 25 beneficials/plant + neem oil 0.5% foliar; Follow-up 7 daysTraining and reviews
- Initial training: 2–4 hours hands-on for staff and co-growers, demo of inspection and logging.
- Monthly review: 30–60 minutes to analyze logs, identify hotspots, and update thresholds or tactics.
- Quarterly refresher: scenario drills and resistance management updates.
Troubleshooting tips
- If follow-ups show repeat incidents in same location, increase inspection frequency and apply cultural controls (pruning, sanitation).
- When treatments fail repeatedly, rotate modes of action and document product lot numbers to detect resistance patterns.
Sample monitoring log template with suggested fields and example entries
| Date | Plant ID/Location | Symptom/Pest | Treatment Applied | Follow-up Date |
|---|---|---|---|---|
| 2025-08-04 | Bed-A3 | 4 aphids/plant (lower leaves) | Released 25 Aphidius /plant; neem oil 0.5% foliar | 2025-08-11 |
| 2025-08-07 | Rack-2 | Powdery mildew on 6% leaf area | Applied potassium bicarbonate 1.0%; removed affected leaves |
2025-08-14 |
| 2025-08-10 | Greenhouse-1 | Spider mites visible; webbing on 2 plants | Predatory mites release; reduced RH to 50% | 2025-08-17 |
| 2025-08-12 | Bed-B1 | Thrips detected on flowers | Sticky traps + spinetoram 0.2 ml/L foliar | 2025-08-19 |
| 2025-08-15 | Drying Room | Mold spots on drying buds (3%) | Increased airflow; sulfur fumigant per label | 2025-08-22 |
Understanding and applying these monitoring protocols allows teams to respond faster and refine IPM strategies with real data rather than intuition. When monitoring becomes routine, treatment decisions become both faster and more effective.
Troubleshooting Common Issues
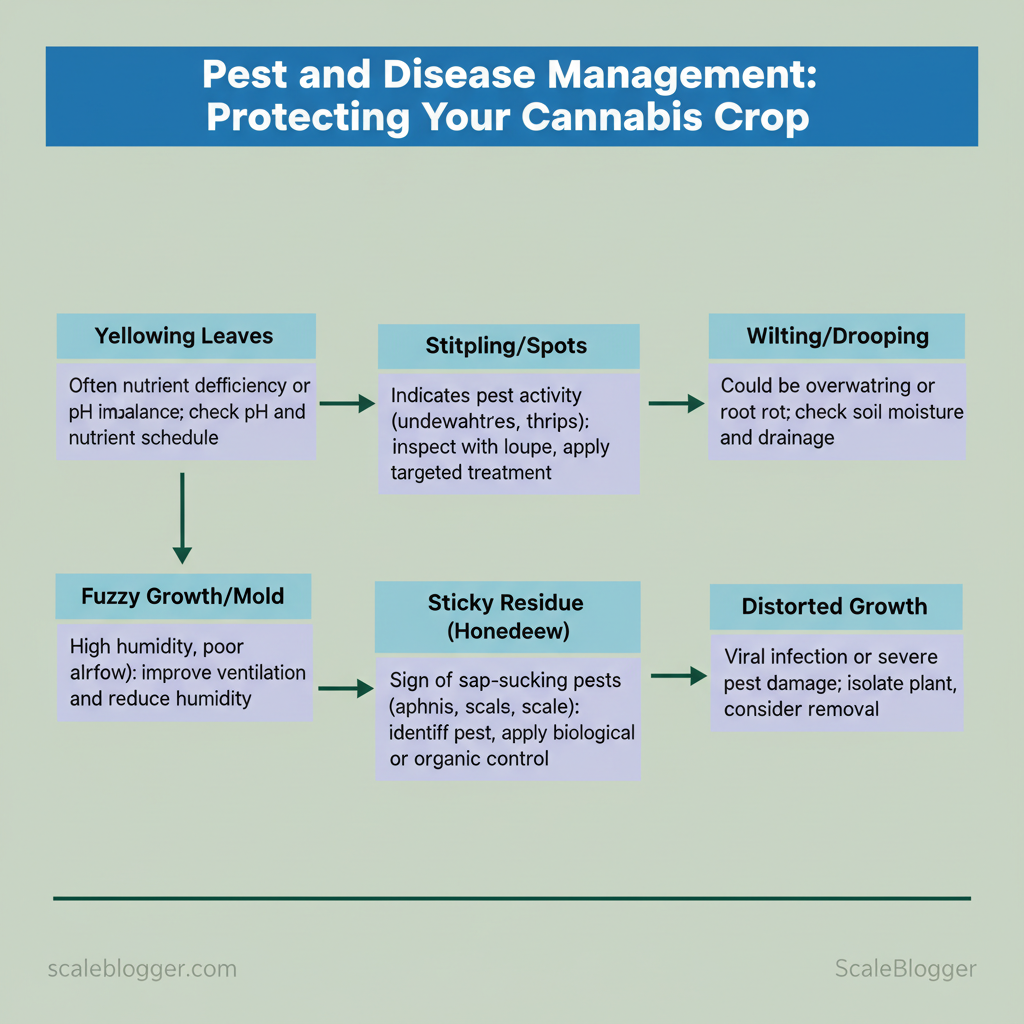
Start by confirming the problem before treating it again; repeated treatments without a fresh diagnosis waste time and stress plants. Re-check environmental drivers (temperature, relative humidity, light intensity), verify nutrient balance and pH, confirm product freshness and correct application, and escalate only when objective criteria are met. When problems persist, a systematic diagnostic loop reveals root causes faster than guesswork.
- Re-check the diagnosis (5–10 minutes)
- Inspect multiple plants and different canopy positions for pattern recognition.
- Compare symptoms to common causes: nutrient deficiency, nutrient lockout, pests, pathogens, heat stress, or irrigation errors.
- Take photos and timestamp them for trend tracking.
- Verify environmental drivers (10–30 minutes)
- Temperature: Confirm day/night swings are within target ranges for strain type.
- Relative humidity (RH): Check for too-high RH (promotes fungus) or too-low RH (stresses stomata).
- Light intensity and schedule: Ensure PAR levels match plant stage and timers/sensors are accurate.
- Confirm nutrition and media (15–45 minutes)
- pH check: Test runoff and solution pH;
5.8–6.5is typical for soil-less mixes,6.0–7.0for soils. - EC/PPM check: Measure electrical conductivity to detect over- or underfeeding.
- Media inspection: Smell and texture indicate compaction, root rot, or salt build-up.
- Verify product integrity and application (5–15 minutes)
- Expiration: Check labels for expiry and storage conditions—many biologicals lose efficacy if heat- or freeze-damaged.
- Mixing/application: Confirm dilution rates, contact time, and that the product reached the affected tissue (foliar sprays need canopy coverage).
- Escalation criteria and controlled interventions
- Mild issue: Isolated leaves, <10% of canopy affected → targeted foliar or soil corrective measures.
- Moderate issue: 10–30% affected, spreading → broader corrective feeding, adjust environment, increase monitoring to daily.
- Severe issue: >30% affected, systemic symptoms, or plant decline despite two corrective cycles → isolate, consider culling to protect the crop.
Troubleshooting checklist (copy and adapt)
Photos taken (date/time) Environmental logs checked (T/RH/light) pH measured (root zone and runoff) EC/PPM recorded Products checked (lot/expiry) Treatment applied (what/how/when) Reassess in 48–72 hoursTroubleshooting examples
- Example — nutrient lockout: Foliar yellowing across lower canopy plus high EC → flush with correct pH water, reduce feed by 25%, retest EC in 72 hours.
- Example — pest hotspot: Localized leaf damage and live insects → isolate plant, apply targeted biological control, increase scouting frequency to daily.
If issues involve seed germination or early vigor, use expert support and germination guarantees as appropriate—document lot numbers and conditions before requesting replacements. Persistent problems resolve fastest with methodical, documented checks rather than repeated, escalating treatments. Understanding these steps helps teams act swiftly while protecting the rest of the crop.
📥 Download: Pest and Disease Management Checklist for Cannabis (PDF)
Tips for Success (Pro Tips)
Start by treating prevention as an active, measurable practice: small experiments, consistent monitoring, and thriving microbial communities protect plants longer than reactive sprays. These tips will help you minimize resistance, catch issues early, and build soil resilience, ensuring your interventions are effective from season to season.
- Test new treatments on a single plant first
- Isolate the trial plant: choose a border plant or one in a small, controllable microclimate.
- Run a 7–14 day observation window: record visible effects, growth rate, and any phytotoxicity.
- Compare against a matched control: same strain, age, and recent treatment history.
Rotate monitor types and sticky card colors
- Use mixed-monitoring approaches: alternate between yellow sticky cards, blue sticky cards, and pheromone traps to catch different pests. Swap sensor make/models periodically: different detectors have varied sensitivity and false-positive profiles. Calibrate placement: place cards at canopy height and sensors near known infestation points.
Rotating detection tools prevents blind spots and reduces the chance of missing an emerging pest population that adapts to a single monitoring cue.
Maintain soil and microbial health to outcompete pathogens
- Prioritize microbial diversity: apply compost teas,
mycorrhizalinoculants, and diverse organic amendments. Avoid broad-spectrum biocides: use targeted products so beneficials aren’t eliminated. Monitor soil metrics: keep pH stable andelectrical conductivity (EC)within target ranges for the strain.
Healthy soils create competitive exclusion where beneficial microbes suppress pathogens naturally.
Keep treatment logs tied to environmental data
- Log everything: date, product, dose, method, target pest, and observed effects. Correlate with enviro-data: attach temperature, humidity, and CO2 readings for the treatment window. Use simple templates: a spreadsheet or mobile app that timestamps entries makes trend analysis trivial.
When a treatment loses effectiveness, these logs reveal patterns—high humidity events, repeated sprays, or specific product sequences drive resistance.
Additional practical moves:
- Stagger treatment classes: avoid repeating the same mode of action more than twice in a season.
- Maintain genetic health: start with vigorous, disease-free genetics from reputable suppliers like TheSeedConnect for fewer baseline issues.
These practices reduce surprises and make decisions defensible, letting teams respond to problems with data rather than guesswork. When consistently applied, they extend the useful life of every treatment and strengthen crop resilience.
Case Studies and Example Scenarios
Fungus gnat outbreaks in indoor rooms are controllable with a disciplined, measurable response that combines monitoring, cultural adjustment, and targeted biological control. In the following case study an integrated approach — sticky-card surveillance, a planned dry-down watering cycle, and deployment of biological agents — stopped a growing infestation and restored root-zone health without broad-spectrum pesticides. The pragmatic goal: reduce adult trap counts to consistently low single digits while eliminating larval populations in the growing medium.
Scenario overview
An 8×8 indoor room reported increased adult fly activity over two weeks. Sticky cards placed at canopy height showed increasing captures; plants displayed early root stress and slow vegetative growth. Rapid intervention focused on cutting the gnat life cycle and preventing re-infestation.Tools and prerequisites
- Required materials: sticky cards, hand lens, moisture meter, beneficial nematodes (
Steinernema feltiae) orBacillus thuringiensis israelensis (Bti), sterile topdressing medium (perlite/sand), spray bottle - Prerequisites: baseline sticky-card counts, irrigation schedule, bed media replacement plan
- Time estimate: initial setup 1–2 hours; visible control typically in 2–4 weeks
Step-by-step response
- Place surveillance: deploy 6–12 sticky cards evenly across canopy and note
cards/location/date. - Immediate cultural change: shift to a conservative watering schedule with a controlled
dry-downso top 1–2 inches of medium dries between irrigations. - Topdress and exclude: apply a 1–2 cm layer of clean perlite or sand to block adult oviposition.
- Apply biological control: drench media with beneficial nematodes or a
Btisolution according to manufacturer dosing. - Continue monitoring: count trapped adults weekly and log
counts, plus observe plant vigor.
Monitoring metrics and confirming success
- Sticky-card counts: primary metric; trend matters more than single readings.
- Soil moisture (% or measure on moisture meter): keep top zone drier than usual without stressing plants.
- Plant growth indicators: new leaf expansion rate, root color and mass on sacrificial checks.
> A sustained sticky-card count below 5 per card per week across multiple locations generally indicates that reproduction has been interrupted.
Example: after implementing the steps above, a typical room moves from visible adult pressure to single-digit card counts within three weeks, with root health improving by the fourth week.
Troubleshooting
- If counts plateau: re-check irrigation points for runoff or overwatering hotspots.
- If larvae persist: repeat nematode/Bti application and consider replacing top 2–3 cm of growing medium in high-risk pots.
- If rapid rebound occurs: inspect incoming clones, trays, and propagation areas for hidden reservoirs.
A disciplined monitoring plan paired with cultural changes and biological tools breaks the fungus gnat life cycle while protecting beneficial microbes and crop quality. Understanding these practical steps helps teams act quickly and validate results with simple, reliable metrics.
Conclusion
Early detection and a consistent strategy can prevent small problems from becoming crop-wide losses. When you notice yellowing between veins or stippling, take a moment to inspect before reaching for a broad-spectrum spray. In one case, a tiny spider mite hotspot was managed by spot-treating with predatory mites and pruning affected leaves, which prevented crop stress from unnecessary chemicals.
Cultural fixes—improving airflow, adjusting humidity, and sanitizing tools—stopped a recurring powdery mildew cycle in a greenhouse case study that relied on prevention rather than repeated fungicide rotations.
These patterns show that integrated actions, not single fixes, preserve yield and cannabinoid quality.
Start with three concrete moves:
- Document every sign in your crop log within 24 hours.
- Apply targeted biological controls at the first congregating pest stage.
- Adjust cultural parameters (RH, VPD, light distance) before escalating to hard-action treatments.
If you still face uncertainty about strain susceptibility, germination quality, or choosing compatible biologicals, consult your records and consider professional germination-verified seed sources and expert support—resources such as The Seed Connect provide seed-specific guidance and warranty-backed germination. Move deliberately: inspect, record, intervene with the least disruptive option, and follow up. That sequence keeps problems manageable and crops productive season after season.