
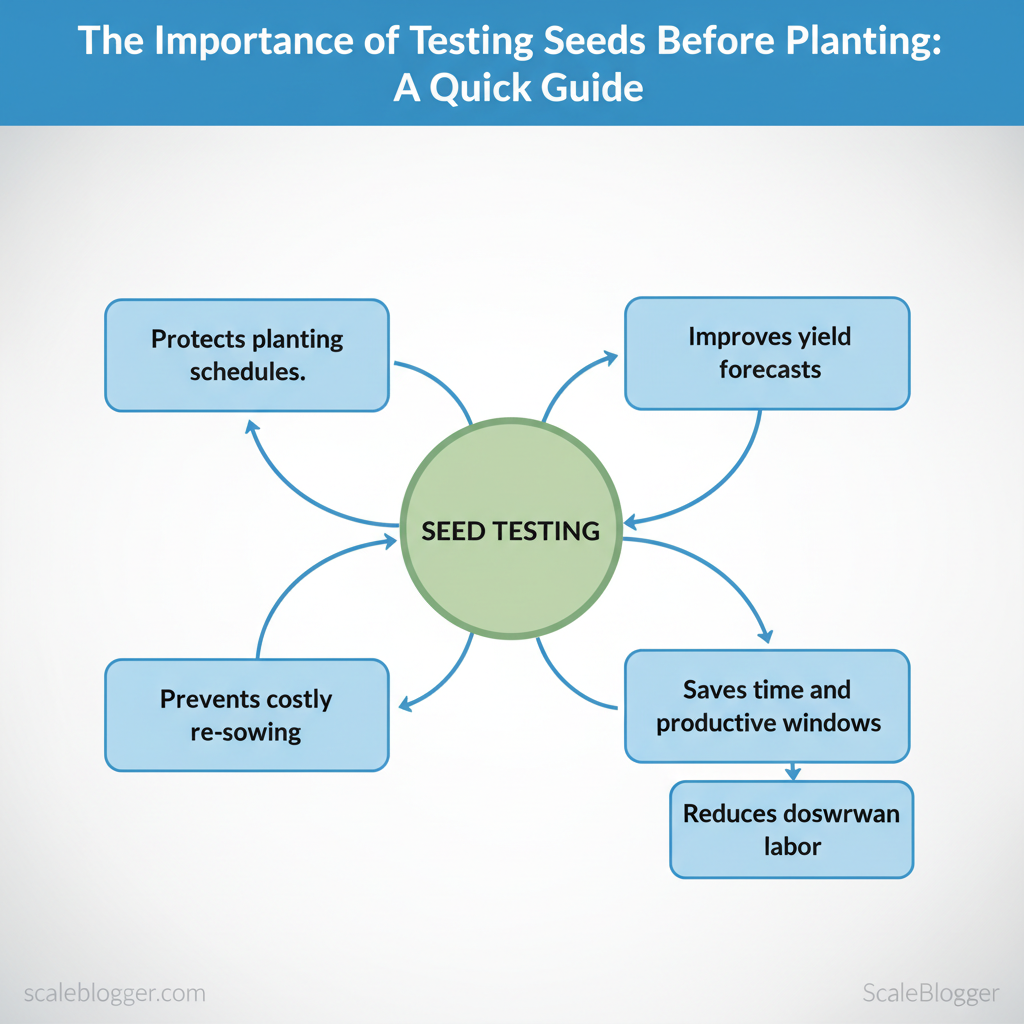
Seeds bought last season or saved from last year can look fine and still underperform in the field. Planting without a quick viability check wastes time, space, and productive windows for crops or ornamentals. Testing seeds first protects planting schedules, improves yield forecasts, and prevents costly re-sowing during peak season.
- How to run a simple
germination ratetest in minutes and interpret results. - When low viability calls for more seed or different planting strategies.
- Practical thresholds for replacing aged or saved seed to protect yield.
- Simple record-keeping tips to track seed performance year over year.
> A brief seed test converts uncertainty into actionable planting decisions, saving weeks and reducing downstream labor.
Research from extension services highlights the value of pre-sowing tests for home gardeners and commercial growers alike. The next section walks through step-by-step testing, decision rules, and quick fixes to keep planting plans on schedule.
Subscribe for more gardening tips

Understanding Seed Viability
Seed viability is the capacity of a seed to germinate and produce a healthy seedling under suitable conditions. Viability isn’t a single binary property but a measurable probability: a seed lot with a high germination rate contains a high proportion of living, physiologically capable seeds, while low viability means many seeds are dormant, damaged, or dead.
What determines viability: Genetic quality: Hybrid vigor or inbreeding affects longevity; high-quality parent stock yields more robust seeds. Maturity at harvest: Seeds harvested too early often fail to complete physiological development, reducing viability. Post-harvest handling: Rapid drying to appropriate moisture and clean storage minimize metabolic breakdown. Moisture content: Too wet accelerates deterioration; too dry can cause structural damage in some species. Temperature during storage: Elevated temperatures speed respiration and aging; cool, stable temperatures extend life. Pest and disease exposure: Fungal infections or insect damage cut viability sharply. Seed coat integrity: Cracked or scarred coats allow pathogens and moisture fluctuations that kill embryos. Seed age: Viability declines over time at a rate specific to species and storage conditions. Chemical exposure: Herbicide residues or fumigants can injure embryos and reduce germination. Pre-treatment history: Improper priming or desiccation can either enhance or reduce longevity.
Consequences of using non-viable seeds: 1. Reduced stand establishment → lower yields and uneven crop emergence. 2. Wasted inputs → water, fertilizer, labor and time spent on seeds that won’t produce. 3. Increased costs for re-sowing and pest management on weak seedlings. 4. Unreliable trial results and planning errors for production cycles. 5. Compromised genetic goals when selecting for traits in breeding or variety trials.
> “If the seed does not look fresh or is more than one year old, it is beneficial to test the germination rate.” — How to Store Seeds and Test Germination Rates (Iowa State Extension)
Practical steps: always check germination rate with a simple paper-towel test before bulk sowing, source from reputable suppliers to reduce risk, and match storage practices to species-specific guidelines. SeedConnect’s sourcing of high-quality organic and heirloom varieties reduces the uncertainty around genetic and post-harvest quality, making it easier to plan reliable plantings. Understanding viability in these terms makes crop planning predictable and reduces costly surprises in the field.
Why Test Seeds?
Testing seeds is the most reliable way to convert uncertainty into predictable outcomes. A simple germination or viability test reveals what will actually emerge in the field or greenhouse, letting managers and growers make budgeted, tactical decisions instead of guesses.
Economic benefits Reduced input waste. Knowing the germination rate prevents spending on soil, fertilizer, water, and labor for seeds that won’t sprout. Better purchasing decisions. Test results inform whether to buy fresh seed now or use existing inventory, improving cash flow and procurement timing. Increased yield potential. Planting to compensate for low germination inflates seed costs and reduces stand uniformity; accurate rates allow optimized seeding densities and higher effective yield. Lower replant frequency. When viability is confirmed, fewer replant events are required, cutting labor and machinery time. * Risk mitigation for contracts. Seed testing documents expected performance for buyers or contract growers, reducing disputes and penalty exposure.
Agricultural advantages Improved field establishment. Accurate seeding rates from test data produce uniform stands and faster canopy closure, reducing weed pressure. Stronger, healthier plants. Selecting seed lots with higher vigor results in robust seedlings that better resist environmental stress. Disease prevention through selection. Testing can expose compromised lots affected by poor storage or pathogens, preventing the spread of seed-borne disease. Optimized varietal choices. Comparisons across seed lots reveal which varieties consistently perform, refining crop planning for quality and marketability.
Practical quick-test protocol (5 steps) 1. Place 100 seeds on a moistened paper towel or germination substrate. 2. Fold towel, seal in a plastic bag, and keep at recommended temperature for the species. 3. Check daily for moisture; count and remove sprouts after the standard period (often 7–14 days). 4. Calculate germination rate = (sprouted seeds / total seeds) × 100. 5. Adjust field seeding rate or reorder seed if rate is below acceptable threshold.
> “If the seed does not look fresh or is more than one year old, it is beneficial to test the germination rate.” — How to Store Seeds and Test Germination Rates, Iowa State Extension
SeedConnect’s focus on sourcing high-quality organic and heirloom seed reduces the need for frequent testing, but on-farm verification remains a best practice. Routine testing converts guesswork into operational decisions, preserves margins, and improves crop outcomes for every planting season. Understanding and applying these checks lets teams act confidently and allocate resources where they deliver the most value.
Types of Seed Tests
Practically every seed decision—whether buying, storing, or direct-sowing—depends on three fundamental tests: germination, purity, and moisture content. Each answers a different question about seed performance and handling; together they let growers plan sowing rates, storage, and seed sourcing with confidence.
1. Germination Test What it is: A practical measure of viable seeds that will produce normal seedlings under defined conditions. Step-by-step procedure: 1. Select a representative sample (commonly 100 seeds or two replicates of 50). 2. Place seeds on a moist paper towel, germination paper, or in sterilized growing medium. Maintain consistent temperature (often 20–25°C for many vegetables) and light as species require. 3. Keep towels moist but not waterlogged; check daily for germinants. 4. Record the number of normal seedlings at the species-specific endpoint (typical windows: 7–14 days for many vegetable crops). Interpreting rates: A germination rate of >85% is excellent for fresh certified seed; 50–70% may require higher seeding rates or repackaging as treated/labelled lower-vigor seed. When seeds are older than one year or stored poorly, run a test before field sowing—this practice is recommended by the Iowa State Extension guide on seed storage and testing: How to Store Seeds and Test Germination Rates. Expected outcomes: A clear percentage (e.g., 78% viable) and notes on abnormal seedlings guide seeding density and replacement decisions.
`text Germination log template: Species: _______ Sample size: 100 Temperature: 22°C Days checked: 7, 10, 14 Day 7: 72 true seedlings Day 10: 76 true seedlings Final germination: 76% Notes: many abnormal radicles -> consider fresh lot
2. Purity Test Definition: The proportion of the sample that is the labeled seed species and variety, free of other seeds, inert material, and contaminants. Methods: Hand-sorting under magnification for small seedlots, sieving and blowers for larger samples, or lab-based seed identification for mixed lots. * Importance: Purity affects seeding rate calculations, regulatory compliance, and genetic integrity; the USDA Natural Resources Conservation Service technical note outlines certification and seed-quality principles: The Importance of Seed Quality for Natural Resource Conservation.
3. Moisture Content Test Why it matters: Moisture level determines storage life and susceptibility to mould or pre-germination; high seed moisture accelerates aging. Testing techniques: Oven-drying (standard lab method), calibrated electronic moisture meters for quick field checks, or the saltbox/dessicator method for rough estimates. * Effects: Seeds stored above recommended moisture (often <8–12%` depending on species) will lose vigor faster and may fail germination tests sooner; conversely, properly dried seed retains viability and shipping resilience.
These three tests form the backbone of actionable seed management—use them together to set seeding rates, choose storage protocols, and decide when to replace a lot. When applied consistently, test data reduce surprises in the field and improve overall crop establishment.

How to Test Seeds at Home
Start by treating seed testing as a simple quality-control step that saves time and space in the garden. A quick germination test reveals whether a packet will produce 70% or more seedlings (a common acceptability threshold) before committing to beds or large pots.
Gathering Materials Paper towels or coffee filters — readily available, absorbent and gentle on small seeds. Clean plates or shallow trays — provide a flat, contained testing surface. Resealable plastic bags — create a humid microclimate; optional for warmth-loving species. Labels and pen — record variety, date, and number tested. Water spray bottle — for even misting, preventing over-saturation. Thermometer (optional) — useful when testing temperature-sensitive seeds. Where to find them: kitchen and garden supplies, hardware stores, or seed suppliers such as SeedConnect for high-quality, organic test samples when evaluating new lots.
Performing the Tests 1. Standard paper-towel test: Moisten a paper towel until damp but not dripping; spread 10–20 seeds evenly, fold towel, place on a plate, cover with a tray or slip into a resealable bag. Keep at the seed’s optimal temperature and check daily. 2. Soil tray test (field simulation): Fill a seed tray with sterilized potting mix, sow 10–20 seeds at recommended depth, keep evenly moist and warm. This mimics real conditions and catches dormancy issues missed by towel tests. 3. Float-and-sink (quick screen): Drop seeds in water; discard floaters as likely non-viable, but confirm by testing a subset—this is a screening tool, not definitive. Common pitfalls: letting towels dry completely, crowding seeds (mold risk), using contaminated trays, or testing at wrong temperatures. Best practices include using 10-20 seeds per test, maintaining consistent moisture, and labeling tests clearly.
Interpreting Your Results Calculate germination percentage: (number of seedlings ÷ number tested) × 100. What results indicate: 80–100% — excellent; 50–79% — plant more densely or increase sowing rate; <50% — consider retesting or replacing. * When to retest or discard: retest after freshening seeds with scarification or cold stratification if species requires it; discard if repeated tests stay below acceptable thresholds.
> "If the seed does not look fresh or is more than one year old, it is beneficial to test the germination rate." — Iowa State Extension how-to page
Using these methods keeps planting decisions data-driven; for batches of organic or heirloom seed, routinely testing ensures predictable yields and avoids wasted effort.
When to Test Your Seeds
Testing seeds should be an early, routine step whenever germination uncertainty could cost time or space. Most growers run a quick germination test when seeds are older, when provenance is unclear, or when environmental conditions change significantly. That single precaution avoids wasted effort and informs whether to increase seeding density, start transplants early, or replace stock.
Timing based on seed type Short-lived vegetables (e.g., onion, parsnip): Test every year; viability can drop rapidly. Fast-germinating garden crops (e.g., lettuce, radish): Test if seeds are >1 year old or come from unknown storage. Long-lived seeds (e.g., tomato, bean): Test every 2–3 years; many retain high viability but performance varies. Native or wild-collected seed: Test before any restoration or large-scale sowing; variability by collection and cleaning method is high. Seed mixes: Test each component if possible; a poor-performing component can skew field emergence. After adverse storage or transport: Test if seeds experienced heat, moisture, or long transit. Before large-scale contracts or sales: Producers and distributors should validate batches to meet contractual germination standards. Regional climate considerations: In cool, short-season regions, test earlier to allow for additional starts or warmer-season varieties. * Seasonal planting windows: Test at least 6–8 weeks before the earliest sowing date to allow retesting or ordering replacements.
Practical post-testing steps 1. Calculate viability using germination rate = (sprouted / total) * 100. Use that figure to adjust sowing rates. 2. Store the viable fraction properly: dry, cool, and airtight packaging; label with test date and measured germination. 3. Discard low-viability lots or segregate for non-critical uses (cover crops, practice beds). 4. Increase seeding density or perform staggered sowings when rates are marginal. 5. Consider sourcing fresh, certified seed if viability falls below target thresholds for the crop and planting method.
> According to Iowa State Extension, "If the seed does not look fresh or is more than one year old, it is beneficial to test the germination rate" (How to Store Seeds and Test Germination Rates).
For commercial or repeat needs, work with reliable suppliers; choosing high-quality, certified organic seed reduces the frequency of surprise failures. Understanding timing and follow-through turns a simple test into a scheduling and sourcing advantage that preserves planting windows and yields.
Common Seed Testing Mistakes
Two errors dominate avoidable losses in seed lots: overlooking moisture levels and ignoring germination rates. Both are straightforward to detect and fix, yet they repeatedly undermine planting schedules and yields.
Overlooking moisture levels High seed moisture accelerates deterioration and fosters fungal growth. Seeds held above 12% moisture (varies by species) lose vigor quickly; symptoms include clumped seeds, musty odor, and poor germination. Practical steps: Monitor storage RH — Use a hygrometer to keep relative humidity stable; desiccant packs work in small lots. Inspect before testing — Visual checks and the smell test catch obvious problems early. Drying protocol — For small batches, spread seeds thin in a dry room; for larger lots, use controlled low-temperature drying to avoid damage. Treat outbreaks — If molds appear, salvage viable seed by drying to safe moisture and consider a certified seed treatment; discard heavily contaminated lots.
Ignoring germination rates Assuming seeds are viable without testing wastes time and land. A simple germination test reveals the percentage likely to sprout under ideal conditions and informs seeding rates and replacement decisions. Industry guidance recommends testing older or questionable seed prior to sowing; Iowa State Extension explicitly advises testing seed more than one year old or that appears aged How to Store Seeds and Test Germination Rates. Likewise, Alabama Extension outlines quick, reliable seed germination tests for field planning Seed Germination Test.
- Conduct a germination test with at least 100 seeds for statistical confidence.
- Record
germination rateand adjust seeding density (e.g., if rate is 70% and target stands require 1000 plants, increase sowing accordingly). - If rate < 60%, discard or treat seed; low rates often cost more in replanting than replacing seed.
Common practical mistakes to avoid: Skipping tests on old seed — age matters more than appearance. Using inappropriate substrates — paper towel vs. petri differs by species. Failing to standardize temperature — many seeds require 20–25°C for accurate results. Not recording results — without data, mistakes repeat.
Seed sourcing matters: choosing high-quality, properly stored seed—such as professionally sourced organic varieties—reduces these risks at the outset. Understanding these practices helps teams move faster without sacrificing quality. When implemented correctly, this approach reduces overhead by making decisions at the team level.
📥 Download: Seed Testing Checklist (PDF)
Conclusion
Healthy crops start with predictable seed performance. Prioritizing seed quality—careful storage, routine germination checks, and sourcing from reputable suppliers—reduces uncertainty in the field and shortens time to harvest. Practical habits around seed handling deliver disproportionate returns: fewer wasted beds, lower replant costs, and more consistent yields.
- Seed inspection: Examine for uniform size, color, and absence of damage; inconsistent seeds often signal poor viability.
- Storage control: Keep seeds cool, dry, and dark; humidity and temperature swings accelerate deterioration.
- Germination testing: A simple paper-towel test gives an early read on expected field results.
- Lot traceability: Track seed batches by source and date to correlate performance with origin.
- Certified sources: Choose suppliers that disclose lot germination and purity for predictable outcomes.
- Heirloom vs hybrid: Select based on long-term goals—heritage traits vs. uniform vigor.
- Organic certification: For organic systems, confirm inputs and cleanliness to avoid compliance issues.
- Record keeping: Log germ rates and field emergence to refine future buying decisions.
- Prepare a
paper-towelgermination test: place 50 seeds, keep moist at room temperature, record sprouts at 7–14 days. - Compare observed germination to supplier claims; if rates fall well below expectations, adjust seeding rate or replace the lot.
- Update procurement criteria to favor lots with documented test results and clear provenance.
> "If the seed does not look fresh or is more than one year old, it is beneficial to test the germination rate." — How to Store Seeds and Test Germination Rates, Iowa State Extension
Choosing reliable seeds and baking basic testing into operations turns procurement from a gamble into a controlled input. This approach reduces surprises in the field and lets management focus on optimizing growth, not troubleshooting germination.
Conclusion
Saved seed can look healthy and still cost an entire season if viability isn't checked. Run a simple germination test on a paper towel, discard lots below 60% germination, and store remaining seed in a cool, dry place — these three steps alone preserve planting windows and reduce wasted beds. As the article’s examples showed, small-scale germination checks turned uncertain seed lots into reliable plantings, while one overlooked packet delayed an entire succession plan. If you wonder “How long will this variety remain viable?” or “When is replacement cheaper than replanting?”, the pattern is clear: test first, then decide.
For practical next steps, perform a quick germination test, relabel and store viable seed correctly, and replace low-viability lots before planting day. For further guidance on sourcing high-quality seed and storage best practices, see resources at Seed Connect and the USDA materials referenced earlier, and explore additional planting tips at seedconnectllc.com. Subscribe for more gardening tips to receive seasonal reminders and step-by-step guides that keep planting productive.