

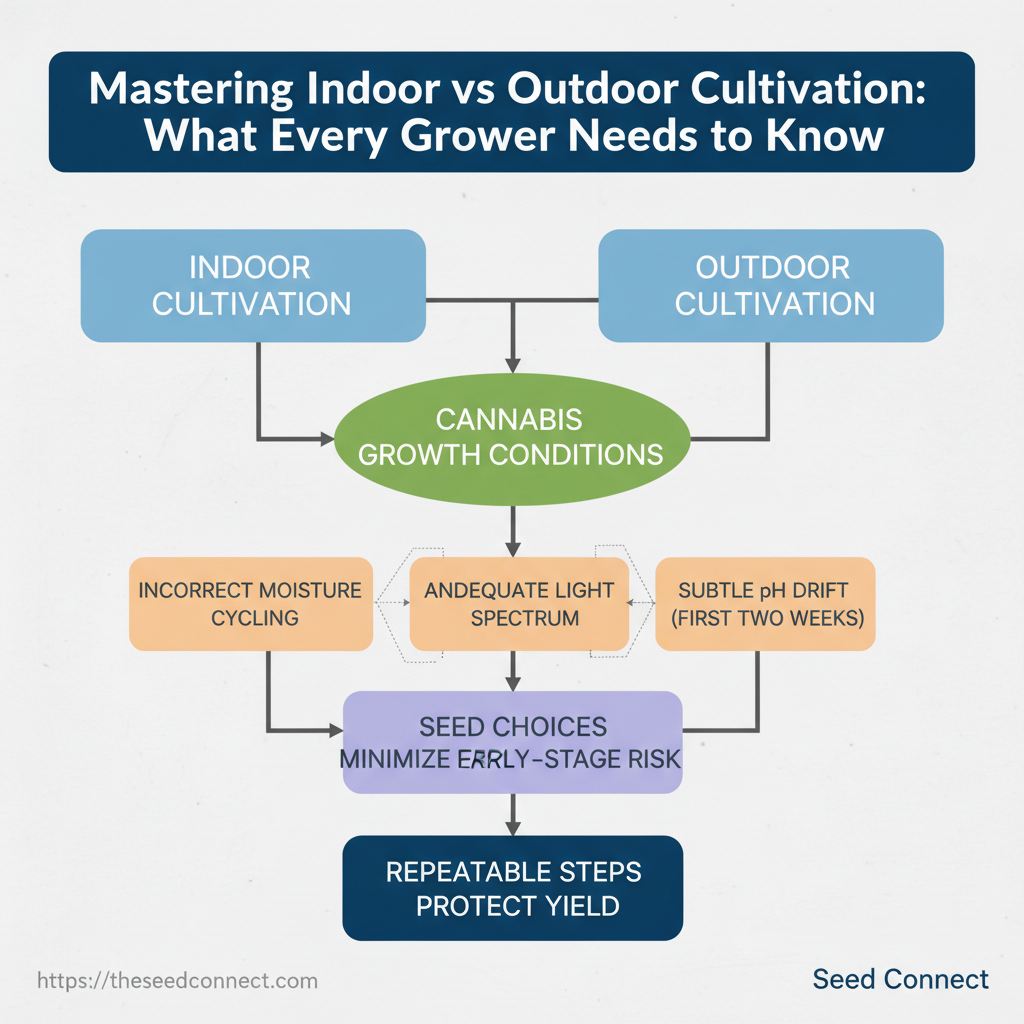
Seedlings often fail due to problems that growers cannot see. These include incorrect moisture cycles, insufficient light spectrum, and slight pH changes in the first two weeks. For growers wanting predictable results, these hidden failures waste time and genetic potential.
Let’s explore the key cultivation factors that lead to success in both indoor and outdoor cannabis growing.
The guidance that follows translates common problems into practical checks: how to verify cannabis growth conditions from day one, when to intervene and when to let plants self-correct, and which seed choices minimize early-stage risk. Emphasis rests on repeatable steps that protect yield and preserve genetic promise, supported by a germination-first mindset and seasoned grower practice.
Next, read a concise set of diagnostics and adjustments organized by growth stage, with applied examples that fit both controlled rooms and seasonal gardens. Those procedures establish reliable seedlings and make later nutrient, light, and training strategies far more effective.
Table of Contents
- What Is Indoor vs. Outdoor Cannabis Cultivation?
- How Does It Work? Key Cannabis Growth Conditions Compared
- Why It Matters: Trade-offs, Costs, Yields and Legal Context
- Common Misconceptions and Myth-Busting
- Real-World Examples: Case Studies and Practical Setups
- Step-by-Step Decision Checklist: Which Method Should You Choose?
What Is Indoor vs. Outdoor Cannabis Cultivation?
What Is Indoor vs. Outdoor Cannabis Cultivation?
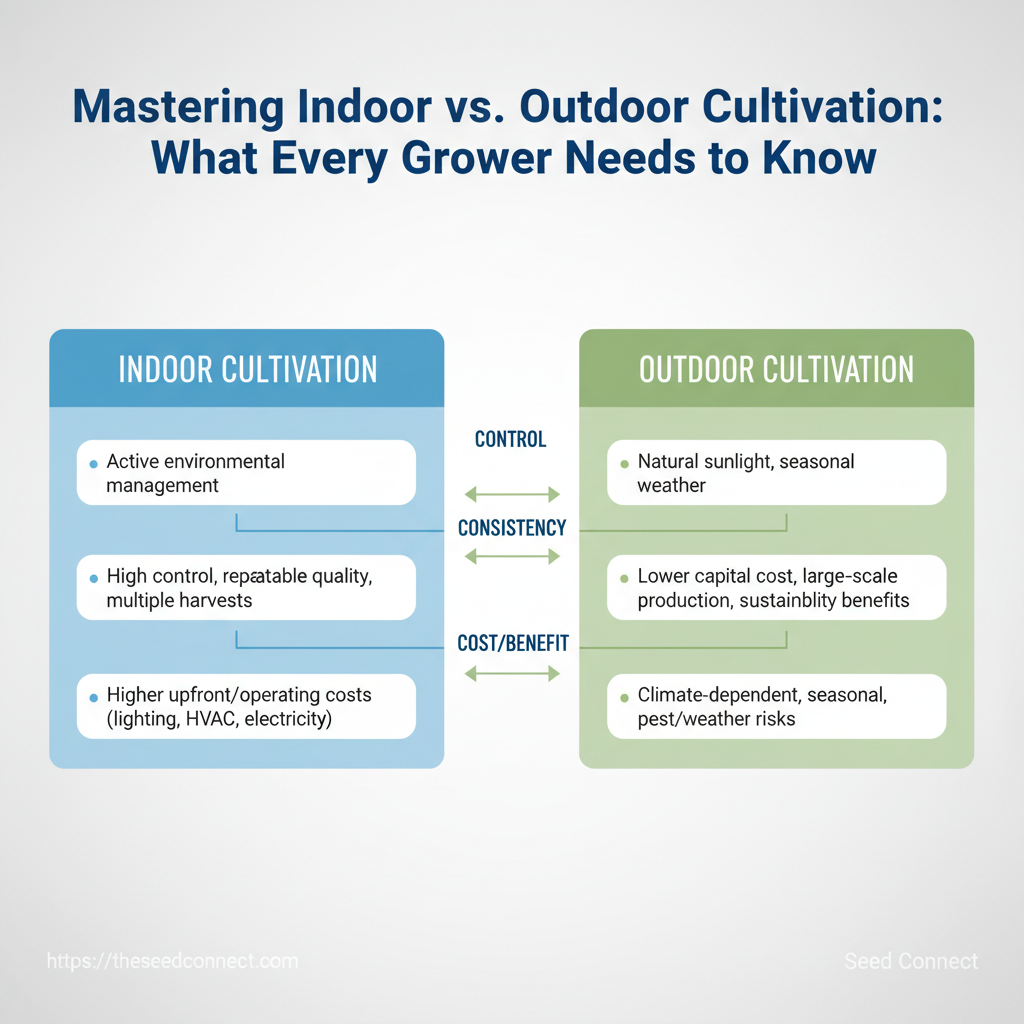
Indoor and outdoor cannabis cultivation are two different methods. They offer distinct trade-offs regarding control, cost, scale, and timing. Indoor growing takes place inside purpose-built spaces — grow tents, warehouses, basements, or dedicated rooms — where environmental variables like light, temperature, humidity, and CO2 are actively managed.
Outdoor cultivation uses natural sunlight and seasonal weather, typically in backyards, fields, or greenhouse structures, relying on the climate and daylight cycle to drive plant development.
Growers pick one or the other based on goals: repeatable quality and year‑round production favor indoor setups, while low-cost, high-volume production favors outdoor sites. Many cultivators also use hybrid approaches such as greenhouses to capture benefits from both.
Indoor: what it looks like and why growers choose it
Indoor environments are engineered systems. Typical components includeLED or HPS lighting, exhaust and intake fans, oscillating fans for canopy movement, dehumidifiers or humidifiers, and environmental controllers measuring PPFD and temperature. Motivations are clear:
- Control over environment: precise light schedules, humidity, and temperature.
- Privacy and security: discrete locations reduce exposure to theft or legal ambiguity.
- Multiple harvests per year:
continous light schedulesallow several cycles in 12 months. - Consistent quality: stable terpene and cannabinoid profiles from batch to batch.
Scale and cost implications: indoor cultivation carries higher upfront and operating expenses — lighting, HVAC, and electricity are the primary cost centers — but it enables premium pricing through consistent potency, appearance, and aroma. Indoor growers often choose feminized or autoflower seeds to canopy management and cycle predictability.
Outdoor: characteristics and when it excels
Outdoor cultivation leverages natural systems. Plants benefit from full-spectrum sunlight, soil biology, and free rainfall when appropriate. Typical contexts range from small backyard gardens to large agricultural fields and hoop houses.- Lower capital cost: sunlight and ambient conditions reduce energy inputs.
- Large-scale production: acres of plants lower per-gram production cost.
- Sustainability benefits: soil carbon capture and lower emissions when managed well.
Limitations: outdoor growing is seasonal and climate-dependent; pests, weather events, and variable sunlight introduce risk. Site selection, soil testing, and local frost/heat windows determine viability. Many outdoor producers time planting to match critical photoperiod changes or use autoflower genetics to avoid long vegetative waits.
- Seed selection: choose genetics suited to environment ( outdoor strains or compact indoor hybrids).
- Site preparation: soil amendment, irrigation planning, and security measures.
- Crop scheduling: indoor growers map multiple cycles; outdoor growers align to local seasons.
Understanding these distinctions helps teams choose the right infrastructure and genetics for their goals, balancing cost, control, and desired scale. When the objective is predictability and multiple annual harvests, indoor systems win; when lowest cost-per-gram and large scale matter, outdoor cultivation often makes more sense.
How Does It Work? Key Cannabis Growth Conditions Compared
Light, temperature/humidity, and the growing medium are the three main factors that affect yield, potency, and…
How Does It Work? Key Cannabis Growth Conditions Compared
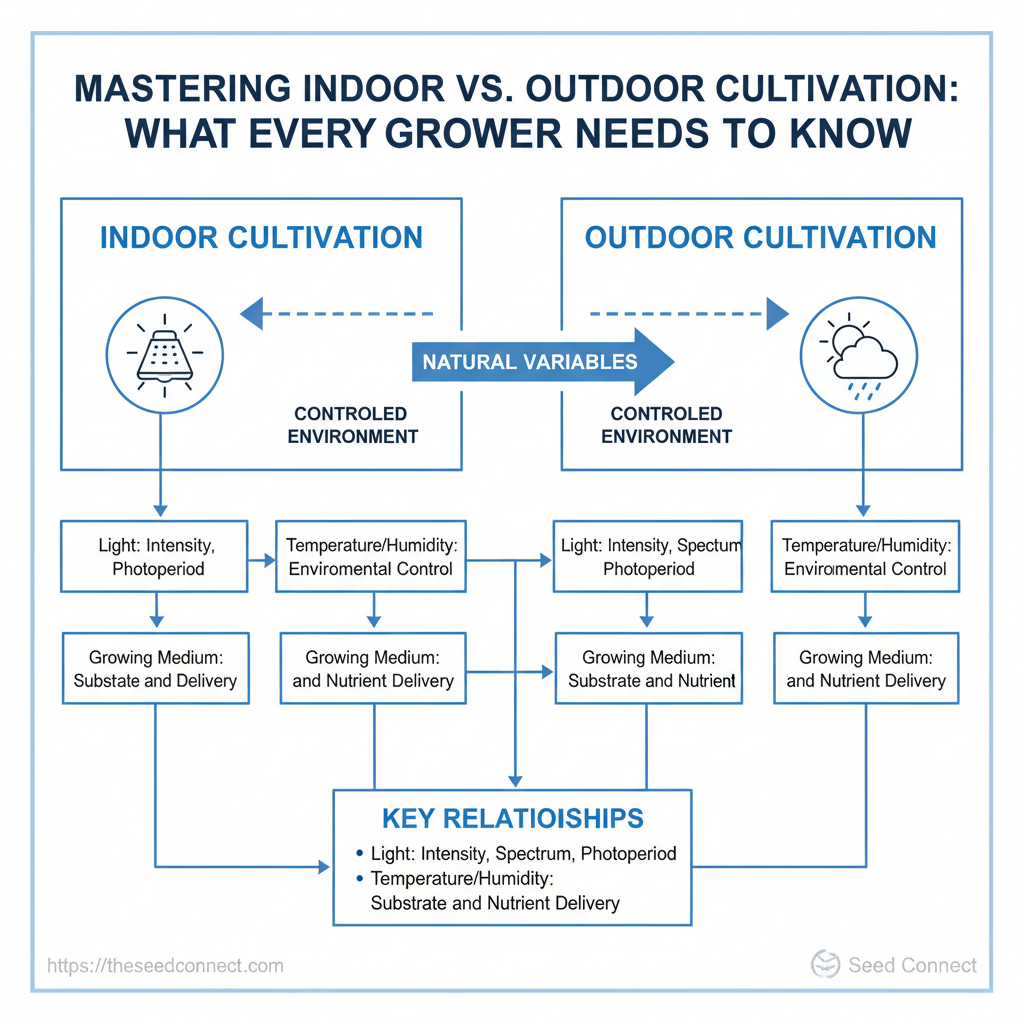
Light, temperature/humidity, and the growing medium are the three main factors that affect yield, potency, and plant health. When you pay attention to all these factors, you can turn great genetics into consistent harvests.
Light: intensity, spectrum, and photoperiod Cannabis uses light for photosynthesis and as a developmental cue. Indoors, growers control intensity with light output and canopy distance, spectrum with LED tuning or lamp type, and photoperiod with timers. Outdoors, intensity and day length are constrained by season and latitude.
- Biological role: Light intensity drives photosynthetic rate; spectrum influences morphology (blue limits stretch, red promotes flowering). According to Indoor vs Outdoor Cannabis Visual Guide, Practical indoor ranges:
PPFD 300–600 µmol·m⁻²·s⁻¹(vegetative),600–900+ µmol·m⁻²·s⁻¹(flowering). Photoperiod: veg commonly18–24hours; flower triggered by12/12for photoperiod strains (autoflowers ignore photoperiod).
- Use spectrum-rich LEDs for full-cycle control. 2.
Maintain even canopy PPFD using reflectors or adjustable fixtures. 3. Outdoors, choose strains matched to local day-length and frost dates.
| Side-by-side comparison of how light is provided and controlled in indoor vs. outdoor grows, including common equipment and expected ranges | |||
|---|---|---|---|
| Factor | Indoor approach | Outdoor approach | Practical tip |
| Intensity (PPFD) | 300–600 veg, 600–900+ flower (LED/HID specs) |
Full sun peaks ~1500–2000+ |
Aim for even canopy PPFD; avoid >1000 indoors without CO₂ |
| Spectrum | Tunable full-spectrum LEDs; HPS (red-heavy) | Sunlight (full spectrum) | Add blue in veg; red in flower for denser buds |
| Photoperiod | Timers: 18/6 veg → 12/12 flower |
Natural day length; latitude-driven | Use blackout cloth to manipulate outdoor photoperiod |
| Common equipment | LEDs, HPS, ballasts, timers | Shade cloth, greenhouse glazing | Invest in quality timers and dimmable drivers |
| Typical problems | Light burn, heat, uneven PPFD | Late frost, short season, cloudy summers | Monitor canopy temp and PPFD maps |
| Recommended temperature and RH ranges and common control methods for indoor vs outdoor cultivation across growth stages | |||
|---|---|---|---|
| Growth stage | Indoor T °C/°F | Indoor RH % | Outdoor target considerations |
| Seedling/clone | 20–25°C / 68–77°F |
65–75% |
Use humidity dome; avoid direct midday sun on young plants |
| Vegetative | 22–28°C / 72–82°F |
40–60% |
Choose planting date to avoid hot/dry midsummer or cold snaps |
| Flowering | 20–26°C / 68–79°F (night slightly cooler) |
40–50% |
Reduce humidity pre-harvest to prevent bud rot |
| Drying/curing | 15–21°C / 59–70°F |
45–55% |
Dry in dark, ventilated space; control RH with packs |
| Extreme weather actions | HVAC, dehumidifiers, heaters | Shade cloth, frost cloth, raised beds | Have contingency plans for heatwaves or unexpected frost |
| Common growing media, nutrient delivery methods, and pros/cons for indoor vs outdoor grows | |||
|---|---|---|---|
| Media | Indoor suitability | Outdoor suitability | Notes / common issues |
| Native soil | ✓ (if tested) | ✓ | Variable fertility; test pH and texture |
| Prepared potting mix | ✓ high | ✓ | Good drainage and nutrients; replace yearly |
| Coco coir | ✓ high | ✓ (in pots) | Neutral pH; requires EC and Ca/Mg management |
| Hydroponic | ✓ high control | ✗ (rare) | Rapid growth; must manage EC/pH precisely |
| Raised beds/ground | ✓ (greenhouse) | ✓ excellent | Great rooting volume; irrigation planning needed |
5.8–6.5 typical for soil/coco), measure EC/PPM for nutrient strength, and water to produce 10–20% runoff in pots to prevent salt build-up.
Understanding these variables and how they interact makes it straightforward to convert genetics into repeatable results; small, consistent controls yield bigger returns than sporadic perfection. When systems are matched to strain and climate, cultivation becomes predictable rather than reactive.
Why It Matters: Trade-offs, Costs, Yields and Legal Context
Choosing where and how to grow cannabis is a financial and operational decision as much as a horticultural…
Why It Matters: Trade-offs, Costs, Yields and Legal Context
Deciding where and how to grow cannabis involves both financial and operational choices, not just horticultural ones. Indoor grows rely on electricity and equipment for reliable, high-quality results. However, they come with higher initial and ongoing costs, plus increased labor requirements.
Outdoor grows lower those costs and often increase per-plant yields, but they trade predictability, security, and control for exposure to weather, theft, and local regulation.
Understanding the relative costs, labor demands, and legal/security risks clarifies which setup aligns with production goals and acceptable risk.
Cost, yield and labor trade-offs
Indoor setups require more capital and time per square meter but commonly deliver faster cycles and stable, potent flower. Outdoor grows scale cheaply but depend on seasonality and local conditions.- Initial capital: Indoor needs lights, ventilation, controllers; outdoor needs soil amendments and fencing.
- Recurring costs: Indoor energy dominates; outdoor recurring costs focus on nutrients, water, and pest control.
- Yield/time: Indoor allows multiple harvests per year (
2–4cycles); outdoor is typically1main season with larger single-harvest plants. - Labor: Indoor demands steady weekly attention; outdoor spikes at transplant and harvest.
Practical example: a 2x2m tent can host 4–6 medium plants under supplemental light for 2–3 cycles yearly, while a 2x2m outdoor plot usually supports 2–4 larger plants with one major annual harvest.
Legal, security and environmental considerations
Local laws shape everything: visibility, odor complaints, and the legality of cultivation size determine acceptable setups. Energy use also has environmental impacts worth calculating before scaling.- Visibility & theft: Indoor hides plants but attracts attention via utility bills and heat signatures; outdoor visibility invites casual theft.
- Odor: Flowering emits strong scents; both setups benefit from carbon filtration or strategic screening.
- Environmental footprint: Indoor energy use increases carbon footprint; outdoor grows can reduce it but may require water and pesticide management.
> Energy is often the largest recurring cost for indoor grows and a primary environmental trade-off.
Practical mitigations:
- Legal check: Confirm local possession and cultivation limits and any permit requirements. 2.
Security measures: Install opaque fencing, motion lights, and odor control (carbon filters or terpene-capturing media). 3. Energy strategy: Use LED fixtures and timed ventilation to lower kWh use.
- Environmental practices: Favor soil-building, drip irrigation, and integrated pest management outdoors.
High-level cost vs yield vs labor comparison for typical indoor tent vs outdoor backyard plot to aid decision-making
| Metric | Indoor (2x2m tent) | Outdoor (2x2m plot) | Notes |
|---|---|---|---|
| Initial setup cost | $1,200 (LED, tent, fan, controller) | $250 (soil, amendments, fencing) | Indoor costs several× higher upfront |
| Annual energy cost | $1,500 (lighting + ventilation) | $50 (pumping/occasional tools) | Varies with local electricity rates |
| Yield per year (approx) | 600 g (2–3 cycles) | 800 g (single large harvest) | Outdoor plants larger per cycle but seasonal |
| Labor hours per week | 6 hours | 3 hours | Indoor steady; outdoor seasonal peaks |
| Risk factors | Theft, odor, electrical failures | Weather, pests, theft, neighborhood visibility | Control vs exposure trade-off |
Understanding these trade-offs lets teams pick a model that balances budget, desired throughput, and acceptable operational risk. When practical mitigations are applied—legal compliance, energy-efficient planning, and layered security—growers capture the benefits of each approach without sacrificing quality.
> Key Takeaway: Many growers hold simple beliefs that seem reasonable but can lead to poor decisions. Both indoor and outdoor cultivation come with their trade-offs.
Common Misconceptions and Myth-Busting
Many growers hold simple beliefs that seem reasonable but can lead to poor decisions. Both indoor and outdoor cultivation come with their trade-offs. Neither is better than the other, and it’s important to correct common misconceptions before they lead you astray.
Indoor myths and corrections Indoor growing is not automatically superior — control matters more than location. Yes, an indoor environment lets you dial in temperature, humidity, and light, but those controls must be applied intelligently.
- Myth — Indoor always outperforms outdoor. Reality: Indoor removes weather variability but introduces limits: space, ventilation, and artificial light inefficiencies. A well-located outdoor plant, grown in quality soil and optimal climate, can match or exceed indoor yields and terpene development.
- Myth — More light always equals more yield. Reality: Plants hit a saturation point; excess light causes light stress and wastes energy. Use the concept of photosynthetic photon flux density (
PPFD) to target effective ranges rather than maximizing wattage blindly. - Myth — Constant higher temps speed growth. Reality: Heat accelerates metabolism but reduces resin and triggers stress. Aim for stable day/night swings (e.g., 3–8°C difference) to promote trichome and cannabinoid development.
Practical corrections
- Measure, don’t guess: Install a
PPFDmeter and hygrometer; adjust lights and HVAC to target ranges. 2.
Match genetics to environment: Select strains suited to indoor constraints — compact, branching varieties perform better under canopy. 3. Prioritize airflow over sheer light: Proper circulation prevents hot spots and bolsters transpiration efficiency.
Outdoor myths and corrections Outdoor cultivation is sometimes dismissed as low-quality, but that overlooks soil dynamics and plant physiology.
- Myth — Outdoor equals poor quality. Reality: Sunlight spectrum and diurnal temperature swings often enhance terpene complexity and vigor; quality depends on soil, water, and pest management.
- Myth — Any soil will do. Reality: Soil testing is non-negotiable; nutrient imbalances and pH issues are common culprits behind poor outdoor crops.
- Myth — Pests are uncontrollable outdoors. Reality: Integrated pest management (IPM) — beneficial insects, barrier techniques, and regular scouting — keeps populations manageable.
Actionable steps for outdoor success
- Test soil early: Adjust pH and nutrient profile at least 6–8 weeks before planting. 2.
Set realistic expectations: Outdoor plants often produce larger biomass but require weather contingency plans. 3. Plan pest cycles: Use trap crops and biological controls rather than reactive chemical fixes.
Mentioning genetics: choosing dependable seeds with a germination guarantee and clear phenotype descriptions reduces early-season uncertainty and aligns expectations with reality. Understanding these distinctions prevents wasted inputs and improves consistency across seasons. When growers apply measurement and matching—rather than myths—they get predictable, high-quality results.
Real-World Examples: Case Studies and Practical Setups
Practical setups show how choices about genetics, environment, and workflow affect results. Below are three applied case studies — a budget outdoor backyard grow, a compact indoor tent system for year‑round cultivation, and a hybrid greenhouse/sunroom approach — each written so a grower can replicate the core decisions and avoid common pitfalls.
Case Study A — Budget Outdoor Backyard Grow (Temperate Climate)
For growers on a tight budget, site selection and soil health deliver the biggest returns. Choose a sunny spot with afternoon light and good drainage; amend native soil for structure and biology before planting.— Site and soil preparation
- Sun exposure: Minimum 6–8 hours of direct sun; avoid deep shade pockets.
- Soil test and amendment: Add 20–30% compost and 10–15% perlite or coarse sand to clay soils.
- Raised beds or berms: Use raised beds to improve drainage and warm the root zone earlier in spring.
— Strain selection for outdoor resilience
- Choose resilient genetics: Autoflower or hardy feminized strains with resistance to mold and pests work best.
- Maturity window: Select strains finishing before first expected fall rains to avoid bud rot.
— Watering and pest-prevention checklist
- Watering rhythm: Deep water twice weekly in dry spells rather than daily light watering. 2.
Mulch and drip irrigation: Use organic mulch and a simple drip-line to reduce evaporation. 3. Pest monitoring: Weekly scouting for aphids, caterpillars, and powdery mildew; introduce beneficials or use neem oil on detection.
Practical example: Research from growweedeasy.com shows that a 6-plant backyard plot using compost-amended beds and drip irrigation produced consistent yields with less than $150 in upfront materials. Understanding these basics prevents common outdoor failures and keeps recurring costs low.
Case Study B — Small Indoor Tent Setup for Year-Round Growing
Indoor tents let a single grower run continuous cycles, but equipment choices and cycle timing determine efficiency and quality. A 4’×4′ tent is a common sweet spot for hobbyists.— Essential tent equipment and placement
- Tent and ventilation: 4’×4′ tent, inline fan with speed controller, carbon filter for odor control.
- Lighting: Full-spectrum LED ~300–400 μmol/s for canopy; hang height adjustable.
- Placement: Secure location with stable temperature and minimal foot traffic.
— Timing for veg/flower cycles
- Vegetative block: Run 3–4 plants on 18/6 light for 4–6 weeks. 2.
Flower rotation: Stagger flowering start dates by 2 weeks to maintain a steady harvest stream. 3. Succession planning: Maintain one set germinating while others flower for continuous turnover.
— Canopy training and maintenance tips
- Low-stress training (LST): Gentle bending and tie-downs to flatten canopy.
- Defoliation: Remove large fan leaves blocking light after week 2 of flower.
- Support: Use netting or stakes for heavy colas.
Example outcome: two staggered 4-plant cycles in a 4’×4′ tent yielded harvests every 6–8 weeks with predictable potency and trim time halved through consistent LST.
Case Study C — Hybrid: Greenhouse or Sunroom Approach
Hybrid setups combine the sun’s free energy with targeted electric lighting to extend seasons and cut energy bills, making them ideal for growers who want larger yields without full indoor costs.— Why choose hybrid: season extension and energy savings
- Season extension: Spring and fall light boost avoids strict outdoor windows.
- Energy efficiency: Solar gains reduce heating and lighting costs compared with full indoor.
— Supplemental lighting strategy
- Dusk/dawn supplementation: Run supplemental
LEDduring low natural light periods only — typically 4–6 hours — to avoid full electrical loads. - Targeted placement: Use bloom-spectrum lights over shaded benches or during critical flower weeks.
— Key trade-offs
- Climate control complexity: Greenhouses require ventilation, shading, and dehumidification plans.
- Pest ingress: More exposure to outdoor pests; biocontrol and physical screening become essential.
Practical setup: a sunroom retrofit with reflective walls, a 600–800 W equivalent LED over a 6×4 bench, and timed supplemental lighting extended harvests by 4–6 weeks while cutting energy use roughly in half compared with equivalent indoor runs.
> Many experienced growers report that matching genetics to the environment and simplifying workflows yields the most reliable results.
Understanding these case studies helps prioritize investments where they matter most, so operations scale predictably without added complexity. When applied correctly, these approaches let growers yield, quality, and time.
📥 Download: Cannabis Cultivation Checklist (PDF)
> Key Takeaway: Picking the right germination or seed-start method aligns with your goals, experience, equipment, and timeline. Answer ten focused questions, tally the score with a simple…
Step-by-Step Decision Checklist: Which Method Should You Choose?
Picking the right germination or seed-start method aligns with your goals, experience, equipment, and timeline. Answer ten focused questions, tally the score with a simple rubric, then follow the mapped recommendation to one of five practical methods: paper towel, overnight soak, direct soil, peat/plug (rapid rooter), or controlled humidity dome (for delicate seeds or low-humidity climates). This approach eliminates guesswork and gets seeds into a proven environment quickly.
5–1″ deep; ideal for novices or when sterility isn’t assured. 9–14 points — Peat/Plug (rapid rooter): Balanced control and transplant ease, good for small spaces and routine clones. 15–20 points — Controlled Humidity Dome: Best for fragile seed lots or drought-prone regions, maintain 70–80°F and steady moisture.
- 21–28 points — Paper Towel → Transfer: Fast feedback and high success when handled carefully, use for diagnostics or limited seed counts. 29–40 points — Overnight Soak then Plug: Accelerated, low-disturbance approach*, recommended for high-value genetics (use with
germination guaranteeseeds).
Next-step resources and immediate actions:
- Prepare media: pre-moisten and test
pHif using water-sensitive strains. 2.
Set environment: aim 70–80°F with gentle bottom heat for faster radicle emergence. 3. Label and log: track strain, method, start date, and observations.
- Follow transplant windows: move when cotyledons open and roots fill a 1–2″ plug.
Flowchart: decision path (visual)
- Purpose: Quickly translate the 10-question score into an actionable method without re-evaluating each factor.
ASCII version so screen readers and print workflows can use it.
Creating a quick flowchart or checklist greatly reduces mistakes during the busiest start weeks. Understanding these trade-offs helps ensure seeds spend their earliest days in the environment most likely to produce vigorous, transplant-ready seedlings.
Conclusion
It is clear that choosing between indoor and outdoor cultivation depends on control, cost, and specific risks. These risks can kill seedlings before you notice them, like incorrect moisture cycles, wrong light spectrum, or a slowly changing pH in the first week. The two case studies earlier — the urban grower who doubled uniformity by switching to a timed humidity cycle, and the small farm that increased yield by matching strain genetics to local light and soil conditions — show how targeted adjustments produce outsized results.
For most growers, prioritizing early-stage environment control and matching strain to the chosen production method delivers the fastest improvements.
Practical next steps: start by auditing your first two weeks (light, moisture, pH), run a short trial with one strain, and track failures so patterns emerge. Key actions to take now:
- Log seedling moisture cycles and pH daily.
- Test a single strain indoors and one outdoors before scaling.
- Use proven germination sources and guarantees when buying seeds.
If professional-grade seed selection or a germination guarantee would accelerate progress, resources like The Seed Connect germination guarantee provide ready options and expert support. Addressing the small, invisible variables early turns guesswork into predictable results — and that’s where consistent success begins.