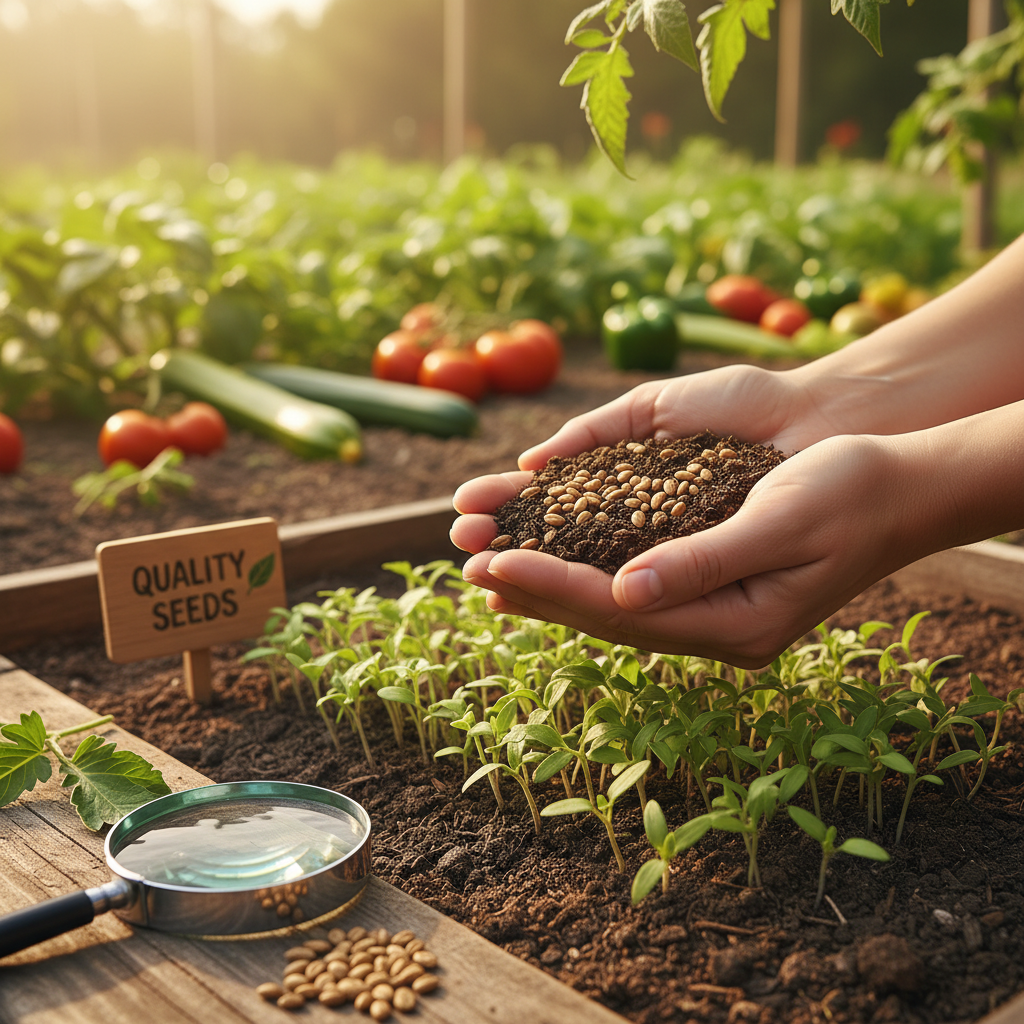
Maximize your garden yield with quality seeds
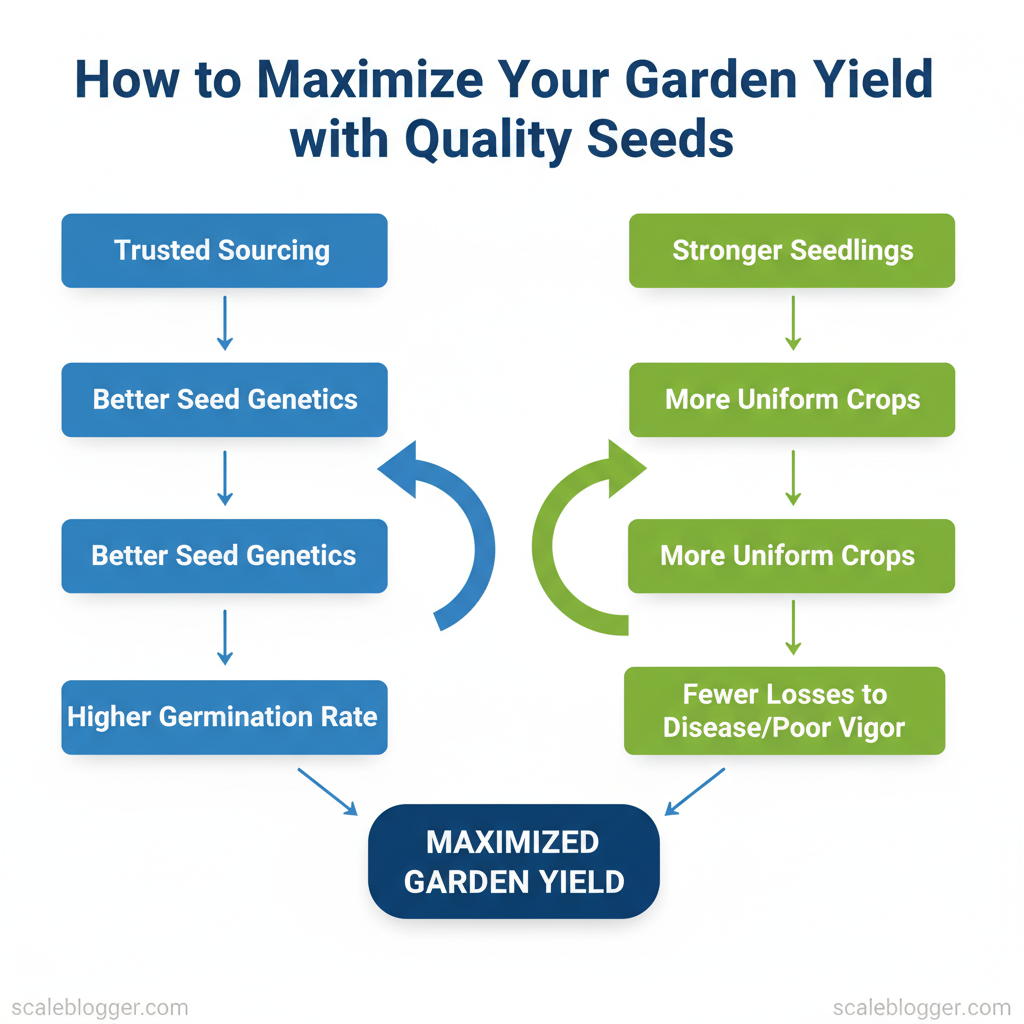
High-quality seeds are the most efficient way to boost harvests without drastically changing your routine. Better seed genetics, higher germination rate, and trusted sourcing mean stronger seedlings, more uniform crops, and fewer losses to disease or poor vigor. That matters because small gains at planting compound into noticeably larger yields at harvest.
- What makes a seed “high quality” and how to spot it in packets
- How seed choice interacts with soil, water, and spacing to multiply output
- Simple planting schedules that turn better seeds into extended harvests
- Quick checks to improve germination and reduce early-season failures
> [!TIP] Start by selecting seeds labeled for your climate and look for firm, full kernels or evenly colored packets to avoid weak stands.
According to Colorado State Extension, careful seed selection and handling are foundational to improving yield. Read on to learn practical steps—seed choice, timing, and small shifts in technique—that give you more food per square foot and more reliable results season after season.
Explore Our Quality Organic Seeds Collection: https://seedconnectllc.com
Table of Contents
- Understanding Seed Quality
- Section Content
- Choosing the Right Seeds for Your Garden
- Preparing Your Soil for Planting
- Planting Techniques for Maximum Yield
- Caring for Your Garden
- Harvesting for Optimal Quality
- Storing Seeds for Future Use
- Common Gardening Mistakes to Avoid
- Conclusion

Understanding Seed Quality
Seed quality governs everything that follows in a planting season: establishment speed, uniformity, and ultimately yield. Two pillars of seed quality are germination rate and purity & variety—both are measurable, actionable, and worth auditing before you spend time and space in the field.
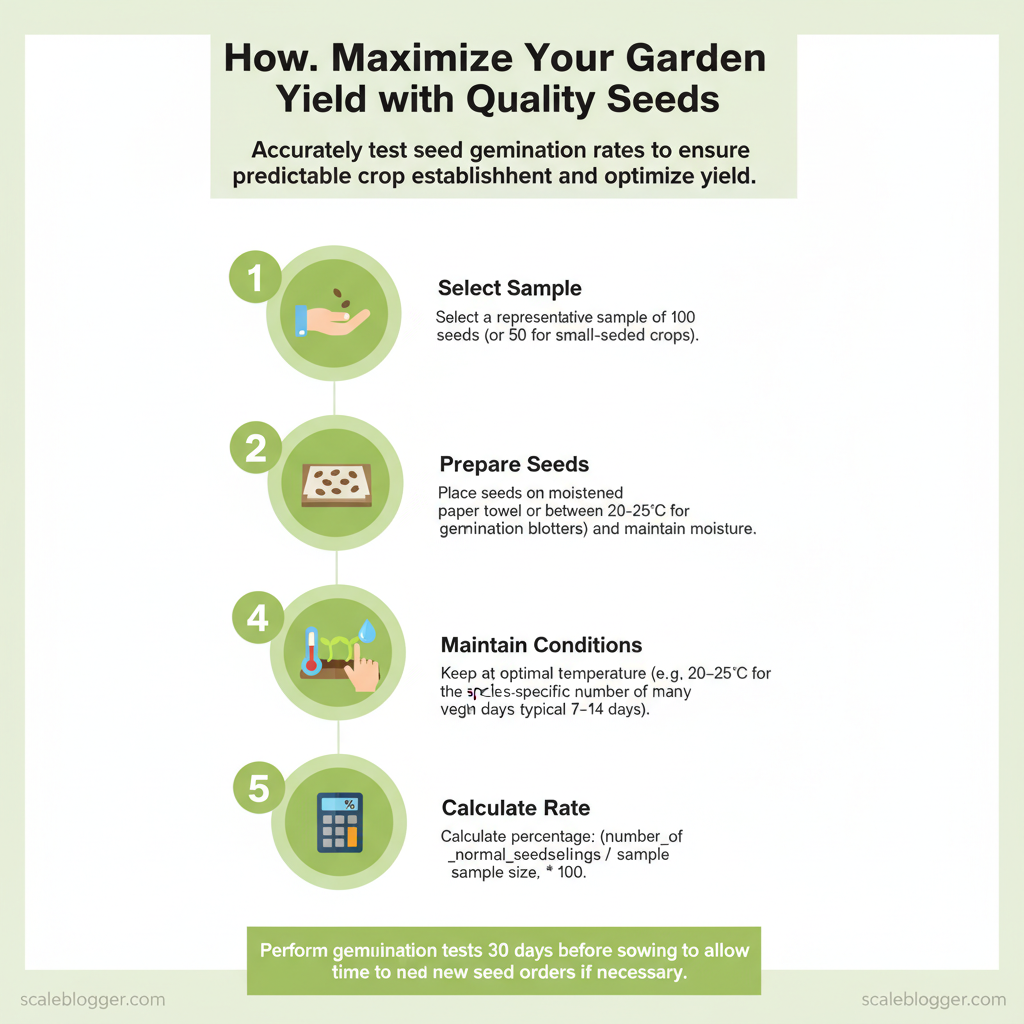
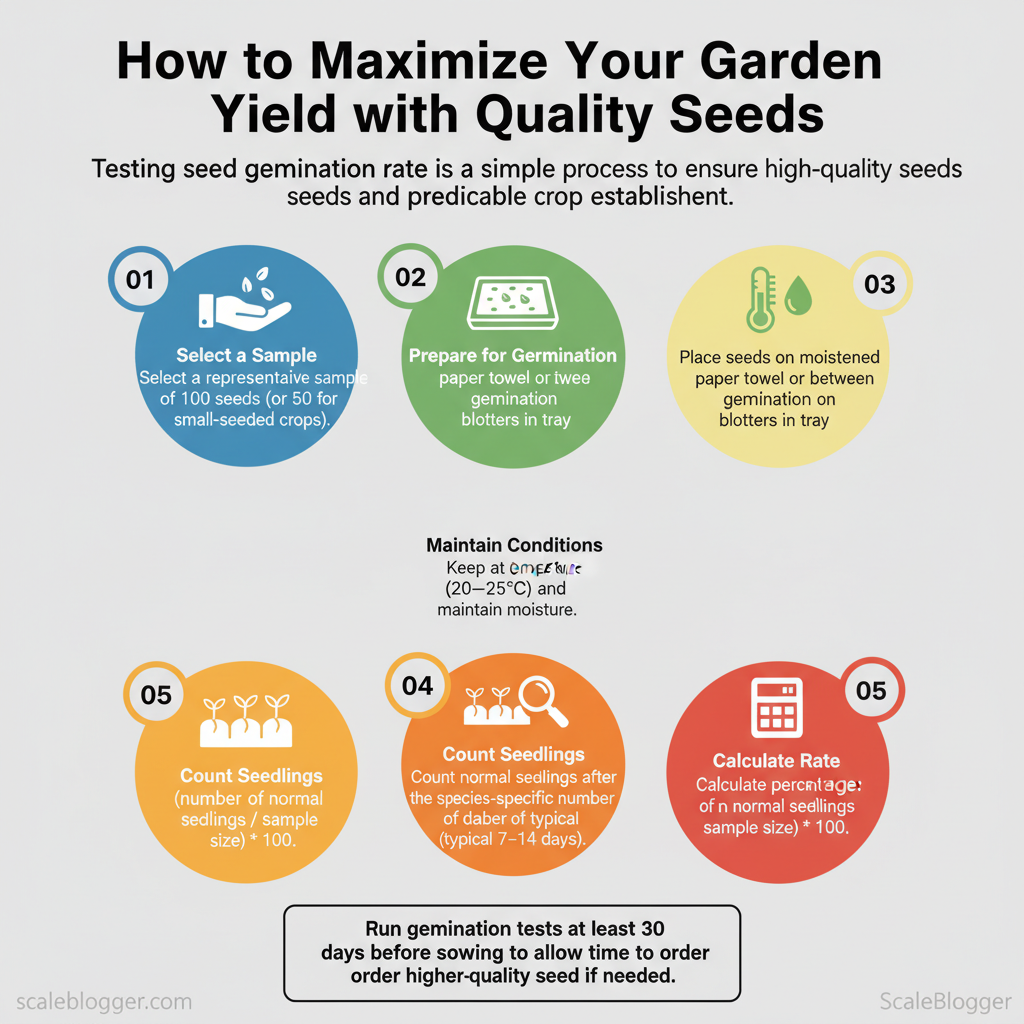
Germination Rate Definition: Germination rate is the percentage of seeds that successfully sprout under suitable conditions within a defined period. Why it matters: High germination rates mean fewer seeds wasted, more consistent stands, and predictable spacing—directly affecting yield per area. How to test germination rates: 1. Select a representative sample of 100 seeds (or 50 for small-seeded crops). 2. Place seeds on moistened paper towel or between germination blotters in a tray. 3. Keep at optimal temperature for the crop (e.g., 20–25°C for many vegetables) and maintain moisture. 4. Count normal seedlings after the species-specific number of days (typical 7–14 days). 5. Calculate percentage: germination_rate = (number_of_normal_seedlings / sample_size) 100. * Practical example: If a 100-seed sample yields 85 normal seedlings, expect roughly 85% field establishment before accounting for soil loss or pests. > [!TIP] Run germination tests at least 30 days before sowing to allow time to order higher-quality seed if needed.
Purity and Variety Definition: Seed purity refers to the proportion of seed that is the labeled variety and free from other crop seeds, weed seeds, inert matter, or off-types. Selecting the right variety: Choose varieties adapted to your climate, day-length sensitivity, disease resistance, and market traits (size, flavor, storage). Local trials or supplier data help match variety to goals. * Consequences of poor purity: Contaminants reduce stand uniformity, introduce unwanted traits (e.g., variable maturity), and can carry weed seeds or seed-borne diseases—each subtracting from yield and increasing management costs. > [!INFO] During seed production, practices like proper isolation and roguing maintain purity—see recommendations on seed production and yield from Colorado State University Extension (Improve Yield with High Quality Seed): https://extension.colostate.edu/resource/improve-yield-with-high-quality-seed/
For growers who prioritize reliable starts and true-to-type crops, sourcing certified, high-quality organic seeds is a practical risk reducer. SeedConnect LLC specializes in sourcing organic, heirloom, and non-GMO varieties globally to help ensure strong germination and purity for production-scale and home growers alike. Testing and selecting seeds up front saves time and inputs later, and it’s the foundation of predictable productivity and crop quality.
Choosing the Right Seeds for Your Garden
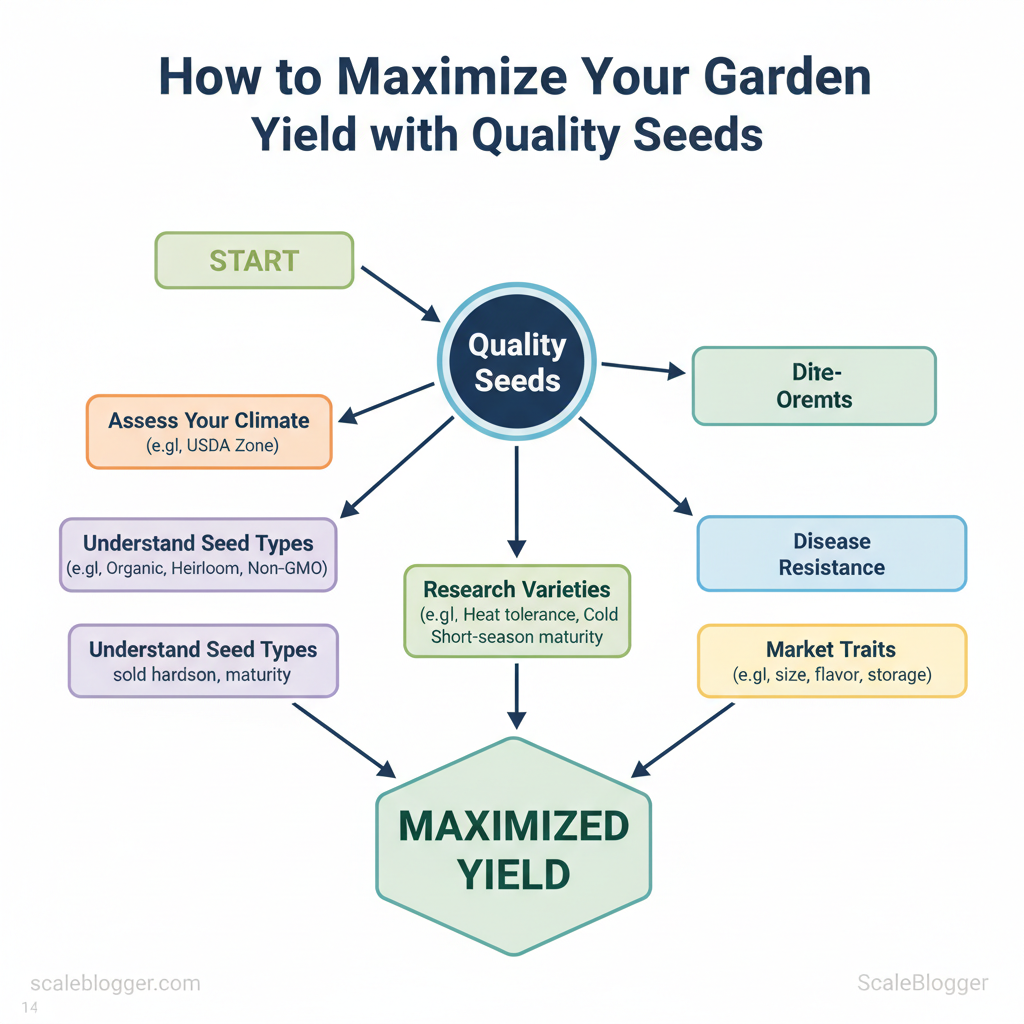
Start by matching seeds to reality: local climate and clear garden goals. SeedConnect’s organic, heirloom, and non-GMO seed selections make it easy to pick varieties specifically labeled for heat tolerance, cold hardiness, or short-season maturity—helpful when you need reliable performance in your microclimate.
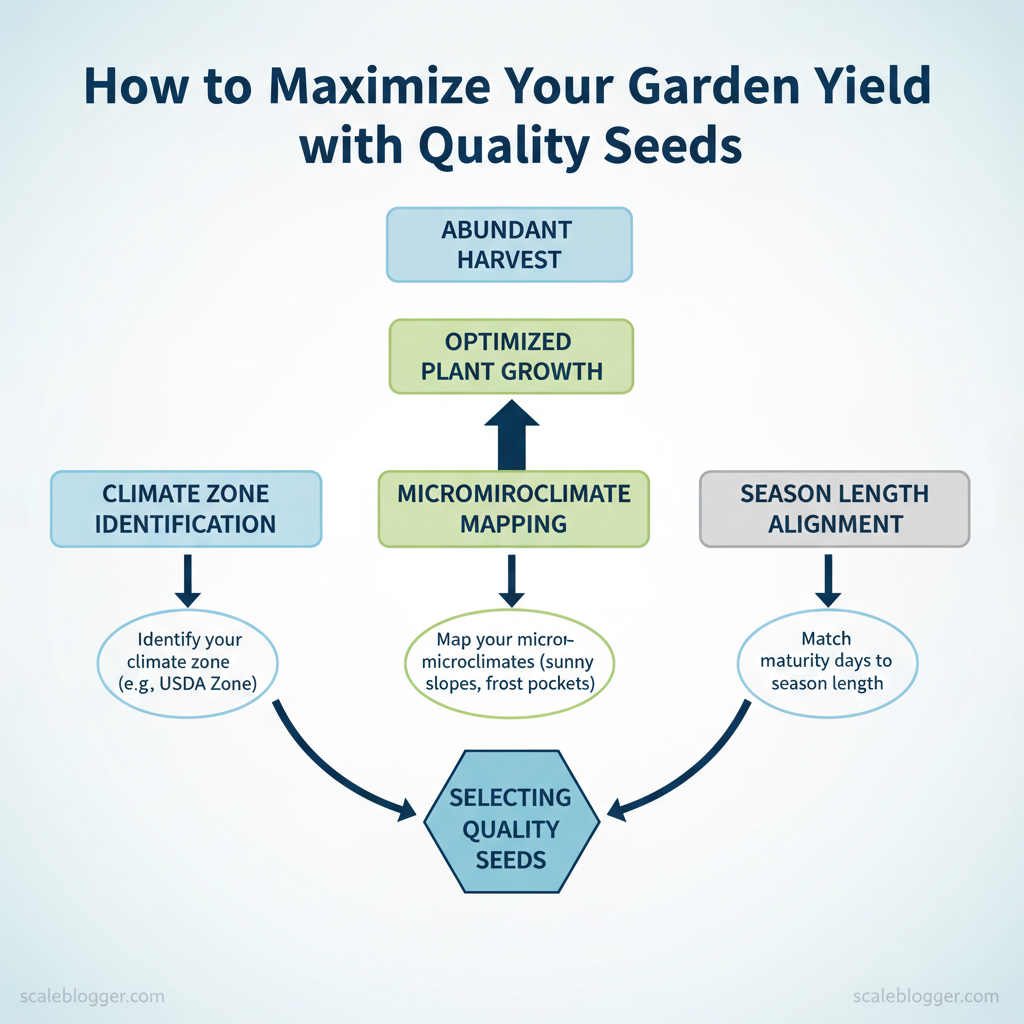
- Assessing Your Climate
- Identify your climate zone — Find your
USDA Zone(e.g.,USDA Zone 5) or equivalent using local extension maps. - Map your microclimates — Note sunny slopes, frost pockets, and sheltered corners; seeds that thrive in full sun may fail in shaded microclimates.
- Match maturity days to season length — Choose varieties with
days-to-maturityshorter than your frost-free window. - Consider heat and humidity tolerance — Pick varieties bred for high humidity or heat if you live in warm, wet summers.
- Use local data sources — County extension sites and long-term weather records give realistic freeze/frost and rainfall expectations; for seed-quality practices and how seed choice affects yield, see Colorado State Extension’s guidance on improving yield with high-quality seed: Improve Yield with High Quality Seed – CSU Extension.
Practical example: If you have a 120-day growing season, prioritize tomatoes and peppers labeled 60–80 days to harvest well before fall chills.
2. Defining Your Garden Goals 1. List primary objectives — Food production, pollinator habitat, cut flowers, container gardening, or heirloom preservation. 2. Prioritize traits — Yield, flavor, disease resistance, storage life, or ornamental appeal. 3. Select seed types to match goals — High-yield food gardens: choose hybrid or open-pollinated varieties selected for productivity. Flavor-forward home kitchens: heirloom varieties often provide superior taste. Low-maintenance landscapes: disease-resistant and drought-tolerant cultivars reduce inputs. Seed-saving goals: pick open-pollinated or heirloom, not hybrids. 4. Align effort with expectation — Intensive crops (e.g., tomatoes) reward inputs; low-effort goals benefit from resilient varieties.
> [!TIP] If you want both yield and taste, combine SeedConnect’s high-quality vegetable seeds for productivity with a small plot of heirlooms for flavor trials.
Choosing the right seeds reduces surprises and maximizes the return on your time and inputs. When seed selection reflects both climate realities and clear goals, gardening decisions become much more productive and enjoyable.
Preparing Your Soil for Planting
Good soil is the single biggest determinant of how well seeds perform. Before you sow anything, run a focused soil check and correct the fundamentals—texture, pH, nutrients, and organic matter—so your seeds and the organic varieties you source from SeedConnect LLC get the environment they need to thrive.
Soil Testing: why and how Why test: Accurate diagnosis avoids guesswork. Tests tell you pH, available nitrogen (N), phosphorus (P), potassium (K), and sometimes micronutrients and organic matter; that directs precise amendments. How to test: 1. Collect 8–12 cores from the top 6 inches across the bed, mix in a clean bucket, and air-dry. 2. Use a reliable lab or DIY kit; commercial labs give the most actionable nutrient recommendations. 3. Record the results and retest the same spots every 2–3 years or before a major crop change. * Interpreting results: Look for pH (most vegetables prefer 6.0–6.8), low P or K flags, and organic matter percentage. If a lab report recommends quantities, follow those rates—over-application wastes resources and stresses plants.
> [!NOTE] > Laboratory soil tests are more reliable than single-strip kits for nutrient recommendations and long-term planning.
Soil Amendments: selection and application Compost: Boosts organic matter and microbial life. Apply a 1–2 inch layer and incorporate into the top 6–8 inches for immediate beds. Lime or sulfur: Adjusts pH. Use lime to raise pH or elemental sulfur to lower it; follow lab rates and apply several months before planting when possible. Aged manure: Adds nutrients and improves structure. Apply sparingly and well-aged to avoid burning seedlings. Rock phosphate & greensand: Slow-release P and trace minerals. Good for long-term fertility, especially in organic systems. Cover crops / green manure: Adds nitrogen and structure. Terminate and incorporate 2–4 weeks before planting. Gypsum: Improves sodium-affected or compacted soils without changing pH. Commercial organic fertilizers: Targeted nutrient boosts*—use when tests show specific deficiencies.
- Apply amendments based on test rates—measure, don’t guess.
- Incorporate into the planting zone (
top 6–8 inches) to integrate organic matter with root zone. - Time major pH changes (lime/sulfur) 2–3 months ahead; quick-release fertilizers can be used closer to planting.
> [!TIP] > If you’re planning to sow SeedConnect LLC’s heirloom or non-GMO varieties, prepping the soil now maximizes their genetic potential and plant health.
Healthy soil reduces pest pressure and smooths the growing season. When you get these steps right, plants establish faster and deliver better yields, allowing you to focus on crop-specific care rather than fixing avoidable problems.
Planting Techniques for Maximum Yield
Good planting technique starts with getting the basics right: correct row spacing and planting depth dramatically influence germination, airflow, disease pressure, and final harvest weight. If you’re using high-quality organic seed—like the varieties sourced through SeedConnect for reliable germination and vigor—you’re already starting ahead, but spacing and timing still determine how much of that genetic potential converts into yield.
Row Spacing and Depth
Plant spacing controls competition. For dense-rooted crops like beets and carrots, tighter rows (8–12 inches) maximize bed use; for large plants like sweet corn or pumpkins, give 24–36 inches between rows to avoid shading and nutrient competition. Depth affects germination speed. Small seeds need light and shallow placement: sow lettuce, celery, and petunias at 1–3 mm or barely covered. Large seeds (beans, peas) should sit deeper—1–2 inches—to access moisture. Seed-to-soil contact is critical. Firm the soil gently after sowing to improve moisture transfer; use a rake or roller for small-seed beds. Adjust for soil type. In sandy soils increase depth slightly to reach moisture; in heavy clay, sow shallower to prevent rotting. Inter-row spacing for airflow and access. Aim for wider spacing in humid regions to reduce foliar diseases and allow mechanical or hand access for weeding. Practical examples: Carrots: rows 10–12 inches apart, thin seedlings to 2–3 inches. Bush beans: rows 18–24 inches apart, seeds 1–1.5 inches deep. Tomatoes (in-row spacing): 18–24 inches, staking or trellising reduces row width needs.
> [!TIP] Use seed depth = 3 × seed diameter as a simple rule when you don’t have crop-specific guidance.
Timing Your Planting
- Know your last and first frost dates and plan around them; many vegetables will tolerate early cool weather if planted after their recommended risk window.
- Use succession planting to keep harvests steady—sow cool-season crops every 2–3 weeks in spring and fall.
- Match seed variety to season: choose cold-tolerant lettuces for early spring and heat-tolerant peppers for mid-summer transplants.
- Start transplants indoors
4–8 weeksbefore outdoor planting based on crop maturity days. - Consider soil temperature: corn germinates poorly below
50–55°F, while spinach will handle40–45°F.
> [!INFO] Colorado State University Extension notes that using high-quality seed and proper seedbed practices improves yield through better emergence and uniform stands (Improve Yield with High Quality Seed: https://extension.colostate.edu/resource/improve-yield-with-high-quality-seed/).
`text Planting calendar template (biweekly succession): Week 1: Lettuce (direct sow) Week 3: Spinach (direct sow) Week 5: Bush beans (direct sow) Week 7: Brassicas (transplant)
> [!NOTE] If you want consistency and genetic reliability, sourcing certified organic, high-germination seed from suppliers like SeedConnect can reduce re-sowing and improve final yield — especially important when timing is tight.
Getting spacing, depth, and timing right transforms a good seed into a great harvest. With those elements coordinated, your beds will give predictable, higher yields and make pest and water management far simpler.
Caring for Your Garden
Start by thinking of water and nutrients as the two rhythms your plants follow: water moves growth in the short term, nutrients build resilience over the season. For gardeners who want predictability, choosing high-quality organic seeds from SeedConnect helps ensure seedlings respond reliably to watering and fertilization, because vigor and uniformity reduce stress-related losses — see SeedConnect for sourcing details (https://seedconnectllc.com).
Watering Techniques Soaker hoses and drip irrigation: deliver water slowly at the root zone, reducing evaporation and leaf disease; use for raised beds and containers. Hand-watering with a wand: great for precision on new transplants; water the soil, not the foliage, to limit fungal problems. Top-watering vs. bottom-watering: seedlings benefit from bottom-watering trays until true leaves appear; mature plants prefer deep top-watering to encourage root depth. Signs of overwatering: yellowing leaves with soft stems, persistent wet soil, and poor growth despite moisture. Signs of underwatering: wilting during heat, dry crumbly soil, leaf edges browning. Watering schedules: 1. Early-morning watering reduces disease and evaporation. 2. Deep, infrequent watering (for example, twice weekly) encourages deep roots; adjust frequency for soil type and weather. 3. Use finger test or a moisture meter reading ~2–4 inches to decide if surface dryness actually means root-zone dryness. > [!TIP] Mulch reduces surface evaporation by up to 75% and stabilizes soil moisture for easier scheduling.
Fertilization Best Practices Start with soil testing: know pH and baseline nutrients before adding amendments; this prevents over-application. Types of fertilizers: organic options include compost, well-rotted manure, bone meal, and kelp; synthetic options include balanced N-P-K formulations and soluble feeds. When to fertilize: apply starter nutrients at transplanting, then follow a feeding schedule tied to growth stages — e.g., vegetative nitrogen boost early, bloom/fruit feeders higher in phosphorus and potassium. Application methods: side-dress 2–4 inches from stems, use foliar feeds sparingly for micronutrient correction, and apply slow-release granules at planting for steady supply. * Organic vs. synthetic: organic fertilizers build long-term soil biology and release nutrients slowly; synthetics give rapid correction when plants show deficiency. Choose based on crop needs and long-term soil goals. > [!INFO] For guidance on seed and crop practices affecting yield, review the Colorado State University resource on improving yield with high-quality seed: Improve Yield with High Quality Seed – CSU Extension.
Practical routines make all this manageable: check moisture early, feed according to plant stage, and favor techniques that build soil structure. If you want reliable starts that respond well to these care patterns, consider sourcing vigorous organic seed varieties from SeedConnect — better seed simplifies every follow-up task. Understanding these routines will make your garden more predictable and productive without adding complexity.
Harvesting for Optimal Quality
Harvest timing determines whether produce tastes vibrant, stores well, or disappoints customers. Start by learning species-specific ripeness cues — visual color changes, fruit firmness, seed maturity, and plant senescence — because a day too early or too late can change flavor and shelf life dramatically. For seed crops, proper isolation, roguing of off-types, and timing are essential to maintain genetic purity and yield, as outlined in the Colorado State University extension guidance on seed-quality practices (Improve Yield with High Quality Seed).
Signs of ripeness to watch for Color shift — many fruits change from green to their harvest hue; use this alongside other cues. Texture change — gentle pressure test indicates cell-softening in tomatoes, peaches, and melons. Detachment ease — ripe fruit often releases cleanly from stems. Seed maturity — for seed-saving crops, seeds should be fully formed and dry inside the fruit or pod. * Plant cues — yellowing foliage and drying stems often signal the end of the harvest window.
> [!TIP] > Photograph a few plants daily in the week before expected harvest; visual records reduce guesswork and improve timing across seasons.
Tools and equipment for clean, efficient harvests 1. Sharp bypass pruners — for clean cuts that reduce disease entry. 2. Harvest knives — serrated blades for squash and melons. 3. Harvest baskets/crates — ventilated containers minimize bruising. 4. Gloves — protect produce and workers. 5. Secateurs — precise work on stems and bunching crops. 6. Moisture meter — helpful for root crops and seed drying decisions. 7. Portable shade/tents — cool harvested produce quickly. 8. Labeling supplies — waterproof tags for lot tracking and seed provenance.
Best practices by crop type Leafy greens: Harvest in cool morning hours, cut outer leaves to encourage regrowth, and cool immediately. Vine fruits (tomatoes, cucumbers): Use two-handed harvest to avoid vine damage; pick at first blush for shipping, fully ripe for local markets. Root crops: Lift gently with forks, brush soil off rather than washing if storing long-term. Seed crops: Allow full physiological maturity on plant when possible, then dry and thresh carefully following isolation and roguing practices cited by Colorado State (Improve Yield with High Quality Seed).
Post-harvest handling and quick checklist Cool quickly — reduce respiration and microbial growth. Grade and cull — remove damaged items to protect bulk quality. Dry and store seeds at recommended humidity and temperature; label lots with variety and harvest date. Recordkeeping: Use a simple harvest log template: `text Date | Field/Bed | Crop | Qty harvested | Notes (ripeness, pests, post-harvest action)
> [!NOTE] > Choosing high-quality seed varieties from suppliers like SeedConnect can improve uniformity at harvest, making timing and post-harvest workflows more predictable.
When harvest timing and technique align, flavor, shelf life, and seed integrity all improve — that payoff is what turns good crops into great ones. Implementing these practices will make your next harvest measurably better without adding unnecessary complexity.
Storing Seeds for Future Use
Proper seed storage starts with controlling the environment and protecting genetic integrity. Keep seeds cool, dry, and dark: those three conditions slow metabolism and prevent mold, insects, and loss of viability. For many garden crops, target temperatures between 32–41°F (0–5°C) and relative humidity below 50%; lower humidity and cooler temps extend shelf life dramatically.
Optimal Storage Conditions Temperature control: Store seeds in a refrigerator or climate-controlled cool room; consistent temps beat fluctuating ones. Humidity management: Use desiccants (silica gel) in containers to maintain low moisture. Containers: Airtight glass jars with rubber seals, vacuum-sealed bags, or food-grade Mylar pouches are best. Avoid plain paper long-term unless you add a moisture barrier. Light protection: Keep seeds in opaque containers or a dark place—light can degrade some seed oils and reduce vigor. * Labeling and organization: Label every packet with species, variety, harvest date, and provenance. Use YYYY-MM-DD date formats for clarity.
> [!TIP] > For small-scale keepers, a chest freezer (set and monitored) plus double-sealed packaging gives multi-year storage without power-hungry climate systems.
- Harvest and dry seeds fully: air-dry until brittle for peas/beans or leather-dry for larger seeds.
- Clean seeds to remove chaff and wet debris—this reduces mold risk.
- Test a sample for viability before long-term storage (germination test of 10–20 seeds).
- Package in moisture-proof containers with desiccant; label and date.
- Store at stable cool temperatures; periodically test viability every 1–3 years.
Seed Saving Techniques Open-pollinated/ heirlooms: Isolate varieties by distance, timing, or physical barriers to maintain purity. Self-pollinated crops (beans, peas): Easier to save with minimal isolation; rogue off-types. Cross-pollinated crops (corn, squash): Require tight isolation or hand-pollination to keep genetics true. Biennials (carrots, onions): Plan for overwintering or use controlled cold storage to ensure flowering next season. * Small-seeded species: Use fine screens and careful winnowing; store in tiny labeled vials.
> [!INFO] > For guidance on producing high-quality seed and practices during production, see the Colorado State University extension resource on improving yield with quality seed: Improve Yield with High Quality Seed – CSU Extension.
Here’s a simple label template you can copy: `text Species: Brassica oleracea (Kale) Variety: Lacinato Harvest date: 2025-09-10 Location/provenance: Community plot A Notes: Isolated 200m; viability test 86% (2025-10)
If you source seeds from a supplier like SeedConnect, look for clear provenance and storage recommendations on the packet—those details make your long-term seed work more reliable. Stored correctly, seeds give you flexibility and preserve the genetics you want to carry forward for seasons to come. This makes planning crops and maintaining traits much easier without constant re-procurement.
📥 Download: Garden Yield Maximization Checklist (PDF)
Common Gardening Mistakes to Avoid
Watering errors and ignoring soil health are by far the two most common causes of poor garden performance, and they’re deceptively easy to fix once you know what to look for.
Overwatering vs. underwatering Signs of overwatering: soggy soil, yellowing lower leaves, root rot smells, and standing water after irrigation. Overwatered plants often show wilting despite wet soil because roots are oxygen-starved. Signs of underwatering: dry, crumbly soil, crispy leaf edges, slowed growth, and leaves that curl or drop to conserve moisture. * How to correct watering mistakes: 1. Check soil moisture with a soil probe or simply stick your finger 2–3 inches in the soil; if it’s moist, hold off watering. 2. Improve drainage by amending heavy clay with compost and coarse sand; raise beds if pooling is persistent. 3. Switch to deep, less frequent watering to encourage deep root growth; aim to wet the root zone 6–8 inches deep. 4. Mulch with 2–3 inches of organic material to stabilize moisture and temperature.
> [!TIP] > Use a simple rain gauge and a weekly water schedule adjusted for heat or rain; many home gardens need only 1–1.5 inches of water per week during active growth.
Neglecting soil health Signs of unhealthy soil: compacted layers, poor drainage, stunted plants, nutrient deficiency symptoms (purpling, chlorosis), and low earthworm counts. How to improve soil health: 1. Test your soil pH and nutrient levels; correct imbalances with targeted amendments. 2. Add generous amounts of well-rotted compost each season to improve structure and microbial life. 3. Rotate crops and plant cover crops to reduce pests and restore nutrients. 4. Avoid excessive tilling; use no-till or minimal-till methods to protect soil structure and mycorrhizal networks. 5. Consider sourcing high-quality organic seed stock — using robust varieties supports plant vigor and complements soil improvement efforts (see practical guidance on improving yield with quality seed from Colorado State University Extension: Improve Yield with High Quality Seed – CSU Extension).
> [!WARNING] > Quick fixes like heavy synthetic fertilizers can mask symptoms but often worsen soil biology over time.
Addressing watering and soil problems together pays dividends: healthier roots mean better drought resilience, higher yields, and fewer pest problems. If you want reliable seed varieties that perform well as you rebuild soil health, starting with quality organic seed will make the other efforts much more effective. When gardeners focus on these fundamentals, their beds recover faster and productivity climbs season after season.
Conclusion
You’ve seen how choosing better seed genetics, confirming germination rates, timing plantings, and matching varieties to your microclimate consistently lift yields and cut waste. Growers who switched to certified organic seed report faster, more uniform stands and fewer disease surprises, and Colorado State University Extension highlights how high-quality seed directly improves yield and crop uniformity. If you’re juggling timing, soil prep, and variety selection, prioritize testing a small batch first and adjusting your plan based on one season’s results—that practical cycle will pay off quickly.
For a straightforward next step, explore practical variety notes and sourcing options at SeedConnect and when you’re ready to act, pick from our curated selections here: Explore Our Quality Organic Seeds Collection. Doing that now—starting with a trial pack of trusted, high-germination varieties—gives you the fastest route to bigger, healthier harvests next season.