
When it comes to creating a thriving garden, having the right plants is essential, and organic seeds are the foundation of any successful gardening endeavor. Choosing the best organic seeds not only enhances the quality and flavor of your produce but also supports sustainable gardening practices that benefit the environment. With the right selection, you can cultivate a bountiful harvest while minimizing chemical usage.
Understanding which organic seeds to include in your garden can dramatically increase your yield and ensure a diverse array of crops throughout the season. Researching the specific benefits of each seed type could provide measurable insights into their impact on growth rates and pest resistance.
Here are some key takeaways to keep in mind:
- Quality Matters: Organic seeds promote healthier plants and soil.
- Diversity Is Key: A variety of seeds can improve resilience against pests and diseases.
- Sustainability: Supporting organic farming practices helps the environment.
- Flavor Boost: Organic produce often tastes better than conventionally grown options.
- Empowerment: Growing your own food fosters self-sufficiency and wellness.
> [!TIP] Cultivating organic seeds aligns with sustainable gardening tips, providing both immediate benefits and long-term rewards for your garden’s ecosystem.
With that in mind, let’s explore the 10 organic seeds every garden should have!
> [!INFO] Ready to enhance your garden? Order Your Organic Seeds Today!

Table of Contents
- 1. Heirloom Tomatoes
- Section Content
- 2. Basil
- 3. Carrots
- 4. Lettuce
- 5. Spinach
- 6. Peppers
- 7. Cucumbers
- 8. Zucchini
- 9. Radishes
- 10. Green Beans
1. Heirloom Tomatoes
Heirloom tomatoes are celebrated for their unique flavors, vibrant colors, and rich histories. These varieties, often passed down through generations, thrive under specific growing conditions and offer a diverse range of flavor profiles. Key to their success is understanding their growing conditions and selecting the best varieties suited for your garden.
Growing Conditions
To cultivate heirloom tomatoes effectively, consider the following essential factors:
- Sunlight Needs: Heirloom tomatoes require full sun, which means at least 6-8 hours of direct sunlight daily. This exposure is crucial for optimal fruit development.
- Soil Type: Use well-draining, nutrient-rich soil with a pH between 6.0 and 6.8. Amending your soil with organic matter, such as compost, enhances fertility and drainage.
- Watering Tips: Consistency is key in watering. It’s recommended to provide about 1-2 inches of water per week, ensuring the soil stays moist but not soggy. Watering at the base of the plant helps prevent fungal diseases.
> Studies indicate that heirloom tomatoes can yield better flavors when grown in organic conditions, emphasizing the importance of soil quality and care.
Best Varieties
When choosing heirloom tomato varieties, consider these popular options known for their distinctive flavors:
- Brandywine: Known for its large, pink, juicy fruits, Brandywine tomatoes are sweet and aromatic, making them ideal for fresh eating.
- Cherokee Purple: This variety is famous for its deep, dusky color and rich, slightly smoky flavor. It’s excellent in salads or sandwiches.
- Green Zebra: With its unique green and yellow stripes, the Green Zebra offers a tangy taste that adds a zesty kick to dishes.
- Mortgage Lifter: This heirloom boasts large, meaty tomatoes with a sweet flavor that’s perfect for sauces and canning.
> Experts suggest planting a mix of varieties to experience the full spectrum of flavors and colors that heirloom tomatoes can offer.
Conclusion
Heirloom tomatoes not only provide a delicious addition to your meals but also connect you to gardening traditions. By focusing on their specific growing conditions and selecting the best varieties, you can enjoy a bountiful harvest that showcases the rich flavors these tomatoes are known for.
> [!TIP] Consider starting heirloom tomatoes indoors before the last frost to get a head start on the growing season.
2. Basil
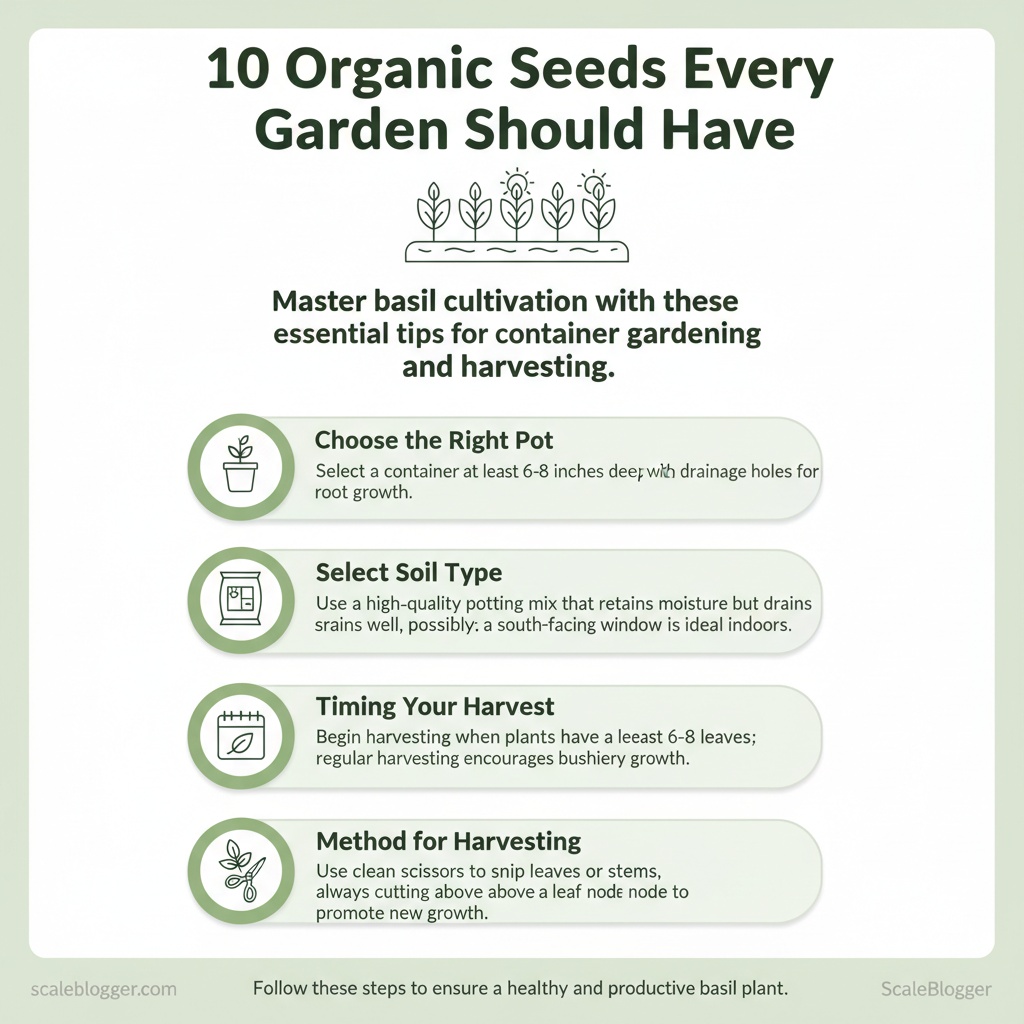
Basil is a versatile and aromatic herb that thrives in a variety of growing conditions, making it a favorite among home gardeners. Cultivating basil successfully requires understanding its needs and addressing common challenges. This section provides essential cultivation tips, including container gardening, harvesting techniques, and how to manage common pests.
Cultivation Tips for Basil
Basil prefers warm weather and ample sunlight, thriving in well-draining soil. Here are some actionable tips for successful cultivation:
1. Container Gardening: – Choose the Right Pot: Select a container that is at least 6-8 inches deep to allow for proper root growth. Make sure it has drainage holes. – Soil Type: Use a high-quality potting mix that retains moisture but drains well. A mix with perlite or vermiculite can enhance drainage. – Location: Position your basil in a spot that receives at least 6-8 hours of sunlight daily. If indoors, a south-facing window is ideal.
2. Harvesting Techniques: – Timing: Begin harvesting when the plants have at least 6-8 leaves. Regular harvesting encourages bushier growth. – Method: Use clean scissors or pruning shears to snip off leaves or stems. Always cut above a leaf node to promote new growth. – Frequency: Aim to harvest basil every few weeks to keep the plant healthy and productive.
3. Common Pests: – Aphids: These tiny insects can weaken your basil plants. Remove them by spraying the leaves with a strong jet of water or using insecticidal soap. – Whiteflies: These pests can be controlled with yellow sticky traps and regular inspections. – Basil Downy Mildew: This fungal disease appears as yellow spots on leaves. To prevent it, ensure good air circulation and avoid overhead watering.
> According to the University of Florida IFAS Extension, healthy basil plants can yield up to 10-20 ounces of leaves per plant over a growing season.
Takeaway
Successfully cultivating basil requires attention to its environmental needs and proactive management of pests. By employing effective container gardening methods, mastering harvesting techniques, and staying vigilant against common pests, you can enjoy this delightful herb throughout the growing season.
3. Carrots
Growing carrots successfully hinges significantly on proper soil preparation, which involves understanding soil depth, pH levels, and fertilization practices. A well-prepared bed leads to healthier carrots, larger yields, and enhanced flavor.
Soil Depth
Carrots thrive in deep, loose soil that allows them to grow long and straight. Ideally, the soil should be at least 12 to 18 inches deep. This depth helps prevent the roots from becoming stunted or forked.
- Benefits of Deep Soil:
- Promotes straight, uniform growth.
- Reduces competition for nutrients.
- Enhances drainage, preventing rot.
Soil pH Level
The pH level of your soil is crucial for nutrient availability. Carrots prefer a slightly acidic to neutral pH, ideally between 6.0 and 6.8.
- Effects of pH Level:
- A pH below 6.0 can lead to nutrient deficiencies.
- A pH above 6.8 may result in poor germination and growth.
> According to a study by the University of California, pH levels outside the optimal range significantly affect carrot yield and taste.
Fertilization
Proper fertilization is essential for robust carrot growth. Carrots benefit from a balanced fertilizer that provides adequate nitrogen, phosphorus, and potassium.
- Soil Testing: Test your soil to determine nutrient levels. This helps in selecting the right fertilizer.
- Organic Matter: Incorporate well-rotted compost or manure to improve soil fertility and structure.
- Fertilizer Application: Use a low-nitrogen fertilizer during planting to avoid excessive foliage growth at the expense of root development.
> [!TIP] Incorporating organic fertilizers can improve soil structure and enhance moisture retention, leading to better carrot growth.
Additional Considerations
- Avoid Compacted Soil: Compacted soil can hinder root growth. Consider tilling or using raised beds to improve aeration.
- Weed Management: Keep the growing area weed-free to reduce competition for nutrients and water.
Preparing your soil thoughtfully not only ensures the successful growth of carrots but also contributes to their flavor and texture.
> [!NOTE] Remember to check your local extension service for specific soil recommendations based on your region.
By focusing on these essential soil preparation aspects, you can cultivate a thriving carrot garden that flourishes each season.
4. Lettuce
Lettuce, a staple in salads and a versatile ingredient in various dishes, comes in several varieties, each offering unique flavors and textures. Understanding the different types of lettuce can enhance your culinary creations and gardening efforts. There are primarily two categories to consider: leafy types and head types, along with their respective growth periods and ideal conditions for cultivation.
Varieties to Consider
Leafy Types: These include romaine, butterhead, and oak leaf lettuces. Leafy types are known for their loose leaf structure, which allows for quicker growth and easier harvesting. Romaine: This variety has long, sturdy leaves and a robust flavor, making it perfect for Caesar salads. Butterhead: Characterized by its soft, tender leaves, butterhead is excellent for wraps and sandwiches. Oak Leaf: With a frilled leaf structure, oak leaf lettuce adds a decorative touch to salads and is also tasty.
Head Types: These types form compact heads and are typically denser. The most common types are iceberg and green leaf. Iceberg: Known for its crisp texture and refreshing taste, iceberg is often used in burgers and sandwiches. Green Leaf*: This variety has a broader, more ruffled leaf and is great for adding color to salads.
Growth Periods
Lettuce can be categorized by its growth periods, which are essential for planning your planting schedule:
- Fast-Growing Varieties: Leafy types like arugula and mesclun can be harvested in just 30 days, making them ideal for quick yields.
- Medium-Growing Varieties: Head types such as romaine and butterhead typically require 50-70 days to mature.
- Slow-Growing Varieties: Some heirloom varieties may take longer, up to 80 days, but often have superior flavors.
> Studies indicate that the optimal growing temperature for lettuce is between 60°F and 70°F (15°C to 21°C).
Tips for Cultivation
> [!TIP] > Ensure your lettuce receives at least 12 hours of sunlight per day for optimal growth.
Here are some additional considerations:
- Soil Quality: Lettuce prefers well-drained, nutrient-rich soil.
- Watering: Consistent moisture is crucial, but avoid waterlogging.
- Harvesting: Cut leaves at the base to encourage regrowth; this can yield multiple harvests from the same plant.
What this means is that by selecting the right variety and understanding its growth requirements, you can cultivate a thriving lettuce garden that provides fresh produce throughout the season.
In summary, choosing the right variety of lettuce can significantly enhance your dishes and gardening success. Focus on the leafy and head types, understand their growth periods, and apply best practices for cultivation to enjoy a bountiful harvest.
5. Spinach
Spinach is not only a powerhouse of nutrients but also a versatile leafy green that can thrive in various growing conditions. This section will explore essential guidelines for growing spinach, focusing on sunlight requirements, watering needs, and harvesting techniques. By following these guidelines, you can ensure a bountiful and healthy spinach crop that enriches your meals with vitamins and minerals.
Sunlight Requirements
Spinach prefers full sun but can tolerate partial shade, especially during hot summer months. Ideally, it should receive:
- 6 to 8 hours of sunlight daily: This ensures robust growth and nutrient production.
- Morning sun exposure: Spinach benefits from early daylight, which helps dry dew and reduces disease risk.
Watering Needs
Maintaining proper moisture levels is crucial for spinach health. Here are important watering tips:
- Consistent moisture: Spinach thrives in moist soil, so aim to keep the soil damp but not waterlogged.
- Deep watering: Water spinach deeply once a week, ensuring roots grow strong and resilient.
- Mulching: Applying a layer of mulch can help retain soil moisture and suppress weeds.
Harvesting Techniques
Knowing when and how to harvest your spinach is essential for maximizing yield:
- Timing: Harvest spinach when leaves are large enough to eat, typically 4 to 6 weeks after planting.
- Cutting method: Use scissors to snip leaves off the outer edges of the plant, allowing the center to continue growing.
- Regular harvesting: Continuous harvesting encourages the plant to produce more leaves.
> Research indicates that regularly harvesting spinach can lead to increased yields and prolonged growing seasons.
Conclusion
By understanding the sunlight, watering needs, and harvesting methods for spinach, you can cultivate a thriving garden of this nutritious green. Whether you’re a seasoned gardener or a beginner, these guidelines will help you enjoy fresh spinach right from your garden.
> [!INFO] Regularly monitoring your plants and adjusting care based on environmental conditions can lead to optimal growth and health.
6. Peppers
When it comes to growing peppers, understanding their specific growing conditions is crucial for a bountiful harvest. Peppers thrive in warm climates, requiring careful consideration of temperature, soil nutrients, and watering practices. The ideal conditions not only enhance the growth of the plant but also improve the flavor and yield of the peppers.
Growing Conditions
1. Temperature Needs: – Peppers are warm-loving plants that prefer temperatures between 70°F and 85°F (21°C to 29°C) during the day. – Nighttime temperatures should ideally remain above 60°F (15°C). – Anything below these ranges can stunt growth, leading to poor fruit development.
> Research indicates that prolonged exposure to temperatures below 50°F (10°C) can cause blossom drop, reducing overall yield.
2. Soil Nutrients: – Peppers thrive in well-drained, nutrient-rich soil with a pH level of 6.0 to 6.8. – Incorporating organic matter, such as compost, can significantly enhance soil fertility. – Key nutrients to focus on include: Nitrogen: Promotes leafy growth. Phosphorus: Supports root development and flowering. * Potassium: Enhances fruit quality and disease resistance.
> Studies have shown that balanced fertilization, particularly with a formula like 5-10-10 (N-P-K), boosts pepper yield.
3. Watering Tips: – Consistent moisture is vital, especially during flowering and fruit set. – Aim for about 1-2 inches of water per week, adjusting for rainfall. – It’s best to water deeply and infrequently rather than shallowly and often to encourage deep root growth.
> [!TIP] Consider using mulch to retain soil moisture and suppress weeds, which can compete with your peppers for nutrients.
Conclusion
In summary, providing peppers with the right temperature, nutrient-rich soil, and proper watering techniques can lead to a thriving garden and a robust harvest. By understanding and implementing these growing conditions, you can enjoy a successful pepper-growing season.
> [!NOTE] Always monitor your pepper plants for signs of stress, such as wilting or discoloration, which may indicate issues with their growing conditions.
7. Cucumbers
Cucumbers are a versatile and refreshing addition to any garden, celebrated not only for their crisp texture but also for their numerous health benefits. These fruits thrive in warm weather and can be grown in various settings, from traditional gardens to containers. The key to successful cucumber cultivation lies in understanding best practices related to spacing, support systems, and watering frequency.
Best Practices for Growing Cucumbers
- Spacing: Proper spacing is essential for healthy cucumber plants. Experts recommend spacing plants about 12 to 18 inches apart in rows that are 3 to 4 feet apart. This allows for adequate airflow, reducing the risk of disease and promoting better fruit development.
- Support Systems: Utilizing support systems, such as trellises or cages, can significantly enhance cucumber growth. When cucumbers are grown vertically, they receive more sunlight and air circulation, which can increase yield. For instance, a well-constructed trellis can support multiple plants and keep fruits off the ground, minimizing rot and pest issues.
- Watering Frequency: Cucumbers require consistent moisture to thrive, particularly during their flowering and fruit-setting stages. A general guideline is to provide 1 to 2 inches of water per week, either through rainfall or supplemental irrigation. It’s best to water deeply once or twice a week rather than giving light, frequent waterings, as this encourages deep root growth.
> According to the University of California Agriculture and Natural Resources, consistent watering can help cucumbers produce larger fruits with fewer blemishes.
Additional Tips for Success
- Mulching: Applying organic mulch around cucumber plants can help retain soil moisture and suppress weeds. This is particularly beneficial in hot climates where evaporation rates are high.
- Fertilization: Cucumbers benefit from a balanced fertilizer that provides essential nutrients. A fertilizer high in potassium can enhance fruit quality and yield.
- Pest Management: Regular monitoring for pests such as aphids and cucumber beetles is crucial. Employing companion planting techniques, like interplanting with marigolds or basil, can help deter these pests naturally.
> [!TIP] Consider rotating cucumber crops each year to prevent soil-borne diseases and nutrient depletion.
Takeaway
By implementing these best practices—adequate spacing, effective support systems, and consistent watering—gardeners can cultivate healthy, productive cucumber plants that yield a bountiful harvest. Experimenting with these techniques will ensure that cucumbers thrive in your garden, providing delicious fruits for your meals.
8. Zucchini
Zucchini, often regarded as a versatile ingredient in many dishes, is not only easy to cultivate but also straightforward to harvest. The best time to harvest zucchini is when they reach about 6 to 8 inches in length, as this ensures optimal flavor and texture. If left too long on the vine, zucchinis can become large and seedy, leading to a less desirable culinary experience.
Harvesting Techniques
When it comes to harvesting zucchini, there are a few essential techniques and tips to keep in mind that can enhance your experience and yield.
1. Timing: – Harvest zucchinis regularly, ideally every 2 to 3 days during peak growing seasons. This encourages continuous production and prevents overripe zucchinis from affecting the plant’s health. – The best time to pick zucchinis is in the morning when temperatures are cooler, and the fruit is firm.
2. Cutting Techniques: – Use sharp garden shears or a knife to cut the zucchini from the plant. Avoid pulling them off, as this can damage the plant. – Cut the stem about an inch above the fruit. This method reduces the risk of rot and promotes healthier future growth.
3. Storage Tips: – Store harvested zucchinis unwashed in a cool, dry place for up to a week. If you need to wash them, do so just before use to prevent moisture accumulation. – For longer preservation, consider blanching and freezing the zucchinis. This process involves briefly boiling them and then placing them in ice water before freezing.
> Research suggests that proper harvesting and storage can extend the shelf life of zucchinis by up to 50%, ensuring you enjoy their fresh flavor for longer periods.
Conclusion
Understanding the nuances of harvesting zucchini can significantly enhance both your gardening experience and culinary outcomes. By timing your harvest correctly, employing the right cutting techniques, and utilizing effective storage methods, you can enjoy delicious zucchinis throughout their growing season and beyond.
> [!TIP] Regularly check your zucchini plants and harvest promptly to maximize yield and maintain fruit quality.
9. Radishes
Radishes are a fast-growing, nutrient-rich vegetable that can thrive in various conditions, making them an excellent choice for beginner gardeners and seasoned horticulturists alike. They are typically sown directly into the soil and can be harvested in as little as three weeks, depending on the variety. This section will explore the essential aspects of planting and caring for radishes, including sowing depth, spacing, and watering needs.
Planting and Care
1. Sowing Depth: Radishes should be sown at a depth of about 0.5 to 1 inch (1.25 to 2.5 cm). This depth allows the seeds to have adequate soil contact for germination while protecting them from birds and other pests.
2. Spacing: Proper spacing is crucial for healthy growth. When planting radish seeds, space them approximately 1 to 2 inches (2.5 to 5 cm) apart in rows that are 12 inches (30 cm) apart. For larger varieties, increase the spacing to ensure they have enough room to grow.
3. Watering Needs: Radishes require consistent moisture, especially during the germination phase. Water them thoroughly after sowing, and maintain soil moisture without waterlogging. A general rule of thumb is to provide about 1 inch (2.5 cm) of water per week, adjusting based on rainfall and temperature.
Additional Care Tips
- Soil Quality: Radishes thrive in well-draining, loamy soil enriched with organic matter. Aim for a soil pH of 6.0 to 7.0 for optimal growth.
- Sunlight: They prefer full sun but can tolerate partial shade, especially in hotter climates. Aim for at least
6 hoursof sunlight per day. - Pest Management: Keep an eye out for common pests like aphids and flea beetles. Using row covers can help protect young plants from these pests.
> According to the University of California Agriculture and Natural Resources, well-managed radish crops can yield up to 5 tons per acre.
Conclusion
In summary, radishes are a rewarding crop for any gardener, requiring minimal effort for a quick harvest. By following proper planting and care techniques, you can enjoy a bountiful yield of this versatile vegetable.
> [!TIP] Remember to stagger your sowing every few weeks to ensure a continuous supply of fresh radishes throughout the growing season.
📥 Download: Organic Seeds Gardening Checklist (PDF)
10. Green Beans
Green beans, a popular garden crop, are not only delicious but also relatively easy to grow. Their care and maintenance involve a few key practices that can dramatically improve yield and health. This section details essential strategies for fertilization, weeding, and pest control to ensure a successful green bean harvest.
Care and Maintenance
1. Fertilization: Green beans thrive in nutrient-rich soil. Before planting, it’s beneficial to amend the soil with compost or a balanced fertilizer containing nitrogen, phosphorus, and potassium. – Tip: Use a fertilizer with a ratio like 10-10-10. This ensures balanced growth throughout the plant’s lifecycle.
2. Weeding: Regular weeding is crucial for green beans, as weeds compete for nutrients and water. – Recommendation: Implement a mulch layer around plants. This not only suppresses weeds but also helps retain soil moisture.
3. Pest Control: Green beans are susceptible to various pests, including aphids and bean beetles. – Control Strategies: Use insecticidal soap or neem oil to manage aphid populations. Introduce beneficial insects like ladybugs to naturally reduce pest numbers.
> Studies suggest that maintaining a clean garden environment can decrease pest infestations by up to 30%.
Detailed Practices
- Fertilization: When planting, consider conducting a soil test to determine nutrient levels. Based on the results, you can tailor your fertilization strategy. For example, if nitrogen levels are low, adding a nitrogen-rich fertilizer can promote healthy foliage growth.
- Weeding: Hand-pulling weeds is effective, but you may also consider using a hoe for larger areas. It’s best to weed in the early morning or late evening when the soil is moist, making it easier to remove the weeds without disturbing the bean plants.
- Pest Control: Regularly inspect your plants for signs of infestation. Early detection is key. If you notice any pests, remove affected leaves promptly and consider organic pesticides as a first line of defense.
> [!TIP] Regularly rotating your green bean crops each season can help prevent pest and disease buildup in the soil.
Conclusion
Effective care and maintenance of green beans involve strategic fertilization, diligent weeding, and proactive pest control. By implementing these practices, you can enhance the health and yield of your green bean plants, ensuring a bountiful harvest this season.
Conclusion
In summary, the journey to a thriving garden begins with selecting the right organic seeds. Here are the key takeaways from our exploration:
- Quality Matters: Choosing high-quality organic seeds ensures better growth and yields.
- Diversity is Key: Incorporating a variety of plants promotes a healthy ecosystem.
- Local Adaptation: Selecting seeds suited to your local climate enhances resilience and productivity.
> “The right seeds can transform your garden into a flourishing paradise.”
Practical Implementation Steps: 1. Research Local Varieties: Identify which organic seeds are best suited for your area. 2. Source Quality Seeds: Purchase from reputable suppliers to ensure seed viability and organic certification. 3. Plan Your Garden Layout: Consider plant spacing and compatibility to maximize growth potential.
For further reading, check out these credible sources on organic gardening practices: – Rodale’s Ultimate Encyclopedia of Organic Gardening – The Organic Seed Alliance: Seed Saving and Production
> [!TIP] Engage with fellow gardeners in community forums or social media groups to share experiences and tips.
Ready to grow your garden? Start by selecting your seeds today and watch your gardening dreams flourish! For more insights, visit our comprehensive guide on choosing the best organic seeds.