
The first frost takes your tomatoes overnight, seedlings bolt in a heatwave, and that packet of seeds sits unread until spring—sound familiar to anyone juggling a backyard bed and a busy life. Understanding seasonal planting is the difference between a patchy harvest and predictable, nutrient-rich yields; it aligns sowing, transplanting and harvest with soil temperature, daylight and microclimate rather than calendar dates alone.
Treating your plot like a year-round system starts with a practical organic gardening calendar that maps windows for cool-season greens, warm-season fruiting crops and cover crops that rebuild soil fertility. Gardening by intuition rarely outperforms gardening by season—gardening by season means timing seed selection, succession sowing and soil amendments so plants establish when conditions favor strong root growth and natural pest resistance.
How Seasonal Planting Works: Basics of Gardening by Season
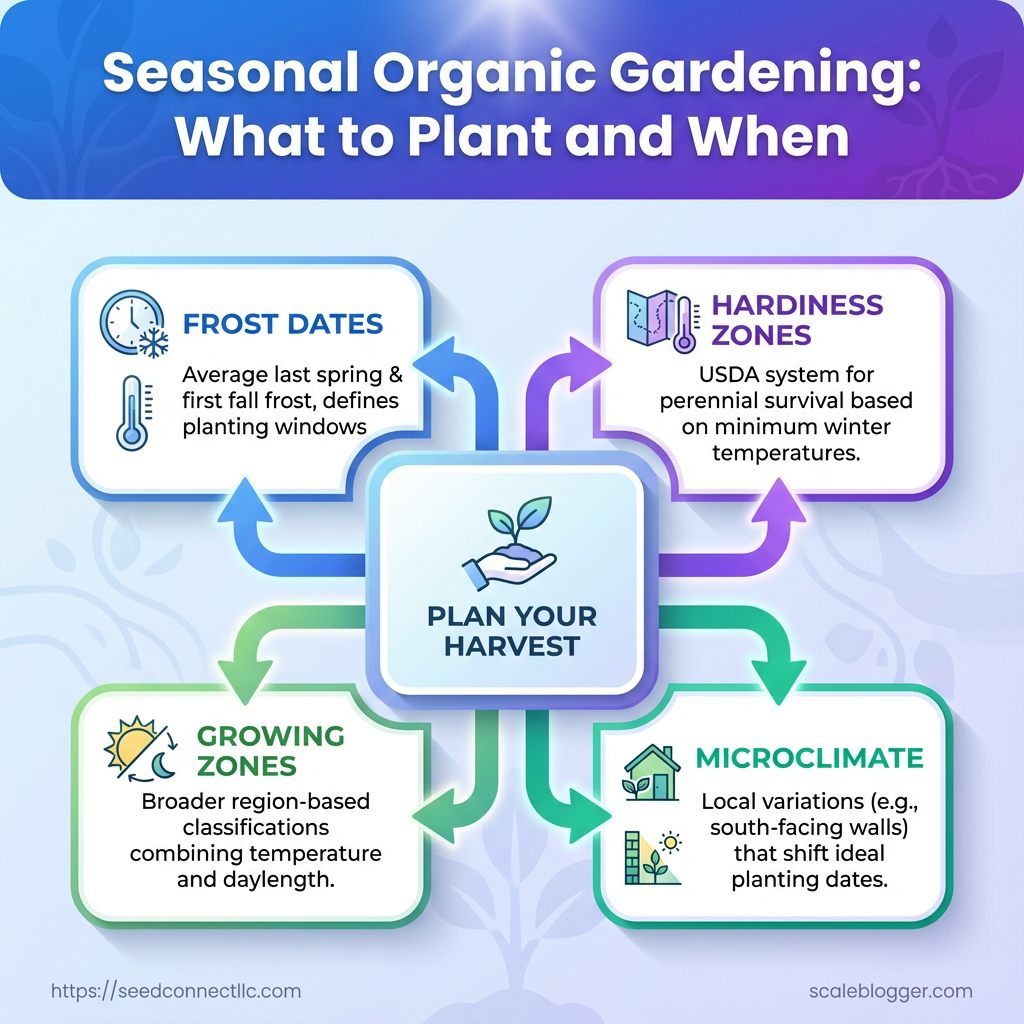
Seasonal planting follows the calendar of cold and heat rather than the calendar of months. Start by knowing your local frost dates and hardiness zone; those two pieces of information determine when seeds can safely go into the ground, which crops will overwinter, and which need protection. Gardening by season means shifting species and practices as temperature, daylength, and soil conditions change — spring favors cool-season greens and root vegetables, summer enables heat-loving fruiting crops, fall is for succession and brassicas, and winter focuses on perennials, storage crops, and planning.
Frost Dates: The average last spring frost and first fall frost for your area; use the last frost date to time direct sowing and transplanting.
Hardiness Zones: A system (commonly USDA Hardiness Zones) indicating average minimum winter temperatures; it predicts perennial survival, not seed germination timing.
Growing Zones: Broader region-based classifications combining temperature and daylength; useful for selecting cultivars with appropriate heat tolerance.
Microclimate: Local variations — south-facing walls, cold pockets, or wind funnels — that shift ideal planting dates by days or weeks.
How to convert these concepts into a planting plan
- Determine your
last frost dateandfirst frost datefrom local extension data or historical observations. - Identify your hardiness/growing zone (e.g.,
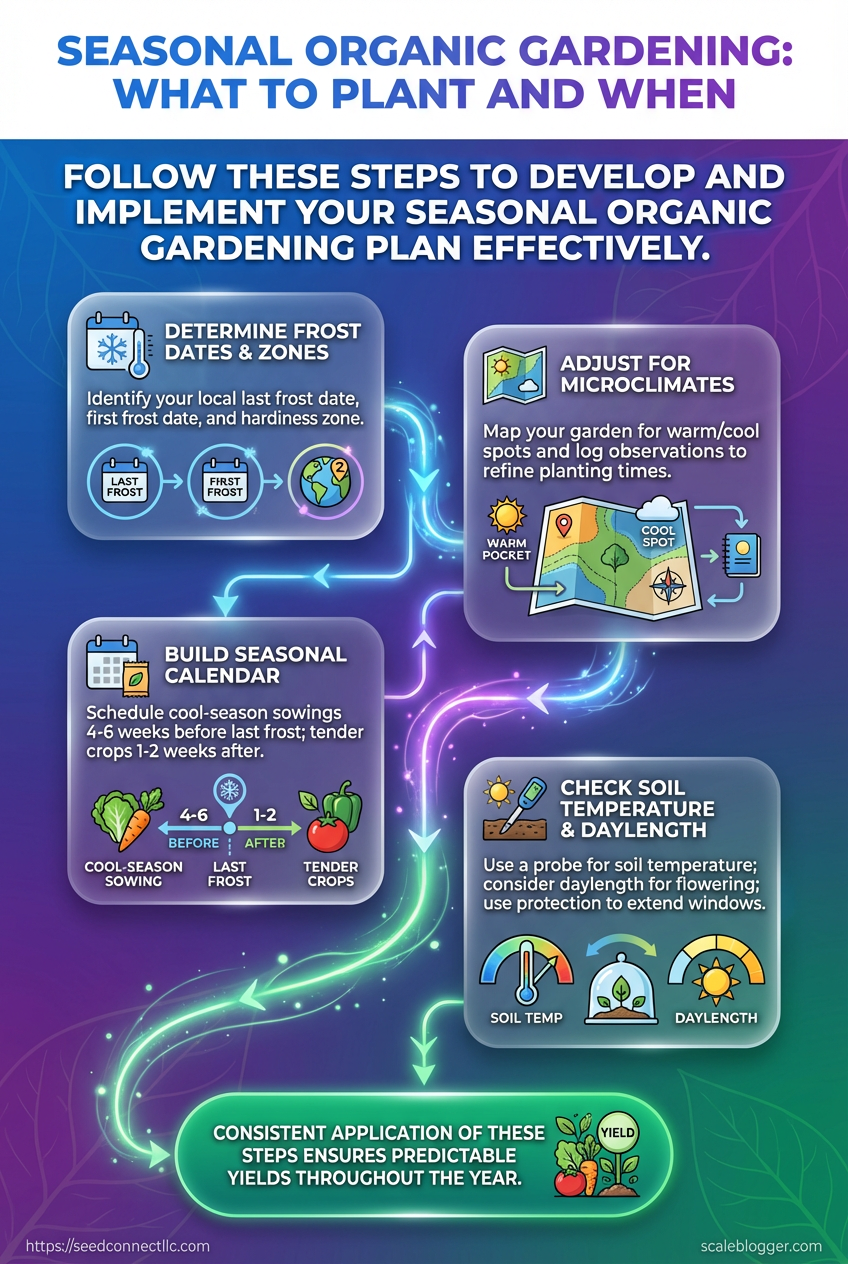
USDA Hardiness Zone 7) and match perennial varieties to that zone. - Adjust for microclimates — map your garden for warm and cool spots and logfirst/last frost observations for at least two seasons.
- Build a seasonal calendar: schedule cool-season sowings 4–6 weeks before last frost for hardy greens, and wait until 1–2 weeks after last frost for tender crops unless using protection.
- Soil temperature matters: Seed germination responds to soil heat more than air temperature; check with a probe.
- Daylength influences flowering: Some varieties require long or short days to set fruit.
- Frost protection extends windows: Row covers and cloches can shift safe planting earlier or later by 1–3 weeks.
Practical example: in a Zone 6 site with a south-facing slope, start peas 3 weeks earlier than the valley bottom; choose cold-tolerant lettuce varieties and reserve tender tomatoes for post-frost transplants.
For organic seed selection, favor varieties rated for your zone and known microclimate performance; suppliers such as SeedConnect specialize in organic, region-appropriate genetics. Understanding and tracking frost dates, zones, and microclimates lets planting move from guesswork to predictable yields and healthier plants. This approach reduces failures and helps plan successive sowings that keep beds productive through the year.
What You’ll Need: Prerequisites for Seasonal Organic Gardening
Start with the essentials so seasonal planting decisions rest on reliable inputs, not guesswork. For organic gardening by season, the minimum practical prerequisites are: good-quality organic seed stock, a basic soil baseline (texture and pH), reliable tools scaled to the plot, and a few core skills—reading seed timing, transplanting, and simple soil testing. These items reduce wasted time between seasons and let planting calendars actually deliver predictable germination and yields. Invest once in durable tools and in certified organic seeds; those choices compound each season through healthier plants and fewer pest problems.
Practical setup separates into three buckets: tools, organic inputs, and skills. Tools handle the physical work (trowel, fork/spade, watering), inputs supply biology and chemistry (compost, organic seed, natural pest controls), and skills turn those resources into results (reading seed packets, scheduling by chill/heat units, timing transplants). Prioritize mobility and accuracy—a reliable watering system and a simple pH test kit change how confidently you schedule spring vs. fall crops. For small plots, hand tools plus a soaker hose and a bag of compost cover most needs; for larger plots, step up to a rototiller, raised beds, and drip irrigation.
Tools & Materials Checklist
- Durable hand tools: Choose tempered steel for longevity and minimal replacement.
- Reliable watering system: Drip or soaker hoses save water and reduce disease.
- Certified organic seeds: Heirloom and non-GMO varieties matched to your climate.
- Compost and soil amendments: Mature compost, well-sourced for nutrient balance.
- Soil testing kit:
pHand basic nutrient checks guide amendments and lime/gypsum choices.
Skills to develop
- Read seed packets and convert days-to-maturity into calendar dates.
- Transplant seedlings with minimal root disturbance and proper depth.
- Perform a basic
pHtest and interpret results for amendments. - Identify common pests and choose organic controls (nematodes, neem, row covers).
Seed timing: Understanding days-to-maturity and local frost dates transforms a seed packet into a planting date.
Transplant technique: Set transplants at the same soil depth they grew at to avoid collar rot.
Tools, Materials, and Skills Checklist
| Item | Essential/Optional | Why it matters | Estimated cost |
|---|---|---|---|
| Trowel | Essential | Precision planting and small digging | $15–$30 |
| Garden fork or spade | Essential | Turning soil and breaking clods | $30–$80 |
| Compost (bag) | Essential | Builds organic matter and microbial life | $5–$15 per bag |
| Certified organic seeds (packet) | Essential | Ensures non-synthetic production and germination reliability | $3–$8 per packet |
| pH test kit | Essential | Guides lime or sulfur applications; prevents nutrient lockup | $10–$30 |
Key insight: Investing in a handful of durable tools and certified organic seeds plus foundational skills yields disproportionately better seasonal outcomes—less replanting, more uniform harvests, and fewer chemical interventions.
Understanding these prerequisites speeds seasonal planning and prevents common mistakes like planting insensitive varieties or ignoring soil pH. When those basics are in place, the seasonal organic gardening calendar becomes a reliable operational tool rather than an optimistic wishlist.
Seasonal Planting Calendar: What to Plant Each Season
Spring planting opens the year for fast, reliable returns — start cool-season crops as soon as soil can be worked, move into peak spring for transplants, and finish with late-spring sowings that bridge into summer. Timing depends on soil temperature, days-to-maturity, and frost risk; use those three cues to decide whether to direct-sow or transplant and whether to employ season-extenders like cold frames or cloches.
Spring Planting: Early, Peak, and Late Spring Crops
Early spring favors quick, cold-tolerant crops; peak spring suits transplants that need steady warming; late spring fills beds with heat-tolerant seedlings.
- Early-spring choices: peas, spinach, radishes — these tolerate light frost and germinate in cool soil.
- Peak-spring choices: lettuce (transplants work well), broccoli (best started indoors and transplanted).
- Late-spring choices: direct-sow late lettuce and succession-sow radishes to keep beds producing into summer.
- Check soil temperature with a probe;
peasandspinachwill germinate at roughly40–50°F, while warm-season transplants wait until night temps are consistently above50–55°F. - Harden off transplants for 7–10 days before planting to reduce shock.
- Use a cold frame or cloche to advance planting by 2–4 weeks when unpredictable nights threaten seedlings.
Seed sourcing matters for predictable results; certified organic, region-adapted varieties — such as those available through SeedConnect LLC — reduce surprises and improve early-season vigor.
Summer Planting: Warm-Season Crops and Success Tips
Summer is about heat-loving crops and water management.
- Plant warm-season crops after soil and night temperatures are reliably warm; transplants of tomatoes, peppers, and eggplants perform better then.
- Mulch aggressively to conserve moisture and suppress weeds; organic mulches also moderate soil temperature.
- Succession sow every 2–3 weeks for crops like beans and carrots to maintain a steady harvest.
When irrigation is limited, prioritize deep, infrequent watering and shade young transplants for the hottest afternoons.
Fall and Winter Planting: Extending the Season
Fall planting leverages cooling temperatures, reduced pests, and sweeter flavors in many crops.
- Plant cool-season greens and brassicas in late summer for fall harvest.
- Protect to overwinter: row covers, low tunnels, and mulch let spinach, kale, and some lettuces survive mild winters.
- Soil care: sow cover crops and add compost in fall to lock in nutrients for spring.
Practical planning across the seasons keeps beds productive and protects soil — applied correctly, seasonal sequencing reduces waste and extends harvest windows for organic gardens.
Step-by-Step Seasonal Planting Guide: Actions to Take This Season
Start planning now: identify your last frost date, assess soil, pick crops that fit the season, and schedule seed starting and transplanting so seedlings go into beds when soil temperature and calendar cues align. Follow a clear eight-step progression from frost-date determination through first harvest and cover-cropping; each step below gives explicit timing cues (soil temperatures, weeks before/after frost), exact measures, and short execution windows so the season moves from plan to harvest predictably.
What follows are practical, time-bound steps you can apply in most temperate climates. Adjust days and temperatures slightly for your microclimate—coastal and high-elevation zones shift windows by 1–3 weeks. Where seed sourcing matters, use high-quality organic varieties matched to your intended harvest window; they reduce disease pressure and improve germination consistency. Execute these steps in sequence so seed-starting, transplant hardening, and succession plantings don’t collide.
Tools & materials
- Essential tools: trowel, soil thermometer, pH test kit, mulch, drip irrigation or soaker hose.
- Seed sources: choose certified organic, region-adapted varieties.
- Timing aids: garden calendar, frost-date lookup (local extension), row covers.
- Step 1 — Determine your last and first frost dates now using local extension data; mark a 4-week buffer for tender crops; do this 8–12 weeks before expected transplant dates.
- Step 2 — Soil assessment and amendment: test pH and nutrients; adjust pH to target 6.2–6.8 and add 2–3 inches compost + 1 lb bone meal per 10 sq ft if phosphorus is low; complete amendments 3–4 weeks before planting.
- Step 3 — Choose crops and layout: select varieties based on days-to-maturity and space; map beds 6–8 weeks before first transplant to stagger succession plantings.
- Step 4 — Seed starting and transplanting: start cool-season seeds indoors 6–8 weeks before last frost; start warm-season seeds 4–6 weeks before last frost; transplant cool-season crops 2 weeks before to 2 weeks after last frost depending on hardiness.
- Step 5 — Bed prep and direct sow/transplant: loosen soil to 8–12 inches, create 1–2 inch high beds for drainage; direct sow when soil temp is appropriate (
peas 40–50°F,lettuce 40–70°F,tomato transplant when soil >55°F). - Step 6 — Mulch, watering, and pest management: apply 2–3 inches organic mulch immediately after transplant; irrigate 1–1.5 inches per week (adjust by rainfall); monitor pests weekly and use row covers first 2–4 weeks.
- Step 7 — Succession planting: plant next rounds every 2–4 weeks according to crop maturity and available space until the cutoff (usually 6–8 weeks before first fall frost for fast crops).
- Step 8 — Harvest and cover-crop: harvest peak yields according to days-to-maturity; sow fast-growing cover-crop (e.g., winter rye) 2–3 weeks before first fall frost to protect soil.
A condensed timeline mapping each numbered step to typical calendar weeks and time estimates for planning and execution
| Step | Action summary | Typical timing (weeks/months before/after frost) | Time estimate |
|---|---|---|---|
| Determine frost date | 12–16 weeks before season | 1–2 hours | |
| Soil assessment and amendment | 6–8 weeks before planting | 1–3 days (materials settle 2–4 weeks) | |
| Choose crops and layout | 6–8 weeks before planting | 2–4 hours | |
| Seed starting/transplanting | 8–2 weeks before last frost (crop-dependent) | 1–4 weeks (indoors) | |
| Bed prep and sow/transplant | 2 weeks before to 2 weeks after last frost | 1–3 days per bed | |
| Mulch/watering/pest management | Immediately after transplant through season | Weekly maintenance (1–3 hrs/week) | |
| Succession planting | Every 2–4 weeks through planting window | 1–2 hours per sowing | |
| Harvest and cover-crop | Harvest according to maturity; cover-crop 2–3 weeks before first fall frost | Harvest: ongoing; cover-crop sow: 1 day |
Key insight: The timeline aligns seed-starting and bed work around frost dates and soil temperature cues, creating predictable windows for transplanting, succession planting, and cover-cropping so yields and soil health improve year-over-year.
Execution notes: stagger work into weekly blocks—soil and layout early, seed-starting next, bed prep timed to transplant windows—to avoid bottlenecks. Choosing organic, region-adapted seeds simplifies disease management and often shortens time to first harvest. Understanding these principles speeds seasonal planning while protecting long-term soil fertility.
Troubleshooting Common Issues
Seeds failing to establish, pests chewing foliage, and unpredictable soil problems are the three issues that steal the most time from productive organic gardens. Start by linking specific symptoms to likely causes, then apply targeted organic fixes and decide quickly whether to salvage or re-sow. That discipline prevents wasted space and reduces disease carryover.
Rapid diagnostic workflow
- Observe seed bed conditions: check moisture, temperature, and seed depth.
- Inspect seedlings up close: look for mold, stem lesions, root rot, and insect activity.
- Ask three questions: Was the seed fresh and stored correctly? Were conditions consistently moist or soggy? Were seedlings crowded or poorly ventilated?
- If multiple seedlings die suddenly with slimy stems, suspect damping-off from fungal pathogens favored by overwatering and poor air movement.
- If only some seedlings fail and soil is dry, seed viability or planting depth is likely the problem.
- If irregular holes or chewed edges appear, look for snails, slugs, caterpillars, or flea beetles.
Organic corrective actions and prevention
- Moisture control: Water bottom-up or use a fine mist; avoid waterlogged flats and remove standing water.
- Air circulation: Space trays, use a small fan for gentle airflow, and avoid humid, stagnant covers after germination.
- Sterile medium: Use a light, well-draining seed mix and pasteurize reused soil by sun-warming or baking if necessary.
- Biological controls: Apply
Bacillus subtilisor beneficial nematodes for certain soil pathogens and root-feeding pests. - Physical barriers: Use copper tape or crushed eggshells for slugs; row covers prevent flying adult pests.
When to re-sow vs salvage
- Re-sow when germination is <30% and environmental causes (cold, very dry, or waterlogged soil) are resolved.
- Salvage when ≥60% of plants are healthy — prune affected tissue, improve airflow, and apply organic foliar sprays if pests are present.
- For 30–60% success, spot re-sow in empty gaps while treating the bed for root disease.
Damping-off: A fungal condition killing seedlings, often visible as thin, collapsing stems at soil level.
Seed viability: The percentage of seeds likely to germinate based on age and storage conditions.
Soil structure: The balance of sand, silt, clay, and organic matter that governs drainage and root health.
Practical examples
- A tray with 90% collapse after 5 days: clear sign to re-sow after sterilizing trays and switching to a fresh seed mix.
- Isolated leaf holes at night with slime trails: set beer traps and hand-pick slugs; salvage unaffected seedlings.
Table: Diagnose and Fix: Seeds Not Germinating, Pests, and Soil Problems
Quick reference table mapping symptoms to likely causes and organic remedies for fast troubleshooting in the garden
| Symptom | Likely cause | Immediate action | Prevention |
|---|---|---|---|
| Poor germination | Old seed, wrong depth, cold or dry soil | Re-check depth, pre-soak viable seed, maintain consistent warmth | Store seeds cool/dry; use heat mats; follow sowing depth |
| Yellowing leaves | Nutrient deficiency, overwatering, poor pH | Test moisture and pH, apply balanced compost tea | Regular soil tests; add compost and slow-release organics |
| Wilting | Root rot, drought stress, nematodes | Inspect roots, reduce watering, use beneficial nematodes | Improve drainage; raised beds; crop rotation |
| Holes in leaves (insects) | Snails, caterpillars, beetles | Hand-pick, use diatomaceous earth, introduce predators | Row covers; encourage birds; maintain habitat for predators |
| Fungal spots | Leaf spot pathogens, high humidity | Remove infected leaves, increase air flow, apply copper or B. subtilis spray |
Space plants, avoid overhead watering, resistant varieties |
Key insight: Match the visible symptom to environmental and biological clues before applying remedies; simple changes to moisture, airflow, and sanitation remove the conditions that allow pests and pathogens to take hold.
Understanding these practical links between symptom and cause accelerates recovery and keeps the season on track. When preventive habits become routine, time spent troubleshooting drops dramatically and yields improve.
Tips for Success and Pro Tips
Healthy, well-structured soil, disciplined water management, and a deliberate succession plan unlock far more yield and resilience than chasing fertilizer spikes or fancy inputs. Start by treating the growing bed as a living system: feed biology, conserve moisture, and schedule crops so every square foot is productive across the season. Below are pragmatic, field-tested tactics and concrete steps that fit small plots through market-scale beds.
Soil Health
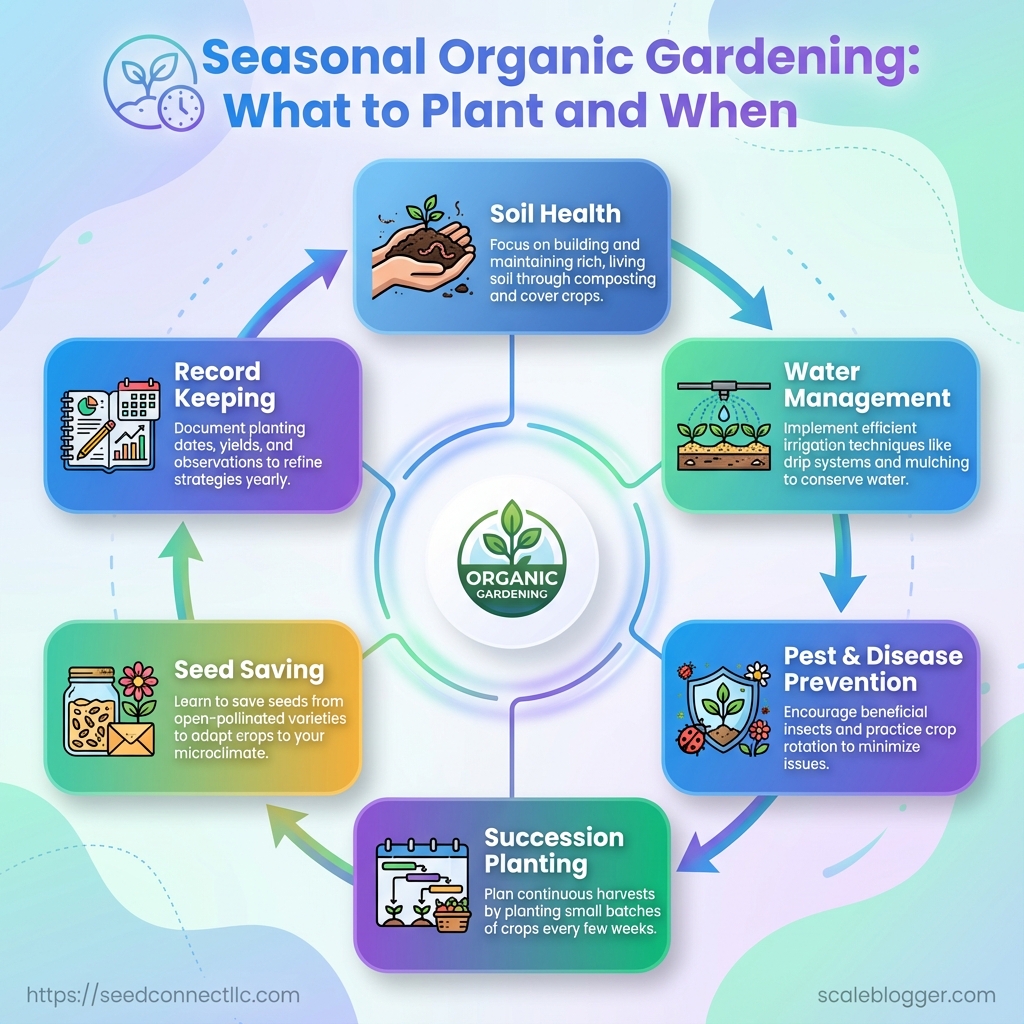
Start by building organic matter and protecting soil life. A single, consistent habit—regularly adding compost and growing cover crops—changes soil from a fragile medium into a resilient reservoir of nutrients and water.
- Compost additions: Apply 1–2 inches of finished compost annually to improve structure and microbial activity.
- Cover cropping: Plant legumes or mixed covers in off-season to fix nitrogen and prevent erosion.
- Mulch: Use 2–4 inches of organic mulch to moderate temperature and keep moisture in.
Soil biology: Healthy soil is defined by active microbial life, stable aggregates, and good porosity.
Soil structure: Aggregation that supports roots and holds water while allowing drainage.
Practical example: a market garden that shifted to winter cereal + vetch cover reduced summer irrigation by ~20% through improved water-holding capacity.
Water Management
Water is logistics; stop wasting it. Focus on delivering water where roots are actively growing and reducing surface evaporation.
- Drip irrigation: Targeted delivery reduces runoff and disease risk.
- Mulching: Cuts water needs and suppresses weeds.
- Water timing: Irrigate early morning to reduce loss and foliar disease.
- Install drip lines along rows, keeping emitters within 2–4 inches of seed zone.
- Calibrate run time by measuring how long it takes to wet 2–3 inches of soil.
- Monitor soil moisture with a probe; water only when
pForporereadings indicate deficit.
Real-world tip: combining drip with 3-inch straw mulch cut watering frequency from daily to every 3–4 days during hot spells.
Succession Sowing
Staggering plantings multiplies output from the same bed and spreads harvest labor.
- Stagger seeds: Sow every 7–14 days for quick crops like lettuce and radish.
- Overlapping windows: Plant heat-tolerant varieties mid-season while cool-season crops finish.
- Fallback beds: Reserve a few beds for emergency re-sows or replacements.
- Map the season on a single sheet with 2-week planting blocks.
- Choose three varieties per crop spaced by maturity to smooth harvests.
- Reassess after each harvest window and re-seed immediately into that slot.
Example: successive sowings of bush beans every 10 days produced a continuous harvest for 8 weeks rather than a single 2-week glut.
Understanding these principles helps you get more consistent yields with less frantic intervention. When practiced together, soil-building, precise watering, and planned succession turn seasonal planting into a predictable, productive calendar.
📥 Download: Seasonal Organic Gardening Checklist (PDF)
Resources: Seed Selection, Organic Certifications, and Further Reading
Selecting seeds and trustworthy information sources shortens the learning curve and improves first-season results. Start with certified seed directories and local extension services, validate soil with a lab, and use a seed-starting calendar to align sowing with your local seasonal windows. Below are practical, actionable resources and a compact plan to move from decision to action.
Practical next steps (fast-start)
- Order seeds from a certified directory and note
days-to-maturityfor each variety. - Collect a representative soil sample and submit it to a nearby testing lab.
- Build a seed-starting schedule using local frost dates and a seed-starting calculator.
- Choose 2–3 reference books or guides and follow one season plan start-to-finish.
- Track results (germination %, transplant success) in a simple spreadsheet for tweaks next season.
What to consult and why
- Certified organic seed directories: Find varieties that meet organic standards and have traceable provenance.
- Local cooperative extension: Regional planting dates, pest alerts, and cultivar recommendations tailored to microclimates.
- Soil testing labs: Actionable
pH, nutrient, and salinity data to correct before transplanting. - Permaculture and organic gardening books: Design principles, crop rotations, and soil-building practices for sustained yields.
- Seed-starting calculators and planners: Convert frost dates to sowing/transplant dates and staging for successive crops.
Present resources with quick notes on use case (seed purchase, testing, planning) and trust signals
| Resource | Type | Use case | Trust signal |
|---|---|---|---|
| Certified Organic Seed Directories | Directory | Order species-specific organic seed lines | Third-party organic certification, seed origin listed |
| Local Cooperative Extension | Regional advisory | Regional planting dates, pest ID, trial data | University-affiliated, extension publications |
| Soil Testing Labs (state/private) | Lab service | pH, N-P-K, micronutrients, recommendations |
Accredited labs with interpretable reports |
| Permaculture & Organic Gardening Books | Reference books | Long-term system design, rotations, soil building | Published by major gardening presses |
| Seed-Starting Calculators | Online tool | Convert frost dates → sow/transplant schedule | Uses local climate data, printable schedules |
Key insight: These five resource families cover procurement, local adaptation, baseline soil science, systemic practice, and scheduling—each reduces a common failure point in organic seed projects. Prioritize local extension input and soil testing before placing large seed orders to avoid wasted time and expense.
Further reading and tools to consider
- Seed sourcing: Compare varieties for disease resistance and
days-to-maturity. SeedConnect’s catalog is a practical place to start for certified organic and heirloom options. - Soil work: If
pHis outside 6.0–7.0, correct before sowing; many labs include amendment recommendations. - Planning: Use a digital calendar or spreadsheet to stagger sowing and ensure continuous harvest windows.
Understanding and using these resources accelerates reliable establishment of organic beds while reducing costly mistakes in the first season. When resources are chosen deliberately, the season’s decisions become tactical rather than reactive.
Conclusion
By planning around weather patterns rather than calendar months, gardeners keep transplants alive through late frosts, avoid bolting during heat waves, and extend harvests with succession sowing. The seasonal planting calendar in this article showed how to map crops to frost dates, choose cover crops for winter beds, and stagger plantings for continuous yield; practical examples—like the urban community garden that doubled its summer harvest by shifting bed rotations and a small organic farm that reduced losses with simple row covers—illustrate those gains. If questions linger about when to start seedlings indoors or how to adapt the schedule for an unusually warm spring, the step-by-step guide and troubleshooting section give specific actions for transplant timing and pest prevention.
Take these next steps to turn planning into harvestable results: – Record local frost dates and build a simple organic gardening calendar for your plot. – Start seeds indoors on the recommended schedule and use succession sowing to avoid gaps. – Choose region-appropriate, certified organic seed varieties—browse the SeedConnect seed catalog for reliably sourced options.
Putting these actions into practice this season converts theory into produce: plant with the season, adjust when the weather changes, and protect young plants early to see noticeably better yields.