
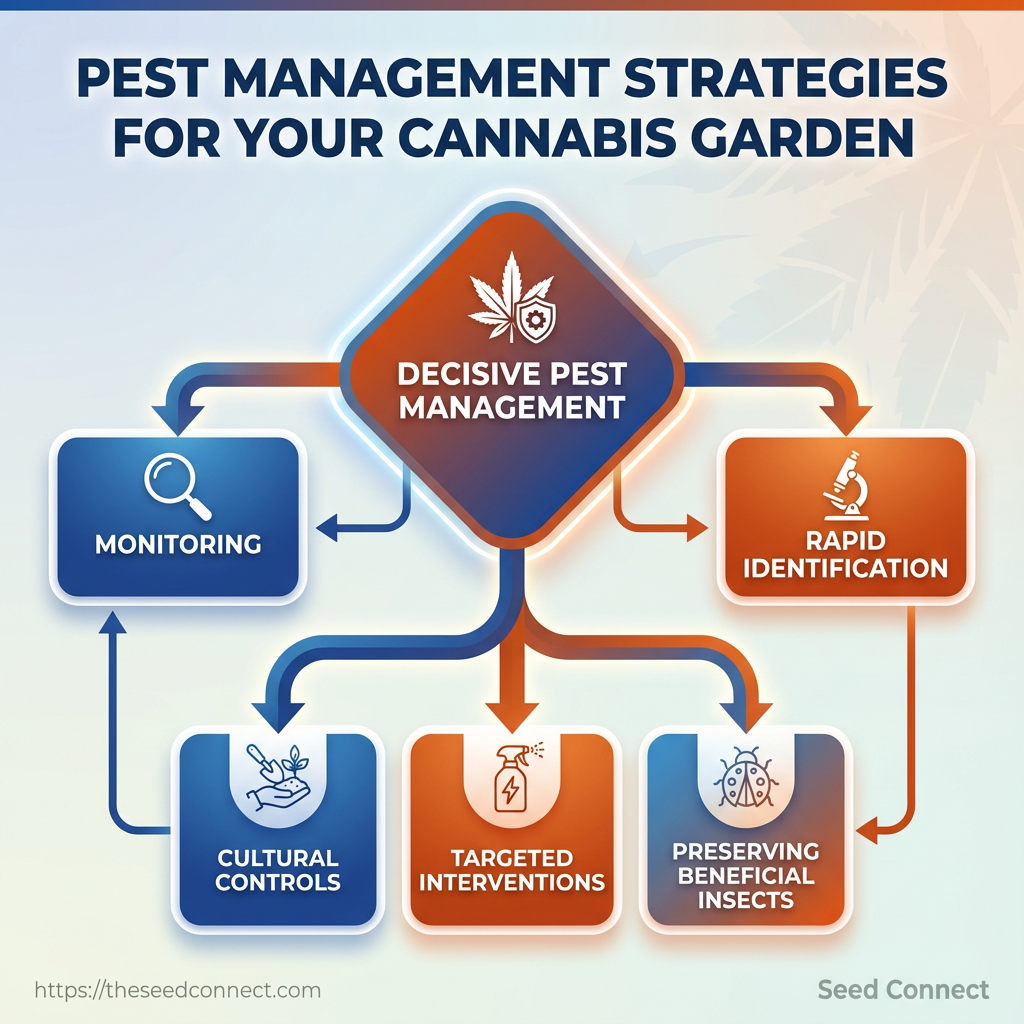
Yellow stippling on fan leaves, sticky honeydew on new growth, and tiny webbing between branch nodes — those are the moments that make a grower’s stomach drop. Rapid identification and decisive pest management stop a minor nuisance from turning into a full-blown outbreak, and the right mix of monitoring, cultural controls, and targeted interventions keeps yields intact. This piece focuses on practical, field-tested approaches to pest control that fit both small personal gardens and scaled-up rooms without leaning on heavy-handed chemicals.
Protecting crop health starts with predictable routines: inspect for early signs, correct the environmental drivers pests exploit, and choose controls that preserve beneficial insects and plant vigor. Integrated approaches to protecting cannabis plants reduce surprises during flowering and limit secondary problems like mold and nutrient lockout, so decisions made in week three still pay off at harvest. []
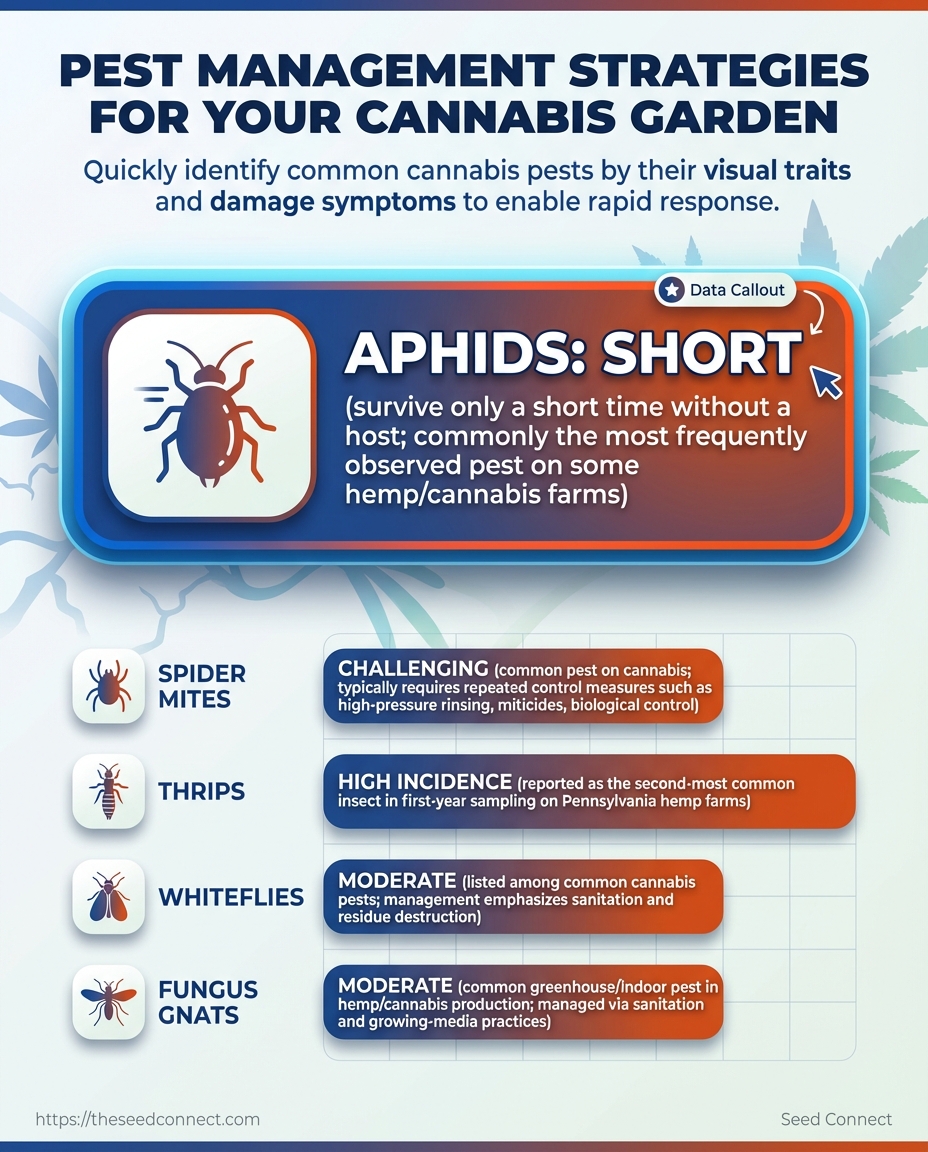
Common Cannabis Pests: Identification Guide
Expect the usual suspects in a cannabis canopy: aphids, spider mites, thrips, whiteflies, and fungus gnats. Visual identification speeds response, but symptoms often show before you spot the insect itself. When spotting discoloration, stippling, or sticky residue, isolate the affected plant immediately and start targeted monitoring so treatment can begin before infestations explode.
How to spot them quickly
- Rapid sign: Look for stippling or tiny white specks—early signs of sap-feeders.
- Physical clues: Fine webbing almost always means spider mites.
- Residue: A sticky, shiny film (honeydew) points to aphids or whiteflies.
- Behavioral cue: Flying adults near new growth usually indicate whiteflies or fungus gnat activity.
- Soil symptoms: Young plants wilting despite adequate water suggests fungus gnat larvae.
Aphid: Small (1–4 mm), pear-shaped; colors range green to black; often clustered on new growth.
Spider mite: Tiny (0.2–0.5 mm), eight-legged; red, yellow or translucent; leaves show fine stippling and webbing.
Thrip: Slender (1–2 mm), elongated; yellow, brown or black; leaves show silvering and black fecal dots.
Whitefly: Moth-like (1–2 mm), white wings; leave honeydew and cause leaf yellowing.
Fungus gnat: Adult is small, mosquito-like; larvae are translucent maggots in soil that feed on roots.
- Isolate the affected plant from the grow room.
- Start sticky traps and inspect the undersides of leaves daily.
- Use a 10x loupe to confirm the pest (look for eggs, nymphs, webbing).
- Apply targeted control: physical removal, predatory insects, or selective treatments.
Side-by-side quick reference for identifying common pests by physical traits and damage symptoms
| Pest | Visual ID (size/color) | Typical Damage Symptoms | Where to look (plant zone) |
|---|---|---|---|
| Aphids | 1–4 mm; green, black, yellow clusters | Honeydew; curled/new growth distortion | New shoots, underside of leaves |
| Spider mites | 0.2–0.5 mm; red/yellow/translucent; webbing | Fine stippling; bronze leaves; webbing | Leaf undersides, lower canopy |
| Thrips | 1–2 mm; slender yellow/brown/black | Silver streaks; black frass dots | New leaves, flowers, bud bracts |
| Whiteflies | 1–2 mm; white winged adults | Yellowing; honeydew; sooty mold | Underside of leaves, upper canopy |
| Fungus gnats | Adults mosquito-like; larvae translucent | Seedling wilt; root damage in soil | Soil surface, potting medium |
Key insight: Visual traits plus symptom patterns allow rapid identification; early detection in new growth and soil prevents most outbreaks. Regular loupe checks and sticky traps cut identification time from days to hours, letting growers choose the least disruptive control method.
Recognizing these pests quickly keeps interventions small and effective. Catching the problem at the symptom stage makes the difference between a minor correction and a full-room treatment.
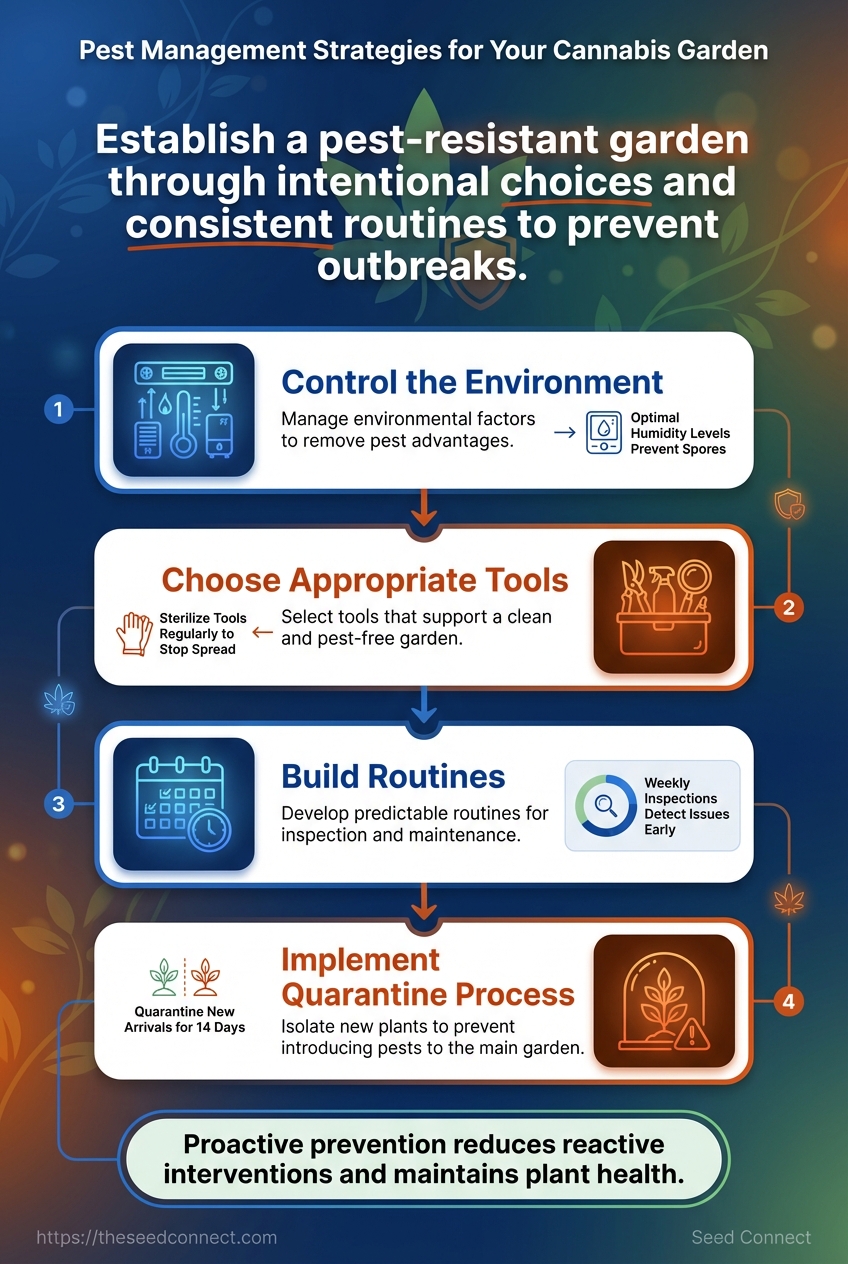
Prevention: Setting Up a Pest-Resistant Garden
Establishing a pest-resistant garden starts with intentional choices before a single seed goes into soil. Invest time up front to control the environment, choose appropriate tools, and build routines that remove pest advantages—this reduces reactive interventions later and keeps plants healthier throughout their lifecycle. Below are the prerequisites, exact environmental targets, sanitation rhythms, and a strict quarantine process to make pest pressure manageable from day one.
Clean, dedicated space: A grow area separated from high-traffic zones reduces contamination risk.
Reliable climate controls: Temperature, humidity and airflow systems sized for the canopy keep pests from staging favorable microclimates.
Monitoring equipment: At minimum, a calibrated hygrometer and thermometer, plus sticky traps and visual inspection logs.
Quarantine area: A small, isolated bench or shelving with independent airflow for incoming plants and clones.
Tools for sanitation: Dedicated pruning shears, disposable gloves, 70% isopropyl for disinfecting, and storage for clean/dirty tools.
What you’ll need and garden prerequisites (checklist)
Provide an easy checklist of tools and materials with purpose and recommended frequency of use
| Item | Why it’s needed | Recommended model/specs | Maintenance/frequency |
|---|---|---|---|
| Hygrometer | Tracks RH to prevent mold and mite outbreaks | Digital probe hygrometer with ±2% RH accuracy | Calibrate monthly; spot-check weekly |
| Inline fan / ventilation | Controls air exchange, prevents stagnant pockets | Variable-speed 4″–8″ inline fan sized to room CFM | Clean filters monthly; inspect quarterly |
| Sticky traps | Early detection of flying pests | Yellow/blue adhesive traps, low-tox adhesive | Replace every 2–4 weeks; inspect weekly |
| Pruning shears | Remove infested tissue, maintain plant health | Stainless-steel, easy-clean folding shears | Disinfect between plants; sharpen/replace seasonally |
| Quarantine space | Isolate new/affected plants | Small bench with separate airflow and light | Use for 7–14 days per arrival; sanitize between batches |
Key insight: Focus on measurement (hygrometer), airflow (inline fan), and detection (sticky traps) — these three reduce pest establishment more than sporadic pesticides.
Environmental controls and cultural practices
Maintain consistent ranges to deny pests favorable conditions. Target ranges below work for most cannabis grows:
- Temperature: 20–26°C (68–79°F) during lights-on, 16–20°C (60–68°F) lights-off for photoperiod grows.
- Relative Humidity (RH): 40–55% in vegetative stage; 35–45% in flowering to limit mold and spider mite reproduction.
- Airflow: Gentle laminar flow at canopy level with 0.2–0.5 m/s (40–100 fpm) and a complete air exchange every 3–5 minutes depending on room size.
Sanitation routines reduce inoculum and breeding sites. Daily tasks include visual inspections, removal of dead foliage, and washing hands or changing gloves between plants. Weekly tasks include vacuuming floors, wiping surfaces with 70% isopropyl, and changing sticky traps. Seasonal deep-clean: move all plants, scrub benches, replace filters, and run an empty environmental cycle with elevated ventilation.
Quarantine procedure for new plants
- Place incoming plants in the designated quarantine bench with separate airflow and light.
- Inspect top/bottom of leaves daily for 7–14 days; deploy sticky traps nearby.
- Treat any signs of pests with physical removal or appropriate biological controls before integrating.
- Only transfer when plant shows no signs for a full week and after a final gentle foliar rinse.
Implementing these controls initially reduces the need for chemical measures and protects crop yield. With consistent monitoring and quarantine discipline, pest issues shift from urgent crises to manageable maintenance, allowing focus on genetics and yield rather than emergency treatments.
Monitoring and Early Detection
Early, consistent observation prevents small issues from becoming crop‑wide problems. Routine inspections that combine quick daily checks with deeper weekly reviews catch insects, nutrient imbalances, and environmental drift before they reduce yield. The process is simple: look, record, act — and repeat with rigour.
What to inspect and when
- Daily quick inspections
- Visually scan canopy for wilting, discoloration, or unusual spots.
- Check leaf undersides and new growth for tiny pests or eggs.
- Confirm environmental setpoints: temperature, RH, and light schedule.
- Weekly deep checks
- Move through the canopy and inspect stems, nodes, and soil/root zone.
- Use a magnifier to look for mites and thrips; check sticky traps.
- Review feeding logs, pH and EC readings, and recent treatment records.
- Bi‑weekly and situational checks
- Perform a thorough substrate/root inspection on sample plants.
- Reassess airflow patterns and replace worn fans or filters.
- After introducing new plants: quarantine and inspect daily for 7–14 days.
Record keeping: Maintain a simple log with date, plant ID, symptom, photos, and action taken.
Tools & quick kit: White paper for contrast checks, 10x magnifier, sticky traps, phone camera, pH/EC pen, notebook or digital log.
Practical examples and signals
- Yellow lower leaves: Often early nitrogen deficiency or overwatering — check run‑off EC and adjust feed.
- Speckled stippling: Typical sign of spider mite activity — verify with magnifier and examine sticky traps.
- Slow new growth: Could be root zone temperature or pH issues — measure substrate temp and
pH.
Step-by-step for a weekly deep check
- Walk each row, photographing 3 representative plants.
- Inspect top, middle, and lower canopy for abnormalities.
- Record environmental readings and compare with last week.
- Tag any suspect plants and apply targeted testing (sticky trap,
10xeyepiece) the same day.
Tools that speed diagnosis
- White paper: Provides contrast to spot translucent pests.
- Magnifier: Confirms mites, thrips, eggs.
- Sticky traps: Continuous monitoring for flying adults.
- Phone camera: Timestamped photos speed remote consultations.
- pH/EC pen: Immediate feedback on nutrient availability.
Present a monitoring calendar with daily and weekly tasks and estimated time per task
| Frequency | Task | Tools needed | Estimated time |
|---|---|---|---|
| Daily | Quick canopy scan, environmental check | Phone camera, thermometer/hygrometer | 5–10 min |
| Weekly | Deep plant inspection, sticky trap check, log update | Magnifier, sticky traps, pH/EC pen, notebook | 20–40 min |
| Bi-weekly | Root/substrate sampling on subset, airflow review | Gloves, sample bags, thermometer, fan checklist | 30–45 min |
| After introducing new plant | Quarantine inspection daily for 7–14 days | Visual, magnifier, sticky traps | 5–10 min/day |
| Post-treatment | Monitor treated plants daily for recovery or side effects | Camera, log, pH/EC pen | 10–15 min/day |
Key insight: Routine, time‑boxed checks make monitoring scalable — small daily investments prevent larger weekly crises and speed diagnosis when problems appear.
Understanding these checks and building simple habits around them keeps pest pressure low and preserves yield quality. When monitoring is standardized, interventions become faster and less disruptive to the crop.
Organic and Biological Control Methods
Using beneficial organisms and botanical treatments provides targeted, low-toxicity pest control that preserves beneficials and keeps flower safe for harvest windows when applied correctly. Beneficials—predatory mites, nematodes, and entomopathogenic fungi—work by establishing in the crop and reducing pest populations over days to weeks. Botanical treatments such as neem oil and insecticidal soaps offer faster knockdown of soft-bodied pests but require careful timing and dilution to avoid phytotoxicity or disruption of beneficial agents.
Practical requirements before you start
Clean environment: Remove heavy infestations and decaying plant matter before release of beneficials.
Stable microclimate: Maintain temperature and humidity appropriate to the chosen organism (predatory mites prefer moderate RH; nematodes need moist substrate).
Compatibility check: Confirm botanical sprays won’t be used within 48–72 hours of releasing living biocontrols.
Tools & materials
- Beneficial organisms: predatory mites (Phytoseiulus, Amblyseius), beneficial nematodes, Beauveria bassiana formulations
- Botanical treatments: cold-pressed neem oil, potassium insecticidal soap
- Application gear: fine-mist sprayer, soil drench applicator, protective gloves
How to apply — step-by-step
- Scout and map hotspots; release beneficials in unaffected borders first.
- Apply beneficials directly to night-time resting sites or soil surface following supplier rates.
- Use botanical sprays during low light and cool periods; avoid spraying open flowers.
- Reassess after 7 days; reapply beneficials or spot-spray botanical treatments where populations persist.
Dilutions, frequency, and expected time-to-effect
- Predatory mites: Typical release rates vary by species and pest pressure; expect population suppression within 7–14 days as mites establish.
- Beneficial nematodes: Apply as soil drench; effects on soil-dwelling pests appear in 3–10 days when soil moisture is kept high.
- Neem oil: Typical dilution ranges 0.5–1.0% (roughly 5–10 ml per liter) applied every 7–14 days; visible knockdown in 24–72 hours, stronger population decline over 7–14 days.
- Insecticidal soap: Typical dilution 0.5–1% (about 5–10 ml per liter); quick knockdown in 24–72 hours; repeat every 3–7 days as needed.
- Beauveria bassiana: Follow product label for spore concentration; expect initial infection signs in 3–7 days and population-level reductions by 10–14 days.
Compatibility and cautions
- Avoid broad-spectrum insecticides when using living biocontrols.
- Avoid spraying botanicals within 48–72 hours of releasing predatory mites or beneficial insects.
- Test botanical sprays on a few plants first to check for phytotoxicity.
Organic/biological options by target pest, application method, speed of control, and safety for flower
Organic/biological options by target pest, application method, speed of control, and safety for flower
| Control | Targets | Application method | Time to see effect |
|---|---|---|---|
| Predatory mites (Phytoseiulus, Amblyseius) | Spider mites, thrips (eggs/nymphs) | Release to canopy/leaf undersides; establish populations | 7–14 days |
| Beneficial nematodes | Soil-dwelling larvae, fungus gnats | Soil drench; keep substrate moist | 3–10 days |
| Insecticidal soap | Aphids, whiteflies, mites (contact) | Foliar spray; avoid flowers and hot periods | 1–3 days |
| Neem oil | Caterpillars, mites, whiteflies (repellent/antifeedant) | Foliar spray at dusk; avoid flowering buds | 1–14 days |
| Beauveria bassiana | Thrips, whiteflies, aphids | Foliar spray; compatible with many IPM regimes | 3–14 days |
Key insight: These options balance establishment time and immediate knockdown—use beneficial organisms for long-term suppression and botanicals for faster, targeted control while observing compatibility windows to protect beneficial populations.
Understanding these methods and their timing lets growers integrate living controls with botanical sprays effectively, protecting plants while minimizing residues and preserving beneficial ecosystems. When applied thoughtfully, organic strategies deliver durable control without compromising flower quality.
Chemical Controls and Safe Pesticide Use
Choosing chemical controls should be the last step after cultural, biological, and mechanical measures have reduced pest pressure. Use pesticides only when action thresholds are met, select products with the narrowest spectrum and shortest residual activity that will control the target, and always plan applications around pre-harvest intervals (PHI) to avoid illegal residues. The goal is effective knockdown with minimal impact on beneficials, worker safety, and final product quality.
PHI: The minimum time between the last pesticide application and harvest to reduce residue risk.
Residual activity: How long an active ingredient remains effective or detectable on plant surfaces.
Escalation thresholds and decision steps
- Monitor and document pest counts or damage by plant/bench weekly.
- If a localized hotspot shows >10% of plants with active feeding or reproductive stages (eggs/larvae/mites), apply targeted biological control or spot-treat with low-residual options.
- If whole-room infestation exceeds 25% of plants or rapid population growth is evident, escalate to broader chemical control while rotating modes of action.
- After chemical treatment, increase monitoring to verify efficacy and avoid repeat applications that would extend residue windows.
Personal protective equipment and safe handling
- Gloves: Chemical-resistant gloves (nitrile or neoprene) for mixing and application.
- Eye protection: Indirect-vented goggles for spray operations.
- Respiratory protection: At minimum an N95 for dusts/aerosols; use a supplied-air respirator for high-exposure mixing.
- Coveralls: Disposable or washable chemical-resistant coveralls; launder separately.
- Boots: Chemical-resistant boots or boot covers.
Practical application steps
- Read and follow the pesticide label completely before mixing or applying.
- Calibrate the sprayer for uniform coverage; test on a few plants first.
- Apply during low wind and cooler parts of day to limit drift and photodegradation.
- Record product, rate, location, operator, and
PHIon a spray log immediately after application. - Re-assess 3–7 days post-application and decide on follow-up based on monitored counts.
Common pesticide options by class, target pests, residual activity, and pre-harvest interval (PHI) considerations
| Product/Class | Targets | Residual activity | PHI / safety notes |
|---|---|---|---|
| Pyrethrins | Leaf-feeding caterpillars, thrips, many adult insects | Short: hours to a few days depending on UV exposure | PHI often 3–7 days; highly toxic to bees when wet |
| Spinosad | Thrips, caterpillars, leafminers | Moderate: several days to ~2 weeks | PHI commonly 3–7 days; effective at low rates, avoid tank mixes with alkaline products |
| Imidacloprid (neonicotinoid) | Sap-feeding insects (aphids, whiteflies) | Long: systemic, weeks of activity | Many states/recreational markets restrict use on flower; check local regulations and long PHI (weeks) |
| Azadirachtin (neem-derived) | Broad: aphids, mites, whiteflies, some larvae | Low-moderate: a few days | PHI typically 0–3 days for foliar formulations; avoid when pollinators are active |
| Horticultural oils | Soft-bodied insects, mites, eggs | Short: contact only, <48 hours | PHI often 0–3 days; excellent for IPM, avoid use under heat stress |
Key insight: Choosing the right chemistry and timing limits residue risk and preserves beneficial organisms. Prioritize contact, short-residual products for flowering stages and reserve systemic, long-residual actives for non-flowering or only when absolutely necessary.
Understanding and documenting these principles reduces regulatory and crop-quality risk while keeping pest populations manageable. When practitioners follow escalation thresholds, PPE protocols, and PHI rules, chemical controls become a precise tool rather than a blunt instrument.
Step-by-Step: Integrated Pest Management (IPM) Plan
Start with a clear, actionable IPM framework that treats pest management as an ongoing system: detect early, contain quickly, treat precisely, verify outcomes, and prevent recurrence. This approach reduces pesticide use, preserves beneficials, and protects yield quality.
- Identify and monitor pests and beneficials
- Begin by mapping the grow area and setting a monitoring schedule: daily visual checks during vegetative/flowering transitions, weekly detailed inspections for established crops. Use sticky traps, hand lenses, and a simple logbook or digital spreadsheet. Record pest species, life stage, location, and population density.
- Measurable success criteria: sticky-trap counts under threshold for action (for example, fewer than 5 thrips per trap per week) and documented decrease in new infestation sites by 50% within two monitoring cycles.
- Practical example: place yellow sticky cards at canopy height near vents and under lower branches; inspect cards twice weekly and correlate counts with leaf damage scores.
- Benefits: early detection shortens response time and increases nonchemical control options.
- Containment and cultural controls
- Immediately isolate affected plants and restrict movement in and out of the room. Adjust cultural variables to make the environment less favorable to the pest — for example, lower humidity to deter fungus gnats or increase air exchange to reduce mould.
- Measurable success criteria: isolated zone shows no new spread after one pest life cycle (7–14 days depending on species), and adjacent zones record zero new positive sticky-trap counts within two weeks.
- Practical actions: remove infested debris, sanitize tools with 70% isopropyl, increase beneficial airflow, and implement a quarantine table for incoming clones or seeds.
- This step buys time to choose targeted treatments while minimizing collateral damage.
- Select targeted biological and mechanical treatments
- Favor biologicals and mechanical methods before chemical options. Introduce predators (e.g., predatory mites for spider mites), apply microbial agents (
Bacillus thuringiensisfor caterpillars), and use vacuuming or pruning to remove hotspots. - Measurable success criteria: predator establishment confirmed by observed predation or presence of life stages within two weeks; pest population reduced by ≥60% after two treatment rounds.
- Example: release predatory mites at a 10:1 ratio of pests to predators in hotspots, then reassess sticky-trap and leaf sampling data every 3–4 days.
- Biologicals maintain crop safety and integrate well with organic certification goals.
- Apply chemical controls as last resort and precisely
- When thresholds are exceeded and other tactics fail, use selective, low-residue pesticides compatible with existing biologicals. Rotate modes of action to avoid resistance and follow label limits for pre-harvest intervals.
- Measurable success criteria: post-treatment pest counts fall below action thresholds within one life cycle; residue testing (when available) meets regulatory or market limits.
- Practical protocol: spot-spray affected zones, avoid broad-spectrum aerosols, document product batch, application rate, and re-entry intervals in the logbook.
- Precise chemical use preserves beneficials and limits regulatory risk.
- Verify results and institutionalize prevention
- Verify effectiveness through scheduled follow-ups: trap counts, leaf sampling, and yield-quality inspections. Update SOPs and staff training based on findings, and implement preventive measures like soil sterilization, strict incoming-plant quarantine, and cultivar selection for pest resistance.
- Measurable success criteria: sustained reduction of pest incidents by ≥80% over the next two crop cycles, documented SOP updates, and 100% compliance in intake quarantine checks.
- Preventive investments pay off by lowering labor and treatment costs over time.
Suggested tools and checklists
- Monitoring tools: sticky cards, hand lens, digital logs
- Biologicals: predatory mites,
Bacillusproducts - Sanitation supplies: isopropyl, dedicated pruning tools
- Recordkeeping: standardized inspection forms and a simple digital dashboard
Understanding and applying these steps makes pest management predictable and scalable while protecting crop quality and worker safety. When teams follow a disciplined IPM routine, interventions become faster, less disruptive, and more cost-effective.
Troubleshooting Common Issues and FAQs
When a treatment doesn’t work, reinfestation occurs, or damage is misidentified, the right first move is systematic root-cause analysis rather than repeating treatments. Start by isolating the problem, documenting symptoms, and comparing them to common pest and abiotic patterns. That prevents wasted inputs, reduces residue buildup, and preserves beneficial populations.
Immediate triage and root-cause steps
- Observe and document symptoms.
- Isolate affected plants from the rest of the canopy to prevent spread.
- Compare signs to reference images or a trusted diagnostic checklist.
- If treatment was applied, note product, dose, timing, and environmental conditions.
- Reassess after 48–72 hours before changing strategy.
Common, actionable reasons treatments fail include improper identification, sublethal dosing, product incompatibility with environmental conditions, and loss of beneficials from broad-spectrum agents. Always confirm identification before reapplying chemicals.
Troubleshooting paths for specific scenarios
Treatment ineffective: Confirm diagnosis, check application rate and coverage, and verify that the product is labeled for that pest and growth stage. If a pesticide was used, test for poor coverage (waxy leaves, dense canopy) before switching chemistries.
Rapid reinfestation: Look for external reservoirs — adjacent crops, shipping containers, or untreated clones. Reinforce sanitation and add buffer treatments like sticky traps and perimeter sprays.
Beneficial insects decline: Assess recent pesticide history and pollinator exposure. Reintroduce beneficials only after habitat and food sources are restored.
Unidentified damage: Photograph upper/lower leaf surfaces, stems, and substrate. Rule out nutrient burn, pH swings, light stress, and mechanical damage before attributing it to pests.
Residue detected / persistent residues: Stop further applications immediately and test tissue/residue if legally required. Persistent residues may necessitate legal escalation in regulated markets.
FAQs (concise answers)
* Why didn’t my insecticide work? Often misidentification or insufficient coverage; review label and environmental conditions.
* How soon can I reapply after a failed treatment? Follow label reapplication intervals; if unsure, wait 48–72 hours and reassess.
* How to distinguish nutrient deficiency from pest damage? Nutrient issues follow a predictable pattern across new vs. old growth; pests often leave localized, asymmetric damage.
* When should legal or safety escalation occur? Persistent residues, off-label applications, or symptoms indicating worker exposure require immediate reporting to compliance officers.
* Should I use beneficial insects after chemical use? Only after residues decline to safe levels; otherwise reintroductions will fail.
Quick triage matrix: issue vs. likely cause vs. immediate fix vs. when to escalate
| Problem | Likely cause | Immediate action | Escalation threshold |
|---|---|---|---|
| Treatment ineffective | Misidentification; sublethal dose; poor coverage | Re-identify pest; check label and reapply with correct coverage | Repeated failure after two correct applications |
| Beneficial insects decline | Recent broad-spectrum pesticide | Cease pesticides; restore habitat; reintroduce beneficials later | Widespread collapse across crop blocks |
| Rapid reinfestation | External reservoir; incomplete sanitation | Increase perimeter control; inspect inputs | Reinfestation within 7 days after full treatment |
| Unidentified damage | Abiotic stress; hidden pathogens | Photograph; test substrate and tissue; isolate plants | Progressive loss despite corrective measures |
| Residue detected | Overuse or inappropriate product | Stop use; retain samples; begin residue testing | Detectable residues above regulatory limits |
Key insight: Use this matrix for fast triage — isolate, document, correct application errors, then escalate if problems persist or legal limits are crossed.
Understanding these diagnostic steps shortens downtime and reduces unnecessary inputs. When followed consistently, they protect crop health and compliance while preserving the biological tools that make integrated pest management effective.
📥 Download: Pest Management Strategies Checklist for Your Cannabis Garden (PDF)
Tips for Success and Long-Term Prevention
Start by building a routine that prioritizes early detection and simple, repeatable maintenance—those two actions prevent most pest and disease problems before they become costly. Focus daily on quick visual inspections and weekly on preventive tasks: maintain proper environmental parameters, rotate biological controls, and keep a clean work area. Small investments—sticky traps, a loupe for close inspection, and a basic pH meter—produce outsized returns by catching issues while they’re still localized. For longer cycles, schedule sanitation and substrate turnover, ensure genetic selection favors resilient strains, and document every intervention so you can spot patterns over seasons. The point is to shift from reactive firefighting to predictable prevention through habit, checklists, and incremental upgrades.
Practical pro tips
- Daily visual check: Walk the canopy for 3–5 minutes to spot new damage.
- Weekly foliage close-up: Use a 30–60x loupe to examine undersides and node junctions.
- Environmental targets: Keep humidity in vegetative and flowering ranges appropriate for strain; stabilize temperature around
70–75°Fwhen possible. - Biological rotation: Alternate beneficials (predatory mites, entomopathogenic nematodes) every 4–6 weeks to prevent resistance.
- Seed selection: Choose genetics with proven vigor and pest resistance for your microclimate.
Maintenance schedule (repeatable)
- Every day: 3–5 minute canopy walk; note abnormalities.
- Weekly: Inspect with loupe; replace sticky traps if >30% covered.
- Bi-weekly: Flush substrate if salts accumulate; check pH.
- Monthly: Deep clean work surfaces; rotate biological controls.
- Per crop cycle: Replace media where applicable; review and adjust SOPs.
Printable checklist: Use the following for quick reference.
- Pre-light: clean tools, check traps, check air filters.
- Mid-week: loupe inspection, record observations, spot-treat small infestations.
- End-of-week: pH check, environmental log review, swap sticky traps.
- Monthly: full sanitation, beneficial agent rotation, inventory supplies.
Common failure mode: Skipping low-effort tasks like sticky-trap replacement allows small hotspots to become outbreaks; avoid this by assigning ownership and a simple visible checklist.
Understanding these practices reduces surprises and stabilizes yields over time. When consistently applied, the routine frees resources to focus on genetics and quality rather than emergency pest control.
Conclusion
When yellow stippling, sticky honeydew, or fine webbing appear, act quickly: confirm the pest, isolate affected plants, and start the least-toxic control that matches the pest’s life stage. Growers who switched from blanket pesticide sprays to an IPM routine — regular monitoring with sticky traps, releasing predatory mites for spider mites, and spot-treating aphid colonies with insecticidal soap — stopped small outbreaks before they escalated and kept yields stable. Integrating cultural controls (cleaning, airflow, and quarantine) with biologicals reduces reliance on harsh chemicals while effectively protecting cannabis plants over the long run.
Next steps are straightforward: begin weekly inspections, document findings, and assemble an IPM kit (sticky cards, magnifier, biologicals, and labeled low-toxicity sprays). For targeted supplies and expert advice on seed-to-harvest continuity, consult The Seed Connect’s grower resources at The Seed Connect growers’ guide (https://theseedconnect.com). If uncertainty remains about identifying a pest or choosing a product, prioritize sample identification and a confined test application rather than whole-room treatments. Consistent monitoring and measured responses win more battles against pests than last-minute broad-spectrum sprays. Apply these practices and the garden will repay the diligence with healthier, more resilient plants.