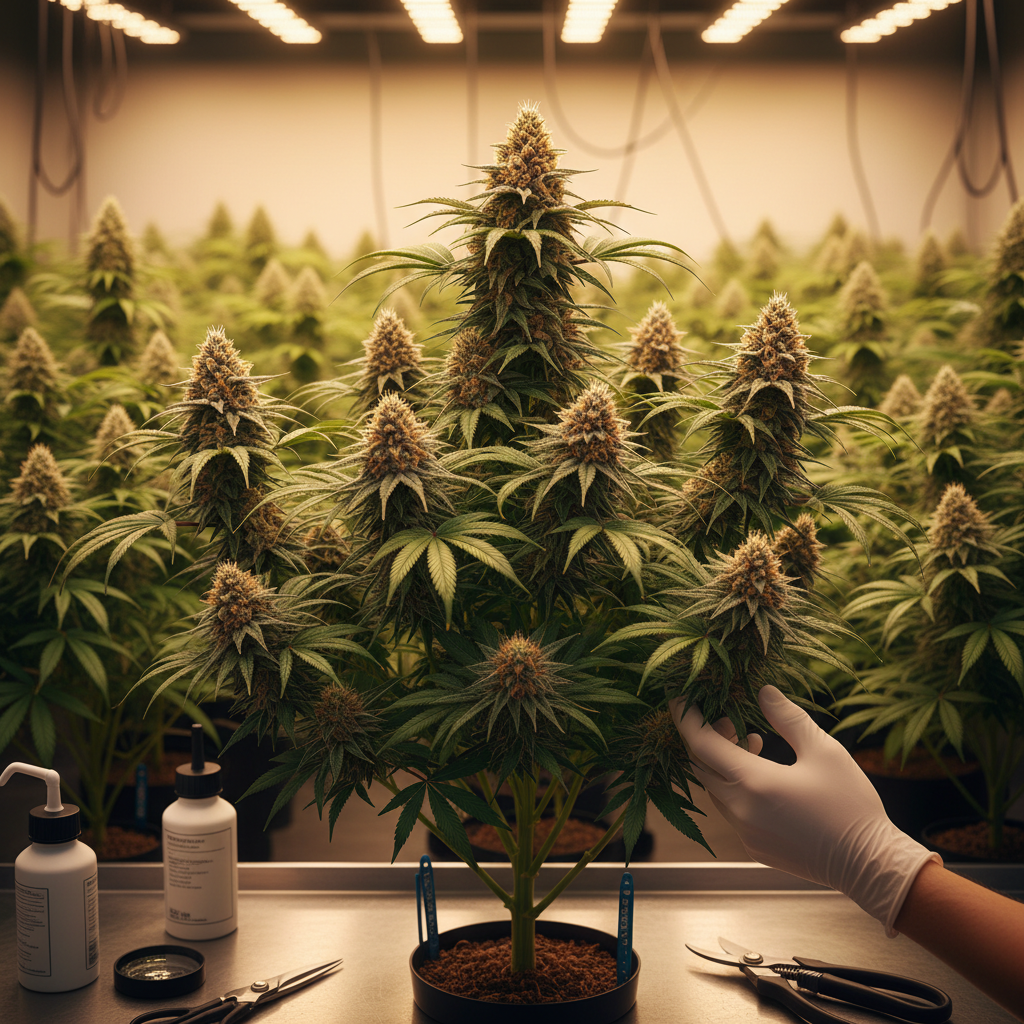
Growing cannabis can be one of the most rewarding experiences — but even the most dedicated cultivators run into questions, challenges, and moments where expert guidance makes all the difference.
From choosing the right genetics to troubleshooting issues like pests, nutrients, or environmental stress, having access to reliable growing support can elevate your success at every stage.
This guide highlights the resources, tools, and expert advice available to help growers build confidence, avoid costly mistakes, and get the most out of every seed.
Whether you’re starting your first grow or refining advanced techniques, the right support system can transform your cultivation journey.
Choosing the Right Seeds
Choosing seeds starts with matching genetics to your goals: yield, harvest time, cannabinoid profile, and cultivation environment determine whether a particular seed type is the right investment. Growers aiming for a predictable, high-THC resin crop will select different genetics than someone prioritizing stealth, speed, or breeding experiments. Understanding seed types and the role genetics play in aroma, effect, and cultivation requirements reduces surprises during the grow and improves success rates.
Feminized: Seeds bred to produce only female plants, eliminating males and maximizing usable flower production.
Autoflowering: Seeds that switch from vegetative to flowering based on age, not light cycle, delivering faster harvests and simplified schedules.
Regular: Unmodified seeds that produce both male and female plants; essential for breeding and creating new hybrids.
F1 Hybrids: First-generation cross between two genetically distinct parents, often engineered for vigor, uniformity, and predictable traits.
Landrace/Heirloom: Stable regional genetics preserved for unique terpene profiles and resilience, often less hybrid vigor but strong cultural value.
How genetics shape outcomes
- Aroma & Terpene Profile: Genetics determine dominant terpenes (e.g., myrcene, limonene), which shape aroma and interact with cannabinoids to influence subjective effects.
- Effect & Cannabinoids: THC, CBD, and minor cannabinoids are largely genetically coded; breeding and chemotype selection influence ratios for therapeutic or recreational aims.
- Growth Characteristics: Genetics control stretch, node spacing, nutrient needs, and pest resistance — pick strains that match your space and skill level.
- Environmental Fit: Some genetics perform better in humid vs. arid climates, indoors under
18/6or outdoors with long seasons.
When to choose each type Feminized — Best for yield-focused growers wanting predictable flower without sexing. Autoflowering — Best for quick cycles, discreet grows, or multi-harvest cropping. Regular — Best for breeders and those who want seed production or genetic selection. F1 Hybrids — Best when uniformity, vigor, and specific trait combos matter. * Landrace — Best for preservationists, terpene hunters, and specialty markets.
Side-by-side comparison of seed types to guide selection by grow goal
| Seed Type | Flowering Time | Typical Yield | Best Use-case |
|---|---|---|---|
| Feminized | 7–10 weeks (flower) | Medium–High | Maximizing bud production, predictable crops |
| Autoflowering | 6–9 weeks total | Low–Medium | Fast turns, small spaces, stealth grows |
| Regular | 7–10 weeks (flower) | Variable | Breeding, producing seeds, selecting traits |
| F1 Hybrids | 7–11 weeks (flower) | High | Uniform commercial runs, stable traits |
| Landrace/Heirloom | Variable (often longer) | Low–Medium | Preservation, unique terpene profiles |
Key insight: Feminized seeds suit most growers focused on flower yield, while autoflowers excel for speed and discretion. Regular seeds remain indispensable for breeding, and F1 hybrids offer commercial predictability; landrace strains deliver unique flavors and resilience that can’t be engineered quickly.
Selecting the right seed reduces guesswork during the grow and aligns expectations with outcomes. Choosing genetics that fit your timeline, space, and market goals keeps operations efficient and predictable.
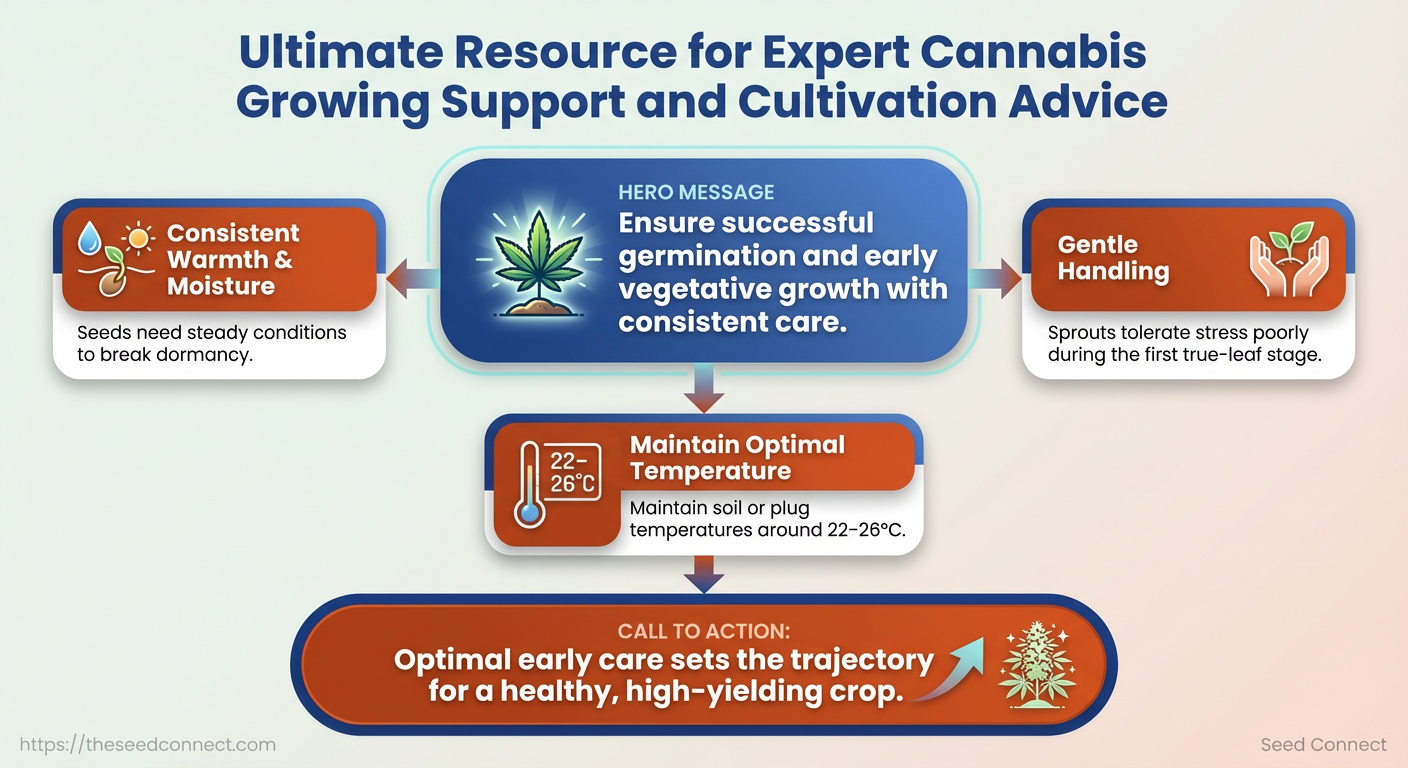
Germination and Early Vegetative Care
Successful germination and the first two weeks of vegetative growth set the trajectory for an entire crop. Aim for consistent warmth, gentle moisture and minimal handling: seeds need steady conditions to break dormancy, and sprouts tolerate stress poorly during the first true-leaf stage. Maintain soil or plug temperatures around 22–26°C and relative humidity near 70–85% during germination, then transition to 50–65% RH and slightly cooler temps for early veg. These environmental targets reduce stretch, encourage strong root initiation and cut early losses.
Germination Methods and Practical Comparison
Germination methods across success rate, ease, equipment, and best situations
| Method | Success Rate | Equipment Needed | Best For |
|---|---|---|---|
| Paper Towel | High (80–95%) | Paper towels, plates, spray bottle | Fast viability check, limited-space growers |
| Direct Soil | Moderate-High (75–90%) | Seedling mix, pots, dome | Simplicity, minimal transplant shock |
| Starter Plugs (rockwool/coco) | High (85–95%) | Plugs, tray, humidity dome | Uniform moisture, hydro runs, cloning workflows |
| Pre-soak/Scarification | Moderate (70–90%) | Water, time, optional sandpaper | Older or very dry seeds, improves uptake |
| Commercial Germination Kits | Very High (90–98%) | Kit-specific trays, mats, domes | Beginners, guaranteed conditions, higher cost |
Key insight: Paper towel is fast for testing viability but risks root damage during transfer; direct soil reduces transplant shock but demands precise moisture control; plugs strike the best balance for commercial uniformity; pre-soak helps borderline seeds; kits remove guesswork for newcomers.
Step-by-step germination (reliable baseline)
- Soak seeds in clean water for 12–24 hours (up to 36 hours for older seeds), then drain.
- Place between damp (not dripping) paper towels on a plate, cover, and keep at
22–26°Cin a dark place. - When taproot appears (1–7 days), transfer to
seedling mixor plug with root down, burying ~2–3 mm. - Use a humidity dome and low-intensity light for 48–72 hours, then introduce gentle light and begin air circulation.
Recovering slow or malformed sprouts
Damping-off: Caused by overly wet, cool conditions; reduce moisture, improve airflow, and use sterile media.
Leggy seedlings: Raise light source height, increase intensity gradually, and lower temps slightly to reduce stretch.
Malformed taproot or split hypocotyl: If root damage is minor, plant deeper to stabilize stem; if extensive, prioritize replacement seed—energy spent rescuing severely damaged sprouts often loses more than re-germinating.
Common fixes include raising light to prevent stretch, flushing media only if salts accumulate, and choosing a fresh, sterile seedling mix when replanting.
Understanding and applying these practices reduces early losses and accelerates reliable canopy establishment; consistent germination protocols save time and preserve genetic potential.
Lighting and Environmental Control
Good light, delivered at the right intensity and schedule, is the single biggest environmental control that determines yield and cannabinoid profile. For commercial and advanced home grows, LED fixtures now dominate because they combine spectrum control, efficiency, and lower long‑term heat management costs. Still, legacy technologies like HPS and CMH/LEC remain relevant where upfront cost or proven flower performance matter. What matters most operationally is matching the light type to your space, running the correct photoperiods, and hitting PPFD targets for each stage.
Light Types: Lighting technologies and tradeoffs.
LED: Modern premium fixtures cost between $300–$2,000+ per fixture, produce low radiant heat, and offer tunable full spectra; best for medium-to-large indoor rooms and vertical farms.
HPS: Initial cost per fixture typically $80–$400, high heat output, fixed orange-red spectrum, excellent flower penetration and historically high yields; best for large single-level rooms with good HVAC.
CMH/LEC: Moderate initial cost ($150–$600), fuller spectrum including UV, moderate heat, improved terpene and cannabinoid expression; good compromise for boutique grows.
CFL: Low initial cost, low PPFD, cool-running; suitable only for seedlings, clones, or very small gardens.
Sunlight/Greenhouse: Zero lamp cost, full spectrum and UV, dependent on season and supplemental lighting for consistent PPFD.
Photoperiods and PPFD targets matter more than wattage.
- Seedling/clone: Photoperiod: 18–24 hours light. PPFD target:
50–150 µmol/m²/s. - Vegetative: Photoperiod: 18 hours light / 6 hours dark (typical) or
24/0for some autos. PPFD:200–400 µmol/m²/s. - Flowering (day 1–3 weeks): Photoperiod: 12/12 for photoperiod strains. PPFD:
400–600 µmol/m²/s. - Late flower (weeks 4–8+): Photoperiod: maintain 12/12. PPFD:
600–900 µmol/m²/sfor dense canopies—top-tier commercial grows push900+in canopy hotspots.
Transitioning from veg to bloom requires both schedule and intensity changes.
- Drop to a
12/12schedule on the same dark cycle to avoid shock. - Increase PPFD gradually over 3–7 days by raising fixtures or increasing output to avoid light stress.
- Monitor temperature and VPD as PPFD rises; adjust airflow and CO2 where available to maintain healthy transpiration.
- Practical tip: If using HPS, expect ambient temps to rise 5–10°C at high PPFD; plan HVAC capacity accordingly.
- Practical tip: For LEDs, use spectrum tuning to increase red and far‑red during flower to promote stretch and resin production.
Lighting technologies for cost, heat output, spectrum control, and ideal grow size
| Light Type | Initial Cost | Heat Output | Spectrum Control | Best For |
|---|---|---|---|---|
| LED | $300–$2,000+ per fixture | Low radiant heat; needs less HVAC | High (tunable full spectrum, UV options) | Medium-to-large indoor, vertical racks |
| HPS | $80–$400 per fixture | High heat; strong infrared | Low (fixed orange/red) | Large single-level flower rooms |
| CMH/LEC | $150–$600 per fixture | Moderate heat | Moderate (broader spectrum including UV) | Boutique growers, terpene focus |
| CFL | $10–$60 per bulb | Very low heat | Low (limited spectrum) | Seedlings, clones, micro grows |
| Sunlight/Greenhouse | Low lamp cost; greenhouse cost variable | Ambient; seasonal variability | Full natural spectrum + UV | Commercial greenhouse, outdoor seasonally |
Key insight: LEDs offer the best long-term ROI through efficiency and spectrum control, HPS still delivers high flower penetration where HVAC is available, and CMH/LEC is a niche choice for quality-focused cultivators.
Understanding and applying these lighting principles lets operations hit target PPFD and photoperiods consistently, which drives predictable yields and cannabinoid profiles. When lighting, schedule, and environment work together, plants use energy more efficiently and produce better-quality flower.
Nutrients, Media, and Watering Strategies
Media choice dictates how often to feed, how strongly to dose, and how tightly to control pH and EC. Use lighter feeds and less frequent watering in soil; use higher-frequency, lower-volume, and more precise EC/pH control in soilless and hydro setups. Each medium has predictable behaviors: soil buffers nutrients and pH; coco holds water and requires regular calcium/magnesium management; hydro systems demand tight EC and continuous oxygenation. Match nutrient strength and watering cadence to the medium rather than treating all grows the same.
Media behavior and practical implications
Soil Soil holds nutrients and buffers pH swings, so start with lower EC and increase gradually. Overwatering and salt buildup are the most common mistakes; therefore, water-to-runoff cycles and periodic flushing are important.
Coco/coir Coco is inert but retains water well and binds potassium and calcium. Feed on every watering for established plants and supplement Ca/Mg routinely. Expect to run higher ppm than soil since there is no organic nutrient reservoir.
Hydro (DWC, NFT, RDWC) Hydro delivers nutrients directly; target tighter EC and daily pH checks. Oxygenation and root-zone temperature control are critical—cooler roots increase uptake and reduce pathogen risk.
Common features across successful programs: Balanced micronutrients: Ensure chelated iron, manganese, zinc, boron are present. Stage-specific NPK: Higher nitrogen in veg, higher phosphorus/potassium in flower. pH control: Adjust often; each medium has its preferred range. EC/ppm monitoring: Read daily in hydro, weekly in soil. * Flush when needed: To avoid lockout and flavor issues.
Basic feeding steps
- Prepare your reservoir or feed solution to target EC/ppm and pH before applying.
- Apply feed according to medium—light, infrequent in soil; regular, measured doses in coco; continuous control in hydro.
- Monitor runoff and adjust; if runoff EC climbs above feed EC by 0.5–1.0 mS/cm, schedule a flush.
When to reduce or flush nutrients: Reduce strength if leaf tips burn or if new growth slows. Flush before harvest week to improve smoke/smell unless growing for extraction.
Quick-reference feeding schedule and target ranges for common media
Quick-reference feeding schedule and target ranges for common media
| Grow Stage | Soil pH | Coco EC/ppm | Hydro EC/ppm | Notes |
|---|---|---|---|---|
| Seedling (Week 1-2) | 6.0–6.5 | 0.4–0.8 (200–400 ppm) | 0.4–0.8 (200–400 ppm) | Very light feed or water-only; avoid salts |
| Vegetative (Weeks 3-6) | 6.0–6.5 | 0.8–1.2 (400–600 ppm) | 1.0–1.4 (500–700 ppm) | Increase N; monitor Ca/Mg in coco |
| Early Flower (Weeks 1-4) | 6.0–6.5 | 1.2–1.6 (600–800 ppm) | 1.2–1.8 (600–900 ppm) | Shift to bloom formula, keep pH stable |
| Mid-Late Flower (Weeks 5-8+) | 6.0–6.5 | 1.4–1.8 (700–900 ppm) | 1.4–2.0 (700–1000 ppm) | Watch for salt buildup; taper K late flower if needed |
| Flush/Harvest Week | 6.0–6.5 | <0.5 (250 ppm or lower) | <0.5 (250 ppm or lower) | Run plain pH’d water to reduce residuals |
Key insight: Soil requires lower EC and less frequent feeds because of buffering; coco needs regular Ca/Mg and moderate EC; hydro must be the most precise with daily monitoring. Adjust numbers based on plant response, genetics, and local water composition.
Understanding these principles lets growers tune feed and water to the medium and plant stage, reducing stress and maximizing yield and quality. When implemented consistently, medium-specific feeding and watering eliminate common physiological problems and accelerate reliable results.
Pest, Mold, and Disease Management
Effective pest, mold, and disease management begins with disciplined inspection and a layered IPM (Integrated Pest Management) approach: observe frequently, act proportionally, and prefer non-chemical controls first. Regular inspection uncovers issues while they’re small; biologicals and cultural controls stop outbreaks before chemicals become necessary. Below are actionable practices, checklists, and decision rules that fit both small grows and commercial rooms.
Daily/weekly inspection checklist
- Daily — Quick visual sweep: Check canopy tops and new growth for stippling, webbing, discoloration, or sticky residues.
- Daily — Environmental readouts: Confirm
RH, temperature, and CO2 (if used) are within target ranges for the cultivar. - Weekly — Close inspection: Use a 10x loupe to inspect undersides of leaves and soil surface for eggs, nymphs, or larvae.
- Weekly — Root and substrate check: Smell and lightly lift pots for over-saturation, sliminess, or root discoloration.
- Weekly — Recordkeeping: Log pest sightings, environmental deviations, and any interventions.
Identification fundamentals
Spider Mite: Tiny, fast-moving arthropods; leave stippling and fine webbing.
Aphid: Soft-bodied insects; exude sticky honeydew and attract sooty mold.
Powdery Mildew: White powder across leaf surfaces; spreads rapidly in high RH and poor airflow.
Botrytis (Bud Rot): Gray fuzzy mold inside dense flowers; often invisible until advanced.
IPM best practices and non-chemical controls
Cultural control: Improve airflow, lower canopy humidity, and avoid dense pruning that restricts circulation. Sanitation: Remove dead plant material, sanitize tools with 70% isopropyl between plants, and quarantine new genetics for two weeks. Physical control: Use sticky traps, predatory mite release points, and yellow cards for aphids monitoring. Biologicals: Release predatory mites (e.g., Phytoseiulus persimilis for spider mites), lady beetles for aphids, and apply beneficial fungi/bacteria like Bacillus subtilis for foliar protection.
When to use chemical intervention
- Assess infestation size and trajectory against threshold levels.
- Prefer targeted, low-toxicity options (neem oil, insecticidal soaps) and avoid broad-spectrum pesticides that kill beneficials.
- Use systemic chemistries only for severe, uncontrolled outbreaks and observe required pre-harvest intervals.
- Always follow label instructions and PPE requirements; document lots and applications for traceability.
Common pests/diseases with signs, most effective organic treatments, and urgency level
| Pest/Disease | Common Signs | Organic Controls | Treatment Urgency |
|---|---|---|---|
| Spider Mites | Fine stippling, webbing, rapid leaf bronzing | Predatory mites, miticidal soaps, horticultural oils |
High |
| Aphids | Sticky honeydew, curled leaves, colonies on new growth | Lady beetles, neem oil, insecticidal soaps | Medium |
| Powdery Mildew | White powder on leaves, reduced photosynthesis | Bacillus subtilis foliar sprays, improve airflow |
High |
| Botrytis (Bud Rot) | Brown/gray fuzzy rot inside buds, sudden decay | Prune to increase airflow, remove infected buds | Critical |
| Fungus Gnats | Larvae in soil, poor root development, adult flies | Dry substrate cycles, Bti drenches, sand topdressing |
Medium |
Key insight: The table highlights that airflow and humidity control plus early biological interventions reduce the need for chemical treatments, while Botrytis requires immediate physical removal and often has the highest urgency. Tracking small signals and protecting beneficials preserves long-term crop health.
Understanding and applying these inspection rhythms and IPM layers keeps crops productive and minimizes risky chemical exposure, letting teams intervene early and efficiently.
Training, Pruning, and Maximizing Yield
Training plants reshapes their canopy to allocate energy into more bud sites and improve light penetration; timing and technique determine whether that energy becomes bigger colas or more evenly distributed yields. Experienced growers choose methods based on strain vigor, growth stage, and whether the genetics are photoperiod or autoflower—autoflowers tolerate only light, low-risk training because they have a fixed lifecycle. Successful programs combine low-stress training early, selective pruning mid-veg, and targeted high-stress techniques (when used) to force branching without crippling recovery time.
Topping: Cut the apical meristem to create two main leaders; best performed after 3–5 nodes. FIM (Fuck I Missed): Partial apical cut that can yield 3–4 leaders; slightly less predictable than topping.
When to apply training and pruning
Early veg (2–4 node stage): Low-Stress Training (LST) and initial topping/FIM work best here because recovery time is long. Mid veg (4–6 weeks): Supercropping and more aggressive LST shaping; defoliation begins cautiously to improve light to mid-canopy. * Pre-flower and early flower (week 0–2 of flower): Final canopy shaping, installing ScrOG net or tucking branches; avoid heavy high-stress work after week 2 of flower.
Expected improvements and practical outcomes
- Yield distribution: More colas and even canopy -> 10–40% higher usable yield depending on baseline.
- Bud quality: Improved bud density and resin exposure when light is evenly distributed.
- Turnaround risk: Over-training reduces stretch and can slow finish; autoflowers suffer greatest penalty from recovery delays.
Safe combinations and example schedules
- Veg week 2: perform topping (single cut) and begin gentle LST tucking.
- Veg week 4: continue LST, perform targeted defoliation of large fan leaves blocking light.
- Pre-flower: install ScrOG net, weave branches across the screen; stop high-stress techniques once pistils appear.
- Early flower week 2: one final light defoliation to open mid-canopy, then minimal interference.
- Rule of thumb: recovery time after high-stress methods should be at least 7–14 days before inducing flower for photoperiods.
Practical tips for strain selection and compatibility
- Bold selection: Choose vigorous photoperiods for aggressive training.
- Bold caution: Treat autoflowers gently—prioritize LST and light defoliation only.
- Bold integration: Use ScrOG with topping + LST for maximum canopy control.
Training methods by complexity, risk, yield impact, ideal timing
| Method | Complexity | Risk | Yield Impact | Best For |
|---|---|---|---|---|
| Topping/FIM | Moderate | Medium | Moderate–High (more colas) | Photoperiods with recovery time |
| Low Stress Training (LST) | Low | Low | Moderate (even canopy) | Autoflowers and photoperiods early veg |
| Supercropping | High | Medium–High | High (thicker branches, larger buds) | Vigorous photoperiod strains |
| ScrOG | Moderate | Low | High (max light efficiency) | Small spaces, even-stretching strains |
| Defoliation | Low–Moderate | Medium | Variable (improves mid-canopy) | Dense canopies; experienced growers |
Key insight: combining gentle LST early with one or two well-timed high-stress cuts and a ScrOG setup produces the most consistent lift in canopy productivity without sacrificing bud quality.
Understanding and applying these techniques with attention to strain and lifecycle lets cultivators expand usable canopy and quality while minimizing recovery windows and risk.
📥 Download: Cannabis Growing Checklist (PDF)
Harvesting, Drying, Curing, and Storage
Harvest when trichome development matches the cannabinoid/terpene profile you want: mostly milky trichomes for peak THC and energetic effects, and increasing amber for more sedative, degraded-THC (CBN) profiles. Plan the post-harvest workflow so each stage—cutting, drying, trimming, jar curing, and long-term storage—has clear environmental targets, checkpoints, and decision points to protect potency and preserve flavor.
Trichome reading and harvest timing
Trichomes: Glandular hairs on buds that hold cannabinoids and terpenes; inspected with a 30–60x loupe or microscope.
- Early harvest: Mostly clear trichomes → higher THCa, lower aroma.
- Peak harvest: ~70–90%
milkytrichomes, 5–20%amber→ high THC and balanced terpene retention. - Later harvest: >20%
amber→ increased CBN-like effects, heavier body.
Practical tip: Check multiple bud sites (top colas and lower nodes) — ripeness is rarely uniform. Photograph and log trichome percentages for future harvest optimization.
Drying vs Curing: conditions and timelines
- Drying phase: Removes free water to prevent mold; aim for 10–14 days in a dark, ventilated room.
- Curing phase: Gradual moisture equilibration in sealed containers to stabilize cannabinoids and develop terpene bouquet; plan for 2–8+ weeks, with longer cures improving smoothness and complexity.
- Hang whole plants or branches in a dark room with controlled air exchange.
- When stems snap (not bend), move trimmed buds into jars for the jar-phase cure.
- Perform scheduled burps: open jars daily for the first 7–14 days, then weekly.
Optimal environmental targets and handling
- Drying temp: 16–21°C / 60–70°F for slow, even drying.
- Drying RH: 45–55% to avoid case hardening or microbial growth.
- Curing jar RH: 58–62% for ideal terpene preservation and mold prevention.
- Long-term storage temp: <15°C / <59°F and low light exposure.
- Storage RH: 59–62% within sealed containers, or use desiccant packs to keep RH stable.
Proper storage to maintain potency and flavor
Oxygen control: Use airtight glass jars; consider vacuum sealing for multi-month storage.
Light protection: Store in opaque containers or a dark cupboard to prevent photodegradation.
Humidity management: Use calibrated 2-way humidity packs when precision matters.
Post-harvest timeline from cut to cured product with target conditions and checkpoints
| Stage | Duration | Temp (°C/°F) | Relative Humidity (%) | Key Actions |
|---|---|---|---|---|
| Cutting and Bucking | Same day | 18–22°C / 64–72°F | 45–60% | Cut plants, remove large fan leaves, move to drying space |
| Initial Drying | 7–14 days | 16–21°C / 60–70°F | 45–55% | Hang branches, maintain airflow, check stems for snap test |
| Trimming | 1–3 days | 18–22°C / 64–72°F | 45–55% | Trim buds (wet or dry trim depending on method), prepare jars |
| Curing (Jar Phase) | 2–8+ weeks | 16–21°C / 60–70°F | 58–62% | Place buds in jars, burp daily first 1–2 weeks, then weekly |
| Long-term Storage | Months to years | <15°C / <59°F | 59–62% | Move to cool, dark storage; use vacuum or humidity packs as needed |
Key insight: Follow slow, controlled drying first to protect terpenes, then use stable, moderate RH during jar curing to let biochemical processes finish — this sequence preserves potency and flavor while minimizing mold risk.
Understanding these principles shortens the feedback loop between harvest and product consistency. With careful environmental control and consistent record-keeping, yields move from variable to predictable while maximizing sensory quality.
Conclusion
You now have a practical roadmap from seed selection through drying and storage that removes the guesswork and brings reproducible results. Remember that deliberate choices in seed genetics, early germination technique, and environmental control compound over a full cycle: growers who prioritized stable genetics and consistent veg lighting routinely reported stronger root systems and a smoother flowering transition, while small-scale producers who tightened humidity and training protocols saw measurable yield gains. Common questions—when to switch nutrients, how aggressively to defoliate, and how long to cure—are answered by watching plant response and keeping records rather than guessing: adjust feeds at clear growth milestones, prune with yield goals in mind, and cure until buds no longer sweat.
Take three concrete next steps: – Audit your current strain choices and germination method to eliminate early losses. – Implement a one-month environmental log (light, temp, RH, runoff ppm) to spot trends. – Standardize a training schedule aligned to canopy goals so harvest timing is predictable.
For germination options and guaranteed seeds to streamline implementation, consult The Seed Connect strain catalog and germination resources at https://theseedconnect.com. With these adjustments in place, the cycle from undefined briefing to reliable harvest becomes a repeatable, optimized process.