
Leaves yellow along the margins while tiny webs form beneath—those early signs tell experienced growers more than any checklist. Observing pest patterns within the first week separates a recoverable crop from a lost one, and adopting sustainable pest management practices early saves time, yield, and regulatory headaches. Practical choices made at detection determine whether you escalate to chemical controls or contain problems with targeted, low-impact tactics.
Integrated approaches change the conversation from reactive spraying to strategic ecosystem design, which is why integrated pest management matters for modern cannabis cultivation. Combining sanitation, biological controls, environmental tweaks, and precise monitoring reduces pest pressure without sacrificing potency or compliance. This guide begins with on-farm diagnostics and moves quickly into repeatable interventions growers can apply across indoor and greenhouse environments.
Overview: Principles of Sustainable Pest Management and IPM
Integrated Pest Management for cannabis centers on preventing pest problems first, then using the least disruptive interventions to keep pest populations below damaging thresholds. This approach reduces reliance on broad-spectrum pesticides, protects beneficial organisms, and preserves product quality for both indoor and outdoor cultivation.
What is Integrated Pest Management (IPM) for Cannabis?
IPM: A decision-driven framework that combines monitoring, cultural, physical, biological, and chemical tactics to manage pests while minimizing environmental, health, and product impacts.
Sustainable pest management: Practices that prioritize prevention, conserve beneficial species, and use interventions proportionally based on measured pest pressure.
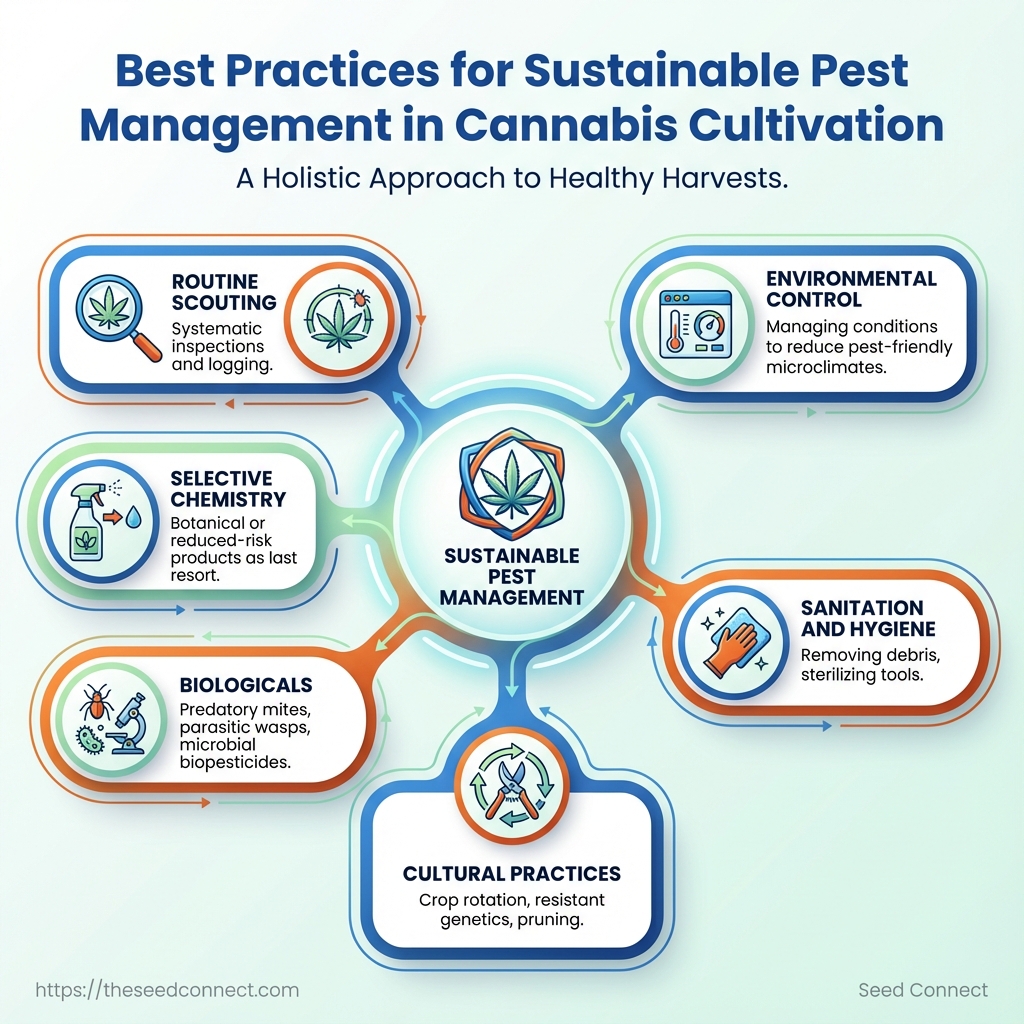
IPM components tailored to cannabis cultivation
- Routine scouting: Systematic inspections for pests and symptoms, recorded weekly in vegetative and flowering rooms.
- Environmental control: Managing temperature, humidity, and airflow to reduce pest-friendly microclimates.
- Sanitation and hygiene: Removing plant debris, sterilizing tools, and controlling human traffic to break pest life cycles.
- Cultural practices: Crop rotation (outdoor), resistant genetics, and pruning to reduce pest habitat.
- Biologicals: Predatory mites, parasitic wasps, and microbial biopesticides deployed as targeted controls.
- Selective chemistry: Using botanical or reduced-risk products only when other measures fail, with strict withholding times.
- Recordkeeping & thresholds: Clear action thresholds documented per pest and growth stage.
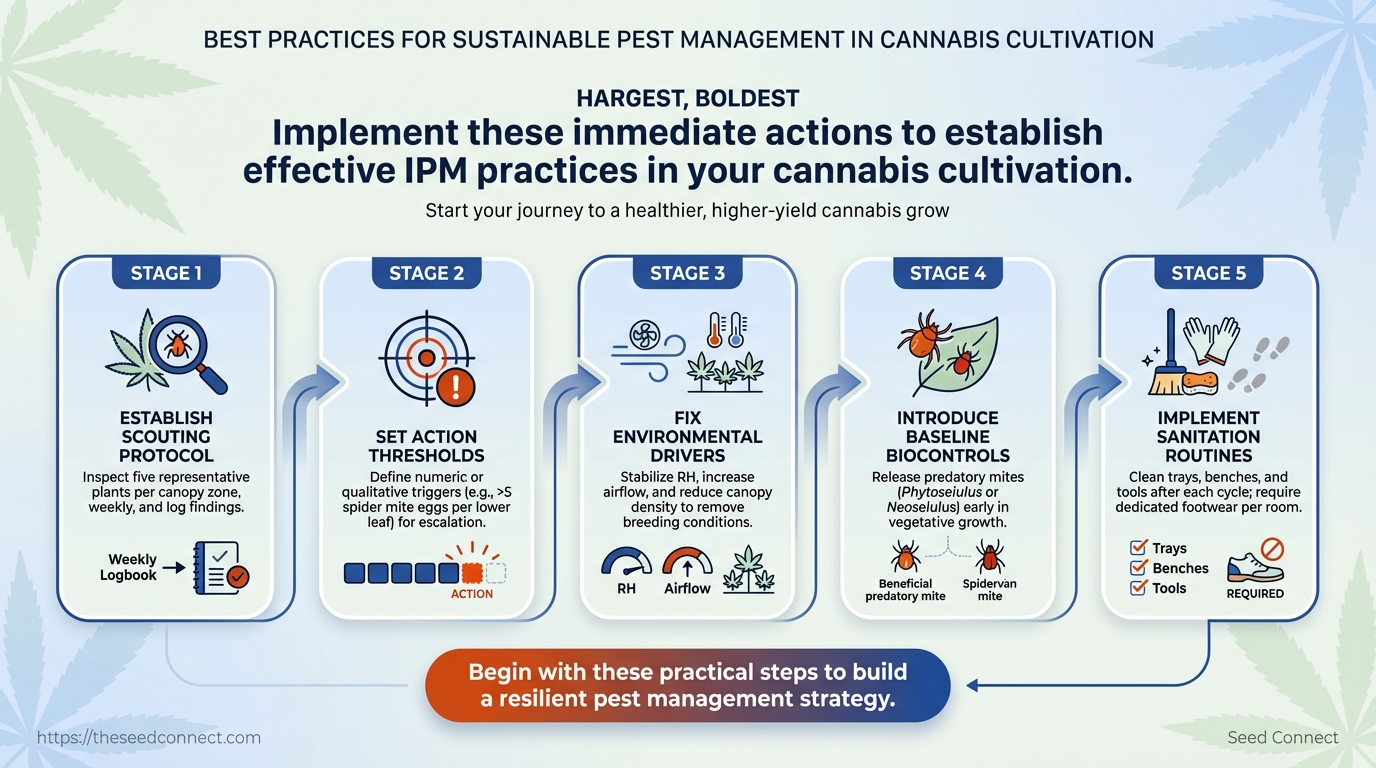
Immediate actions for growers to adopt
- Establish a simple scouting protocol: inspect five representative plants per canopy zone, weekly, and log findings in a central spreadsheet.
- Set action thresholds: define numeric or qualitative triggers (e.g., >5 spider mite eggs per lower leaf) that prompt escalation.
- Fix environmental drivers: stabilize RH, increase airflow, and reduce canopy density to remove breeding conditions.
- Introduce baseline biocontrols: release predatory mites (
PhytoseiulusorNeoseiulus) early in vegetative growth. - Implement sanitation routines: clean trays, benches, and tools after each cycle; require dedicated footwear per room.
Practical examples and checks
- Example — Small indoor: Weekly sticky cards, targeted predatory mite releases, and a single spot-treatment with neem when threshold met.
- Example — Outdoor commercial: Barrier netting, row sanitation, pheromone traps, and strategic releases of parasitic wasps.
### Types of pest control (cultural, physical, biological, chemical) and list pros/cons and suitability for different grow scales
| Control Type | How It Works | Best Use Cases | Risks/Limitations |
|---|---|---|---|
| Cultural Control | Altering practices to reduce pest habitat | Routine pruning, resistant genetics; small & large farms | Labor-intensive; slow payoff |
| Physical Control | Barriers, traps, heat/cold treatments | Sticky traps, exclusion nets, hot-water seed treatments | Limited scalability; may stress plants |
| Biological Control | Predators, parasitoids, microbial agents | Greenhouses and IPM programs; preventive use | Requires monitoring; temperature-sensitive |
| Botanical/Organic Chemical | Plant-derived pesticides, oils, soaps | Spot treatments in certified organic operations | Phytotoxicity risk; short residual activity |
| Synthetic Chemical | Conventional insecticides/miticides | Severe outbreaks where residues managed | Resistance development; remainder & worker safety |
Key insight: Combining control types yields robustness—cultural and physical measures reduce initial pressure, biologicals maintain low pest levels, and selective chemistry remediates spikes while preserving beneficials.
Understanding these principles makes pest problems manageable without sacrificing yield or product integrity. When implemented deliberately, IPM shrinks treatment costs and protects long-term crop health.
Prerequisites: What You’ll Need
Successful germination and early-stage grow work because the basics are in place before the first seed touches the medium. Expect to gather a compact set of reliable tools, consumables, and a few practical skills that remove guesswork during the critical first two weeks of growth.
### Tools & materials checklist
- Quality seeds: Select feminized, autoflower, or high-THC genetics that match your goals; client offerings like Theseedconnect provide a germination guarantee for confidence.
- Germination medium: Use sterile seed starter plugs or a balanced soilless mix no more than 1″ deep.
- pH meter: A digital pH meter for substrate and runoff, accurate to ±0.1 pH.
- TDS/EC meter: Monitor nutrient concentration with a
ppmor EC reading for controlled feeding. - Temperature and humidity monitor: Maintain
70–80°Fand40–60%RH for most strains. - Lighting: A dimmable LED with adjustable intensity and spectrum for seedlings.
- Clean water source: Filtered or dechlorinated water, target
pH 5.8–6.5depending on medium. - Labeling system: Waterproof tags and a logbook or digital tracker for strain, date, and notes.
Each bullet above represents a minimum-quality expectation for repeatable results.
### Skills checklist
Seed identification: Recognize seed health (firm, dark, intact) and distinguish seed types by breeder notes.
Record keeping: Track germination date, lot number, moisture events, and any fertilizer doses in a simple spreadsheet or notebook.
Safe chemical use: Read labels, mix nutrients with protective gloves and eyewear, store concentrates locked and labeled.
### Regulatory & compliance reminders
Local licensing rules: Confirm local laws for seed purchase, possession, and cultivation before buying.
Pesticide restrictions: Use only products approved for cannabis in your jurisdiction and follow label rates.
Waste disposal: Handle nutrient runoff and chemical containers per municipal hazardous-waste guidelines.
- Inspect seeds visually and log lot information.
- Prepare medium and calibrate meters.
- Set environmental controls and label trays before planting.
Understanding these prerequisites reduces early losses and speeds iteration on genetics and technique. Having the right gear and disciplined records turns small experiments into reliable results.
Step-by-Step Implementation (Numbered Steps)
Start by building a consistent monitoring culture: frequent, structured observations catch problems when they’re smallest and cheapest to fix. Set clear inspection cadences tied to plant stage, standardize how observations are recorded, and define action thresholds before applying any treatment. This system reduces guesswork, preserves beneficial organisms, and keeps compliance straightforward for licensed operations.
Tools & materials
- Monitoring: sticky traps, hand lens, moisture meter
- Environment control: hygrometer, thermostat, inline fans, dehumidifier
- Biologicals: predatory mites, beneficial nematodes, Bacillus spp. products
- Low-impact treatments: insecticidal soaps, horticultural oils, microbials
- Records: inspection log template, treatment log, supplier lot tracking
- Establish a Monitoring Routine and Baseline
- Implement Cultural and Environmental Controls
- Deploy Biological Controls and Beneficials
- Apply Targeted, Low-Impact Treatments When Needed
- Use Physical Controls and Mechanical Removal
- Rotate Strategies and Maintain Records for Long-Term Control
Set inspection frequency by growth stage: seedling/clone every 2–3 days, vegetative 3–7 days, flower 7–10 days. Use sticky traps in each room quadrant and rotate placement weekly. Conduct spot checks on high-risk plants (lower canopy, new cuts) with a hand lens. Record findings consistently: date, location, pest ID, severity (1–5), and environmental readings. Define thresholds: e.g., treat when mite count >5/leaf or 5% plants show white powdery mildew.
### What success looks like Low early-detection counts, consistent trend lines in the log, and fewer escalations to chemical treatments.
Institute sanitation protocols: clean tools between rooms, boot baths, and a quarantine area for new material. Set environmental setpoints to reduce pest/disease pressure: temperature 65–75°F, RH 40–55% in flower, and VPD targets appropriate for stage. Schedule changes during low-activity windows and verify with data loggers for 72 hours after adjustments.
Choose beneficials by target: predatory mites for spider mites, Hypoaspis for soil-dwelling pests, Steinernema spp. for fungus gnats. Time releases early—establish before outbreaks or immediately on first detection. Follow supplier recommended rates and monitor efficacy via pre- and post-release counts. Watch for compatibility issues with broad-spectrum products.
Trigger treatments only after thresholds are met. Select low-residual, compliant options and rotate modes of action across episodes to avoid resistance. Apply evenly with fine nozzles, avoid drift to beneficial release zones, and log PPE used. Compliance: confirm label use for cannabis where applicable and maintain MSDS on file.
Prune infected tissue to healthy tissue margins and remove debris daily. Install screening on intake vents and sticky barriers at entry points. Isolate and dispose of heavily infested plants offsite following local regulations. Quarantine new genetics for the full inspection cycle before moving to production benches.
Plan rotations by rotating biologicals, product classes, and cultural tactics on a seasonal calendar. Keep a treatment log that includes product, rate, lot number, applicator, and environmental conditions. Schedule quarterly audits and supplier reviews to validate product quality and changing pest profiles.
Understanding these steps speeds response time and reduces reliance on heavy chemistries, keeping crops healthy and compliant while protecting beneficial systems. When implemented consistently, this approach scales across rooms and seasons without losing control.
Troubleshooting Common Issues
Recurring infestations can usually be stopped by a rapid, methodical response that combines immediate containment with changes to the grow environment. Start by confirming the pest identity, isolate affected plants, and apply targeted tactics that remove the current population while addressing the conditions that let pests return. Below are practical diagnostics, step-by-step containment, and long-term strategies that growers can implement the same day and sustain over the season.
### Quick diagnostics for top pests
- Whiteflies — Tiny, moth-like insects visible when disturbed; sticky honeydew and sooty mold often follow.
- Spider mites — Fine webbing on undersides of leaves; tiny speckling and leaf bronzing.
- Aphids — Soft-bodied clusters on new growth; produce honeydew and attract ants.
- Fungus gnats — Small dark flies around soil surface; larvae in wet media damage roots.
- Thrips — Slender, cigar-shaped insects; silvering and streaking on leaves.
### Immediate containment (do this first)
- Remove and isolate the most heavily infested plants.
- Flush nearby trays and benches with clean water; reduce humidity and increase airflow immediately.
- Apply a contact control: spray affected leaves with a gentle insecticidal soap or
0.5%potassium soap, making sure to hit undersides. - Place yellow sticky traps and, where appropriate, release predatory biocontrols (e.g., predatory mites for spider mites).
- Clean tools, trays, and work surfaces with a
70%isopropyl solution before returning to the grow area.
### Long-term changes to prevent recurrence
- Optimize airflow and spacing: Crowding creates microclimates where pests thrive.
- Modify irrigation schedule: Fungus gnats and root pests prefer constantly wet media; allow surface to dry between waterings.
- Use resistant genetics where possible: Some strains show tougher foliage and faster recovery.
- Implement a rotation of biocontrols and soft chemistries: Prevents resistance buildup.
- Maintain a strict sanitation protocol: Quarantine new plants and inspect clones before introduction.
Scout frequency: Check plants 2–3 times per week during high-risk periods.
Integrated pest management: Combine monitoring, cultural controls, biologicals, and targeted treatments rather than relying on one method.
Understanding and interrupting the pest life cycle quickly prevents population rebound and reduces chemical dependence. Consistent scouting and small environmental changes often stop a recurring infestation before it becomes a crop-wide problem.
Regulatory, Safety, and Compliance Considerations
Regulatory compliance and safety practices are non-negotiable when handling cannabis seeds and associated inputs. Start by aligning operations to local laws, then embed safe product use, label compliance, and meticulous recordkeeping into standard operating procedures so every batch, shipment, and customer interaction can be traced and defended. This reduces legal risk, improves customer trust, and makes audits routine instead of disruptive.
### Safe product use: practical controls and PPE Follow label instructions exactly and treat labels as legally binding documents. Train staff to read and follow pesticide, nutrient, and seed-treatment directions before any application.
- Personal protective equipment (PPE): gloves, eye protection, NIOSH-approved respirators for aerosols, and disposable coveralls for seed treatments.
- Controlled mixing areas: use ventilated enclosures and secondary containment for liquid mixes.
- Storage rules: separate pesticides, nutrients, and seeds; lock away restricted materials; maintain
+4°Cto+20°Cranges per label for seed viability when specified. - Disposal: follow local hazardous waste rules for spent containers and unused chemistries.
### Label compliance: what to include and verify Labels must be legible, accurate, and reflect use limitations and safety statements. For seeds, include genetics, germination guarantee, lot number, origin, and any treatment (e.g., fungicide-coated).
- Verify each product label against supplier documentation before accepting inventory.
- Update labels immediately if formulations or instructions change.
- Keep a label-change log with date, approver, and reason.
### Recordkeeping: audit-ready documentation practices Good records turn inspections into quick checks rather than investigations. Build a consistent, searchable system that links seed lots to sales, germination results, and customer complaints.
- Batch traceability: record
lot number, supplier invoice, receiving temperature, and storage location. - Germination logs: test rate, method, tester initials, and date—retain for the length of the guarantee period.
- Training and SOP records: signed acknowledgements for every employee handling regulated materials.
- Create a standard file structure (physical or digital) and name conventions like
YYYYMMDD_supplier_lot. - Run quarterly internal audits: sample 10% of files, check for signatures, dates, and matching
lot numbers. - Produce an audit packet quickly by exporting batch records, SOP versions, and training logs.
SOP: Standard Operating Procedure documents the how-to for repeatable compliance.
Batch Record: Detailed log tying a specific lot through receiving, testing, storage, and shipment.
PPE: Personal protective equipment required for safe handling.
Implementing these controls minimizes regulatory exposure and speeds up responses to inquiries or recalls. When teams adopt straightforward record practices and consistent labeling, compliance becomes a competitive advantage rather than an administrative burden.
Tips for Success and Pro Tips
Successful pest and cost management starts with consistent observation and small, repeatable protocols that catch problems before they compound. Implement a monitoring rhythm, select reliable suppliers and beneficial organisms that match your environment, and adopt a few labor-saving workflows that keep costs predictable while preserving plant health. The following practical tips, examples, and short processes deliver immediate wins for sustainable pest management and efficient cannabis cultivation.
### Prerequisites
Regular inspection cadence: Daily quick scans; weekly detailed checks.
Baseline data: Records of humidity, temperature, and ppm/EC values for each crop cycle.
Supplier vetting checklist: Certificates, germination guarantee, and crop-specific strains.
### Tools & materials
- Integrated pest monitoring kit: sticky cards, hand lens, moisture probe.
- Beneficial organisms: predatory mites, parasitic wasps, entomopathogenic fungi.
- Simple lab tools: microscope or USB scope,
ECmeter, pH meter.
### Practical Pro Tips
- Implement a four-step weekly monitoring loop.
- Scan canopy visually and with sticky cards.
- Document abnormalities with timestamped photos.
- If pests detected, map hot spots and isolate affected benches.
Early detection: Use yellow sticky cards at canopy height to catch flying pests before populations explode. Targeted response: Treat only the infested zones to cut chemical and labor costs. Supplier choice: Prioritize vendors offering germination guarantees and transparent provenance; reputable seed suppliers (including those that provide feminized and autoflower seeds with germination support) reduce rework and replant costs. Beneficial match: Choose predators that fit microclimate—predatory mites for spider mites in dry rooms; Aphidius wasps for aphid outbreaks in vegetative rooms.
### Labor- and cost-saving tactics
- Batch inspections: Group plants by growth stage to reduce walk time and improve diagnostic accuracy.
- Standard operating photos: Keep annotated reference images for each pest/disease stage so technicians make consistent calls.
- Preventive cultural controls: Use resistant genetics where possible, maintain proper airflow, and avoid overhead watering to reduce humidity-driven pathogens.
Definition list
Integrated pest management: A layered strategy using monitoring, cultural controls, biologicals, and chemicals only when necessary.
Beneficial organism: A living agent deployed to suppress pest populations naturally.
When these principles are integrated into daily operations, teams spend less time firefighting and more time optimizing yield and quality. Understanding which measures prevent problems is what keeps costs down and crops healthy.

📥 Download: Sustainable Pest Management Checklist for Cannabis Cultivation (PDF)
Measuring Success and Continuous Improvement
Start by tracking a concise set of measurements that map directly to crop health, product quality, and business outcomes. Prioritize metrics that are actionable, easy to collect, and comparable across cycles so trends reveal practical levers for change. Use logs and audit-ready reports to make reviews routine, repeatable, and defensible.
Prerequisites
Clear SOPs: Written cultivation and post-harvest procedures that define when and how measurements are taken.
Baseline data: At least three previous cycles of comparable size to establish normal ranges.
Tools & materials
- Digital grow log or crop management platform for timestamped records.
- Scale and moisture meter for yield and wet/dry measurements.
- Lab access or partner for potency and contaminant testing.
- Spreadsheet or BI tool for trend charts and KPIs.
Which metrics to track and why
- Germination rate: Percentage of seeds that sprout; early indicator of seed quality and starting practices.
- Survival to transplant: Proportion of seedlings making it to first transplant; signals nursery environment issues.
- Cycle time (days): Seed-to-harvest duration; shorter timelines increase throughput but may affect quality.
- Yield per plant (g): Direct revenue driver and efficiency measure.
- Potency (THC/CBD): Product quality metric tied to pricing tiers and customer expectations.
- Pest/disease incidents: Count or severity score; critical for risk management and IPM validation.
- Cost per gram: Operational efficiency measure that combines inputs, labor, and overhead.
How to interpret trends
- Correlate metrics across time—if germination improves while survival drops, investigate nursery handling rather than seed quality.
- Watch rate-of-change not just absolute values; a steady 2% monthly drop in potency flags nutrient or light spectrum drift.
- Segment by strain and batch; averages can mask problematic genetics or supplier lots.
- Schedule monthly KPI meeting with cultivation, quality, and purchasing teams.
- Run a dashboard printout of last cycle vs. baseline and highlight deviations
>5%. - Audit 3 random batch logs for procedure adherence and sign-offs.
- For suppliers, request lot-level germination and purity reports, then run a 10-seed internal germination test.
- If a supplier’s lot falls below contract
thresholdfor two consecutive deliveries, initiate probationary sampling and escalate to replacement sourcing.
SOP for regular reviews and supplier evaluations
Logs and audit-ready reports
Grow log: Time-stamped entries of environmental conditions, inputs, and corrective actions.
Batch report: Harvest date, lot identifiers, yield, moisture, and lab results.
Deviation log: Description, root cause analysis, corrective actions, and verifier sign-off.
Supplier dossier: Certificates, lot tests, delivery records, and communication trail.
Example: If germination climbs from 85% to 92% after switching propagation trays, document the tray model, environmental setpoints, and re-run a 30-seed verification. That creates a defensible improvement path and a repeatable SOP.
Measuring and documenting performance this way turns intuition into repeatable gains and reduces variability that eats margins. When implemented consistently, continuous measurement frees teams to scale without losing control.
Conclusion
When yellowing leaves and tiny webs first appear, swift, informed action keeps a crop salvageable and productive. The approach described here blends early observation with layered controls: start with accurate monitoring, apply cultural controls to reduce pest pressure, introduce biological agents before populations explode, and reserve targeted chemical options as a last resort. A commercial greenhouse that adopted this sequence cut repeat outbreaks by more than half within a season, and several small-scale growers reported healthier canopies after switching to weekly trap-based monitoring and habitat diversification.
Take these next steps to convert theory into results: – Begin a 7‑day monitoring routine using sticky cards and detailed notes. – Implement one cultural change this week (e.g., airflow improvement or pruning schedule). – Trial a biological control in a confined area before full deployment.
Common questions — when to spray, how to choose predators, and how to document results — get answered by prioritizing thresholds, matching agents to target pests, and keeping a simple log. For seed-level support and strain-specific pest resilience tips, see The Seed Connect’s cultivation resources. Commit to these actions this month, and reassess pest dynamics after four weeks to refine your integrated pest management strategy for sustainable pest management in cannabis cultivation.