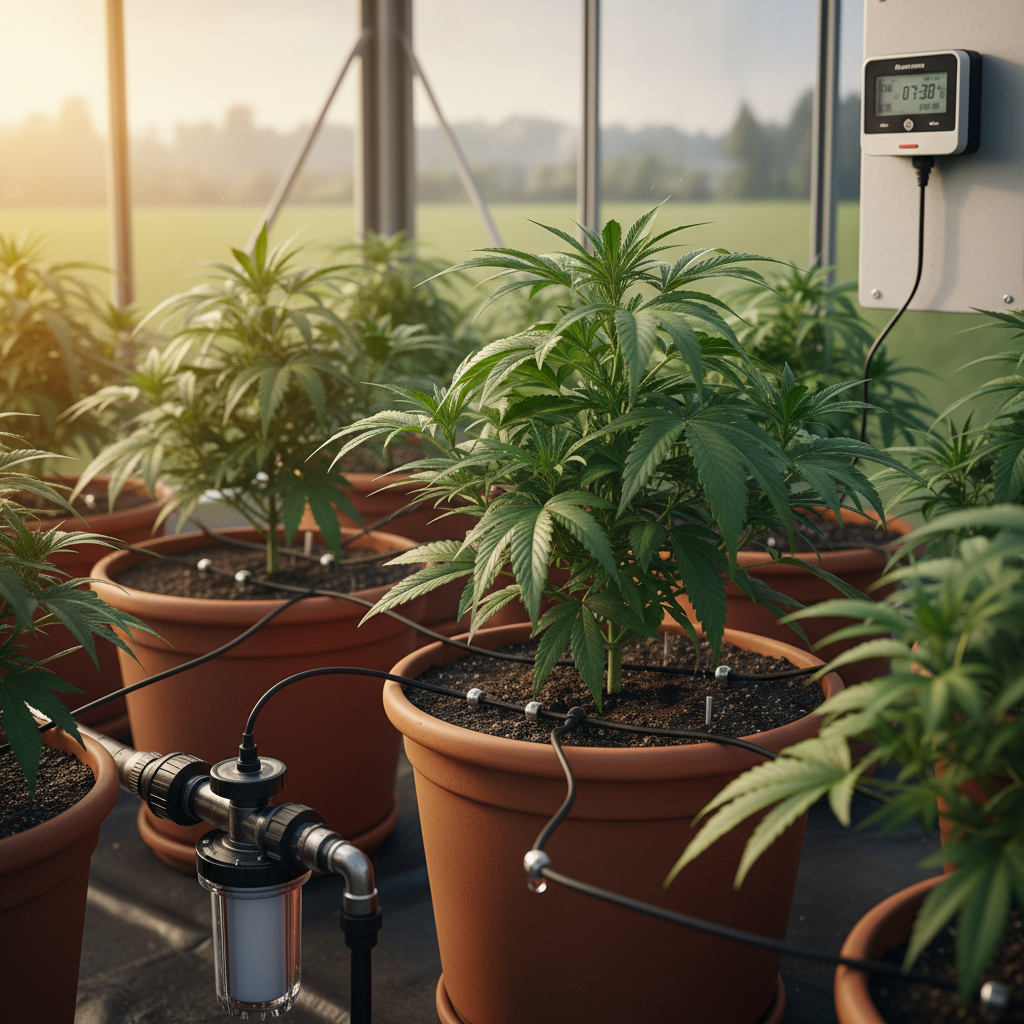
Soil stays soggy in one corner while the other pots curl brown by midweek—nothing wastes time like inconsistent watering during flower. Understanding cannabis irrigation means recognizing how water moves through media, how roots respond to wet-dry cycles, and why one method can cut runoff and stress while another shrinks yields. Experienced growers stop guessing and treat water as a managed input, not something that happens between feedings.
Think about a tent that runs perfectly for three cycles, then drips and drowns a tray overnight; that kind of variability kills uniformity and profit. Shifting to approaches that match plant demand—from pulse irrigation to controlled drip—reduces waste and stabilizes nutrient uptake, improving both potency and terpene expression. []
Prerequisites and What You’ll Need
Getting an efficient cannabis irrigation system online takes a handful of good tools, a little plumbing sense, and routine water testing. Start with the essentials listed below, then plan for a one- to two-day setup and a learning curve of a few grow cycles to dial timing and concentration. Typical difficulty: moderate — mostly straightforward plumbing and basic electrical hookup.
Tools & materials
- Irrigation controller: programmable timer to automate cycles and run multiple zones.
- Tubing and fittings: main supply tubing, distribution lines, hose clamps, and barbed fittings sized to your emitters.
- Emitters / drippers: pressure-compensating drip emitters or micro-sprayers matched to pot size and flow.
- Pressure regulator: keeps flow steady when municipal pressure fluctuates.
- Backflow preventer: required by many jurisdictions to stop irrigation water from re-entering mains.
- Reservoir: opaque tank sized to system (10–200+ L), with return plumbing if recirculating.
- Filters: inline sediment/mesh filters to protect emitters.
- pH and EC meters: accurate handheld meters for
pH 5.8-6.5and nutrient concentration monitoring. - Water meter / flow meter: optional but useful for tracking consumption and leaks.
- Basic plumbing tools: tubing cutter, adjustable wrench, PTFE tape, silicone sealant.
- Growing medium & trays: coco, soil, or hydro medium compatible with chosen emitters.
Skills required
Basic plumbing: fitting tubing, installing regulators, sealing threaded connections.
Water testing: using pH and EC meters and adjusting nutrient solution.
Reading moisture meters: interpreting wet/dry cycles and adjusting run times.
Electrical basics: wiring a low-voltage controller or installing a GFCI-protected outlet.
- Prep the reservoir and filter.
- Run supply tubing and install pressure regulator and backflow preventer.
- Lay out emitters, secure tubing with clamps, and connect to controller.
- Calibrate
pHand EC, run a test cycle, then inspect each emitter for even flow.
Required vs optional tools and expected cost/complexity
| Tool/Item | Required/Optional | Purpose | Estimated Cost Range | Skill Needed |
|---|---|---|---|---|
| Irrigation controller | Required | Automates cycles, multi-zone scheduling | $50–$400 | Basic electrical setup |
| Drip emitters | Required | Deliver precise water per pot | $0.10–$2 each (packs vary) | Low – placement accuracy |
| Pressure regulator | Required | Stabilizes line pressure for emitters | $15–$80 | Basic plumbing |
| pH meter | Required | Measure acidity for nutrient uptake | $30–$200 | Moderate – calibration practice |
| Reservoir | Required | Holds nutrient solution, buffer for system | $20–$300+ | Low – placement & venting |
Key insight: Investing in a reliable controller, pressure regulation, and accurate pH/EC meters prevents most common irrigation failures. Spend a bit more on filters and emitters that are easy to flush — that saves hours troubleshooting clogged lines later.
Getting these pieces right up front means fewer surprises during the first grow cycle and steadier yields over time. A calm, measured setup pays off in predictable watering and healthier plants.
Understanding Plant Water Needs and Scheduling
Plants signal what they need, but the way pots and media hold water — plus your grow room climate — actually determines when to water. For cannabis, water scheduling revolves around three levers: how much the medium retains, how fast the plant and environment remove water (evapotranspiration), and how you measure moisture reliably. Getting comfortable with those three lets watering move from guesswork to repeatable rhythm.
How medium and pot size change things
- Medium retention: Coarse coco or sandy mixes drain quickly and need more frequent, shorter waterings. Heavy composted soil holds more water and can stretch time between irrigations.
- Pot volume: Larger pots buffer fluctuations — they stay moist longer and allow less frequent watering. Small pots cycle dry fast and demand tighter schedules.
- Root density: A dense root ball will pull water faster than a young, sparse root mass; adjust frequency as plants mature.
Evapotranspiration basics and accounting for environment
- Evapotranspiration (ET): Combined water loss from soil evaporation and plant transpiration. ET rises with higher temperature, stronger airflow, and lower relative humidity.
- Practical rule: Warmer, drier rooms often double the watering frequency compared with cool, humid ones. Fans increase ET locally even if room RH is unchanged.
- How to respond: Reduce watering volume but increase frequency in high-ET conditions, or increase volume and slightly lower frequency in low-ET conditions.
Practical tests and measurement
Weight test: Pot feels light → likely time to water. Track pot weight when fully wet and again after allowing it to drain; use that full-to-dry delta to set a wet-weight target (e.g., water when pot reaches ~30–40% of saturated weight).
Moisture meter calibration: Insert the meter in several pots at consistent depth. Calibrate by comparing readings to the weight test and by sampling the medium with a small probe to feel for moisture. Mark meter reading that corresponds to the comfortable driest point for that stage.
Logging and refinement
- Record pot weight (wet and drain) on day 0.
- Log meter reading and environmental data (temperature, RH, fan speed) every watering.
- Note plant stage and visual cues (leaf limpness, new growth rate).
- Adjust schedule weekly based on trends.
Target moisture ranges and sample watering frequencies by growth stage and medium
| Growth Stage | Medium Type | Target VWC (%) | Typical Frequency (per day/week) | Notes |
|---|---|---|---|---|
| Seedling | Light soilless (peat/perlite) | 20–30 | 1–3 times/week | Keep surface slightly moist, avoid waterlogging |
| Vegetative | Coco/perlite | 40–55 | Daily to every other day | Higher uptake as leaf area expands |
| Early Flower | Potting soil mix | 40–50 | 3–5 times/week | Stabilize moisture to support bud set |
| Peak Flower | Coco/soil blend | 35–50 | 3–6 times/week | Maintain steady supply without oversaturation |
| Late Flower/Flush | Well-drained soil | 30–45 | 2–4 times/week | Gradually reduce to support ripening/flush |
Key insight: these targets are starting points — medium, pot size, and room ET dictate exact timing. Use weight and meter cross-checks to tune the numbers for your setup.
Keeping a short log of weights, meter readings, and HVAC conditions turns watering into a predictable process. Over a couple cycles you’ll stop guessing and start scheduling with confidence.
Choosing Efficient Irrigation Systems
Efficient irrigation starts with matching system capabilities to scale, labor and water goals. For cannabis grows that want consistent yields with minimal waste, pick a system that delivers precise volumes, integrates with nutrient dosing if needed, and matches your maintenance bandwidth. Small personal grows tolerate simpler setups; commercial rooms benefit from automated drip or recirculating systems with sensor feedback.
System comparison and how to choose
Misting/fogging: Useful for clones and humidification; not typically a primary irrigation method for flowering plants due to poor root delivery.
Selection criteria
- System scale: Small grows: hand-watering, soaker tubing, basic drip.
- Commercial: automated drip, ebb-and-flow with recirculation.
- Labor tolerance: Low: automation; High: manual acceptable.
- Water availability: Limited: recirculating systems or precise drip.
- Budget: Low: hand-watering/soaker; Medium–High: drip with controllers; High: full fertigation + sensors.
Sensors and fertigation
- Install a
soil moisture sensorper 6–12 plants for consistent feedback. - Add automated fertigation when scaling beyond manual dosing to maintain stable EC and pH.
- Integrate a controller with timed zones and fail-safes to prevent overwatering.
Practical setup steps
- Map irrigation zones to canopy layout and pot sizes.
- Choose emitter types and test
L/hflow to match media water-holding capacity. - Add filtration and a pressure regulator to protect emitters and pumps.
Choosing a system: quick examples
- Small personal tent: basic drip with 1–2 L/h emitters, manual timer.
- Medium bench grow: porous tubing with zone valves and one moisture sensor per zone.
- Commercial room: modular drip or ebb-and-flow, automated fertigation, multiple sensors.
Side-by-side evaluation of irrigation systems for water efficiency and suitability by grow scale
| Irrigation Type | Water Efficiency | Upfront Cost | Maintenance Level | Best Use Case |
|---|---|---|---|---|
| Drip (individual emitters) | High | Medium | Medium | Uniform pots, scalable commercial runs |
| Ebb-and-flow (recirculating) | High (recycles water) | High | High | Water-limited or large-scale nutrient control |
| Hand-watering | Low | Low | Low–Medium | Hobby tents, very small grows |
| Soaker hoses/porous tubing | Medium | Low–Medium | Low | Long benches, simple setups |
| Misting/fogging | Low for irrigation; high for humidity | Medium | Medium | Cloning, humidity control, not primary irrigation |
Key insight: Drip and recirculating ebb-and-flow systems lead on efficiency and uniformity, while hand-watering and porous tubing suit smaller operations with lower budgets; choose based on water goals, labor, and willingness to manage pumps/filters.
Picking the right system saves time, water and variability across the canopy. Invest in simple sensors early—consistent moisture control pays back in healthier plants and steadier yields.
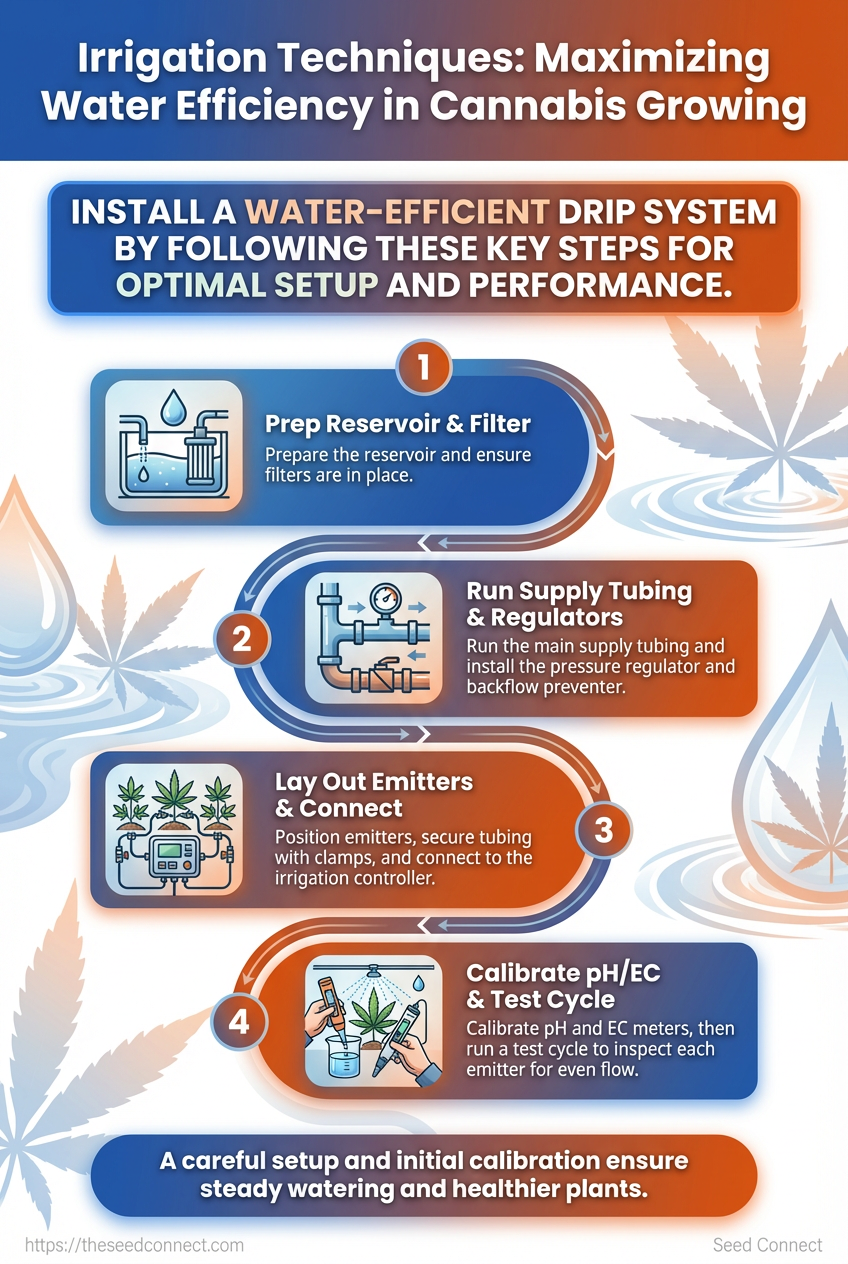
Step-by-step: Installing a Water-Efficient Drip System (Numbered Steps)
A good drip installation starts with a clear plan and ends with calibrated emitters that deliver consistent moisture where roots need it. Follow these numbered steps in order so the system runs efficiently, avoids clogging, and matches the watering schedule you chose earlier.
Prerequisites
Site assessment: Walk the grow area, note sun/shade, slope, and plant spacing.
Layout drawing: Sketch main line, manifolds, and each bed or pot row on paper or digital map.
Water source capacity: Verify flow (gallons per minute) and pressure (use a pressure gauge).
Permits/regs: Confirm local requirements for backflow prevention if connected to potable water.
Tools & materials
- Basic toolkit: pipe cutter, pliers, Teflon tape
- System components: filter, backflow preventer, pressure regulator, mainline tubing, distribution lines, stakes, emitters
- Test tools: pressure gauge, soil moisture meter, scale for pot weight tests
- Assess the site and finalize the layout, placing valves and manifolds so each zone covers similar plant groupings.
- Install the mainline connection at the water source and mount a filter and backflow preventer immediately downstream to protect the system and municipal supply.
- Fit a pressure regulator after the filter; set it to the system range, typically
20–30 psi, then run the mainline to the manifold locations. - Run distribution lines to each bed or pot row; secure tubing with stakes and keep runs as short and uniform as possible to reduce pressure variance.
- Install emitters and inline drip tubing, matching emitter flow-rates to plant needs—common options are
0.5,1.0, and2.0GPH—group similar emitters on the same zone. - Program the controller with the schedule from the earlier planning step, assigning watering duration and frequency per zone and allowing for seasonal adjustments.
- Test each zone: open valves, observe for leaks, and measure flow at representative emitters to confirm even output across the line.
- Calibrate emitter output using pot weight or soil moisture checks; adjust run times so each pot/bed reaches the target moisture without runoff—repeat tests after 24–48 hours and tweak durations as needed.
Common system benefits: Water savings: targeted delivery reduces waste. Root health: consistent moisture avoids stress. * Scalability: easy to add zones as the grow expands.
Proper installation makes later upkeep simple and keeps plants consistently fed and watered—do the homework up front and the system will repay the effort with reliable, water-efficient performance.
Automating and Optimizing: Sensors, Timers, and Controllers
Sensors and controllers do the heavy lifting once the environment is understood; good placement, regular calibration, and clear control logic turn sporadic watering cannabis plants into a predictable, efficient system. Start by treating sensors as the grow’s “eyes and ears”: they must sample representative microclimates, be calibrated to reliable baselines, and feed controllers that act on clear, conservative rules rather than guesswork.
Best sensor placement and why it matters
- Root-zone sensors: Place probes midway down the pot, off-center toward the active root mass, to measure moisture where roots actually extract water.
- Canopy sensors: Mount relative humidity and temperature sensors at plant canopy height, shaded from direct lights, to capture the microclimate plants experience.
- Ambient sensors: Place CO2 and room temperature sensors away from vents and walls to avoid biased readings.
- Drain/ runoff sensors: Position EC and pH probes in runoff channels or collection trays to detect salt buildup and drainage issues.
Calibration routine and frequency
- Clean probes with distilled water and a soft brush.
- Calibrate moisture sensors using a
dryandsaturatedreference: note readings in oven-dried media and fully wetted media. - Calibrate EC and pH sensors with fresh, certified calibration solutions following manufacturer instructions.
- Log calibration values and dates.
Do this initial cycle every week for the first month, then monthly once readings are stable. Recalibrate immediately after any sensor shock (flooding, chemical contact, power spikes).
Programming logic examples
- Moisture-based: If average pot moisture <
20%for two consecutive checks, run irrigation for30sper outlet; hold for 4 hours before next check. - Time-based fallback: Allow scheduled irrigation at low-rate night cycles (e.g.,
02:00) when moisture sensors are offline. - Weather-based (for greenhouse): If forecasted daytime temperature >
30°Cand humidity <45%, add a mist cycle tied to evapotranspiration estimates.
Data logging and interpretation
- Event logging: Record every irrigation start/stop, sensor reading, and calibration event with timestamp.
- Trend analysis: Plot weekly average moisture and EC to detect drift, root-bound drying patterns, or salt accumulation.
- Anomaly detection: Use simple rules—three consecutive out-of-range readings triggers a maintenance alert.
Troubleshoot sensor readouts and indicate corrective actions
| Symptom | Likely Cause | Immediate Fix | Preventative Action |
|---|---|---|---|
| Sensor reads constant high moisture | Waterlogged media or shorted probe | Remove probe, dry media, check wiring | Use protective sleeves, position probe mid-column |
| Sensor reads erratic values | Loose connection or contaminated probe | Tighten connectors, clean probe with distilled water | Secure connectors, schedule cleaning monthly |
| Controller not activating irrigation | Faulty relay or logic threshold too strict | Test relay, temporarily lower threshold | Add manual override, test relays quarterly |
| Uneven moisture across pots | Blocked emitters or inconsistent flow | Flush lines, replace clogged emitter | Use pressure compensating emitters, balance lines |
| High EC readings after irrigation | Salt buildup in root zone | Flush media with extra runoff | Implement scheduled leaching, monitor EC weekly |
Key insight: Consistent calibration and representative probe placement reduce false positives and unnecessary irrigation. Logging lets you move from reactive fixes to preventive maintenance, saving water and stabilizing plant stress.
Sensors and controllers won’t replace observation, but they make decisions repeatable and auditable. Set conservative automation rules, keep calibration disciplined, and the system will return steady yields and far fewer last-minute panics.
Water Quality, Nutrient Management, and Recycling
Water chemistry defines what nutrients are actually available to plants. Test and document incoming water for pH and TDS/ppm before it hits your system, then adjust nutrients and pH with those baseline numbers in mind. For most hydroponic setups, aim for pH 5.8–6.2; for soil-based grows, keep pH closer to 6.0–6.8. Typical electrical conductivity (EC) / ppm targets by stage are useful guides rather than hard rules: seedlings require very light feed, vegetative growth needs moderate EC, and bloom requires higher EC with bloom-focused formulations.
TDS/ppm: Total dissolved solids measured as electrical conductivity converted to parts-per-million; start every run by logging this value.
pH: Hydrogen ion concentration; influences nutrient uptake and should be checked daily in reservoirs and weekly in runoff.
Baseline record: Keep a simple spreadsheet with date, source TDS, source pH, reservoir EC/pH, and any adjustments made.
Practical EC/PPM target ranges (typical) Seedling: EC ~0.2–0.4 (100–200 ppm) — very light feed. Vegetative: EC ~0.8–1.2 (400–600 ppm) — steady, balanced macros. Early flower: EC ~1.2–1.6 (600–800 ppm) — increase phosphorus/potassium. Late flower: EC ~1.6–2.0 (800–1000 ppm) — watch for salt buildup.
Managing a recirculating reservoir safely requires a short checklist and a reliable routine: 1. Flush and replace reservoir water every 7–14 days, depending on plant load and EC drift. 2. Before reuse, measure reservoir EC, pH, and temperature and compare with baseline records. 3. If EC has risen >15% or pH drifted more than 0.3 units, discard and sanitize. 4. If reusing, filter water (sediment + carbon) and treat with UV or appropriate oxidizer to reduce microbial load. 5. Rebalance nutrients to target EC and adjust pH to the recommended range.
Water quality practices growers use Test daily: pH and EC in the reservoir. Document: Log all measurements and adjustments. Filter: Use sediment + carbon for particulate and organics. Sanitize: UV or oxidizers before recycling. * Rotate: Scheduled full replacements to prevent salt and pathogen accumulation.
Water filtration and sterilization options for recirculating systems
| Method | Effectiveness | Upfront Cost | Maintenance Frequency | Best For |
|---|---|---|---|---|
| Sediment filter | Removes particulates, protects downstream units | Low ($20–$100) | Replace cartridges monthly | Pre-filtration for any system |
| Activated carbon | Removes organics, chlorine taste/odor | Low–Medium ($30–$200) | Replace cartridges every 3–6 months | Improving water taste and organics control |
| Reverse osmosis | Removes dissolved salts, very low TDS | High ($200–$800) | Membrane change 1–3 years; filters quarterly | Starting water purification for RO-based builds |
| UV sterilizer | Kills microbes without chemicals | Medium ($80–$400) | Clean lamp sleeve yearly; lamp replace annually | Pathogen control for recirculating reservoirs |
| Chlorine/chloramine neutralizer | Neutralizes municipal disinfectants quickly | Low ($10–$50) | Add as-needed when using municipal water | Adjusting tap water prior to nutrient addition |
Key insight: Filtration layers work best together — sediment first, then carbon, then fine treatments (RO or UV) based on goals. Budget and plant density determine where to invest: small grows get big benefits from carbon + UV, while large recirculating systems often need RO plus routine sanitation.
Good water records and a predictable recycling routine reduce surprises, protect root health, and let nutrient adjustments be predictable rather than reactive.
Troubleshooting Common Issues
If irrigation starts misbehaving, the fastest wins are simple diagnostics and targeted fixes. Start with flow and reservoir checks, then move to emitters and controller logic; most problems fall into clogged parts, pressure mismatches, biofilm or salt buildup, or programming errors. The actions below are practical, step-by-step, and aimed at getting an automated watering system back to predictable performance.
Quick checks to run first
- Visual inspect: Walk the lines and look for drips, dry zones, puddles, or algae on the reservoir.
- Pressure check: Verify the pump or pressure regulator reads within the system’s recommended range.
- Manual run: Trigger a manual cycle from the controller to isolate electrical/programming issues from hydraulic problems.
- EC/readings: Measure reservoir
EC/ppmand compare to normal setpoints.
Clogged emitters: step-by-step fix
- Shut off the system and depressurize the line.
- Remove affected emitters and flush the supply line toward the pump to dislodge debris.
- Soak emitters in white vinegar for 30–60 minutes, scrub gently, then rinse.
- Replace any emitters that remain restricted.
- Restart and monitor for even flow.
Algae, biofilm and salt management
- Sanitize regularly: Empty and sanitize reservoirs monthly using a safe bleach or hydrogen peroxide protocol.
- Filter and cover: Fit inline filters and keep reservoirs covered to reduce light and organic growth.
- Flush schedule: Perform a complete line flush and
ECreset after each nutrient change.
Controller and scheduling issues
- Check time and daylight savings: Confirm controller clock and time zones.
- Verify program steps: Ensure cycles don’t overlap or create pressure drops.
- Backup and test: Export config, then run a single manual program to confirm behavior.
Quick-reference troubleshooting
matrix: problem -> immediate fix -> preventive action
| Problem | Immediate Diagnostic | Immediate Fix | Long-term Prevention |
|---|---|---|---|
| Emitter clog | Reduced or no drip at emitter | Remove, soak in vinegar, flush line | Install inline filters; periodic emitter soak |
| Uneven watering | Dry zones vs wet zones on run | Check pressure regulator and line layout; rebalance laterals | Use pressure-compensating emitters; even line runs |
| High EC in reservoir | EC/ppm reads above setpoint |
Partial drain and top-up or full flush | Regular reservoir monitoring and scheduled flushes |
| Root rot / hypoxia signs | Wilting despite wet media, slow growth | Reduce cycle length; improve drainage; aerate media | Adjust irrigation frequency; improve root-zone aeration |
| Controller programming error | Unexpected run times or no runs | Reset schedule; run manual test cycle | Maintain backed-up settings and label programs |
Key insight: Most irrigation failures are incremental—build-up, pressure drift, or a mis-scheduled program. A simple, methodical check from pump to emitter finds issues fast and prevents crop loss.
A few minutes of methodical troubleshooting usually restores normal operation and prevents repeat failures. Keep a small toolkit (filters, spare emitters, vinegar, EC meter) on hand and the next problem becomes routine to fix.
Tips for Success and Pro Tips
Precise irrigation beats guessing every time. Match water delivery to container size and root zone, check plants by weight, split long soaks into multiple short cycles when working with deep, heavy media, and keep a simple log to learn what your crop actually needs.
Emitter output: Match the emitter flow rate to pot volume — small pots (under 5 L) generally need 0.5–1.0 L/hr, medium pots (5–20 L) 1–2 L/hr, large pots (20 L+) 2–4 L/hr. Choosing the right emitter prevents overrun and uneven drying.
Soak cycles: Multiple short cycles let water percolate and oxygenate media more evenly than a single long soak, especially in deep or heavily amended soils.
Weight-based check: Weekly pot weighing reveals true water uptake and drift; it’s the simplest way to validate your schedule without digging into the media.
Irrigation log: A one-line daily log (date, run time, pot weight delta, notes) turns guesses into data and accelerates useful adjustments.
Practical steps to set this up:
- Calibrate emitters: Run a single emitter into a measuring container for 1 minute, record the volume, and calculate
L/hr. - Set initial schedule based on pot size and emitter calibration.
- Conduct a weekly weight check:
- Weigh representative dry pots to establish baseline dry weight.
- Weigh the same pots at the end of a watering cycle to get wet weight.
- Record the difference and compare week-to-week to spot trends.
- Adjust run times by 10–25% based on weight trends and plant response.
Practical examples growers use:
- Match output to pot: A 15 L fabric pot with a
1.5 L/hremitter run for 20 minutes delivers roughly0.5 L— ideal for slow, even wetting. - Short cycles for deep media: Run three 10-minute cycles spaced 15 minutes apart instead of one 30-minute cycle to improve percolation and oxygen retention.
- Weekly weight validation: If wet-to-dry delta drifts down 10% over two weeks, increase run time by 10% and recheck.
> Experienced growers rely on weekly weight checks to catch subtle shifts from evaporation, root expansion, or valve drift before plants show stress.
Keep the log simple and check weights consistently; the small time investment pays off with fewer surprises and more predictable yields.
📥 Download: Irrigation Techniques Checklist (PDF)
Maintenance Schedule and Long-term Optimization
A predictable maintenance rhythm keeps an irrigation system reliable and plants healthy. Build a calendar that combines quick weekly checks with deeper monthly, quarterly, and yearly tasks so small issues get caught before they cascade. The schedule below is practical for hobby and small commercial grows, and scales by frequency and crew size; larger operations simply batch the same tasks across zones.
Tools & materials needed
Pressure gauge: For spot-checking line pressure.
Replacement filters and tubing: Match your system specifications.
pH and EC meters: Calibrate before use.
Small wrenches / tubing cutter: For quick repairs.
Checklist clipboard or digital log: Track dates, technicians, and anomalies.
Weekly: visual inspection and line flush
- Inspect emitters, fittings, and visible tubing for leaks or blockages.
- Flush distribution lines after heavy nutrient feed to prevent salt buildup.
- Check reservoir level, pumps, and listen for unusual sounds.
- Clean or replace inline filters and screen filters.
- Inspect emitters more thoroughly and remove mineral deposits.
- Calibrate moisture and EC sensors; log calibration values.
- Deep clean reservoirs with a mild disinfectant and rinse thoroughly.
- Test backflow preventers and any check valves to ensure compliance and performance.
- Inspect pump seals and belts, and replace small-wear parts as needed.
- Review system capacity relative to crop load and plan upgrades if run-time or pressure drops are chronic.
- Replace worn main lines, aging pumps, and any components past manufacturer life recommendations.
- Audit system layout for efficiency gains (zoning, emitters per plant, timer optimization).
Monthly: filter and sensor maintenance
Quarterly: reservoir deep clean and safety checks
Yearly: capacity review and component replacement
Maintenance schedule with frequency and estimated time per task
| Task | Frequency | Estimated Time | Notes |
|---|---|---|---|
| Inspect filters | Weekly | 10–20 min | Quick visual and pressure check; swap clogged filters as needed |
| Clean reservoir | Quarterly | 45–90 min | Empty, scrub, disinfect, refill and rebalance nutrients |
| Calibrate moisture sensors | Monthly | 15–30 min | Calibrate with standard solutions; record offsets |
| Flush distribution lines | Weekly after feed | 20–40 min | Run clear water until outlet runs clear; reduces salt clogging |
| Replace worn tubing | Yearly (or as needed) | 30–120 min | Prioritize high-pressure/UV-exposed lines |
Key insight: Regular small investments of time—weekly inspections and monthly calibrations—prevent the long, costly downtime that comes from neglected components. Quarterly deep cleaning addresses biological and mineral buildup that weekly tasks miss, and an annual systems review ensures the irrigation footprint stays matched to crop needs.
A steady maintenance rhythm makes irrigation predictable and reduces surprise repairs, which means steadier yields and less time firefighting. Keep the log current and treat small anomalies as signals, not annoyances, and the system will repay the effort season after season.
Measuring Success: Metrics and Logging
Success starts with picking a small set of meaningful metrics and logging them consistently so trends become obvious instead of noisy. For irrigation and watering cannabis plants, focus on water efficiency, root-zone stability, and the plant-level effects on growth and yield. Track those with simple, repeatable measurements and a daily or per-event logging cadence so adjustments can be tied to outcomes.
Which KPIs matter
Water per plant/day (L): Daily average liters delivered to each plant.
Number of irrigation events/week: How often the system waters per plant.
Average EC (mS/cm): Root-zone electrical conductivity indicating nutrient concentration.
VWC stability (% volumetric water content): Variability and mean VWC from sensors.
Average plant weight gain (g/week): Short-term growth rate tied to irrigation changes.
Yield per plant (g): Final harvest weight per plant.
Estimated water cost savings ($): Operational cost reduction from optimization.
How to log effectively
- Create a spreadsheet where each row is one irrigation event or one plant-day.
- Include these columns:
- Log frequency:
water,EC, andVWCat every event; weights weekly; yield at harvest.
Date: YYYY-MM-DD
Plant ID: Tag or pot number
Water (L): Volume delivered per event
Events/day: Count for that plant
EC (mS/cm): Measured at drain/runoff or reservoir
VWC (%): From soil or substrate sensor
pH: Input and runoff if measured
Ambient Temp (°C): Environmental context
Grow Stage: Veg/flower/late-flush
Plant weight est (g): Weekly measurement or visual score
Notes: Pests, nutrient changes, anomalies
Practical example: 30-day baseline → optimized irrigation
Example 30-day baseline vs optimized irrigation metrics showing water use and yield impact
| Metric | Baseline (30d avg) | Optimized (30d avg) | Delta | Percent Improvement |
|---|---|---|---|---|
| Water per plant/day (L) | 4.2 | 3.1 | -1.1 | 26% |
| Number of irrigation events/week | 14 | 9 | -5 | 36% |
| Average EC (mS/cm) | 1.8 | 1.9 | +0.1 | 6% |
| Average plant weight gain (g/week) | 95 | 112 | +17 | 18% |
| Estimated water cost savings ($/plant/month) | $2.60 | $1.90 | -$0.70 | 27% |
Key insight: Reducing over-watering and spacing events increased effective uptake (slightly higher EC) and delivered an 18% faster weekly weight gain while saving ~27% on water costs — a clear win for efficient irrigation cannabis metrics and water savings.
Logging made the causal link visible: fewer, better-timed irrigations reduced leaching and stabilized VWC, which improved nutrient uptake and growth. Keep the spreadsheet tidy, review trends weekly, and use small controlled changes so each adjustment’s impact is measurable. These habits turn watering from an art into a repeatable science that boosts yield and cuts waste.
Conclusion
Getting irrigation right transforms a chaotic grow into a predictable one: consistent moisture, steadier nutrient uptake, and fewer rescue waterings during flower. Remember the practical wins covered earlier — swapping hand-watering for a low-pressure drip reduced dry spots and runoff in a multi-pot room, and adding soil moisture sensors plus a simple controller smoothed stretch and boosted uniformity across strains. Those moves matter because they target the three failure points: uneven delivery, poor timing, and unchecked water quality.
Start with a short checklist: calibrate your schedule to substrate and stage, install a pressure-compensated drip line, and add at least one soil moisture sensor per 4–6 pots. Track EC, run-off pH, and daily moisture for two weeks and adjust. If hands-on help fits the plan, resources like the SeedConnect irrigation guide walk through component choices and maintenance. Take these steps this week—set timers, run a flow test, log the first seven days—and you’ll see where small tweaks produce steadier growth and fewer surprises when plants hit flower.