



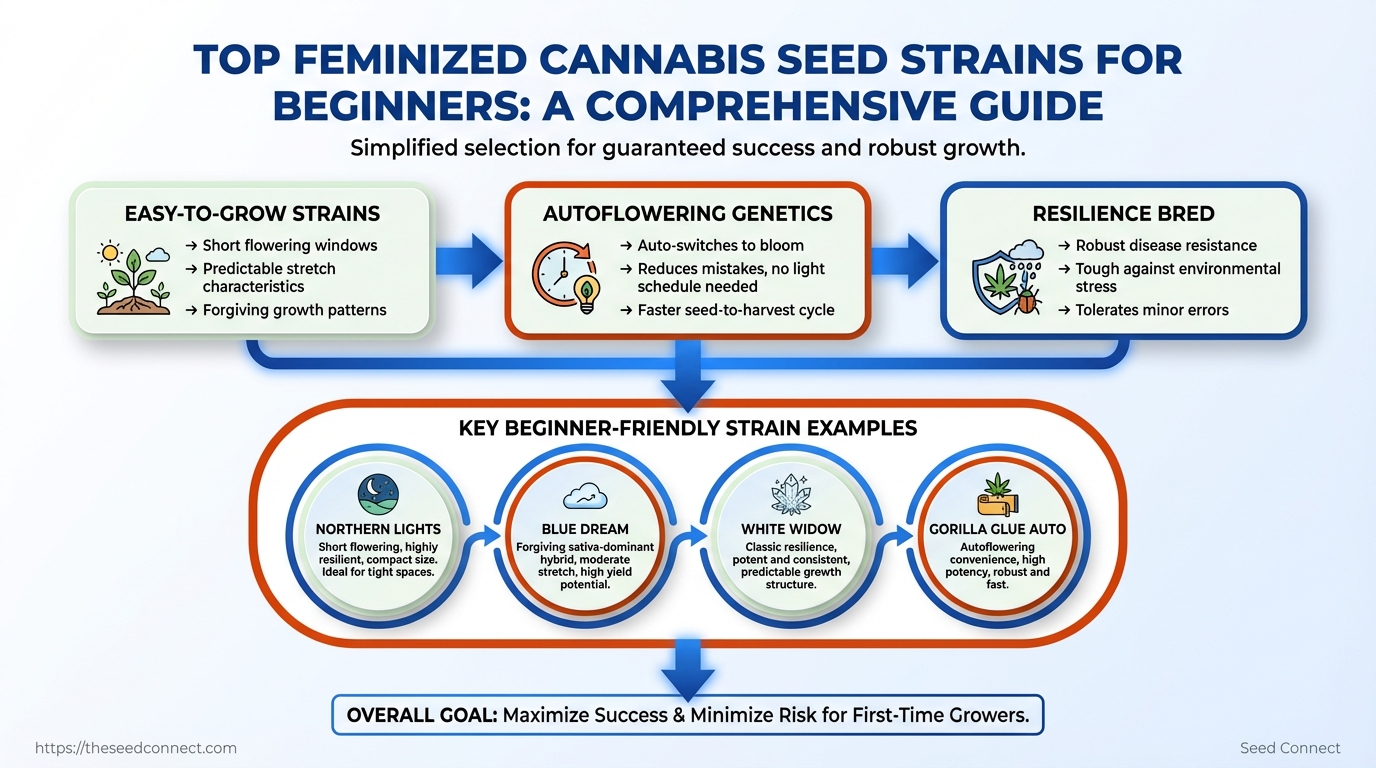
Choosing a seed seems easy at first. But issues like leggy seedlings or mildew can ruin your start. New growers see the same pattern: eager planning, mixed seed choices, and then poor germination or plants that struggle to grow. Selecting the best feminized strains and the right genetics for your setup greatly reduces the chance of failure.
Start by prioritizing easy-to-grow strains with short flowering windows, disease resistance, and predictable stretch characteristics, not flashy terpene profiles alone. For anyone trying cannabis for beginners, autoflowering genetics and strains bred for resilience reduce mistakes and speed confidence, especially when learning nutrient schedules and environmental control.
Why Choose Feminized Seeds: Beginner Advantages
Feminized seeds eliminate the worry of male plants. This…
Why Choose Feminized Seeds: Beginner Advantages
Feminized seeds eliminate the worry of male plants. This helps beginners focus on learning about watering, nutrients, and controlling their growing environment. Feminized genetics make planning easier. Each seed is likely to produce a female plant that bears buds.
This reduces wasted space, lowers legal risks from unwanted pollination, and simplifies the grow cycle.
Feminized: Seeds deliberately bred to produce female plants only, minimizing male plants in a crop.
Regular (non-feminized): Seeds that can produce either male or female plants; used for breeding and genetic stability.
Autoflowering: Seeds that switch from vegetative growth to flowering based on age rather than light cycle, often containing Ruderalis genetics.
Let’s dive into the key advantages and disadvantages to keep in mind.
- Pros — Feminized: Consistent yield: predictable number of flowering plants; Less space wasted: no culling of males; Simpler scheduling: no need to switch to flowering light cycle abruptly.
- Cons — Feminized: Higher seed price: premium for stability; Less breeding flexibility: unsuitable if planning to breed; Occasional hermaphrodites: stress can trigger hermaphroditism, requiring care.
- Pros — Regular: Genetic flexibility: ideal for breeding and maintaining landrace traits; Often hardier: some argue regulars show vigor.
- Cons — Regular: Sexing required: cull males early or risk pollination; Wasted resources: time and space lost on males.
- Pros — Autoflowering: Fast and compact: great for short seasons or discreet grows; Low maintenance: forgiving light schedules.
- Cons — Autoflowering: Smaller yields: generally lower per-plant yield; Limited training: topping and heavy stress can reduce performance.
Decision criteria to choose the right seed type
- Consider space limits and plant count.
- Assess available grow time and legal plant limits.
- Decide whether breeding is a future goal.
- Prioritize desired effects (THC/CBD, terpene profile) over convenience when necessary.
Quick side-by-side comparison of seed types to help beginners decide which to choose
Table: Why Choose Feminized Seeds: Beginner Advantages — Seed Type, Ease for Beginners, Typical Grow Time & more
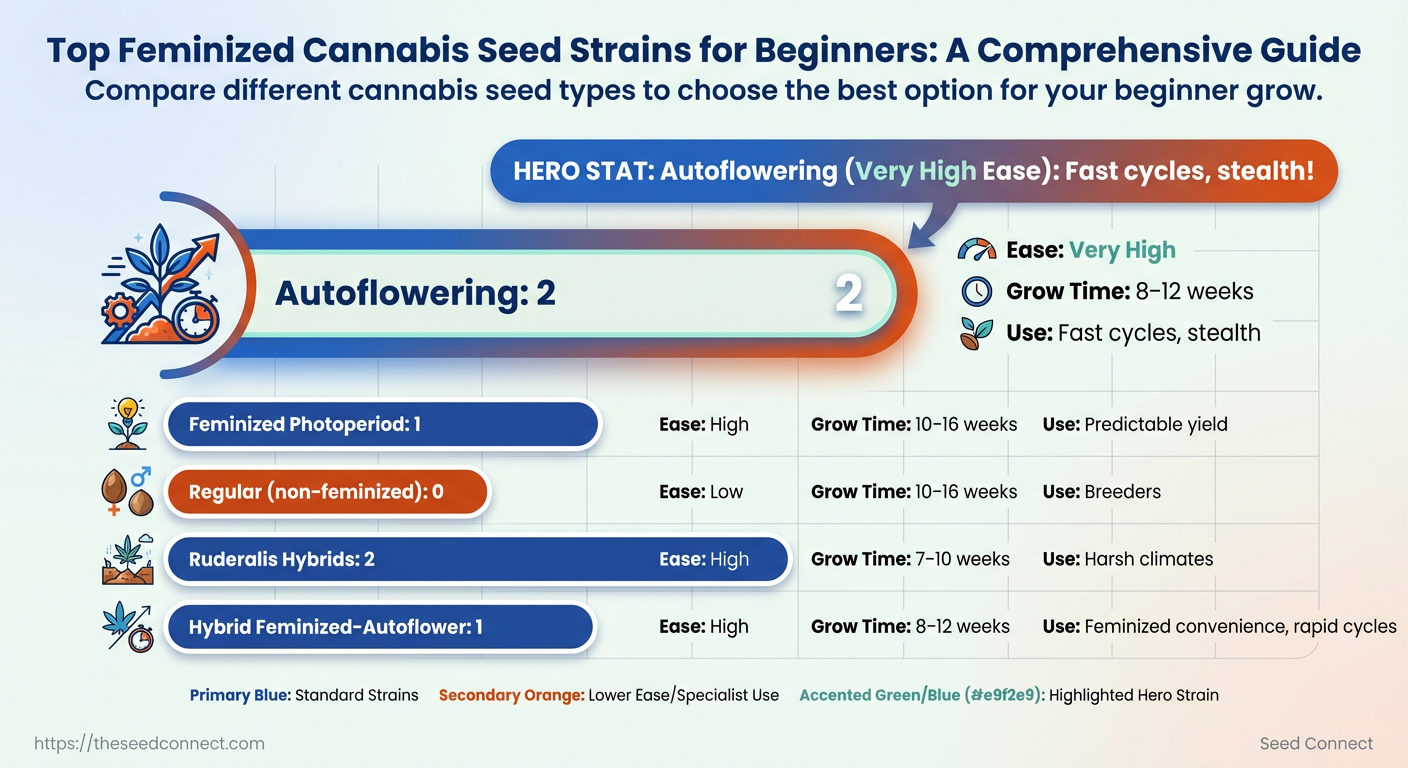
| Seed Type | Ease for Beginners | Typical Grow Time | Best Use Case |
|---|---|---|---|
| Feminized Photoperiod | High — very beginner-friendly | 10–16 weeks flowering depending on strain | Home growers wanting predictable yield |
| Regular (non-feminized) | Low — requires sexing skills | 10–16 weeks flowering | Breeders and genetic preservation |
| Autoflowering | Very high — simple light routines | 8–12 weeks seed-to-harvest | Fast cycles, stealth, limited space |
| Ruderalis Hybrids | High — very hardy, quick | 7–10 weeks rapid cycles | Harsh climates, very short seasons |
| Hybrid Feminized-Autoflower | High — combines simplicity and feminized traits | 8–12 weeks balanced | Growers wanting feminized convenience with rapid cycles |
For beginners focused on learning cultivation rather than breeding, feminized seeds from a reputable supplier reduce early mistakes and speed skill development. Choosing the right seed type aligns grow goals with space, time, and legal constraints so effort goes into plant care instead of troubleshooting basic sexing or accidental pollination.
What You’ll Need — Prerequisites and Materials
Starting a small cannabis grow only needs a few reliable items…
What You’ll Need — Prerequisites and Materials
You only need a few reliable items and basic skills to start a small cannabis grow. Everything else is about your preferences and the size of the grow. For most feminized or autoflower seeds, the time from germination to harvest usually ranges from 8–16 weeks. This varies based on genetics and whether the seed is photoperiod or autoflower.
Difficulty is Easy — Beginner when choosing stable, easy-to-grow genetics and following simple, repeatable routines for watering, light scheduling, and basic pruning.
Time estimate: Germination to harvest typically ranges from 8–16 weeks depending on strain type and desired plant size.
Difficulty level: Easy — Beginner. Many modern feminized and autoflower strains are bred for predictable growth, rapid flowering, and forgiving nutrient windows; beginners succeed by keeping inputs consistent and learning to read plant cues.
Basic plant care literacy: Understand watering, light schedules, and simple nutrient dosing.
Observation skills: Be able to spot yellowing leaves, nutrient burn, or pests early.
Legal compliance: Confirm local laws and limits for cultivation.
Tools & materials (minimum practical kit)
- Seeds: High-quality feminized or autoflower seeds — choose genetics labeled as beginner-friendly.
- Grow medium: Quality potting soil or soilless mix with good drainage.
- Containers: 3–10 L pots depending on target plant size.
- Lights: Full-spectrum LED or compact fluorescents for small grows.
- Basic nutrients: Vegetative and bloom formulas with simple feeding charts.
- pH kit: pH meter or test kit to keep water/soil around
pH 6.0–6.8. - Ventilation: Oscillating fan and modest intake/exhaust for fresh air.
Optional upgrades that speed progress
- Inline fan + carbon filter for smell control and airflow.
- PH/EC meter for precise nutrient control.
- Trellis/netting for training and higher yields.
Basic skills to develop
- Learn a simple watering schedule and avoid overwatering.
- Read leaves: yellowing, curling, or spotting indicates a likely nutrient or pH issue.
- Practice a single light schedule for vegetative and flower phases.
Practical example: a beginner chooses an autoflower feminized seed, uses a 7 L pot in a 6000K LED for veg, feeds half-strength nutrients, and harvests at 10–12 weeks.
Understanding and assembling these basics makes the rest of the process predictable and low-risk. When those fundamentals are in place, growers can focus on strain choice and refining technique without unnecessary complications.
Selecting the Best Feminized Strains for Beginners
For your first grow, pick feminized genetics…
Selecting the Best Feminized Strains for Beginners
For your first grow, pick feminized genetics that make things easier. Choose seeds with reliable flowering, good nutrient tolerance, compact growth, and resistance to common pests and mold. Selection favors strains with short-to-medium flowering windows, stable genetics from established breeders, and clear grower reports showing predictable yields under basic care. The list below uses those criteria and focuses on varieties that perform well indoors and outdoors for growers who want straightforward results without advanced training or complex feeding schedules.
Selection criteria: Genetic stability: predictable female-only flowers. Flowering time: shorter windows reduce risk and attention. Hardiness: tolerance to typical beginner mistakes (light variation, small nutrient errors).
Yield vs. size: reasonable harvests from limited space. Effect clarity: consistent, easy-to-identify cannabinoid/terpene profiles.
Top 10 beginner-friendly feminized strains (profiles and quick tips)
Northern Lights: Overview — Classic indica-leaning variety with mellow, sedative effects. Grow specifics — Flowering 7–8 weeks; compact plants that suit small tents. Keep feeding moderate; nitrogen excess can reduce bud density.
Blue Dream: Overview — Balanced hybrid with uplifting daytime effects. Grow specifics — Flower 9–10 weeks; stretches moderately during early flowering. Low-stress training enhances yields without complex pruning.
White Widow: Overview — Resilient hybrid known for heavy resin and balanced effects. Grow specifics — Flower 8–9 weeks; resists common molds. Maintain good airflow to maximize trichome development.
Early Skunk: Overview — Fast-flowering hybrid optimized for short seasons. Grow specifics — Flower 7–8 weeks; great for outdoor or SOG setups. Ideal for staggered planting to ensure steady harvests.
Harlequin: Overview — High-CBD option, great for beginners seeking mild, functional effects. Grow specifics — Flower 8–9 weeks; less demand for high nutrients. Monitor phosphorus late in flowering for best cannabinoid expression.
Girl Scout Cookies: Overview — Potent hybrid with rich terpene profile. Grow specifics — Flower 9–10 weeks; responds well to SCROG. Moderate defoliation improves light penetration to lower buds.
Critical Mass: Overview — Extremely high-yielding indica for compact grows. Grow specifics — Flower 7–8 weeks; heavy colas may need support. Use trellis or stakes late in flowering to avoid stem breakage.
AK-47: Overview — Easy-going hybrid with steady resin production. Grow specifics — Flower 7–9 weeks; forgiving of minor nutrient swings. Maintain stable pH to avoid lockouts that slow growth.
Green Crack: Overview — Energetic sativa-leaning strain, good for daytime use. Grow specifics — Flower 8–9 weeks; benefits from topping to control height. Short, frequent feeds keep vigor without nutrient burn.
OG Kush: Overview — Iconic, resin-heavy hybrid with strong aroma. Grow specifics — Flower 8–10 weeks; aroma can be intense indoors. Carbon filtration or odor control is essential for discreet grows.
Summarize strain attributes (flower time, yield, difficulty, dominant effect)
Table: Selecting the Best Feminized Strains for Beginners — Strain, Flowering Time, Estimated Yield (g/plant) & more
| Strain | Flowering Time | Estimated Yield (g/plant) | Difficulty Rating |
|---|---|---|---|
| Northern Lights | 7–8 weeks | 350–450 | Easy |
| Blue Dream | 9–10 weeks | 450–550 | Moderate |
| White Widow | 8–9 weeks | 350–500 | Easy |
| Early Skunk | 7–8 weeks | 300–450 | Easy |
| Harlequin | 8–9 weeks | 300–400 | Easy |
| Girl Scout Cookies | 9–10 weeks | 400–500 | Moderate |
| Critical Mass | 7–8 weeks | 500–700 | Moderate |
| AK-47 | 7–9 weeks | 350–500 | Easy |
| Green Crack | 8–9 weeks | 300–450 | Moderate |
| OG Kush | 8–10 weeks | 350–500 | Moderate |
Understanding these choices makes selecting a starter strain less trial-and-error and more about matching goals to grow space, time, and tolerance for maintenance. When matched to your environment and schedule, these feminized varieties deliver consistent results without steep learning curves.
Key Takeaway: Start by viewing the entire process as a series of measurable steps. Each phase has clear environmental targets, timing, and simple troubleshooting so growers can spot deviations quickly and fix them before they affect yield.
Step-by-Step Grow Guide: Germination to Harvest (Numbered Steps)
Start by viewing the entire process as a series of measurable steps. Each phase has clear environmental targets, timing, and simple troubleshooting so growers can spot deviations quickly and fix them before they affect yield.
- Germination (0–7 days)
Start seeds in a sterile medium. Soak seeds in room-temperature water for 12–24 hours until the seedcoat darkens, then place between moist paper towels or in a plug of propagation mix at 22–25°C and ~80–90% relative humidity. Check twice daily and transfer once the taproot is 2–5 mm.
Plant point-down 3–5 mm into the chosen medium.
If seeds fail to sprout by day 7, test another seed; weak germ rates often indicate old or improperly stored seed. Keep humidity high but avoid standing water to prevent damping-off.
- Seedling → Early Vegetative (Weeks 1–3)
Move seedlings under 18–24" (45–60 cm) LED or fluorescent lights at 18–24°C with 60–70% humidity. Run a light cycle of 18/6 (on/off). Begin feeding at quarter-strength of a balanced vegetative nutrient when true leaves appear.
Train gently by topping or low-stress training (LST) after 3–4 nodes to encourage even canopy.
yellowing cotyledons usually means overwatering; reduce water volume and increase air exchange. Stretching indicates insufficient light—lower fixtures gradually while watching leaf temperature.
- Vegetative → Flowering (Weeks 3–8 vegetative; 6–9 flowering)
Switch to flowering by changing the light cycle to 12/12. Reduce humidity to 40–50% and raise daytime temperatures to 22–26°C. Transition to a bloom-specific nutrient with higher phosphorus and potassium; increase feed to half-then-full strength across a week.
Monitor trichome and pistil development; expect preflowers 1–3 weeks after the switch.
nutrient lockout shows as brown leaf tips—flush with pH-balanced water (pH 6.0–6.5 in soil) and resume with lighter nutrient concentration. Watch for hermaphrodite signs under stress; remove immediately if found.
- Flush, Harvest, Drying & Curing (Final 1–3 weeks + 7–14 drying + 2–8 week cure)
Begin a 7–14 day flush with plain water (pH adjusted) before harvest to clear salts. Harvest when trichomes are mostly cloudy with some amber for balanced effects. Dry branches in a dark room at 18–22°C and 45–55% RH for 7–14 days until stems snap.
Trim and jar buds with burping schedule: open jars twice daily first week, then taper to weekly. Cure in jars for 2–8 weeks for improved flavor and smoothness.
mold during drying appears as white fuzz—raise airflow and lower RH immediately, discard affected material. If buds taste grassy after short cures, extend curing time and keep stable temperature.
Understanding and executing these exact steps makes scheduling and troubleshooting straightforward, and keeps quality consistent from germination through a careful drying and curing process. When growers follow measurable targets and inspect daily, outcomes improve predictably and efficiently.
Key Takeaway: New growers encounter a predictable set of problems; diagnosing them quickly and applying one immediate correction plus a practical long-term fix gets plants back on track without panic. Below are the top 10 problems, each with a fast diagnostic…
Troubleshooting Common Issues
New growers encounter a predictable set of problems; diagnosing them quickly and applying one immediate correction plus a practical long-term fix gets plants back on track without panic. Below are the top 10 problems, each with a fast diagnostic checklist, a one-step immediate corrective action, and a durable prevention strategy that reduces recurrence.
Yellowing lower leaves
Diagnostic checklist: older leaves yellowing first, stems still firm, soil moist. 1. Immediate action: Reduce watering frequency and let top 2–3 cm of soil dry.
- Long-term prevention: Improve drainage and follow a feeding schedule matched to growth stage.
Brown tips on leaves
Diagnostic checklist: leaf-tip burn, fertilizer salt buildup, runoff white residue. 1. Immediate action: Flush medium with 2–3× pot volume of water.
- Long-term prevention: Use measured feed strengths and test runoff EC regularly.
Nutrient lockout (stunted growth, dark leaves)
Diagnostic checklist: pH out of range, rapid feeding changes, foliar discoloration. 1. 0` for hydro.
- Long-term prevention: Stabilize water source and log pH/EC after each change.
Slow growth / stunted plants
Diagnostic checklist: small internodes, slow leaf emergence, cool temps. 1. Immediate action: Raise ambient temperature into the 22–28°C range and ensure adequate light.
- Long-term prevention: Match genetics to your environment and maintain consistent light schedules.
Cottony bud rot (Botrytis)
Diagnostic checklist: grey/white mold inside buds, high humidity, tight canopy. 1. Immediate action: Remove infected material and increase airflow immediately.
- Long-term prevention: Keep humidity below
50%during flowering and thin canopy for air movement.
Silvery webbing (spider mites)
Diagnostic checklist: tiny speckling on leaves, silk webbing underside. 1. Immediate action: Isolate plant and spray with insecticidal soap or a miticide labeled for cannabis.
- Long-term prevention: Introduce beneficial predatory mites and monitor regularly.
Leaf curl / clawing
Diagnostic checklist: downward-curled leaves, often from overfeeding or heat stress. 1. Immediate action: Cut feed to half strength and check for root temperature >26°C.
- Long-term prevention: Maintain stable nutrient regimen and root-zone temperature control.
Purple/red stems (not strain-specific)
Diagnostic checklist: stems reddening with poor vigor and cold nights. 1. Immediate action: Raise day/night temperatures to avoid swings below 15°C.
- Long-term prevention: Choose strains tolerant to your local temperature profile.
Yellowing between veins (interveinal chlorosis)
Diagnostic checklist: yellow tissue between green veins often with new growth affected. 1. Immediate action: Apply chelated iron or adjust pH to ensure micronutrient availability.
- Long-term prevention: Use balanced micronutrient supplements and monitor pH.
Overwatering (wilting despite wet soil)
Diagnostic checklist: drooping leaves, saturated medium, slow recovery after watering. 1. Immediate action: Stop watering, increase airflow, and top-dress with perlite to speed drying.
- Long-term prevention: Train watering rhythm by weight-checks and use well-aerated mixes.
Provide quick symptom -> cause -> immediate action reference for rapid troubleshooting
Table: Troubleshooting Common Issues — Symptom, Likely Cause, Immediate Fix & more
| Symptom | Likely Cause | Immediate Fix | Prevention |
|---|---|---|---|
| Yellowing lower leaves | Nitrogen deficiency / overwatering | Reduce watering; check drainage | Proper feed schedule; amend soil for aeration |
| Brown tips on leaves | Nutrient burn / salt buildup | Flush medium with clean water | Measure feed strength; periodic runoff checks |
| Cottony bud rot | High humidity & poor airflow | Remove infected buds; increase ventilation | Keep RH <50% in flowering; thin canopy |
| Silvery webbing (spider mites) | Spider mite infestation | Isolate; apply miticide or insecticidal soap | Introduce predators; regular inspections |
| Slow growth / stunted plants | Low light, cold, compacted roots | Increase light/intensity and temp | Match light to stage; ensure root health |
Understanding these diagnostics and acting fast reduces wasted time and seed stock, and it builds confidence in managing a healthy grow. When those basics are handled consistently, attention can shift from triage to optimizing yield and quality.
Key Takeaway: Start with a few high-impact habits that produce disproportionately better plants: daily observation, consistent light/water timing, and choosing genetics matched to your space. Small upgrades—a cheap pH meter, a clip fan, or swapping to an…
Tips for Success and Pro Tips for Beginners
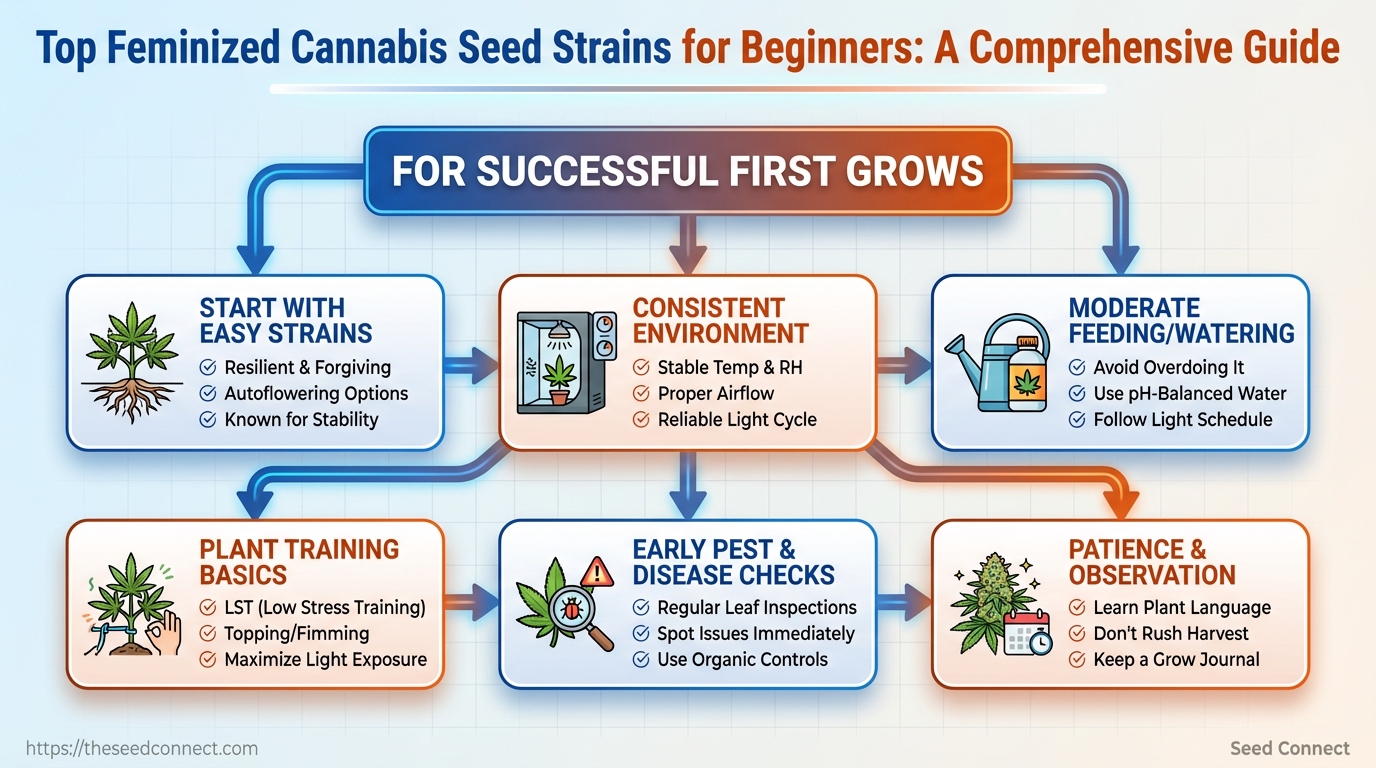
Start with a few high-impact habits that produce disproportionately better plants: daily observation, consistent light/water timing, and choosing genetics matched to your space. Small upgrades—a cheap pH meter, a clip fan, or swapping to an autoflower or easy-to-grow feminized strain—often outperform big one-time purchases because they make your routine repeatable.
Practical daily and weekly routines
- Observe plants for 60–90 seconds each day.
Check leaf color, new growth, run-off pH, and the underside of leaves for pests.
- Log one measurable variable daily.
Use a simple notebook or spreadsheet with columns for light hours, water volume, nutrient ppm, and notes.
- Weekly deeper check.
Flush small sections (if needed), measure medium moisture at root level, and rotate plant positions for even exposure.
Small-budget upgrades that change outcomes
- pH meter: Keeps nutrient uptake predictable and prevents lockouts.
- Clip fan: Stabilizes stems and reduces mold in humid spaces.
- Cheap EC/PPM meter: Prevents overfeeding and helps track nutrient trends.
- Reflective material: Raises usable light without adding fixtures.
- Quality seeds: Choosing reliable feminized or autoflower genetics reduces variability and stress.
Simple training and nutrient management tips
- Topping early: Remove the top node after 3–4 nodes to encourage two main colas.
- Low-stress training: Bend branches outward during vegetative growth for an even canopy.
- Feed by observation: Increase nutrients only when growth slows and leaf color indicates need.
- Adjust by runoff: Use
runoff pHandrunoff ppmas checks before changing nutrient schedules.
Space- and budget-specific strategies
- Small closets: Choose compact, indica-dominant feminized strains and use SCROG for canopy control.
- Tight budgets: Prioritize a reliable seed source and a pH meter over expensive lights.
- Low-headroom setups: Favor autoflowers and lst instead of vertical training.
Germination guarantee: Buying high-quality seeds with a germination guarantee reduces early losses and saves time and resources.
Understanding these practices accelerates learning and reduces costly mistakes, making small investments and disciplined routines the highest-return moves for beginners and budget growers alike.
Post-Harvest: Drying, Curing and Storage
Good post-harvest work keeps potency, stabilizes moisture, and protects terpenes. Begin drying quickly but gently to avoid microbial growth and terpene loss; follow with a slow, controlled cure that converts chlorophyll and deepens flavor. Targets and controls matter: drying window, precise relative humidity (RH) and temperature ranges during cure, a consistent burping routine, and airtight storage all determine the final quality.
Drying protocol and targets
- Hang trimmed branches or place colas on racks in a dark room at
18–21°C (65–70°F)with45–55% RHfor 7–14 days.
- Monitor weight or stem snap: when thin stems snap cleanly rather than bend, buds are ready for trimming/curing.
- Prevent rapid drying — temperatures above
24°Cor RH below30%cause brittle, terpene-poor buds; RH above60%increases mold risk.
Dry time: Depends on density; expect 7–14 days for most cultivars.
Curing protocol and RH control
- Place dried but slightly springy buds in airtight glass jars filled to ~60–75% capacity to allow air volume for gentle moisture equilibration.
- Maintain jar microclimate at
58–62% RHand15–21°C (60–70°F)during the first 2–4 weeks. Use humidity packs rated for62%if precision is needed.
- Burp schedule:
- Daily burping for first 7–10 days: open jars for 10–20 minutes to exchange air and release moisture.
- Every 2–3 days for weeks 2–4.
- Weekly checks after month one; continue monthly as needed.
- Indicators that curing is progressing: reduced grassy/harsh aroma, smoother smoke on small tests, and stable jar RH sitting near target after burping.
Storage recommendations
- Container: Use clean, airtight glass jars.
- Environment: Store in cool, dark conditions near
15–20°C (59–68°F)and~50% RH. - Avoid: Plastic long-term (static, terpene absorption) and freezers (trichome damage from ice crystals).
- Long-term technique: Vacuum-sealed jars or jars with oxygen absorbers extend shelf life, but maintain
<60% RHinside.
Definitions
Burping: Briefly opening sealed containers to exchange stale air and lower internal humidity.
Terpenes: Volatile aromatic compounds responsible for scent and contributing to overall effect.
Follow these steps and watch the jars closely in weeks one through four; that attention during cure is where quality is won or lost. When drying and curing are handled precisely, storage becomes a matter of maintenance rather than rescue.
Conclusion
Picking the right seed, preparing the basics and following a clear germination-to-harvest routine removes most surprises new growers face. After weighing beginner advantages of feminized seeds, the article showed why choosing one of the best feminized strains and sticking to proven, easy-to-grow strains cuts risk: strains such as Northern Lights or Blue Dream consistently resist stress and simplify feeding and light schedules. Practical troubleshooting—how to salvage a patchy germination run or stop early mildew—was paired with concrete steps for drying, curing and storage so that harvest quality matches the effort invested.
Next actions are straightforward: choose a beginner-friendly feminized strain, assemble the materials listed in the prerequisites, and follow the step-by-step grow guide from seed to cure. com) to match goals and environment. Expect learning curves; early runs teach more about microclimates and nutrient pacing than any book.
With those lessons, a confident second grow is inevitable—start with a single plant, track conditions, and refine technique each cycle.