Table of Contents
Quick Answer: Germinate cannabis seeds indoors when you want maximum control: keep them warm and dark with deliberately maintained moisture until a healthy taproot forms, so conditions stay consistent. Germinate outdoors only when early-season temperatures and soil moisture are stable, because rain oversaturation, day-night temperature swings, crusting soil, and wind can slow or stress the first root from the start.
Why do two seeds from the same pack behave so differently once one starts on a warm shelf and the other goes straight into spring soil?
The goal is identical either way: wake the seed, soften the shell, and get a healthy taproot moving.
The conditions around that goal are not identical at all.
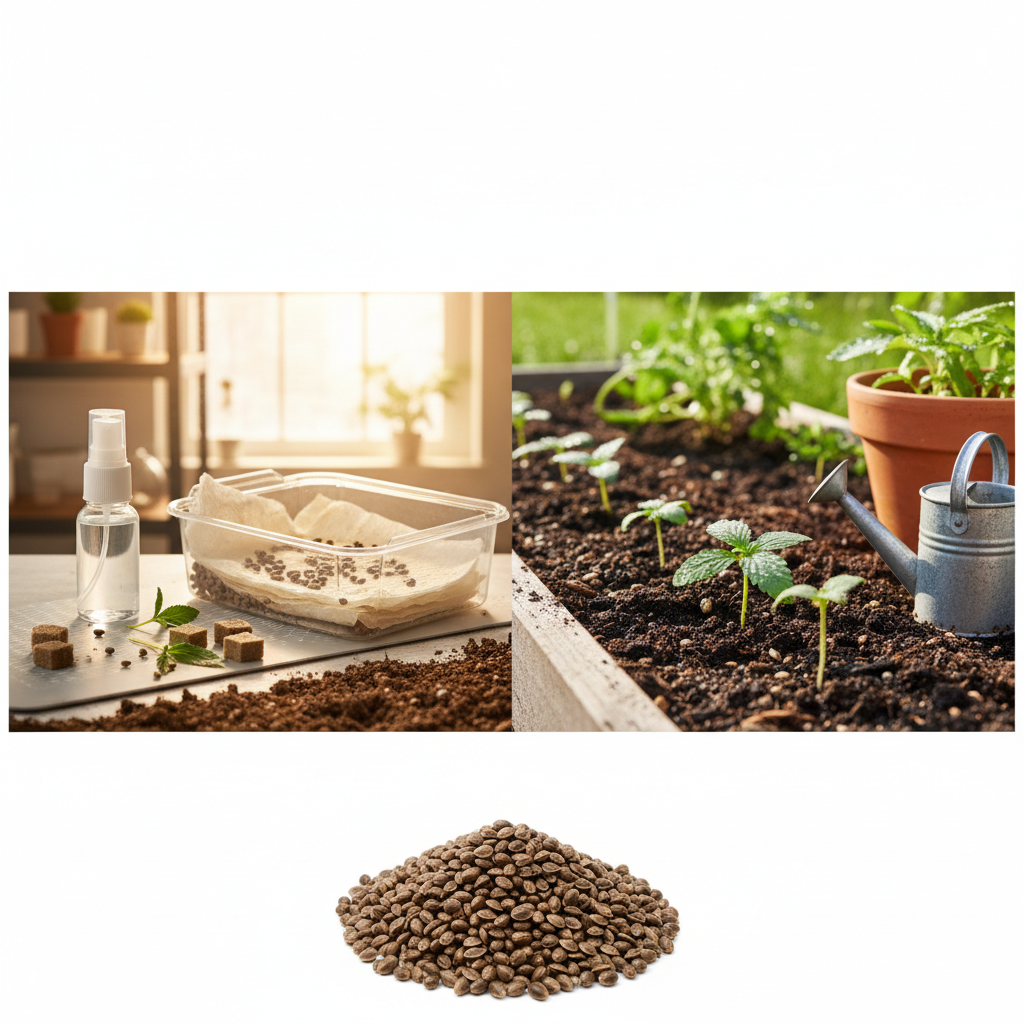
Cannabis seed germination indoors
That matters because seeds are most reliable when the environment stays consistent—inside, it’s much easier to keep things stable (a warm, dark setup is the target).
Outdoor starts feel more natural, but they also bring more moving parts. Soil temperature shifts with the weather, rain can oversaturate the medium, and a cold night can slow everything down fast.
A seed in a protected pot may do fine, while one planted into exposed ground faces wind, crusting soil, and uneven moisture from the first day.
Temperature: Indoors, you can hold a steadier warm range. Outdoors, day-night swings can slow the first root.Moisture: Indoors, moisture stays deliberate. Outdoors, rain and evaporation decide a lot for you.Light exposure: Indoors, darkness is easy to maintain until sprouting. Outdoors, stray light and surface drying are harder to control.Surprises: Indoors, failures are easier to trace. Outdoors, pests, birds, and compact soil can change the result overnight.
A simple example makes it clear—without relying on perfect conditions.
Put one seed in a humidity dome (or another enclosed, warm starter setup) and it may sprout on a predictable timetable because the environment stays buffered.
Put the same seed into exposed garden soil during a cool week and it may sit longer, waiting for the ground to warm up and moisture to settle into a safer rhythm.
For outdoor germination tips, timing matters as much as technique. Warm soil, gentle watering, and a sheltered spot often matter more than any fancy method.
The real difference comes down to control vs patience. Indoors favors consistency; outdoors favors convenience and natural conditions—but asks you to be more selective about when you start.
One method gives you more control: the indoor germination setup
What if the real advantage of indoor germination is not speed, but control? With cannabis seed germination indoors, you can keep temperature, moisture, and darkness steady enough to remove a lot of guesswork.
That matters because seeds react fast to swings. BudTrainer’s germination guide notes that seeds do best in a warm, dark space around 70°F to 85°F (21°C to 29°C), which is exactly what indoor setups make easier to maintain.
Comparing the main indoor methods
Method
Difficulty
Typical Germination Time
Moisture Control
Best For
Paper towel method
Easy
1-5 days
High, but easy to overdo
Fast checks and close monitoring
Starter cubes
Easy to moderate
2-7 days
Very high
Clean transplants and stable humidity
Direct-to-soil
Easy
3-10 days
Moderate
Simple starts with less handling
Humidity dome setup
Moderate
2-7 days
Very high
Keeping warmth and moisture steady
Paper towel setups give you the clearest view of progress, but they need careful handling.
Starter cubes and domes feel a little more controlled, while direct-to-soil removes one transfer step that can bruise a fragile taproot.
The tradeoff is simple: more visibility usually means more handling, and more handling means more risk.
Warm the space first. Keep the area steady, not hot, and avoid windowsills that cool at night. Pre-moisten, do not soak. The medium should feel damp, never dripping. Keep seeds dark. Darkness supports the early stage and prevents unnecessary stress. Check once or twice daily. Look for cracking, then a white taproot. Move gently at first root. Plant it shallow and point the root downward.
> As Royal Queen Seeds explains, the hard part is not just moisture, but keeping temperature and humidity stable without exposing seeds to a drying environment.
The biggest mistakes are easy to avoid. Overwatering cuts off oxygen, cold surfaces slow germination, and rough transfers can damage the first root.
A steady indoor setup gives you cleaner results than most outdoor germination tips, especially when weather is unpredictable.
For growers who want fewer surprises, that control is the real win.
A real-world start: how outdoor germination works in the garden
A seed dropped into a calm spring bed can sprout cleanly, while the same seed in cold, soggy soil just sits there.
Outdoor germination makes sense when the garden already behaves like a nursery bed, not when it still feels like late winter.
That usually means stable daytime warmth, mild nights, loose soil, and a spot that drains well.
Once those pieces line up, the process can be simple and low-fuss, especially for growers who want to work directly in the final planting spot.
When the garden is ready
Outdoor germination works best when the weather is settled and the soil is warm enough to support fast root growth.
Several guides point to a germination range around 22–26°C or 72–79°F, with consistency mattering more than chasing one perfect number; see Athena Ag’s cannabis germination guide , Almanac’s step-by-step cannabis seed guide, and BudTrainer’s four-method comparison.
A practical rule works well here: if the soil still feels cold at hand level, wait.
If the bed drains after rain and does not stay slick, you are closer to a safe start.
What can throw it off
Weather is only part of the story.
Pests, compacted soil, and uneven moisture can all slow a seed before it establishes a root.
That is why outdoor germination tips usually focus on the ground itself.
A light, airy mix gives the root an easier path, while heavy soil can hold too much water and invite rot, a concern echoed in Royal Queen Seeds’ germination guidance and Dutch Passion’s soil germination method.
> A seed in open soil needs three things at once: warmth, air, and steady moisture.
Pick a sheltered spot: Use a place with morning sun and protection from hard wind. Loosen the top layer: Break up crusted soil so the seedling is not fighting compaction. Water lightly: Keep the area damp, not soaked, to avoid suffocating the seed. Watch for pests: Slugs, birds, and ants can undo an early start fast. Check after rain: If water pools, move the seed or improve drainage first.
For growers comparing indoor vs outdoor germination, this is where outdoor conditions ask for patience rather than precision.
Starting with strong genetics matters too, which is why many growers pair these outdoor germination tips with reliable seed stock from our Outdoor starts reward good timing.
When the garden is ready, the seed does not need much more than a safe pocket of soil and a little consistency.
Surprising results: why growers often combine indoor and outdoor methods
A tray of seedlings on a warm shelf can look almost too safe to fail, yet that same batch may struggle once it meets spring weather.
That is why many growers stop treating indoor vs outdoor germination as a strict either-or choice.
The hybrid approach starts with cannabis seed germination indoors , then moves young plants outside after they have a stronger start.
Seeds like steady warmth and dark conditions; Budtrainer notes a range of 70°F to 85°F works well, while Royal Queen Seeds points out that stable warmth and moisture are hard to maintain in open conditions and on windowsills (Budtrainer, Royal Queen Seeds).
That extra control often pays off later.
When seedlings are moved outdoors only after they have a root base and a tougher stem, they handle small weather swings better than seeds trying to sprout in the garden from day one.
Why the staged start works
A staged start is simple, but it changes the risk profile.
Early protection: Seeds avoid cold snaps, soggy soil, and pest pressure during the most fragile phase. Cleaner selection: Weak or non-viable seeds are easier to spot indoors before they waste garden space. Better timing: Transplanting lets growers match outdoor planting to a real weather window, not a guess. Less seed loss: Fewer seeds disappear into poor soil conditions before they ever emerge.
A practical transplant path
Germinate indoors first. Keep the environment warm and steady until the taproot and first seedling growth appear. Harden off gradually. Place seedlings outside for short periods before full transplant. Move them once conditions settle. Wait for mild nights and stable soil, then shift them into the garden. Watch the first week closely. The plant should stay upright, green, and calm, not wilt after every breeze.
Athena Ag notes that ideal germination temperatures sit around 75–80°F (24–27°C), and that cooler conditions slow activity while excess heat can damage the embryo (Athena Ag).
Imagine a grower who starts 12 seeds indoors, then transplants only the healthiest seedlings outdoors after the weather steadies.
Fewer seeds are exposed to bad soil at the start, and the garden bed gets plants that are already past the most delicate stage.
That blend of control and timing is why the hybrid method keeps showing up in real grows.
It gives seedlings a safer launch, then hands them over to the sun when they are ready.
If you want the highest chance of success, what should you check before you start?
A perfect germination method cannot rescue a weak starting point.
Before any water touches the medium, check the seed itself, the storage history, and whether your setup can hold steady warmth.
Temperature is a bigger deal than many growers expect.
BudTrainer places germination around 70–85°F (21–29°C), Athena Ag points to 75–80°F (24–27°C), and Royal Queen Seeds warns that open air or a windowsill makes those conditions much harder to hold steady.
Seed quality checklist before you begin
Check
What to Look For
Why It Matters
Seed appearance
Firm shell, intact edges, and no obvious cracks or crushing
Damaged shells often fail before the root even starts
Storage conditions
Kept cool, dry, and dark, not in a humid or hot place
Heat and moisture age the embryo before germination begins
Moisture source
Clean water or a damp starter medium, never a soaked setup
Too much water limits oxygen and slows the first root
Temperature range
A stable range near 70–80°F (21–27°C) with minimal swings
Consistent warmth keeps germination moving at a steady pace
Starting container
Small, clean, and easy to inspect without disturbing the seed
Fewer moves mean less stress on the emerging taproot
Clean handling
Washed hands and clean tools, with no soap or fertilizer residue
Contamination and chemical residue can hurt tender tissue
Daily timing
A setup you can check once or twice a day
Early root tips are fragile and need quick attention
A healthy-looking seed still is not a guarantee.
It simply removes easy failures from the start, which is a better position than chasing problems later.
That matters even more when comparing indoor vs outdoor germination.
Indoors, the goal is control: clean container, steady moisture, and no big swings.
Outdoors, the goal is timing: settled weather, protected soil, and no exposure to drying sun or cold night air.
Indoors: Do use a small starter setup and check moisture daily. Don’t leave the seed on a bright windowsill or in a room that heats and cools fast.
Outdoors: Do wait for stable conditions and sheltered ground. Don’t start in cold, soggy soil that holds water longer than it holds warmth.
Moisture: Do keep the medium evenly damp. Don’t flood it, because excess water crowds out oxygen.
Handling: Do move the seed as little as possible. Don’t keep digging it up to “check progress.”
That is where our germination guarantee and grower support fit into a cleaner start.
The point is not just selling seed; it is reducing guesswork before the first root ever appears.
A careful setup saves time later.
Check the seed, check the conditions, then start once everything is steady enough to stay that way.