

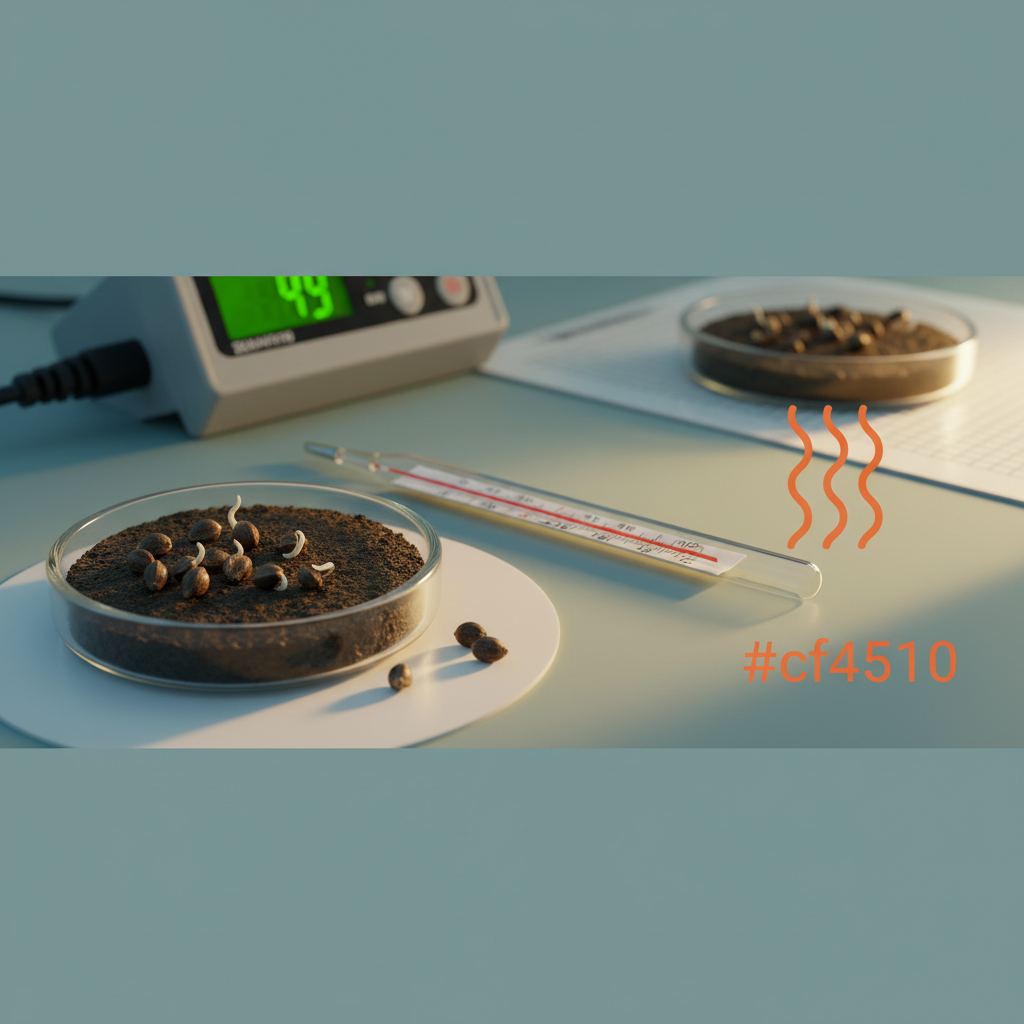
Getting Temperature Control for Cannabis Seed Germination right can make the difference between steady sprouting and seeds that stall. Rather than judging the room temperature alone, growers should pay attention to the temperature around the seed and growing medium, where germination actually takes place.
A 2024 peer-reviewed study examining cannabis landraces found that temperature significantly affects cannabis seed germination and early seedling development. In this guide, The Seed Connect explains how to maintain stable seed-zone temperatures, use heat sources safely, and avoid temperature swings that can interfere with germination.
What if the real reason your seeds are stalling is the temperature, not the seed?
When seeds stop germinating, it is easy to blame their genetics.
However, the environment plays a key role too.
Understanding how cannabis seeds respond to their surroundings allows for more precise adjustments that can enhance sprouting success.
Steady warmth is essential as it influences internal biological processes crucial for germination.
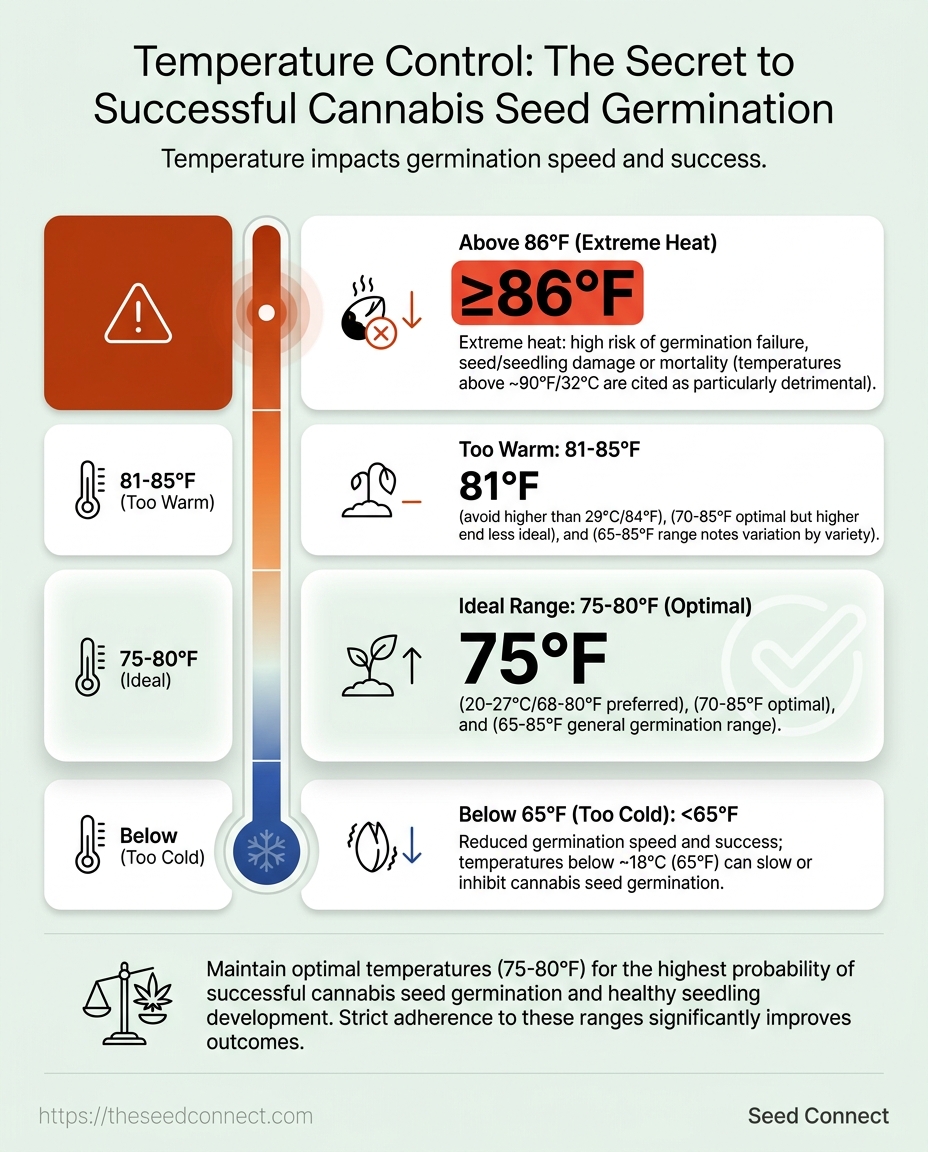
For example, the best temperature range for germination is around 75°F to 80°F (24°C to 27°C).
A grower who keeps a steady temperature will likely see faster and more even sprouting than one who has changing room temperatures.
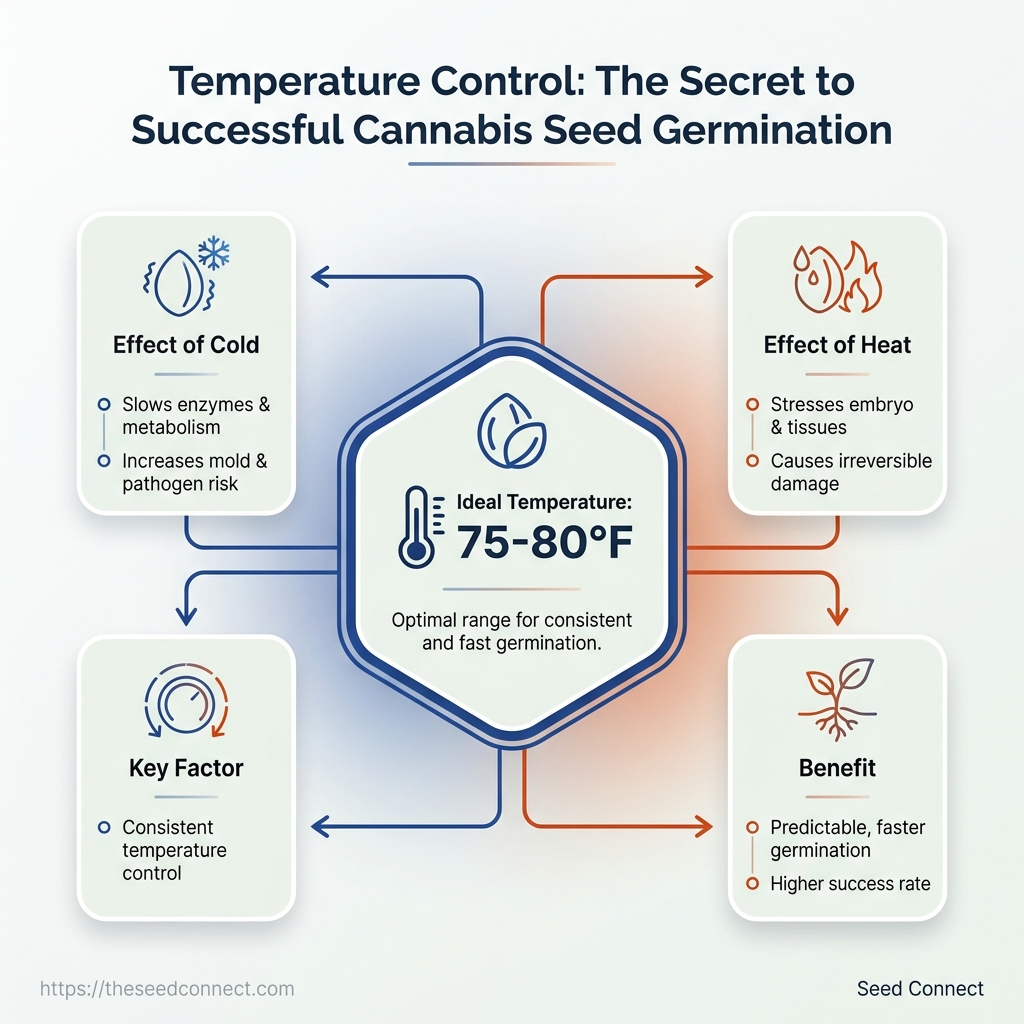
Here’s the temperature setup we want before the first seed goes in
A warm room can still leave your seeds effectively cold.
Before starting, set up your measurements and check the seed zone conditions.
Adjust only based on what fails the tests.
Here’s a checklist to help you ensure your temperature setup is right:
Table: Here’s the temperature setup we want before the first seed goes in — Check, Pass/Fail, Notes / If it fails
| Check | Pass/Fail | Notes / If it fails |
|---|---|---|
| Seed tray/container is stable during your normal day/night window | Pass | If it swings: add buffering (insulation around the container) and/or switch to controlled heat instead of relying on ambient room warmth. |
| Heat method provides gentle, indirect bottom warmth | Pass | If it’s uneven: reposition the heat source so the entire tray bottom warms evenly; avoid direct blasts onto the tray. |
| Probe/thermometer is measuring at seed/medium level | Pass | If you measured air instead: move the probe so it reads the root/seed-zone temperature you’re trying to control. |
| No direct sun or vent airflow hits the tray | Pass | If there’s airflow/sun: relocate the tray or shield it to prevent fast spikes and cold pockets. |
| Moisture is evenly damp (not crusting, not persistently soggy) | Pass | If the top crusts: slightly increase moisture once and then reassess; if it’s soggy: reduce water and improve drainage/airflow so temperature isn’t masking a wetness problem. |
Once this checklist passes, your job is simpler: keep conditions steady and observe the first signs of germination. If you still get delays, use the drift method (Section 8) to determine whether the issue is heat cycling, moisture mismatch, or batch/viability.
What if your heat source is helping one day and hurting the next?
A tray can look fine in the morning and stall by nightfall—often because the heat source cycles (on/off) or creates uneven pockets, not because the seeds suddenly ‘need more warmth.’
Treat heat like a controlled tool: your goal is a steady temperature profile across the container so the germination process doesn’t pause and restart.
Heat source comparison
Table: What if your heat source is helping one day and hurting the next? — Heat Source, Best Use, Main Benefit & more
| Heat Source | Best Use | Main Benefit | Main Risk |
|---|---|---|---|
| Heat mat | Seed trays and starter cubes | Steadier bottom warmth for the root zone | Overheating if used without a thermostat/probe |
| Warm room | Backup support when the space stays steady day/night | Low effort and generally predictable | Air may feel warm while the medium is still too cool |
| Appliance top | Temporary warmth only (after you confirm temps first) | Quick ambient heat from nearby electronics | Hot spots and cycling heat can stress seeds |
| Direct sunlight | Generally avoid for germination | Can warm a tray fast in a pinch | Rapid spikes, fast drying, and uneven heating |
The practical rule: avoid fast ramps and uneven coverage
The safest setups deliver gentle, even bottom warmth and prevent sudden spikes.
For example, a tray sitting on top of a fridge may seem adequately warm early on, then run noticeably hotter once the compressor kicks in.
Those overnight shifts can slow sprouting because different parts of the tray experience different moisture/temperature timing.
Do-versus-don’t
- Do verify tray/medium temperature with a probe (especially with heat mats).
- Do position the heat source so it warms the whole container evenly.
- Don’t rely on “warm to the hand.” Your skin can’t detect drift, localized hot spots, or cycling behavior.
Stable, well-managed warmth helps germination progress predictably—whereas excitement-from-ambient heat usually leads to swings you can’t see.
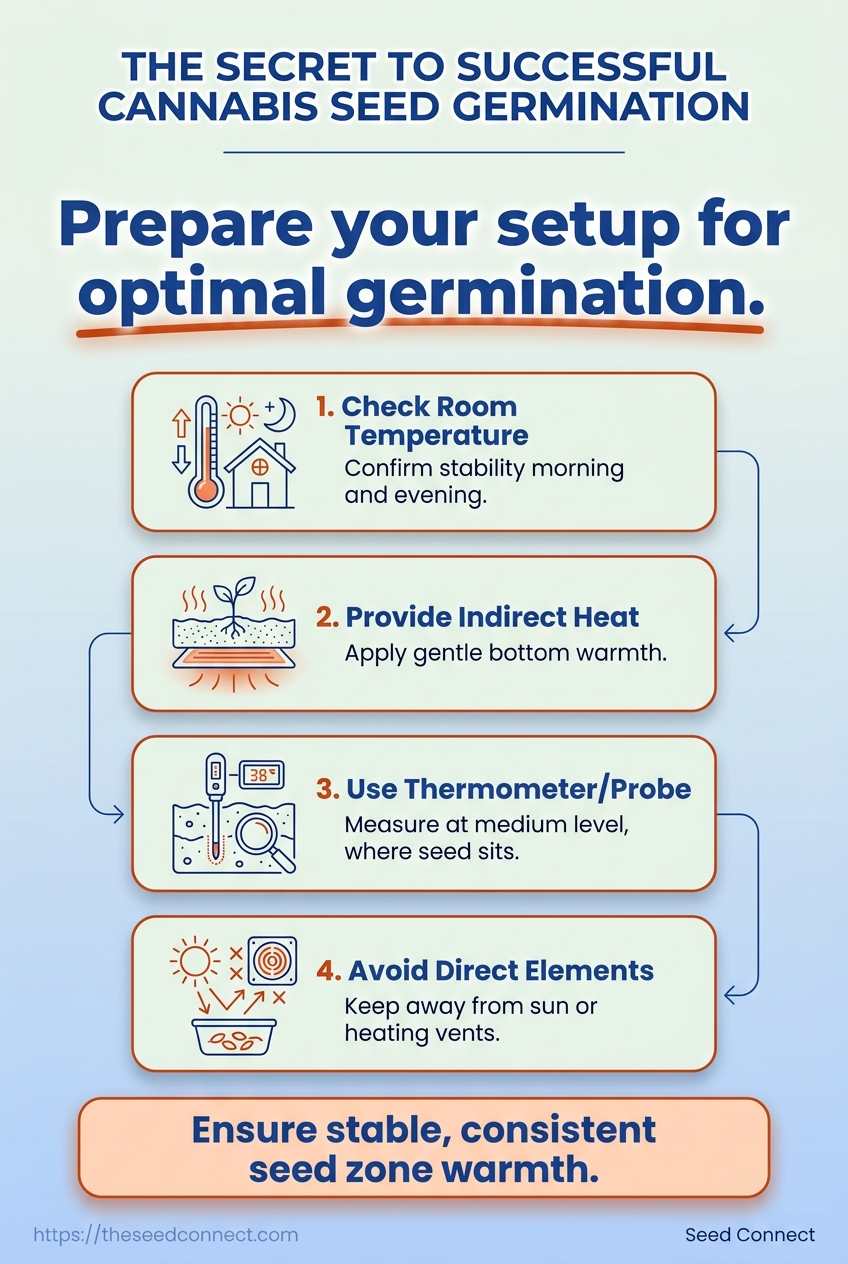
Surprising-stat: small temperature swings can change germination speed fast
Germination isn’t reacting to how comfortable the room feels—it’s reacting to what the germination environment actually does over time.
Even small temperature changes can affect when seeds soften and take in moisture.
This means growth may seem fine during warm hours but can stop when conditions change.
Why swings tend to be worse than steady temps
- Cool periods slow internal chemistry: the medium may stay wet, but progress pauses.
- Warm peaks can act unevenly: some seeds may advance while others lag, producing inconsistent emergence.
- Temperature and moisture interact: cooler zones often stay damp longer, while warmer zones can dry the surface sooner—either pattern can interrupt a clean breakthrough.
What to do with this insight
If runs look inconsistent, treat temperature cycling as your first suspect and confirm it with a simple comparison: record the seed/tray-level readings at the start of your normal operating window, then re-check later the same day (the exact logging/workflow is in Section 11).
If you see drift, reduce it by buffering/insulating the setup and/or using controlled warmth to prevent hot/cold swings.
Once drift is reduced, only then move on to troubleshooting moisture distribution or batch/viability.
Contrarian take: warmer is not always better for cannabis seeds
Don’t assume that more heat means faster germination.
Push cannabis seeds too far, and you can slow the process, stress the embryo, or cause the seed shell to open unevenly instead of cleanly.
That matters because germination is a biological trigger, not a speed contest.
What “too warm” looks like at the tray
Use these signs to decide whether you should back off heat (even if the medium still looks moist):
- Fast surface drying. The medium may look damp below, while the top layer crusts quickly.
- Swollen seeds with no taproot. Seeds puff up, then stall without clear root emergence.
- Odd shell behavior. The shell splits unevenly, looks glossy/tight, or seems slow to open.
- Smell and feel don’t match the goal. A stale, “warm/steamy,” or almost baked smell is a warning—even if the tray still feels wet.
What to do when you suspect excess heat
- Do reduce heat first. Lower the heat input or move the setup so the seed-zone returns to the earlier target range.
- Do not keep misting. Adding more water on top of excess warmth can turn a temperature problem into a sogginess problem.
- Do not keep handling the seeds. Once shells start to open, repeated checks and touch can add stress.
A small adjustment usually beats a big intervention.
Gentle, consistent temperature control keeps the seed doing the work—while heat-heavy setups often create the delay they were meant to prevent.
If your germination results vary, it’s time to stop relying on instincts.
If your germination results vary, it’s time to stop relying on instincts.
Instead, use a consistent routine based on observation and controlled…
Scenario: you are starting seeds at home, and you want a repeatable routine
If your germination results are different each time, stop relying on your instincts. Instead, use a consistent routine based on observation and controlled changes.
Let’s assume you’ve already completed the pre-start temperature checklist from Section 5 and correctly placed your probe.
Day 0–1: log your baseline (so you can compare)
Day 0 (setup + first readings)
- Start when your setup is at its normal operating conditions.
- Confirm moisture is evenly damp across the tray (use Section 5’s pass/fail cues).
- Record:
- Seed-zone temperature (not air temperature)
- Moisture notes
- Start time
Day 1 (stability proof)
- Measure again at the same times you measured on Day 0. 5.
If readings changed, identify the most likely cause first (probe placement, insulation/buffering, or heat-cycling) rather than changing multiple variables at once.
Day 2–3: change one variable, then measure again
Use the same two measurement windows each day.
- If the seed zone runs cool: buffer/insulate the container and rely on controlled bottom warmth (avoid chasing the warmest spot in the room).
- If the seed zone runs warm or swings: reduce heat input and remove fast-spike sources (direct sun, appliance-top warmth, or any setup that cycles aggressively). Re-check temperature at the tray level after adjustments.
- If moisture behaves inconsistently: treat it as a moisture-distribution or drainage/airflow issue (temperature fixes won’t correct a persistently wet or crusting surface).
When to stop and move on
Once you’ve documented a couple of cycles where your seed-zone temperature stays near your target and your moisture stays consistent, and you still aren’t seeing meaningful progress, stop environmental tuning and move to viability/seed-batch troubleshooting (per the decision point the article references).
What temperature kills germination?
Sustained overheating can damage the embryo and stall germination. Use the article’s working band as your guide, and treat prolonged conditions above the upper “too warm/extreme heat” thresholds as a red flag.
What temperature is too hot for cannabis seedlings?
“Too hot” is mainly about what the seed-zone experiences, not what the room feels like. If the seed/medium stays above the working range for too long (especially when it spikes), germination can slow or fail.
Will cannabis seeds germinate at 65°F?
Yes—but slower. Below the sweet spot, the biological processes slow down, so consistency improves when you hold closer to the recommended warm band.
Is 50°F too cold for seeds to germinate?
At 50°F, germination is typically unreliable and very slow. If your space runs that cold, you’ll need gentle, controlled warming at the seed/medium level—not just a warmer room.
How hot is too hot for cannabis seed germination?
It’s less about “one warm hour” and more about sustained heat and spikes beyond the working window. If you see repeated drift/peaks, stabilize the setup so conditions stay within the recommended range.
Conclusion
Successful cannabis seed germination depends on what the seed actually experiences in the seed zone.
Use your logged results to choose the next troubleshooting step:
- Seed-zone temperature stayed in the workable band and moisture was consistent → temperature-related stalling is likely resolved.
Move on to viability/seed-batch troubleshooting.
- You saw hot/cold pockets and/or uneven moisture → fix the heating pattern first (eliminate spikes/swing sources), then re-check the seed-zone conditions during your normal operating window before changing anything else.
Remember, the goal isn’t to guess; it’s to create a consistent setup you can trust to ensure success each time.